this car is going to be so badass when its done
I would’ve rather seen oval tubing, and you’re going to be using alot of wrap (i would imagine). Then again, it’s your pocket 
Considering that you will most likely sell the car, did you put any thought into ease of removal (DP)? With a doghouse welded over it all, i cant imagine it being very easy to remove that DP.
:gotme:
:tup:
Im pretty sure they already stated that its being bolted back in. Not welded.
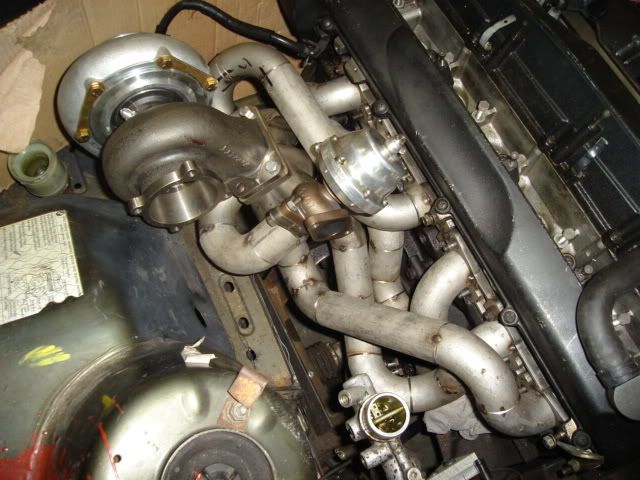
Newman and I were just discussing this yesterday. The downpipe isn’t fully done yet as it is missing a vband disconnect at the last 45 shown inside the car and a flex section. But welding the dog house fully in was discussed. Newman is making a new dog house that covers all cut out parts up to the old blower box inlet(now used as an exhaust inlet). This doghouse design will allow downpipe removal without removal of the cover.
nicely done. :tspry:
Definately weld the seams then, i would assume. peace of mind…
All this work Newman and you still plan to sell once it’s done? If you do still plan to then you have to have a buyer lined up already right? If not, I’ll make the first bid by offering up my first born…
As it looks now, I’d probably sell the lotus and keep this, but chances are I will just keep all 3. 
I’m still waiting on some exhaust parts, so in the meantime:
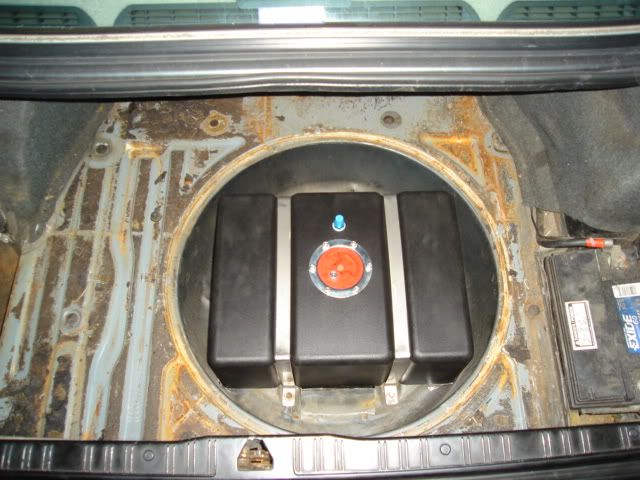
Yesterday, I removed 58 LBs of sound deadening from the trunk, as well as all the carpet. I put the 8 Gallon fuel cell into the spare tire well. The Summit 8 Gallon cell has no sending unit, so I can see myself running out of fuel once or twice. I may make a holder for an extra fuel can of Just In Case fuel.
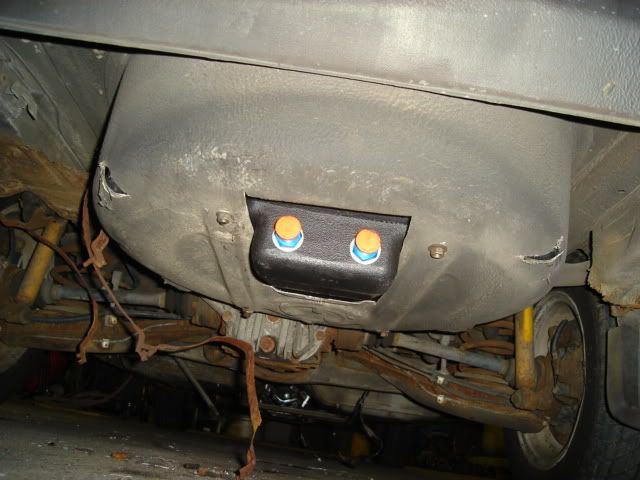
I scored some strips of 16GA 304 that i will make hold down straps with. Today I also plan on mounting the WG. I am not doing a dump, I’ve decided i hate WG dumps, so i will try to tie it into the exhaust a ways downstream… probably at the second straight section.
If i still have time remaining, I am going to look into mounting the IC, while also performing a bumper tuck. (To do this you remove the pressure from the gas springs behind the bumper and press them in)
This is a pic of an aluminum bumpered car that’s been tucked and painted, I think the only change needed is painting the door moulding black.
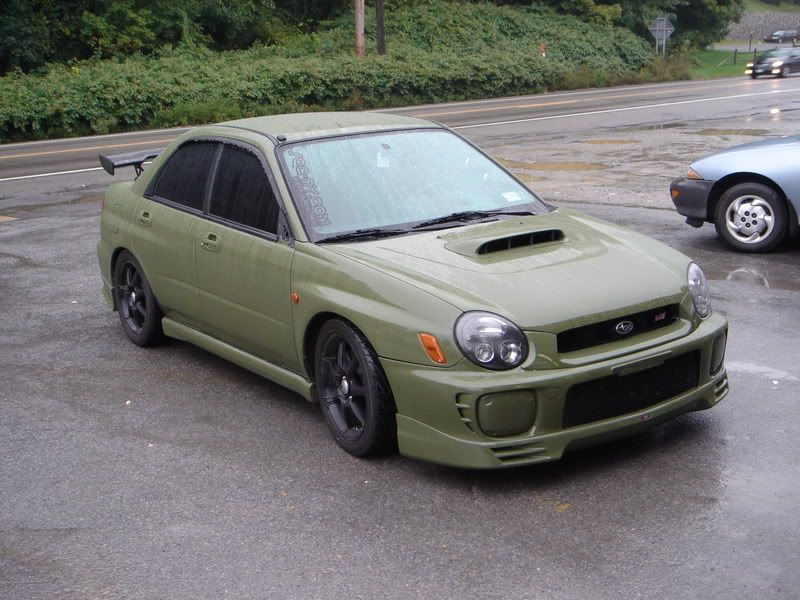
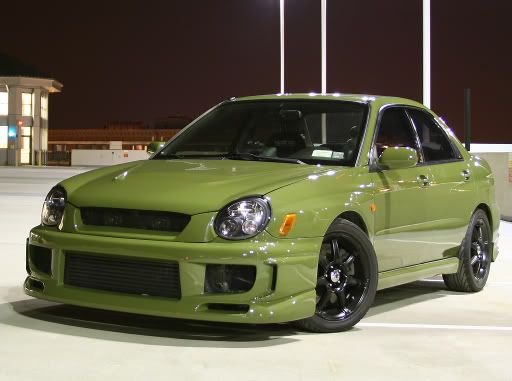
THIS IS THE COLOR I WANT + Fat gold wheels = sex:
it’s BMW urban green. only came on a few Z4s

leg hump
cool
68-70 pontiac Verdoro Green? :pimp:
hard to find accurate pics online, such a old color. mismatched, faded,shitty old pic…

That color is great…its gonna look hot with the gold wheels! Are you painting the engine bay and interior this color too?
Brendon
oh I didnt see you knew the bmw color already. thats a nice color
haha thats the predator hatch.
If you read the rest of the article, the author says:
“Heat wraps are great, just do not use them ON the header. Use them on a device or component on your vehicle that you are trying to protect from header heat.”
Its a fucking layer of insulation. It doesn’t care where the heat is coming from, its just there to decrease the amount of heat transferred.
Got everything I planned for accomplished today.
First:
Fuel Cell
Next:
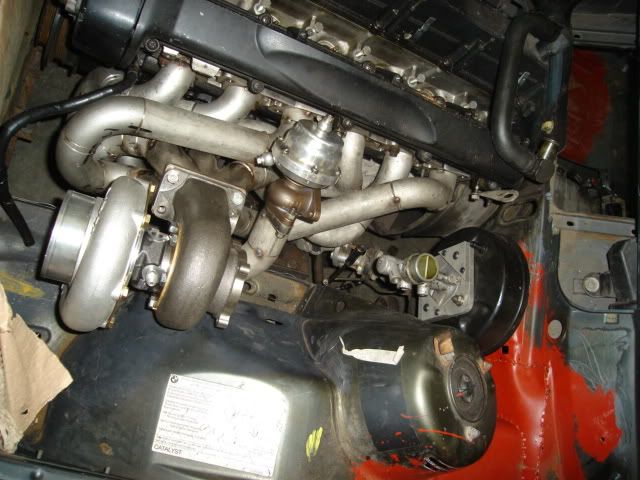
Wastegate mounted to manifold
Then:
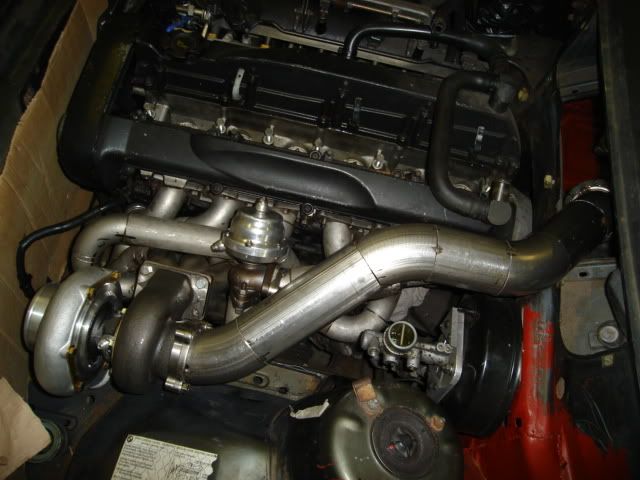
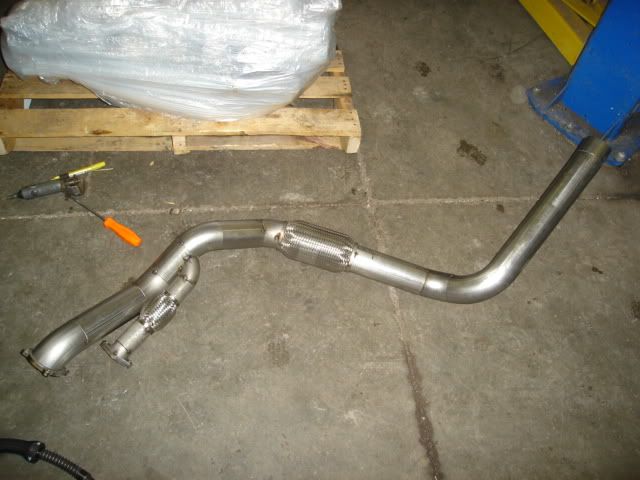
Added some flex to the downpipe

After:
Connected the WG to the DO with some tube and a flex joint (minimize internal, thermally induced, stresses)
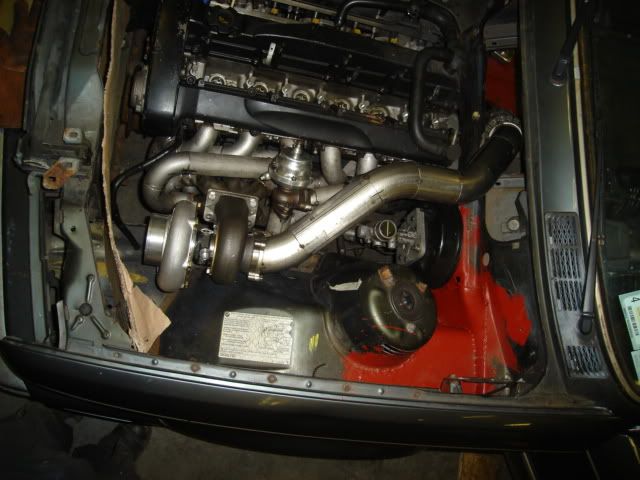
The completed Downpipe:
He finally got home at 1 in the morning. What a dedicated little guy.
you’re going to tuck the metal bumpers?!