BLKS197's 2006 Mustang GT Procharger Build

First and foremost I would like to thank Jason and everyone else who helped with the install this weekend, there really are too many names to list. I appreciate the interest everyone showed in it, which made me enjoy this install even more. I can’t say enough how satisfied I am with J&J Speed Shop. From ordering the kit, to getting all of the odds and ends together, and going over the entire install, I can’t say thank you enough.

http://www.horsepowerconnection.com/images/Products/Procharger/Procharger%20Logo.jpg

       ![http://i283.photobucket.com/albums/kk300/TAJoerg/jnj.jpg?t=1266203299](http://i283.photobucket.com/albums/kk300/TAJoerg/jnj.jpg?t=1266203299)

http://i645.photobucket.com/albums/uu171/TAJoerg31589/DSC_0209.jpg?t=1266191639
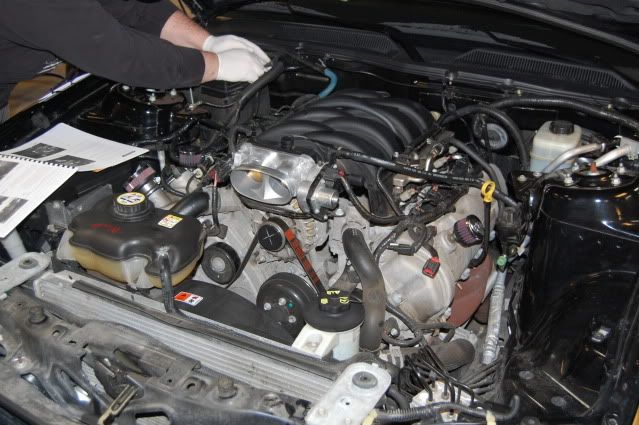
First step of the build was removing the front fender wells, radiator fan, coolant overflow, power steering reservoir, radiator shroud, and CAI. You can also see the valve cover and oil cap breathers to help eliminate some of the crank case pressure.
http://i645.photobucket.com/albums/uu171/TAJoerg31589/DSC_0213.jpg?t=1266191682
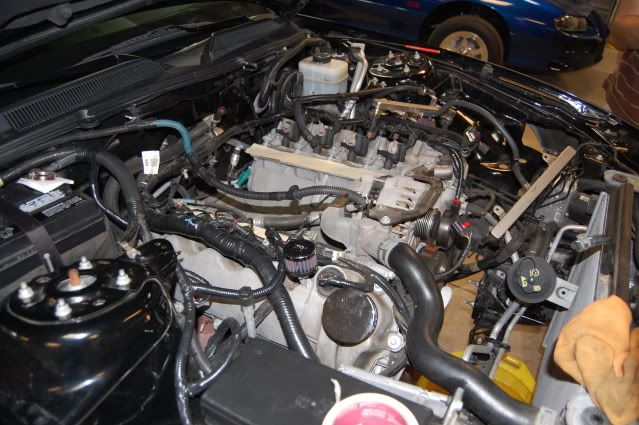
Intake manifold was removed to install the CMDPs. Swapped over to Ford Racing 60# injectors as well. You can see that the coolant hoses on the driver side have been removed.
http://i645.photobucket.com/albums/uu171/TAJoerg31589/DSC_0215.jpg?t=1266191731
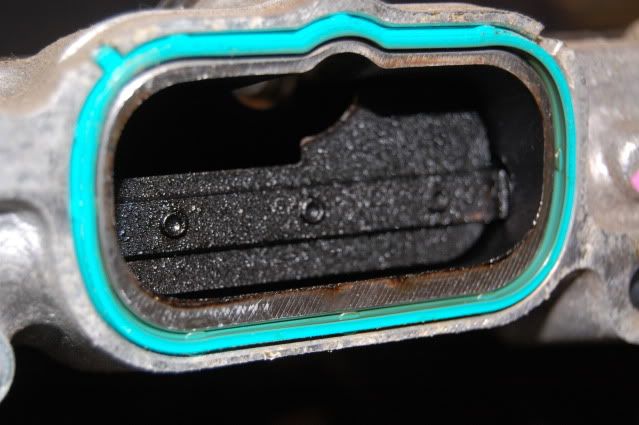
This is a quick picture of one of the stock CM plate valves. The valve cover breathers will eliminate the blow by seen in the picture. The delete plates will also allow for better air flow.

http://i645.photobucket.com/albums/uu171/TAJoerg31589/DSC_0221.jpg?t=1266191775
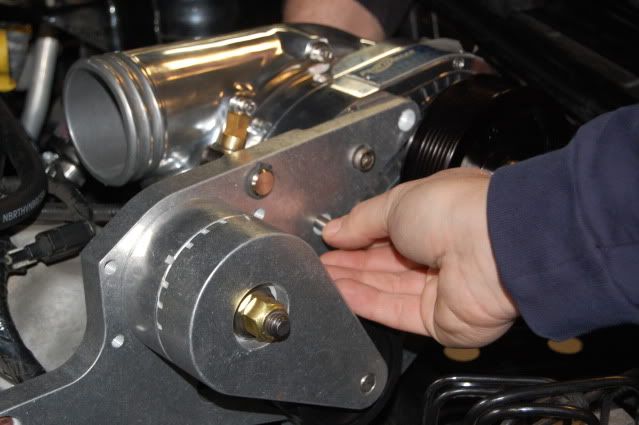
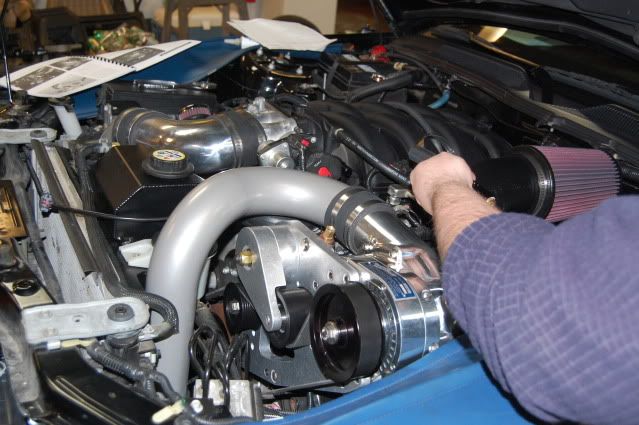
Picture of Jason installing the bracket, and mounting the polished D1SC head unit.
http://i645.photobucket.com/albums/uu171/TAJoerg31589/DSC_0223.jpg?t=1266191810
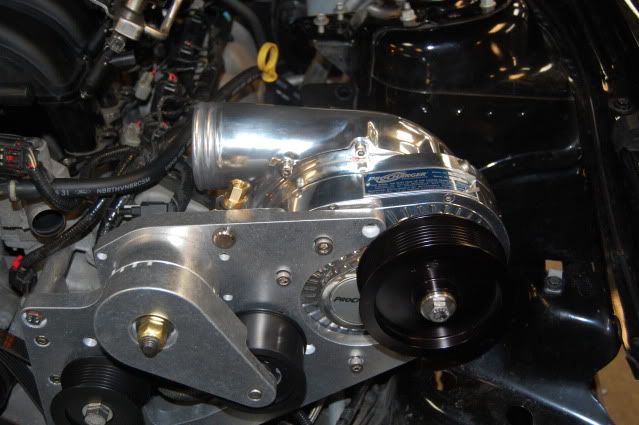
The head unit and bracket both installed.
http://i645.photobucket.com/albums/uu171/TAJoerg31589/DSC_0224.jpg?t=1266191860
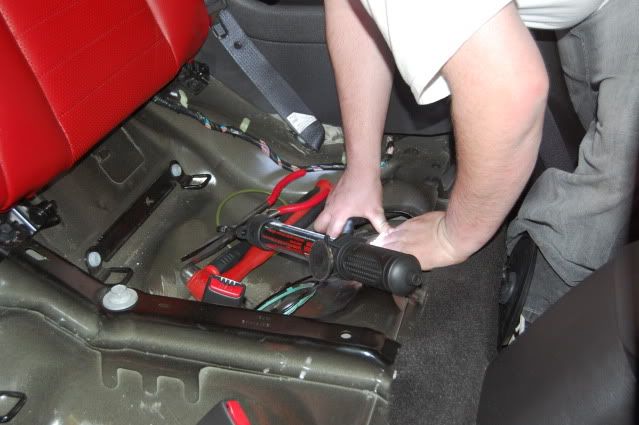
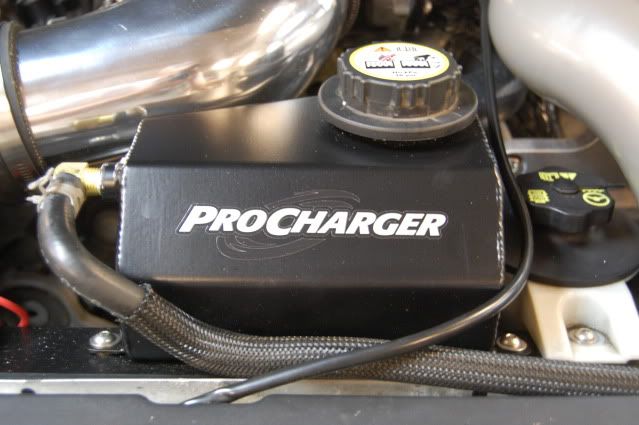
Starting on the upgraded fuel sending unit. I will be using a Ford Racing GT500 dual sending unit pump. Having the access panel under the rear seats allowed for the change without dropping the tank.
http://i645.photobucket.com/albums/uu171/TAJoerg31589/DSC_0226.jpg?t=1266191895
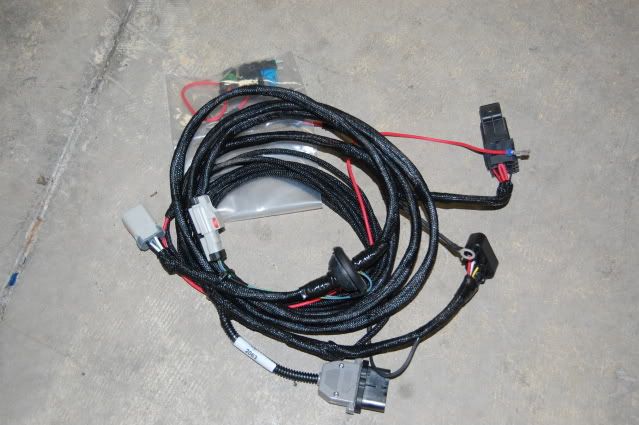
New GT500 fuel system plug-and-play harness
http://i645.photobucket.com/albums/uu171/TAJoerg31589/DSC_0229.jpg?t=1266191935
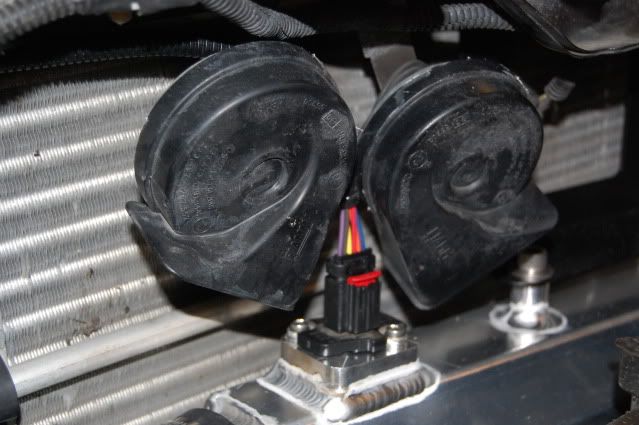
The kit came with a second module and relay that was mounted in the spare tire well of the trunk.

http://i645.photobucket.com/albums/uu171/TAJoerg31589/DSC_0231.jpg?t=1266191982
Beginning to run the charge piping. This picture also shows the new radiator fan, new coolant overflow tank, remounted powering steering reservoir, and the coolant lines were hooked up.
http://i645.photobucket.com/albums/uu171/TAJoerg31589/DSC_0233.jpg?t=1266192051
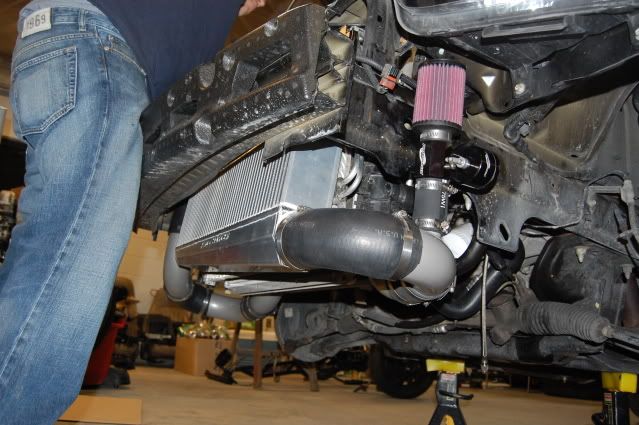
Three core Procharger front mount intercooler.
http://i645.photobucket.com/albums/uu171/TAJoerg31589/DSC_0234.jpg?t=1266192113
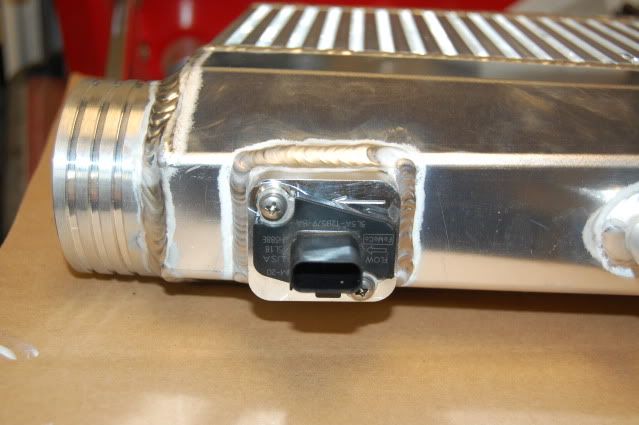
The kit relocates the MAF to the outlet pipe of the intercooler.
http://i645.photobucket.com/albums/uu171/TAJoerg31589/DSC_0236.jpg?t=1266192160
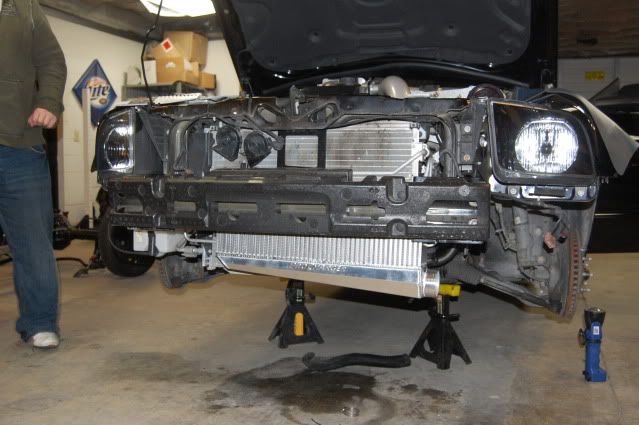
Front mount IC mounted to the brackets.


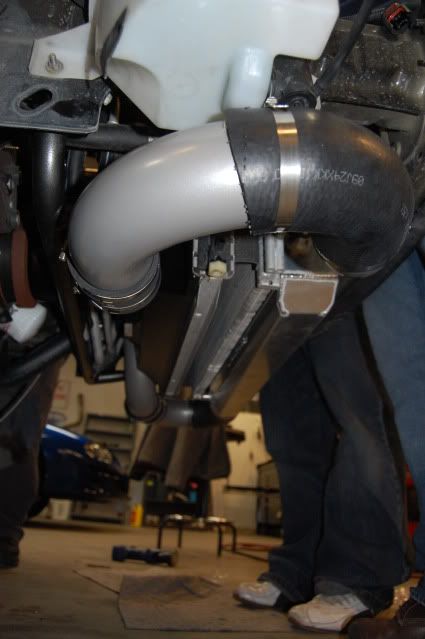
Picture of the charge pipes going into, and coming out of the IC.
http://i645.photobucket.com/albums/uu171/TAJoerg31589/DSC_0239.jpg?t=1266192294
This is the charge pipe coming from the head unit before the IC. The braided steel wire hanging down is the oil drain line for the head unit, and it was tucked away after the install was done.
http://i645.photobucket.com/albums/uu171/TAJoerg31589/DSC_0241.jpg?t=1266192379
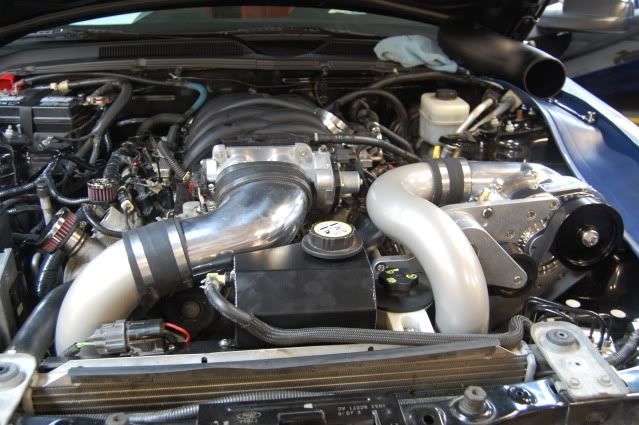
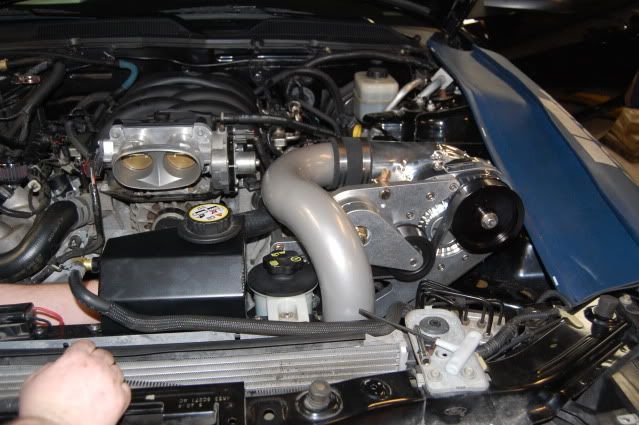
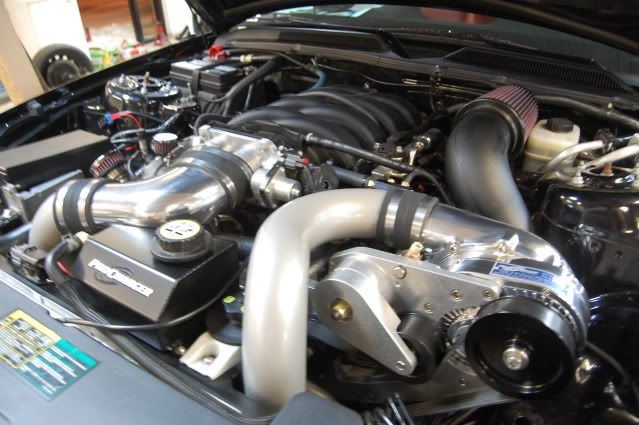
Picture of the engine bay with all of the charge piping hooked up.

http://i645.photobucket.com/albums/uu171/TAJoerg31589/DSC_0242.jpg?t=1266192422
This kit utilizes a Diablosport MAFia which extends from the front mount to the factory plug. It also allows for some adjustment of the MAF.
http://i645.photobucket.com/albums/uu171/TAJoerg31589/DSC_0243.jpg?t=1266192489

http://i645.photobucket.com/albums/uu171/TAJoerg31589/DSC_0247.jpg?t=1266192551

http://i645.photobucket.com/albums/uu171/TAJoerg31589/DSC_0248.jpg?t=1266192593

The car is on a rough base tune for now, this is the next thing on the list to work on.

Looks cool, any projected numbers?

It should make a little over 450 to the wheels, depending on how aggressive we get with the tuning. The weak point in the 4.6L 3V’s are the rods, and 450 is considered the “safe” number in regards to how much power they can handle. The next step is a forged short block with full bolt ons next year.

Nice write up! Looks good, good luck :tup:

Thanks Joe, your evo build is pretty awesome too, I have always loved those.

again, nice angle shot of my ass :slight_smile:

You were all over my front mount…no homo

looks good, woohoo

Another procharged fuel injection car which will put down sweet numbers and have no problems :tup: I’m jealous man, looks good.

Nice to see an S197 GT with decent street oomph. Black too :slight_smile:

Its a nice setup! :tup:

Pretty neat how they move the maf to the intercooler. I’ve never seen that before.

That blower is like a vortech in the aspect that is shares engine oil correct?

If so you are going to want to run a thicker motor oil, the blower whips the hell out of it, and shears it badly.

I used to run rotella synthetic 5w40…

No, prochargers are self contained. The new vortech v3 is self contained as well.

JT beat me to it. Like he said, Prochargers are completely self contained, and the fact I didn’t have to tap the pan which was a major selling point over other power adders.

:tup: Ted. Looking good.

Nice!

That is a much better system guys.

I remember tapping the oil pan of my 4.6L a few years back, that was terrible.

Thanks! :tup:

Looking good and nice numbers :bigtup:

What times do these set ups run about?