How to steal the soul of an FD - SOLD

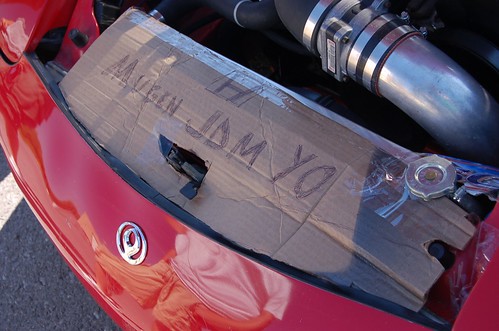
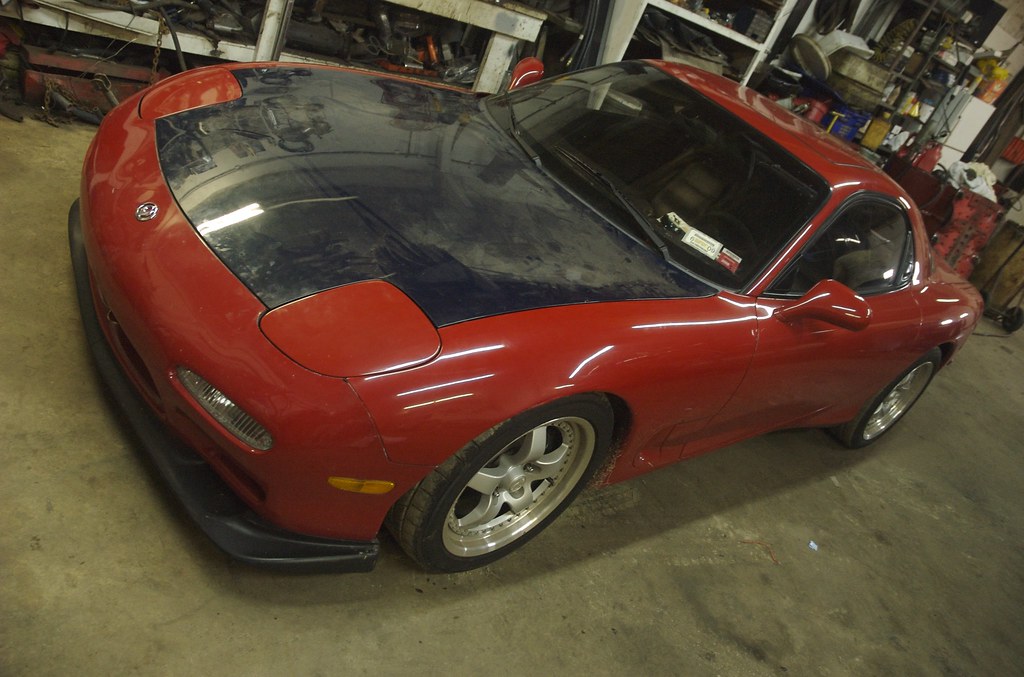
Well, a bit of an update. Sorry for the slight redundancy, but I wrote up an extensive post for the v8rx7forum swap board and thought it’d be nice to share and incorporate an update with!

I remember I spent a decent bit of time looking for exhaust photos and information, so I thought I’d post up a quick rundown of what I ended up doing, in case it helps anyone else decide on their build.

If I had to do it again, I probably would have reduced to 2.5" sooner, since my power goals are mild and there were major clearance issues on the drivers side (unless you wanted to lose a lot of ground clearance).

I also took this chance to fix one of my #1 issues with the swap, which is the terrible fitment of the O2 sensors with JTR headers. I’m guessing JTR has long since fixed the issue, but some of my parts are quite old. Anyway, my driver’s O2 needed at least .5" ground out of one of the webbed fins of the transmission and the passenger’s one was hitting as well, but no material was removed to make it fit.

My solution (suggested by my friend doing the fab work on this) was to copy the C5 corvette style o2 placement and have them straight up from the exhaust.

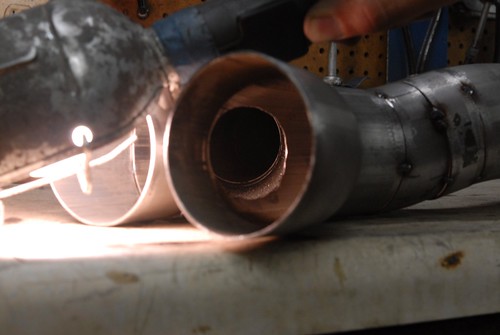
Here’s a crappy photo of it. I’ll get more when the exhaust is out and they’re fully welded on. This was just a quick mock-up using a junk sensor. Passenger’s side, maybe 4" back from the exhaust flange to the header.

http://farm2.static.flickr.com/1085/952047646_07a2443874.jpg

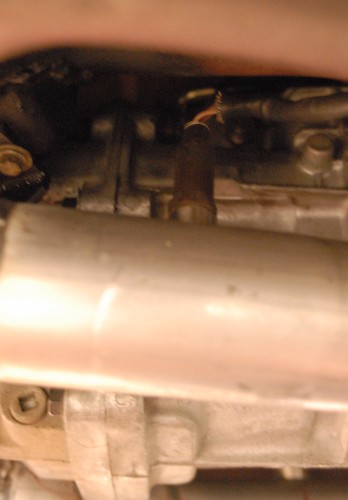
We found plenty of room to run them straight up and this will also allow for much nicer wiring, since it can just follow the trans harness up into the engine bay, no sagging wires or anything to catch debris.

I’m running the 13111 Bosch O2s that are for the rear O2 sensors of a C5 Corvette. It’s a common mod for F-bodies with headers, since they have a 24"+ pigtail, if I remember right. Tons of wire length to allow proper routing. Maybe too much, but we’ll see.

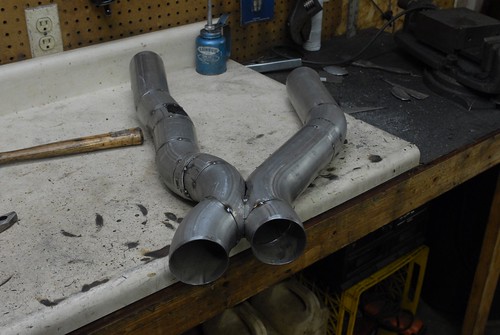
So with that out of the way, I’ll start with the end. Here’s basically the final product. We still need to add hangers and finish fully welding the new o2 bungs.

http://farm2.static.flickr.com/1166/951196073_19aab41506.jpg

The mufflers are 2 Magnaflow 2.5" with a 4" outer case. Part number is available if you want it, but they’re just the regular straight through Magnaflows from Summit. Only polished were in stock, so that’s what I ended up with. Length is 26", if my memory serves me. You wouldn’t want to go much longer or else you’d end up with a very tight bend after going under the rear subframe.

The pipe is regular aluminized steel, also from Summit. I’ll be coating it with some high temp paint (VHT actually works and doesn’t come off). The paint has held up on friend’s cars for a few years with no issues, so it should be a semi-long-term solution for cheap.

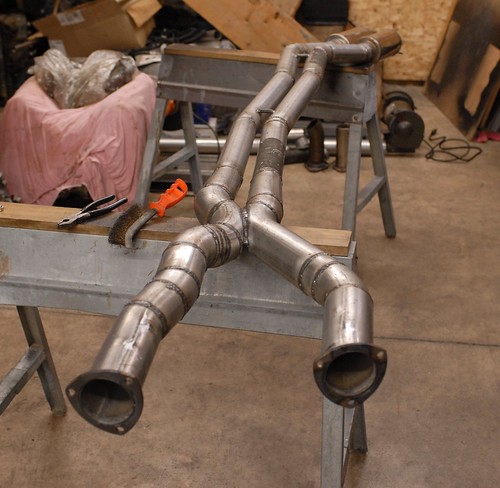
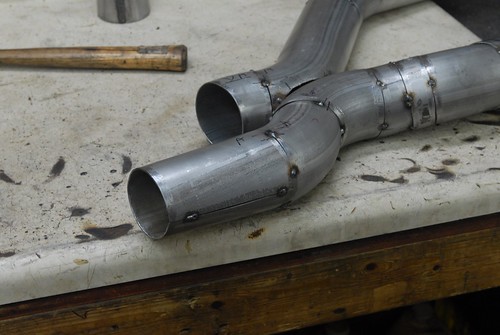
Diameter begins at 3" from the header outlet, does some twists to get around the driver’s side mount and transmission case and goes into a 3" homemade x-pipe.

John’s x-pipe (internal view)
http://farm2.static.flickr.com/1222/916686128_36662ca2b0.jpg

http://farm2.static.flickr.com/1072/915841481_243c0ecc30.jpg

It’s worth noting here that we had to grind off a small portion of the trans case and some of the trans mount as well (Hinson mount). John rewelded the mount and reinforced it as well, but if you’re looking to undertake this, be aware! It would have been avoidable, but we’d be giving up at least 1-2" of ground clearance at that spot. It would likely have been the lowest point in the car then. Not something we wanted.
Back to diameter, we stepped it down to 2.5" after the X, since 3" dual is total overkill for anyone under like 600-700whp.

We were very unhappy with the cheap crap reducers I got from Summit, so John convinced me that we could make our own. Our methods were ghetto as hell, but the final product was awesome. They came out great and will flow better than probably anything short of some $200 Burns fancy thing.

http://farm2.static.flickr.com/1409/915843971_cce1a55653.jpg

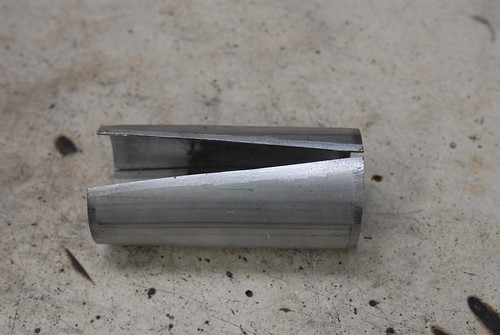
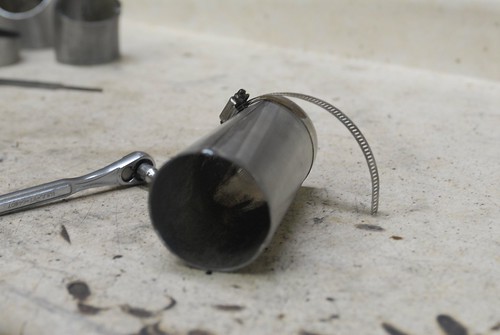
Started by measuring the circumference of a 2.5" pipe and then marking that onto a 3" pipe. Then we decided how long the reducer could be and notched out the pipe. Tacked the narrow end to keep it from moving and moved on to the wormgear.

http://farm2.static.flickr.com/1286/915843197_067874305f.jpg

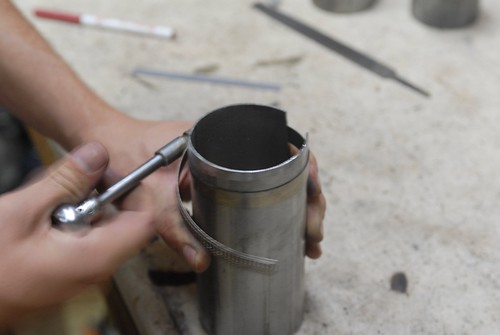
Drew it in just about all the way, until it made a nice transition into a regular 2.5" pipe and tacked it again. Fully welded it later on.

http://farm2.static.flickr.com/1359/915842545_97df1bae86.jpg

http://farm2.static.flickr.com/1164/915839409_10e74a634d.jpg

So, that’s the basics of what we did. All the bends are mandrel bends, a few are ever-so-slightly cheated with an angle on the end of a joint, but I’d challenge anyone to be able to pick out which ones and where. I’m amazed at how straight the system is. The sharpest bend is probably roughly 35-45*. It all fits well, everything except the spot between the transmission and mount on the driver’s side has plenty of clearance any nothing should hit. Stock hangers are being used with no additions. We still need to make some tips that look nice, finish the rear hangers and fine-tune the fitment. Obviously things will change and settle once I start driving, but any issues that might bring should be easily solved with tweaking the hangers or a hammer. :smiley:

Sorry for rambling on, but I like to give a full view of what was done.

Hammer to fix rattles FTW

Another “borrowed” post from the swap board, converted to a status update for here…

So, after finishing up my exhaust, I took the 30 minute drive back from the garage to my apartment, all via backroads. 35-55mph speed limits and enough other cars around to keep one from going much faster than that.

Since this was one of the first real drives in the car, we had a laptop hooked up and I asked my friend to keep a close eye on the temperature in particular. To my dismay, within probably 15 minutes or so, I was closer to overheating than I’d like to admit. Through the last few minutes of the drive, temperatures were between 230 and 240*. Way too hot for my liking.

So, when we arrived back at my apartment, my friend set to making up the radiator shrouding that I had intended to make for a long time now. Since we didn’t have the time or tools available there to chop up the sheet aluminum I have for the final version, we came up with this simple “cooling plate”. Since we were on our way to a Honda meet that another friend was throwing, we had to spice it up with some JDM goodness. :smiley:

http://farm2.static.flickr.com/1229/1011739922_82ccf9101b.jpg

Not shown is the bottom shrouding, basically extending the opening in the bumper directly to the bottom of the radiator and some simple side plates stuffed in to keep air from escaping out the sides.

So, after about 30 minutes of quick fab work and taping this contraption together, we hit the highway, going 65-75. Temps hit 205 and stayed steady. :eek: This is awesome!!

Of course, the true test was to head back to the 35-55 type roads. After about 20 minutes of cruising in that, temps were no higher than 210. The only thing that even phased this setup was going into a residential section and putting around at like 10-20mph. Temps crept back to 225-230, where the fan is still set to come on (changing that soon, when I go to get tuned).

So, all in all, I’m completely amazed by the difference the shrouding has made. Now I need to take my fan off the radiator and make completely sure it’s turning in the correct direction. After that, it’s a simple job of getting the computer flashed to kick the fans on at around 210* or so, and the car should stay cool on it’s own.

I doubt any of this is new information for people, but I think it’s good to stress just HOW IMPORTANT shrouding is. I’d damn near guarantee I doubled or tripled the airflow through the radiator core. Someone running without shrouding and a poor temperature gauge could easily cook the motor and never know it.

Photos courtesy of my friend Marnie. Bonus shot of the finished exhaust and plate…

http://farm2.static.flickr.com/1238/1011731484_0d123263f9.jpg

I love this thread, this project and this car. Marry me. :stuck_out_tongue:

DIY > *

Grow a vag, drop 20lbs and lose the hairyness. Then <3.

(disclaimer: I’ve never seen you, so I may need to add to requirements before marriage)

ur plate > all

I KNEW IT I KNEW IT I KNEW IT!

haha we couldn’t wash the car becuse the bush 30pk cardboard would die.

WOT the trans comes up, and the shifter base hits the shifter hole panel. Not hard to fix. And readjust the autometer indash needles do be more useable. And other then fan wiring, the exhust is done, no probles. Im very happy, they keep getting better every one. I want to go full duals now.
02s are fixed. tq arm is fixed. revse lockout is fixed… headlights still dont both work… and for some reson the car has a front swaybar? that shit has to go. Needs the cam, and spray on there ASAP.
And get it not the dyno soon to.

Hahaha I knew that was coming…

Well, I got the car aligned yesterday. Either the previous owner had all of the suspension off while the car was in his garage or someone was running around with an extremely unsafe alignment. I know the front was mostly off for installing the subframe, but I didn’t expect the rear to be as bad as it was.

Before:
Front Camber
-1.8* -1.3*

Caster
6.9* 5.3*

Front toe
0.16* 0.10* (total toe was 0.26 - both were toed in heavily

Rear Camber
-1.5* -1.7*

Rear Toe
0.06* -0.02* (total toe was 0.04*)

Since I knew the alignment was going to be at least significantly off, I never pushed the car hard with those settings, but I did take one or two long sweepers, entering around 5/10 and stepping it up to 7/10 or so and definitely felt like the car was squirrly and it felt like it had some odd camber gain or toe issues - it just felt different all through the corner and really raised some concerns.

Specs after:

Front Camber
-1.5* -1.5*

Caster
6.0* 6.0*

Toe all around is +/- 0.01 of 0*

Rear Camber
-1.2* -1.2*

After the alignment, I’ve pushed the car similarly and harder as well. Stability is increased tenfold. I haven’t broken the traction limits, but I’m sure it will be progressive and controlled. I’m very happy with the alignment.

Now, obviously I can’t comment at all about tire life or the track effectiveness of this setup yet, but if I had to wager, I’d say with 0 toe and the relatively low amounts of camber, it should be more than fine.

Next order of business is to track down a loud POP under hard braking. It’s from the front end and can be felt in the steering as well as distinctly heard. I’m hoping that if I tighten the brake calipers, it will go away. Any other ideas on what it could be?

Oh yeah, Johnny’s sweet radiator shrouding/ducting holds up to water incredibly well. Cardboard ftw.

Done and done :stuck_out_tongue: :lol:

This car needs a photoshoot, methinks :ohyeah:

First it needs a wash (rain doesn’t count) and detailing. And an interior. And the junker hood swapped off…and a million other things. But, yeah, I’ll get some sexy photos ASAP. Just gotta worry about the mechanical still.

Hey brent, where did you bring it to get aligned?

° = ALT+0 1 7 6

:slight_smile:

Yeah, I know THOM. Just not sure how to do it on the mac. Oh well, I like * well enough. :smiley:

I went to Craig Autometrics for the alignment.

I was in town briefly at my parents place and Brent stopped by.

http://www.mturck.com/ForSale/102_6846.jpg
First gear is about 70ft, 2nd goes for an easy 130+ :lol:

One evil neighbor gave me a nasty look right after he left, my father and the other agreed it was one of the best sounding V8’s they’ve heard in awhile. It did sound awesome.

sighting all over.

I haven’t told brent this, I was talking to jason short the other day.
“hey johnny, is that LS1 RX7 your helping on red.” ya why? “I was driving down W. hennretta, in my car. And I thought I was hearing a LS1 around, leaving every light. But I didnt see anything. Then it cuts thu the mall, and gets on it.”

“damn that thing sounds sweet dude”

:mamoru:

Hahaha, awesome. I definitely get a decent bit of attention - partly due to the car and partly due to me driving it a bit fun most of the time. Hands down my favorite part of the car is the sound it makes. Absolutely perfect. :smiley:

Been working on this a bit over Christmas break.

Drove it a bit last week when it was 40* out.

Got the dash back in for what should be the final time. PCM is also mounted (no more kicking it around the floor)
http://farm3.static.flickr.com/2141/2159092317_c0e6cd00b8.jpg

Got the new hood on (thanks Addicted2booTs)

And put the cover on it for now…maybe more work later this week, but probably just collecting some parts I need and fixing up my Jeep.

Not much of an update, but I’ve been pretty busy doing everything but working on the FD. Hoping to do paint this winter and finish off the interior.

hands down my favorite build on the side, good work!