Its a really nice piece, got it from RPM they have a sale on them right now, contact Jeremy about getting ine or call them. RPM also rebuilt my trans, and it looks like new.
The bellhosing adds weight over the stock but thats a givin. I hear its a lot lighter then the mcloud bellhousing setup, and fit a lot better too so thats good.
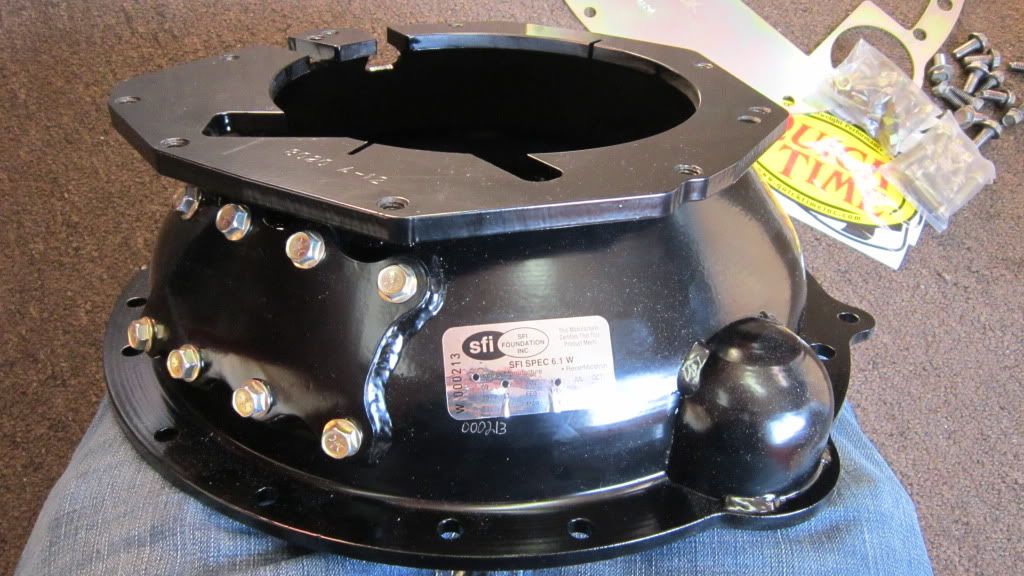
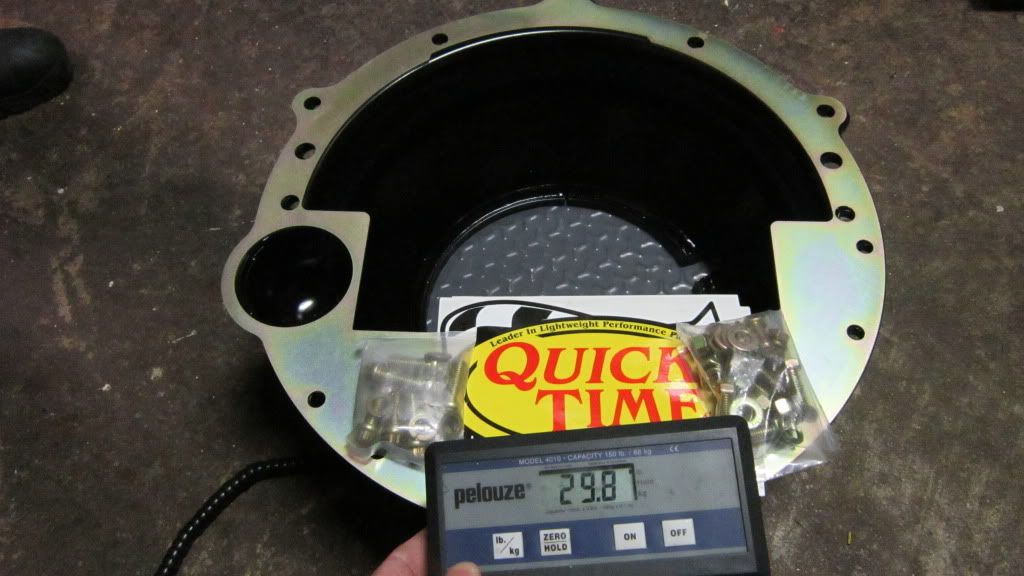
Quick time LS1 bell housing with SFI window, block plate, and bolts is 29.8 pounds.
Just the bell housing with the window bolted on is 25.4 pounds
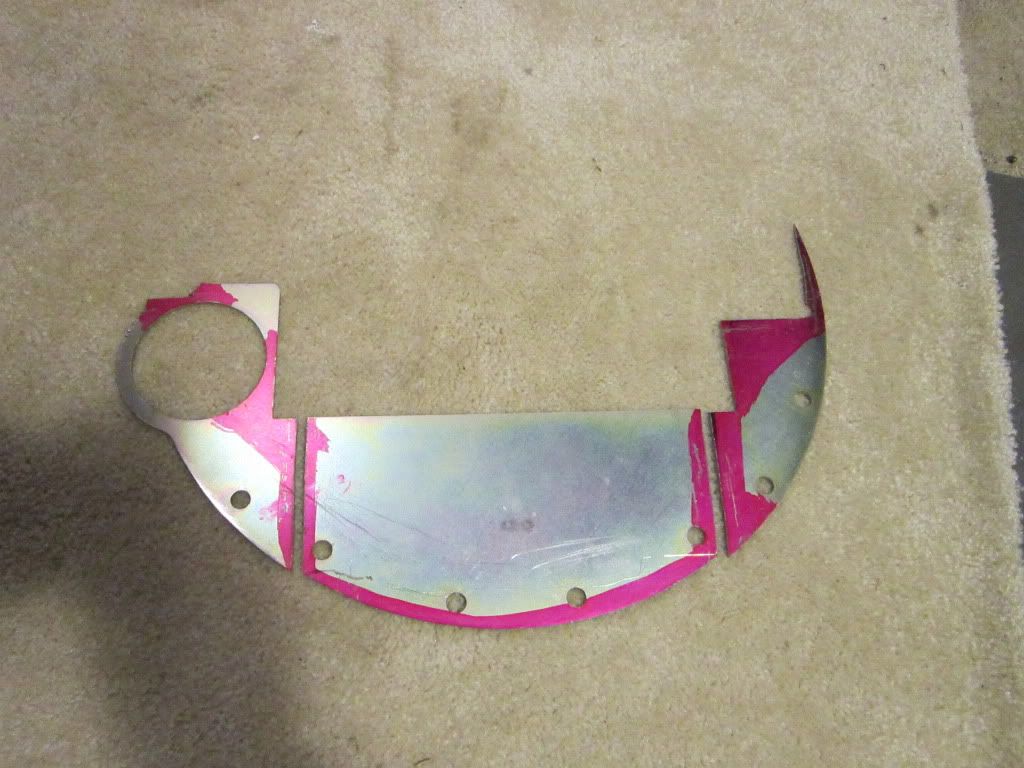
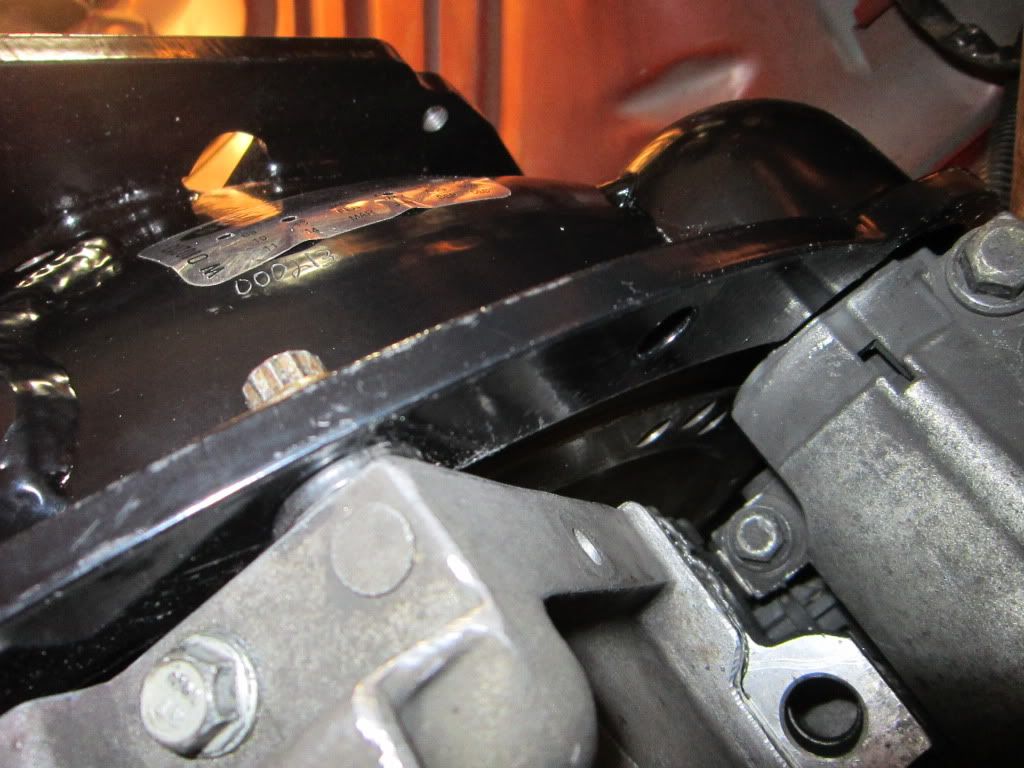
The “block saved plate” is .115 thick and mate of steel. I see it as really doing nothing, the shape it is. Its not going to save the starter ear (so hopefully just the starter nose breaks off and not the block, that never happens, the starter breaks off bolted to the outer bolt with the ear. cracking thu the inner bolts hole:cry: Or any area in the back of the block, I would think they could make the plate solid, and just have a large hole for the crank bolts, and drill some smaller holes in the pattern for the rear cover bolt heads to fit into. That would still protect the block form getting hit, or “parts” :eek2: that are going get wedged in and cracking the block in easy. It dose protest the rear face of the oil pan, but thats the cheapest and easiest thing to fix will the the damage thats going to happen your block. The bell housing will still contain the parts and protect you and the car.
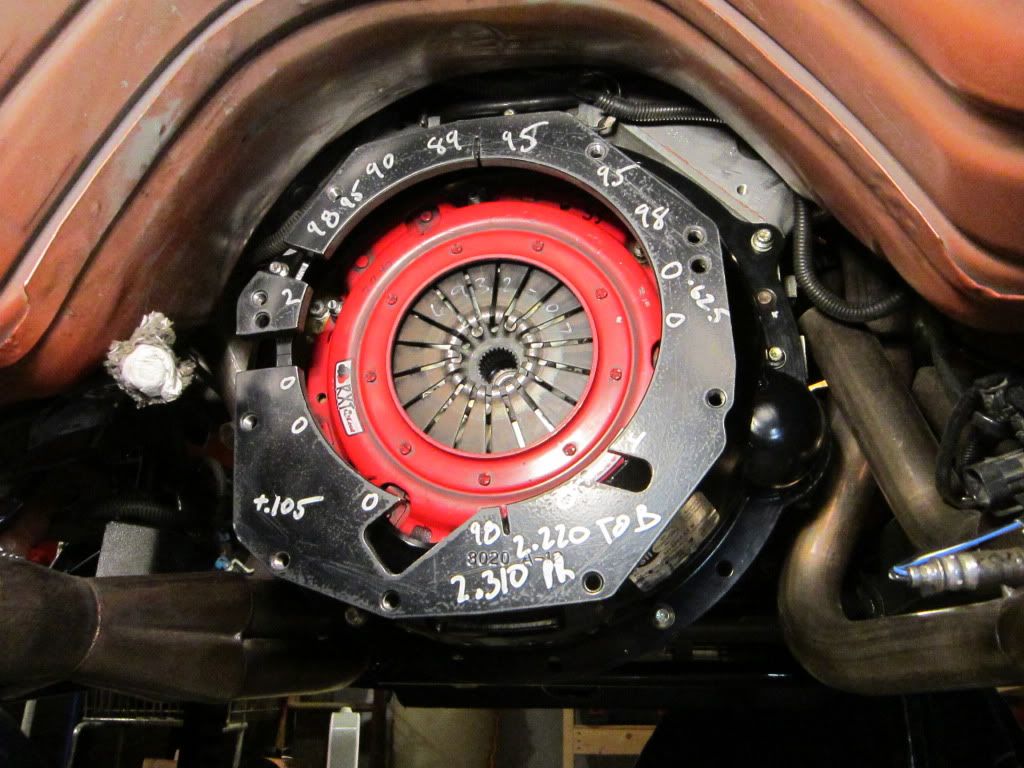
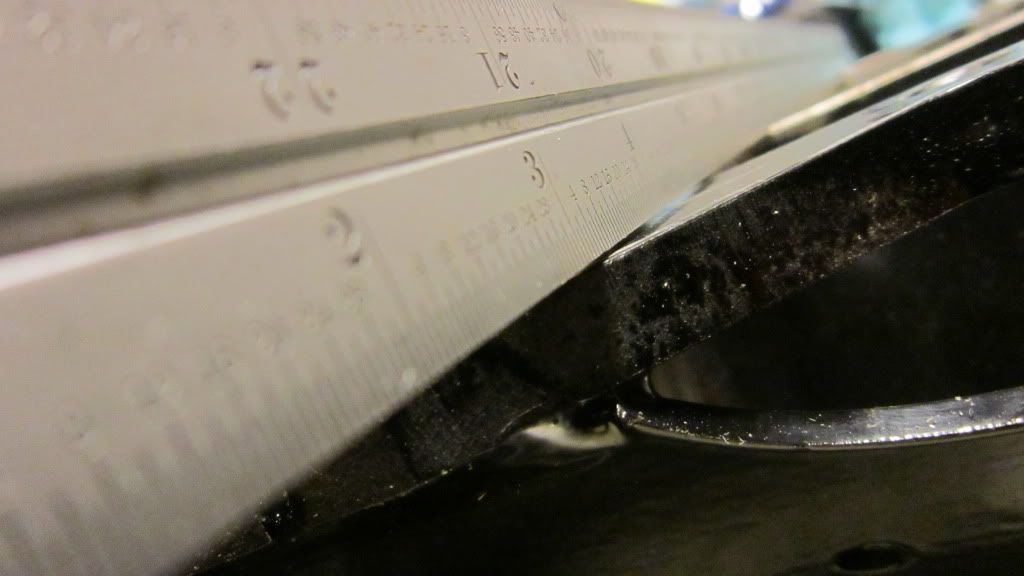
I forgot if I measured this on the surface plate, at newera then I picked it up. But I wrote it was .105 taller (with the block plate) then my stock bell housing. Side my side this pic I took that looks about right. (+.105)
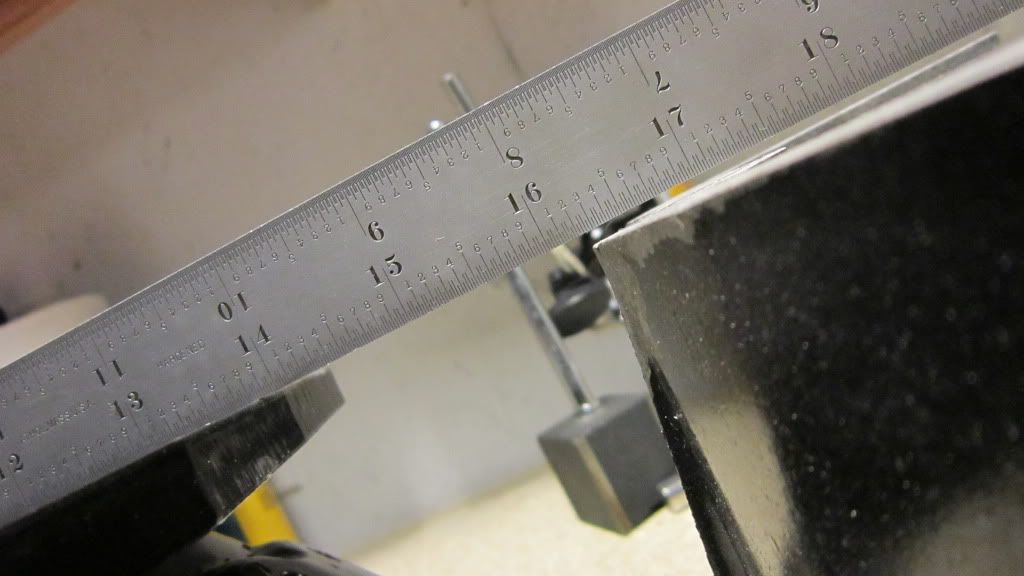
And this pic without the plate (.115) it looks to be what would be (.010) very little to see, but should up with a 24" strait edge, just the quick time bell is slightly thinner, then my stock in the back ground.
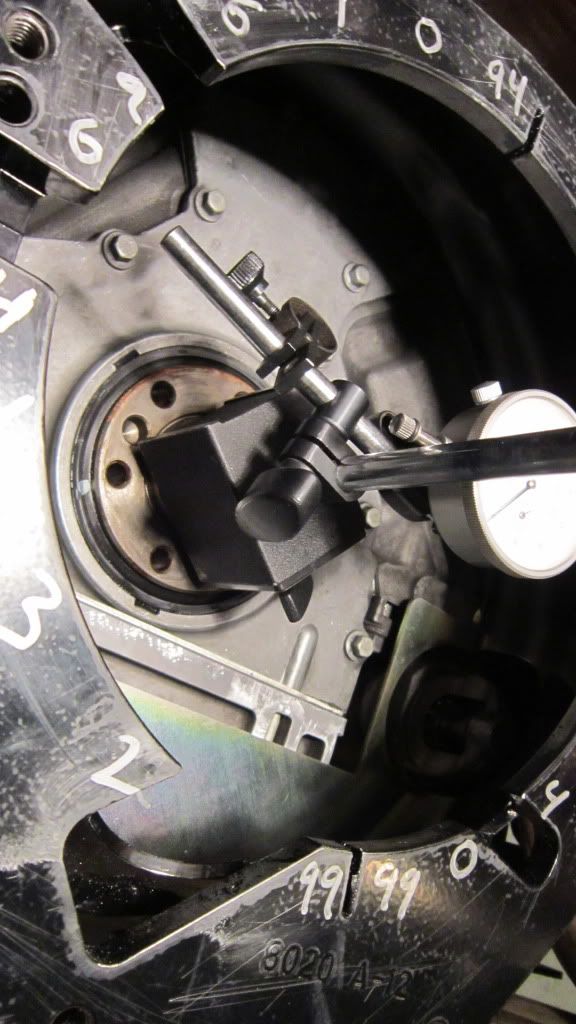
A few of the backside of the threaded holes had the last sharp thread hanging off. But everything else was nice a deburred, No big paint runs, but hit the mating surfaces with a file to knock down any high spot (mostly thicker paint thats going to happen) I did noticed on the trans plate, the lower part was tipped in a little with a start edge. (welding distortion?) But the trans bolts to the outside of the plate anyway, I checked how square that face is off the crank center line (mag base on the crank) as farther outside the plate were the trans bolts are as you can. Its not overall centered, and has a few cutouts, but over all was very good. I was happy about that, I think it was within .010 overall. Hard to see the indicator face full 360* in the tunnel. Same goes for how centered the bell housing was, I could see some witness marks on the main cutouts ID were it looks like quicktime uses some sander on the paint to remove some high spots. But the trans locates with those 2 smaller dowels, so I dont know if that pattern is centered on the dowels anyway? But this is what people use to check it.
With the block plate bolted on, I marked the open spots around the starter and oil filter to add some holes for cooling, and let the clutch dust blow out, for the clutch life and slave. But ended up just cutting the bottom part off (a little weight :D) and trimming it to fit nice with the shape of the block, and not cover the starter at all. So its all open past the block, and just running 2 hardened washer (think there extra arps, hand sanded a little to get them to .115, money) for the lower oil pan bolts. So it has alot of cooling the the brake fluid will drain out the slot when you bleed the clutch. And you can fit it around the clutch and flywheel bolted on. This also removes the big area that might hit the oil pan, I see some guys saying they didn’t have to grind anything. Maybe some oil pans are different? I had the pan off a few weeks ago when I had the trans put getting reuilt to change the oil pan baffle, so at that time I ground the unmachine higher spots of the pan down with it off the car.
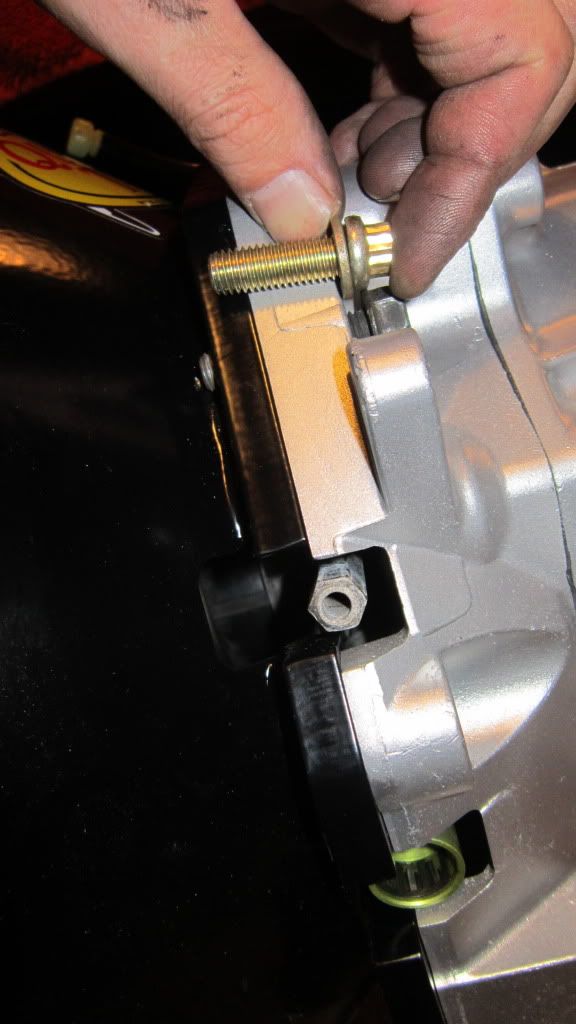
Test fit it the spacing is a little off for the master, so the bleeder screw access was off a little bit. I think you could get the 7/16th/11mm socket but it just needed a little 45* flat (bottom side of the opening) took a min with the grinder.
Came with nice 12 point 10mm head bolts (these go into the block) the smaller head means a smaller socket for easier to get to all of them. And because the bellhousing is thicker some of the bolts are closer to the budge so stock bolts will not work, thats you use need these for the block. The trans bolts going into it will be to long (as in the pic) they don’t pass thu the flange and will hit. I think you need them about 35mm if you want to buy some new ones, I didn’t find any nice ones with the built in washer I liked, or the right lengths (30 or 40mm) At a few stores I checked quick before I put all this in. Best would be a 10mm 12pint so you just need that one socket to pull the trans fast at the track, keep it simple to work on.
So just cut down the stock bolts (about 4-5 threads), and ground a lead edge on them so they start nice.
The stock dowels are 5/8th .625 The bellhousing was tight, the holes were a little small, so took little of the paint off of dowel holes with a flap sand paper porting tool. If you do this don’t take any metal off 1st and see how it fits, paint came right off the bell slights right on snug. I test fit it without the block saved plate at 1st, (you could maybe use it that way to get your airgap right) if you do this and have a gen 3 block or the non recessed rear cover bolts (LSX and a think all gen4 setup I noticed have them) The upper 2 rear cover bolts, and maybe the one of the right will hit the curve of the bell flange. Even a low head or normal m6 bolt with no washer will stock out, a button head like used for the fast valley cover will clear.
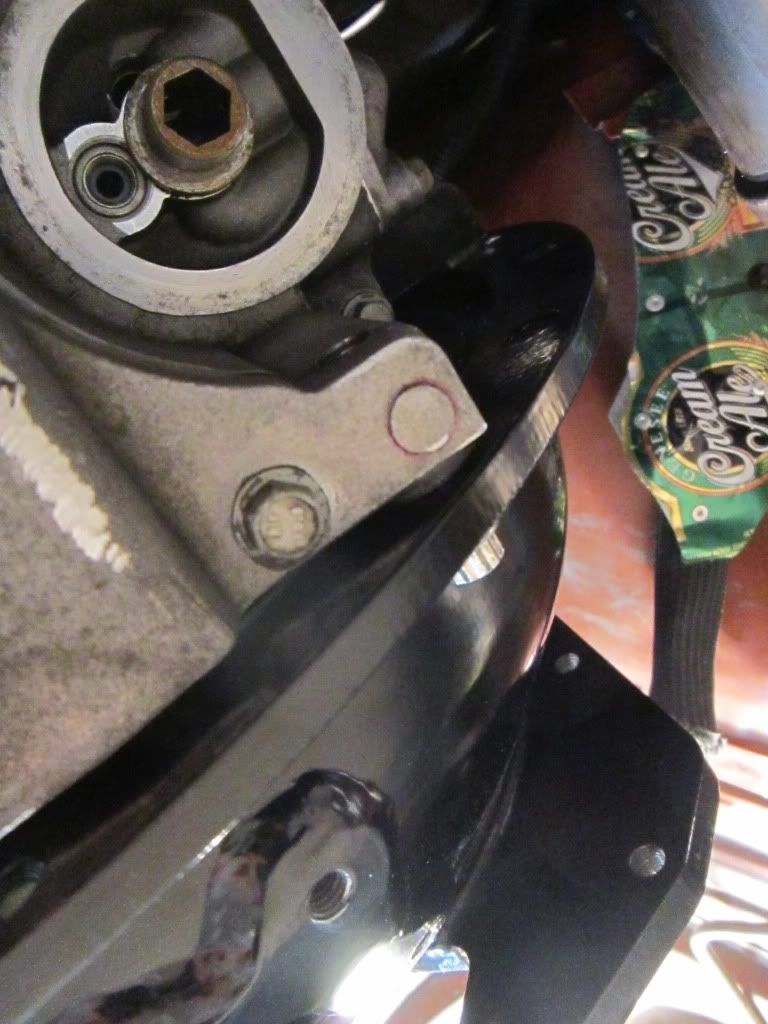
here it is installed before the trans went back in
With the slight disc wear the block saved plate worked out too better for the air gap. TOB to face was 2.220 (no shim), face the fingers was 2.310