This one will be shorter. HA! PSYCH! :lol ;D This is one more comprehensive guide by yours truly. I suggest you read it in its entirety, but you could just talk to me sometime and i can explain it to you verbally. I just wont be able to show you diagrams and such, but you can look at the pretty pictures here, just like you used to when you were little. Anyways, here we go, go get yourself a snack, a drink and get comfy with some reading glasses.
As you know, speakers need enclosures. Subwoofers have several types of enclosures. I will be covering 2 of the most popular types.
The first type is a sealed enclosure. This is basically just a box with 2 holes. The first hole will be big and is cut out for the subwoofer to sit in. The second hole is smaller and is there to run speaker wire. This style box is generally the smaller of the two. This type of enclosure is used more often for a higher quality sound. The bass it produces seems to be tighter sounding and smooth. You can build your own sealed enclosure, as its the simplest one to build. The materials are not expensive and it does not take a lot of time. You just have to make sure you calculate the side panels correctly and that its airtight. This kind of an enclosure will take about 1-2 hours to make, as its not complex in its design and has a short list of materials needed as well as tools. You can also purchase one from your favorite stereo shop or call the subwoofer manufacturer and order one from them or one of their distributors. These boxes do not require a lot of math. This makes it a great choice for a trunk thats either very tall or very wide. As long as you stick to the proper volume(designated by the subwoofer manufacturer) you can change its dimensions and not lose sound integrity. These boxes are also lighter in weight and are easier to wrap in carpet if you decide to make one yourself. Most people using subwoofers in their cars should stick to this kind, because they work with any type of subwoofer and in virtually any car. This style enclosure is also popular for you guys with trucks with a short cab. They can be made rather slim and long to fit on the floor behind the seats. If youre using 2 subwoofers theres two sub types of sealed enclosures. The first is one single large chamber where both speakers share the same air. The second is two separate chambers, one for each speaker. Both are equally good and most people will make a single chamber enclosure to save weight and time. The two chamber configuration is stronger. If you plan to use two very large and heavy subwoofers you should probably build the two chambered version as the separation will not allow the longer peices of the box to flex. There is virtually no difference in sound between the two sub types.
Here are some photos to help guide you.
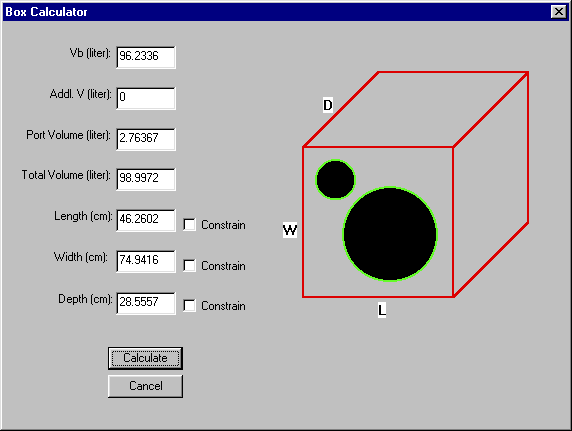
Here we have a screenshot of a simple program people use to help guide them in the process of making a sealed enclosure. There are many different programs out there, but they all work on the same general principle.

In the next photo we are looking at a sealed enclosure the person is building themselves. This a complete enclosure with no front plate(thats where you cut out the round hole to mount the subwoofer in). The black lines are what i think is silicone. This is in place to make sure there are no leaks in the box, as it ruins sound. You can use almost anything that will seal it. Sometimes people will coat the inside(or just the seams) with fiberglass resin, some use silicone, some use wood glue(ive used that in mine and it works just fine). It doesnt make too much of a difference what you use as long as it makes your enclosure stronger and airtight.
In the following image you see a completed and wrapped sealed enclosure. Inside you can see the seams are coated with what appears to be wood glue. The small insert is the piece that goes in the smaller how in the box to hook up wires to it. Its basically a plug that you use to connect the speaker wire coming from your amplifier. On the inside it has wires that are hooked up to your subwoofer.

In this next photo we can see a two chamber sealed enclosure being made. Once again, you have a substance sealing all the seams to ensure a proper airtight enclosure. This enclosure is also shown with no front plate.

In the next photo is also a completed sealed enclosure, but it has some filler in it. Some manufacturers add it to their enclosures to make them sound smoother. This does work and is most helpfull with cheaper subwoofers and amplifiers. High end equipment doesnt really require any kind of filler as it already produces a smooth pleasing sound.

The second type of woofer enclosure is a ported enclosure. This one is generally a larger size enclosure. This also sounds different from the sealed enclosures. Ported enclosures will give you a couple more decibels(on average, but it really varies with the speakers you use, the size of the box and the port and the amplifiers you have powering the speakers). These dont sound as nice and tight as the sealed, but they tend to sound deeper. A lot of you wont hear a HUGE difference between the two enclosure styles, but if you think you will, listen to both before purchasing. When building a ported enclosure there are several things you have to keep in mind. You need to make the enclosure and your port a certain volume and then you will need to make sure its tuned to a certain frequency if you want to compete in the SPL competitions. People that compete in SPL drags use this type of enclosure. The ports vary by size and shape. Some can be very slim but long, some ports are very wide and very tall and some are tubes. There isnt one best type of port, theres only the one that works best with what youve got and what you are trying to get it to do for you. This type of enclosure takes much longer to make and sometimes requires a thicker front plate. People that compete in SPL drags love to use extreme power and very big subwoofers. This is the reason that sometimes you have to make a double and in some cases a triple thick front plate. Several subwoofers are known for ripping apart the front wall if its not strong enough and litereally breaking themselves out of the enclosure. This style enclosure requires more pieces to make and sometimes needs internal reinforcements(in extreme SPL cases). When building this type of box its best to round off all the edges that are on the inside so that the air flows smoother over them and doesnt make a slight whooshing sound that can distort.
Here are some photos of ported(or sometimes referred to as vented) enclosures.
This photo is a rather extreme case of a ported enclosure because if you look at the site it has a LOT of internal bracing and is a very complex build. In the picture you can see some of the bracing inside the speaker hole and the large port opening at the very bottom.

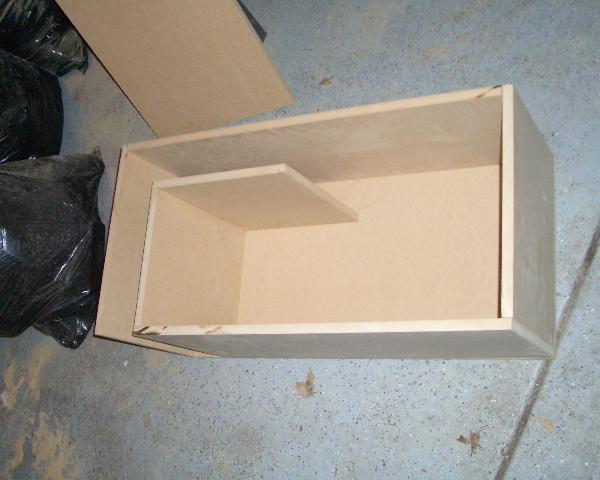
In the following photo youre looking at a ported enclosure(very similar to the one i build for my car) from above. The part of the enclsoure thats facing the bottom of the picture is the front plate. The L shaped portion on the left side is the actual port.

Here we have yet another shot of that same program you can use to help calculate enclosure dimensions. This time the selected type is a ported enclsoure with a tube port. Tube port volume is calculated slightly different from rectangular port volume, but its basically the same enclosure in the end.

The next two photo show two boxes that are 90% the same. The only difference is that one has its ports on the inside and the other has them on the outside. When making this style enclosure you should make a separate chamber for each speaker.

In the following shot youre looking at the inside of a Rockford Fosgate built SUV with a very complex multisubwoofer enclosure. This isnt something most of us will have in the car. Most people do not need anything like that, but its a show vehicle so they built it to attract attention.

As with sealed enclosures you want to make that all of your seams are airtight because having leaks ruins sound even in a box thats already got a LARGE hole in it. These enclosures are generally larger and thicker so they add even more weight you the vehicle and take up more trunk space. This style enclosure is usefull for SUV or van owners as you have more airspace to fill with sound.
One other aspect is pointing your enclosure. Some subwoofers sound louder facing the front of the car, where others are supposed to face the rear. Sometimes its loudest pointed straight up. For example, in my Eclipse, my enclosure sat facing up. The sound was basically reflecting off my rear window and was moving forward. I found this out by pointing it froward, up and backward and checking for which way sounded louder. Pointing straight up was loudest so I left it facing up.
Here is a link to the site where you can find some info on the program to help calculate box dimensions, just incase you decide to make your own and need a little help. http://www.ajdesigner.com/speaker/bcv.php
Like always if you have questions post them up or ask me in person and I’ll help you out. Hope you find this info usefull in your ventures into acoustics.

