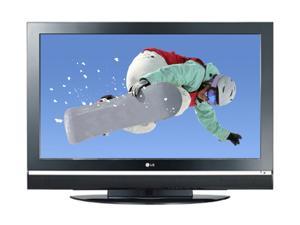
Had some issues with my LG 50" plasma flat screen that I ignored for about 10 months. Had issues turning on when it got cooler out. Fine all summer but as soon as the fall hit, she took about 15-20 cycles to turn on. Finally she gave up and wouldn’t come on at all. TV’s about 6 years old and had the screen replaced under warranty a couple few years ago. No other major problems.
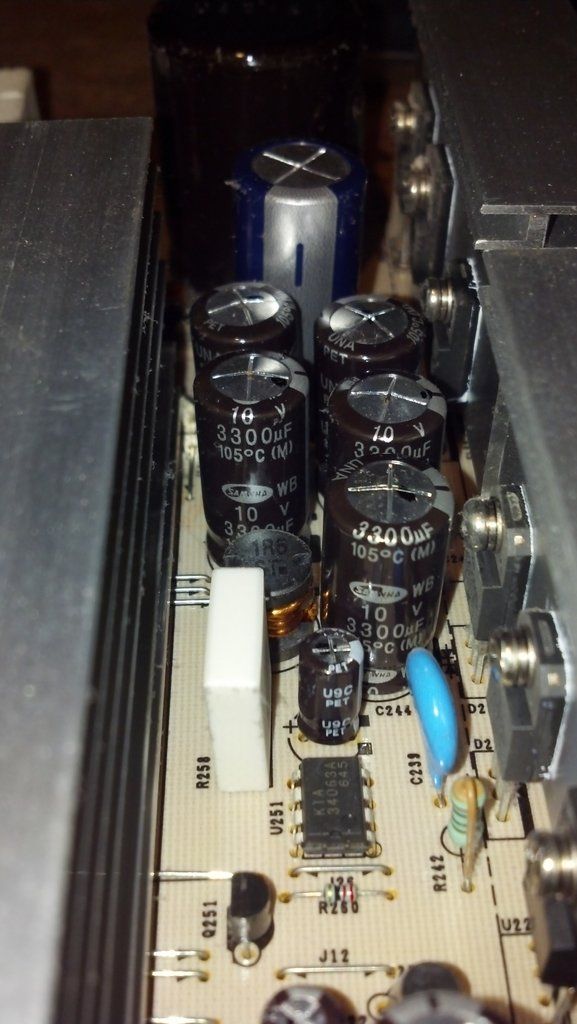
A little net search yielded the fact that this was a common problem with my TV, and probably many others. Apparently the capacitators go bad as they are of lesser quality so they hinder the power on function of the unit. When they are faulty, they tend to bulge at the top and discharge some sort of black material (cancerous I’m sure).
Electronics geek described the problem, the repair process, and linked to a company called LCD Alternatives and for about 25.00 they'll send you all the bad capacitors, solder wicks, solder, and some other little items. Mine was 25.00 because I bought some extra solder kits and a soldering iron. Pretty simple operation, if you have some skill at desoldering and soldering circuit boards, which I do not. Got most of the capacitors out but struggled with the last one, which turns out to be the one that squashed my project.
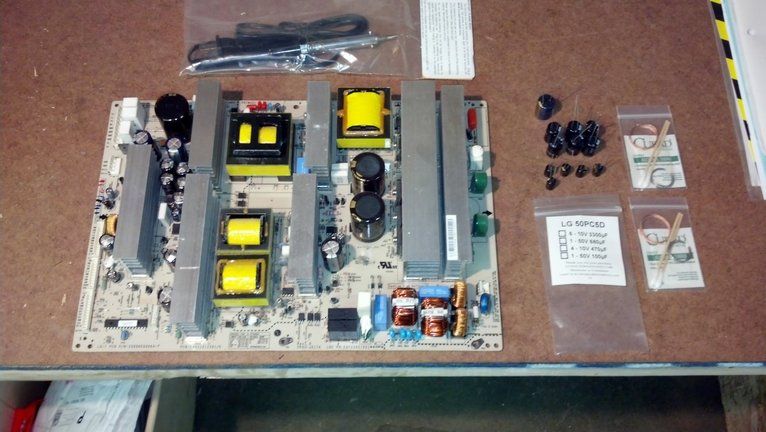
I didn’t feel too hot about that last one and my fears were confirmed when I re-installed it and that one started to smoke when I powered it up. I think I damaged the delicate circuit pathway in the board removing the bad one. A little more research and located an entire replacement board from MCM Electronics. Not the cheapest, about 165.00, but all the guys that had it for cheap were out of stock (probably due to Monkey's trying to repair the capacitors on the circuit board). Free ground shipping. New board came in today.
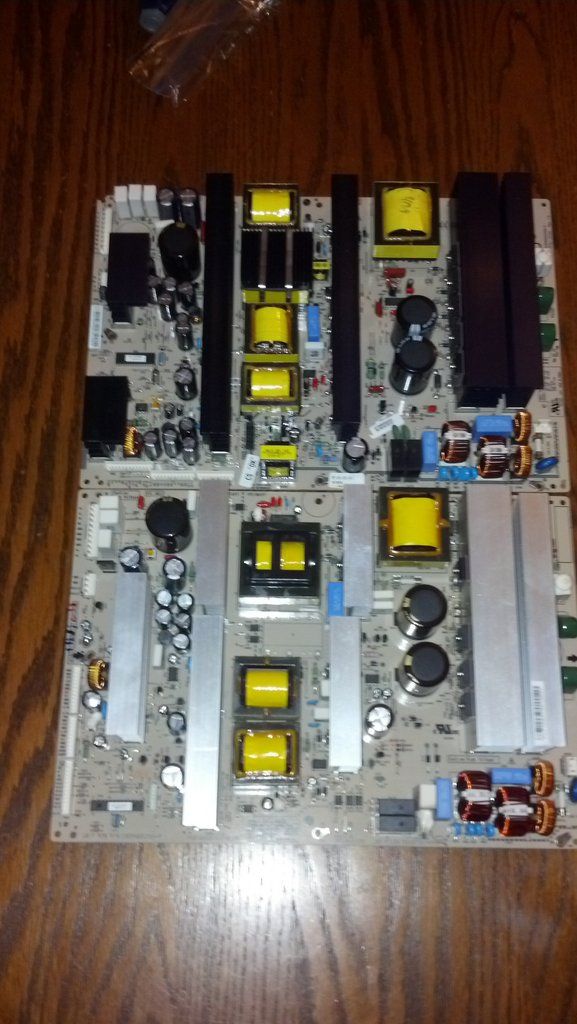
Not a dead ringer for the old one based on the layout but I figured it was upgraded a little as all the major components seemed to be there. Only one of 10 or so screws did not go back in due to the hole location being a couple mm off.
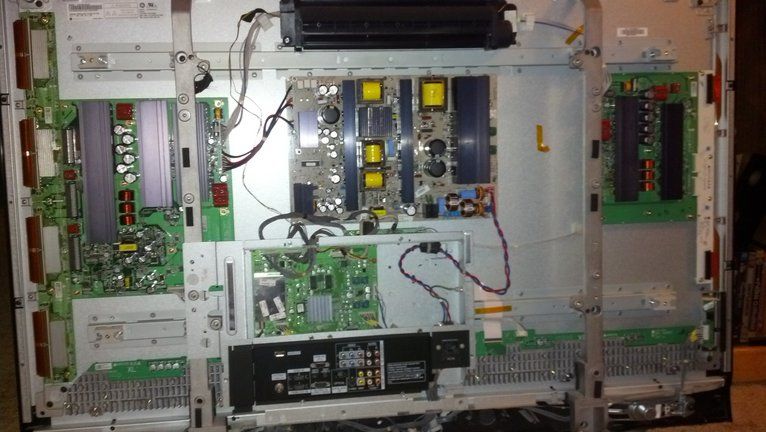
Connected all the corresponding cable connection, re-assembled the unit, hung her on the wall, and wala....back in business. In summary, if you know how to solder enough to swap out these components, you could solve this problem yourself for about 14.00, which is IIRC, the cost of the kit without the soldering iron and extra materials. BTW, if anyone wants to teach me to solder correctly, I can sleep a little better at night. Hope this was helpful.
I bet you could youtube ‘how to solder’ with legit results. It’s not that hard, just takes practice.
In fact, now that you have an extra circuit board go ape shit soldering things on and off. Most of the time the soldering iron is too hot or too cold. I’ve had great luck with my Haako fx888. I got it for around $100 and while the US colors make it look like a toy, it’s not.
I think I had it plenty hot. I have a couple little scars to prove it. I know that the tips from LCD Alt. said that sometimes when you “wick” solder off, you might need to add more to get more to come off. It was the re-soldering that sucked. Couldn’t seem to get the solder to stay where I wanted it. Tried you tube on my phone but most of the videos were not really magnified enough to be helpful. Do you use flux like you would when you solder copper pipe? Seemed like that might have been the missing element.
That’s a rough place to learn to solder. I’ve been doing it for years and I’m still not comfortable on circuit level stuff. They guy to contact is Luke_L. He’s a soldering Jedi. Doesn’t even need an iron, just the force.
Yeah, shoulda considered posting for help but I’m stubborn and I like to be self reliant. Guess it wasn’t too costly a learning experience. God knows I’ve spent more to learn less in the past. Guess I can keep practicing. Would like to be able to do some solder connections on the car over the winter. So now I have the iron.
There is such a thing as too hot, and yes, definitely use flux and/or flux cored wire. it IS different than the stuff for plumbing but serves the same purpose.
A number of years ago I got a free rear projection 51" HDTV off a buddy of mine who ran it night and day and swore it was shot. Took it apart, cleaned it, re-aligned the guns, use it to this day. Guys on AVS still love the model, they use it as a foundation for a smaller home theater setup.
I started trying to “fix” things I could cause I got sick of the throw away mentality. Tool breaks, take apart, diagnose, fix. Just couldn’t see scrapping a 5-6 year old TV. Glad I didn’t. Nice size, good picture, and hope it lasts for another 5-6 years.
The biggest mistake I see people doing when learning to solder is that they try to melt the solder on the iron, then place it. The key is to heat the component and melt the solder on it and not on the iron, there only needs to be enough on the iron to ensure good thermal contact with the board/component. The solder will follow the heat somewhat as well.
I take apart all my broken shit too, I’ve fixed my cheap air die grinder like 4 times now.
I tried heating the “leg” of the capacitor but it never seemed to get hot enough to melt the solder. I ended up with the place and chase scenario. Like trying to pick up an ice cube off the counter with a spoon.
The solder on that board is probably lead free solder,which can have a higher melting temperature. I prefer to use the lead rosin core solder and a good wick like chem-wick. I haven’t run into any problems with those harbor freight irons,they don’t sell replacement tips for them or fine point tips which kind of sucks. If you want to upgrade irons,look into a Weller WES51,I used one for years and it was great.
Either not hot enough or it wasn’t making good contact with the leg, did you tin the iron? Edit: lead free is another good point, since this was a kit, did they mention it anywhere?
This seems to be a pretty decent how-to. Like somebody else said, practice on the old board, it’s not too difficult and is a pretty useful skill. http://www.aaroncake.net/electronics/solder.htm
I find it helps to have a little glob of solder on the tip to reduce the contact resistance and foster heat transfer.
Another tip I’ve learned is when removing parts melt all the contacts into one glob then remove the component when it’s melted. Then you can blow or solder wick the rest away.
I’m about to do this on my TV as well. However, I’m ready to admit that I completely suck at soldering so I’ll probably be talking to Luke to see if he can get that part done. Either way, great attempt and thanks for posting this.
Electrolytic caps are not great in long term applications, but they sure are cheap.
Thats entry level soldering stuff. Unless you count soldering wires together. Anyone can do that w/o burning up the wire too bad.
For through hole component removal, I LOVED this tool…
Congrats on the fix. That is the fix for a lot of broken electronics.
Yeah, that LCD Alternatives website had kits for a wide variety if manufacturers.
---------- Post added at 09:18 AM ---------- Previous post was at 09:17 AM ----------
[quote=“drvnkd,post:19,topic:226915"”]
Electrolytic caps are not great in long term applications, but they sure are cheap.
Thats entry level soldering stuff. Unless you count soldering wires together. Anyone can do that w/o burning up the wire too bad.
For through hole component removal, I LOVED this tool…