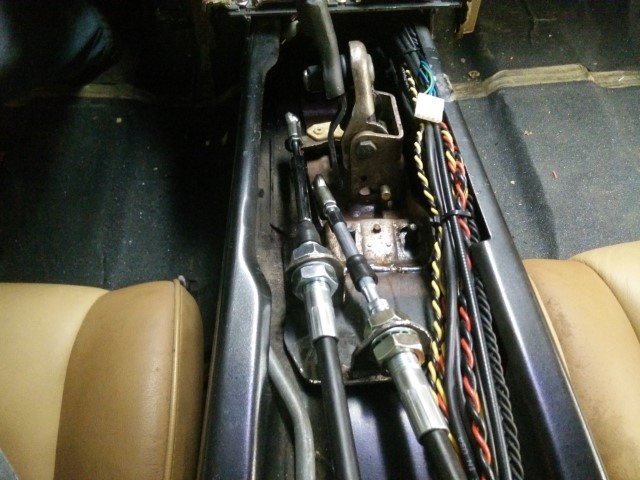
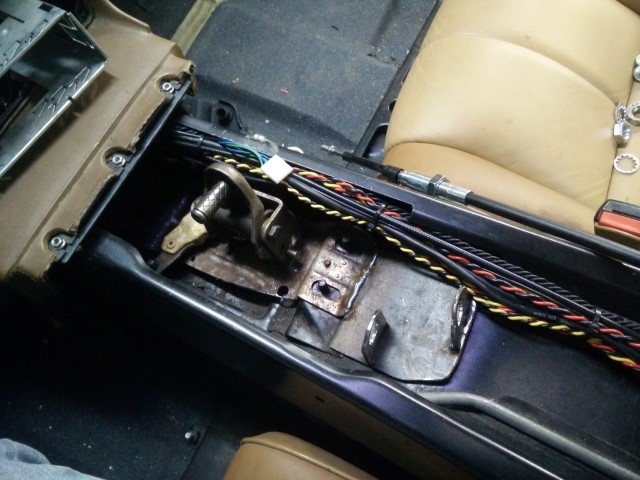
Started working on the shifter cables. Apparently there are good cables available from California Push-Pull that will just drop into place if I make a custom bracket and bolt it to the transmission. Great. Too bad I’ve got several problems with this. I e-mailed Californai Push-Pull; no answer. Fair enough. I called them, at around 2:30P Pacific time (they’re in California, you see), and was greeted by some woman informing me that all questions about cables had to be directed to Dave, and Dave had left for the day. They close at 5P PST. Wonderful. I left a message with the woman regarding my inquiry including my cell phone number. No call back. I can’t deal with that kind of customer disservice. I was willing to drop ~$250 on cables with him, but instead I ended up with some universal 1/4"-28 threaded end cables from a company called Steinjager. Cost me $100 for the both and it gave me something else to ‘engineer’. Plus, they’re beefy as hell. Sturdy cables. Even included those 1/4" heims up front and 1/4" ball joints at the transmission. Not bad. I found them via rock crawling forums. Dudes use them for custom manual transfer case shifting setups. If it’s good enough for them, should work for me, eh?
Anyway, the bulkhead locations seem to be pretty spot on but I’m still going to wait to finish weld and gusset until I have cable ends that fit my shifter assembly or make new dowel pins on the lathe to weld into the shifter assembly that actually fit those heims. Six one, half dozen the other. I’ve got to make everything at the trans too, but I’ve got a few ideas. The shift assembly is stone simple. I’ll likely just make one from scratch to suit my needs. After all, the cables are coming into the transmission from the complete opposite side in my car than when it was in the Cavvy. Need to get creative.
Here’s an example of an M-Tech ‘short shifter’ on a European F23. Mine would be a bit different to accommodate the different cable entrance location/angle, and I’d have to make the arm for the select cable [lower cable to the right] a mirror image of the one here. This is due to the direction the select cable moves when the shifter operates in the factory F23 cars; opposite that of my factory Fiero 5-speed shifter.
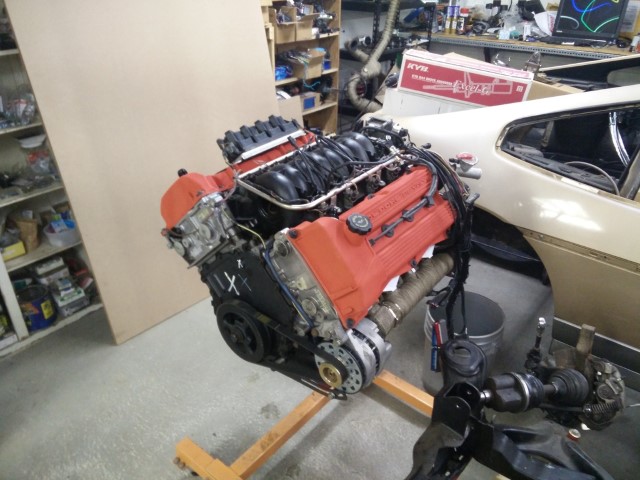
Yea, GM’s indy program used a highly modified version of this motor. Unfortunately it doesn’t share many parts with the production motor, but it’s still cool. If I replace the springs, retainers and rods in this motor, I can bump the redline up from 6.5K to about 8.5K. …and that’s nice.
Anyway; I painted the valve/cam covers today. Turned out okay. Kinda meh, but I’m not going to fuck with them anymore. I’ll be remaking them when I get a TIG machine anyhow, as well as the intake and oil pan.
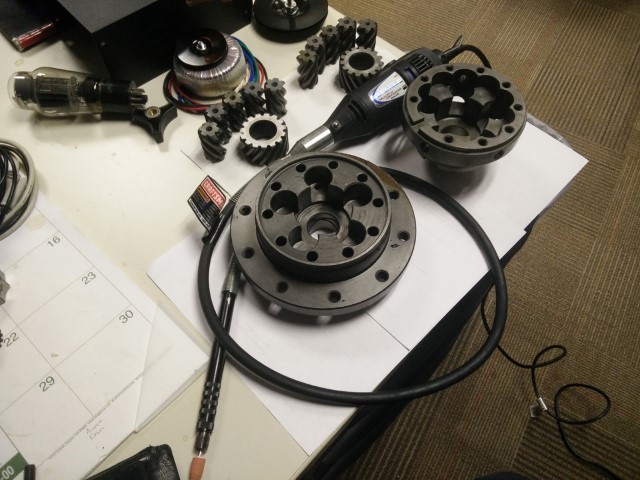
I split the case on the F23 today. Really, it was pretty easy. Just had to stop at Harbor Freight and get a set of 3/8" drive allen keys to get the one bolt out of the intermediate shaft:
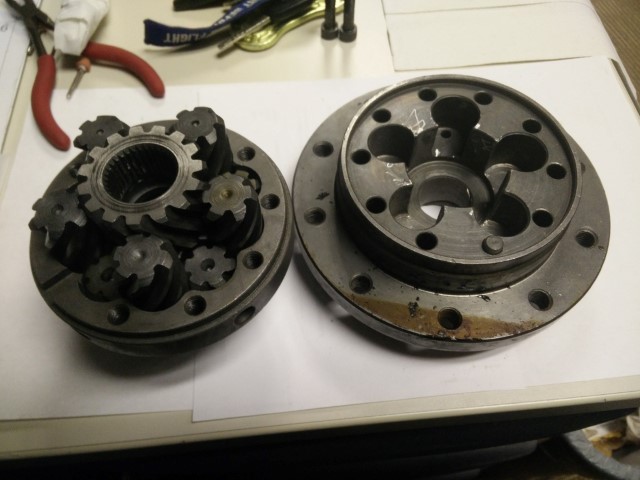
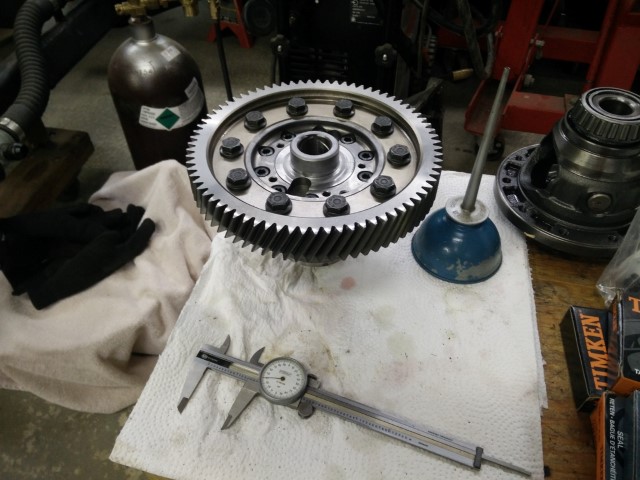
I also got that differential. Everybody on the internet is absolutely correct; it’s acceptably made, but poorly assembled. The diff is constructed of solid castings with decent machine work on gears, reliefs and splines. The Belleville (spring) washers in between the axle gears are garbage and must be replaced with good washers stacked properly, which the originals were not. There are 9 M8-12.9 bolts holding the two halves of the diff together, and 7 of them were just about to fall out. I’ll need to slather them in red LocTite when I torque them back down. First, I need to spend an hour or so with the dremel cleaning up some of the not-so-great machine work and then I can put it back together.
I brought that diff and my Dremel to work so that I could spend a few hours cleaning it up. Wasn’t too bad. I guess I’m pretty familiar with helical gear-type LSDs now.
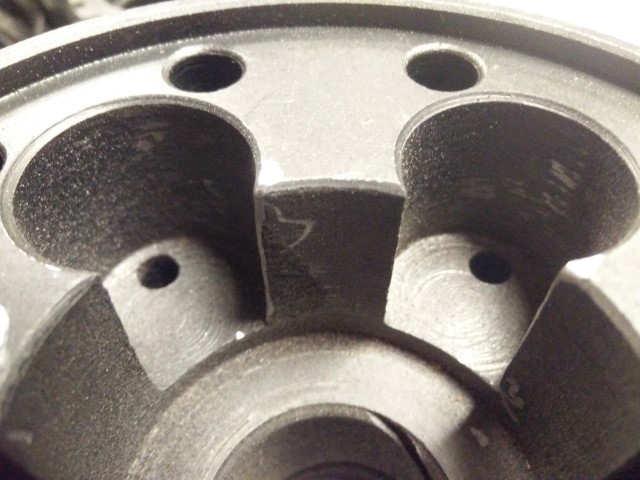
Here’s the non-drive half of the housing with the left knife edge ‘broken’ or rounded-over. The casting is only mediocre as far as surface quality goes. There aren’t any pinholes or anything I can see in the casting that worry me, I just don’t want tiny chunks breaking off and grinding around my trans for how ever many miles.
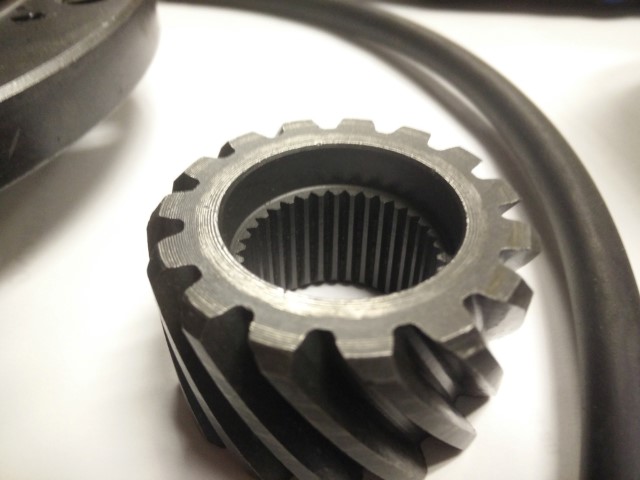
Here’s one of the axle gears. That ‘pocket’ formed behind the splines is where the retention clips in the axles engage. See how it’s square to the spline surface? If you just throw the gears in like that and try to remove an axle after you’ve installed it, the clips won’t compress and you’re pretty much fucked.
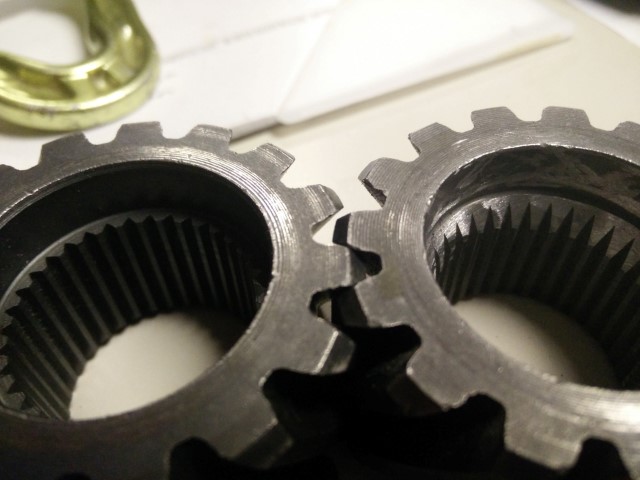
The solution? Chamfer those bitches.
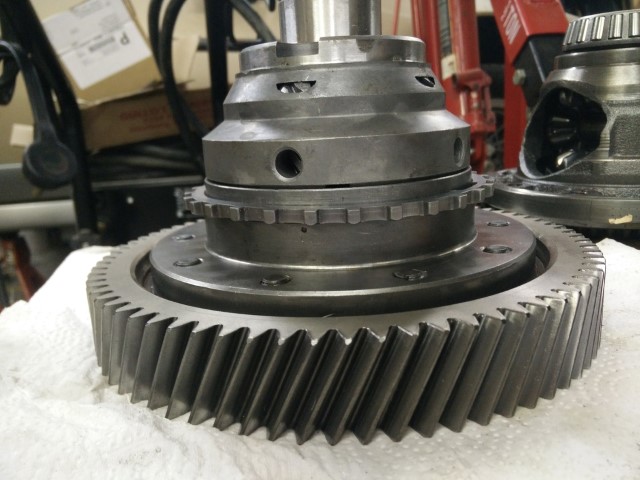
That’s really all you’ve got to do until you measure for shims. Some people have discovered that depending on how their carrier bearing preload shims measure out, they need to clearance the inside of the trans housing or even have a few thousands machined off of one of the surfaces as their measured shim ended up negative. Hope to not have to deal with that. Planning on getting everything back together tomorrow. Before I torque the housing bolts back down with red Loctite, I’ll soak everything in some solvent and scrub everything. Reassemble with some gear oil and reassemble the transmission, given I can come up with some shims.
I don’t really know exactly what that black schmutz is all over the damn thing. I think it’s just dried machine oil from being in a shipping container for weeks across the salty ocean. Who knows? It’s coming off tomorrow.
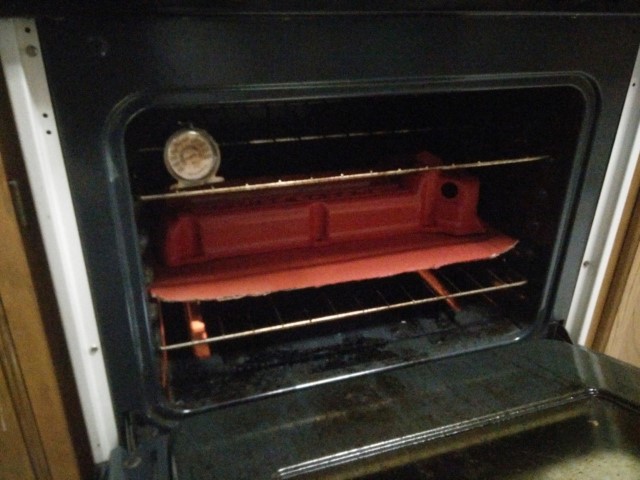
Hah. Remember those valve covers? Well, I painted them in my basement so that I could bake them in the oven in my apartment. The car is at my parent’s house and my father is gracious enough to let me borrow a bay to complete this dumb thing. He’s got a 2-car detached with 220VAC and heat and he doesn’t charge me a dime. Thanks pops. If you’ve never done the oven thing, it’s relatively safe. It’s only paint, not powdercoat. The oven is only at like 200 degrees and I vented it for a long while afterward. No detectable residue the next day in the oven. The paint didn’t go in fresh. I allowed ten minutes for the coat to at least tack.
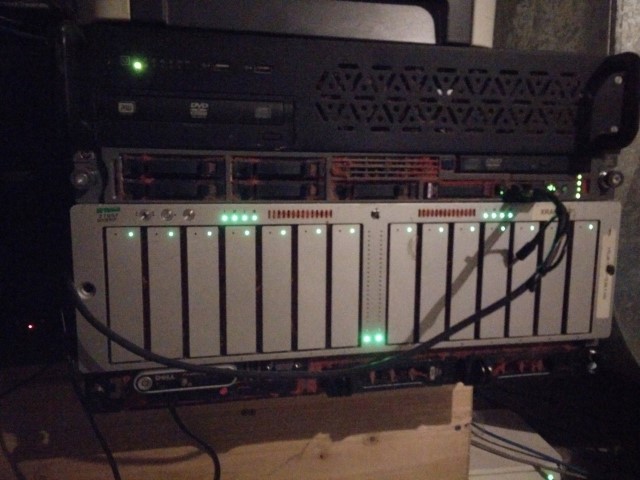
Anyway, I actually sprayed the damn things on a gigantic piece of cardboard under the smaller oven-sized piece you see with the VC itself on it in the over above. I did this in the basement. Like 8 feet away from my IT junk. Whoops.
I think it’s just dried particles clung to dust on the fan intakes. I’ll have to get a vacuum after them. Still funny to see them all red, though. I really need to work on buying a house with a shop or enough room to build one after I’m done with this thing. I saw a thread about custom building a large powder coating oven, so I might get into that if I can get ahold of a big enough shop. Truly, they’re simple enough. Basically you build a gigantic box that’s well-sealed and well-insulated out of galvanized sheet steel and 2x4s. Add some insulation, a few 220V oven heating elements, a PID controller with thermocouple and some kind of top-bottom recirculation fan and you’ve got yourself a large scale powder coating oven. Boom.
Woke up late. Couldn’t force myself out of bed. Anyway, I worked on some shit.
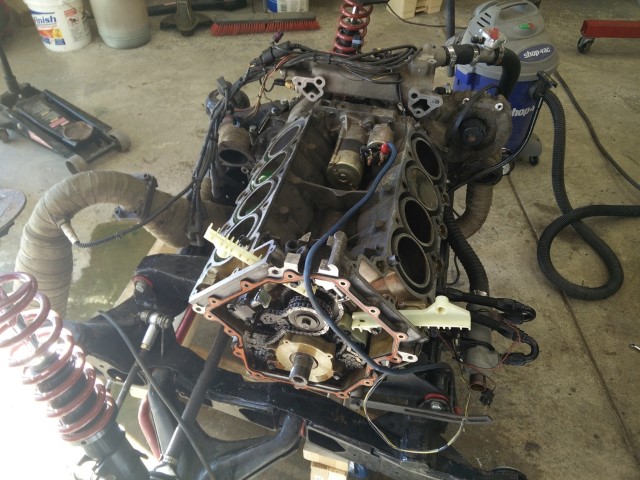
I put the motor back together. Looks pretty good.
Torqued everything down on the diff. Red Loc-Tite on the final drive bolts and red Loc-Tite on the diff case halves.
Had to do a little work on the VSS reluctor ring to get it to squeeze on. It’s probably like a final .005" interference fit. I tapped it on with a 2x4 and rubber mallet. Whatever. It worked.
That’s all I’ve got for tonight. Hopefully this weekend I’ll get to put the trans back together?
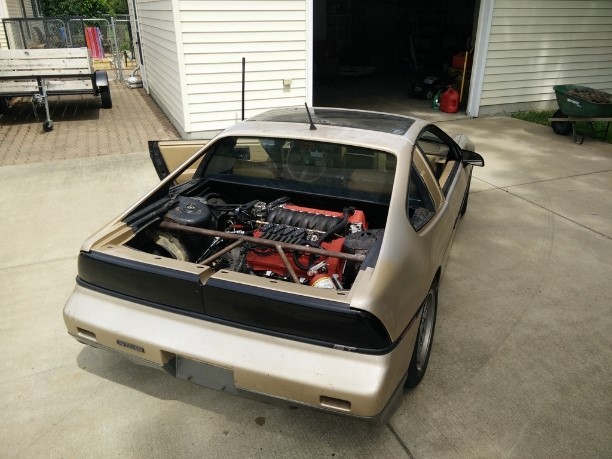
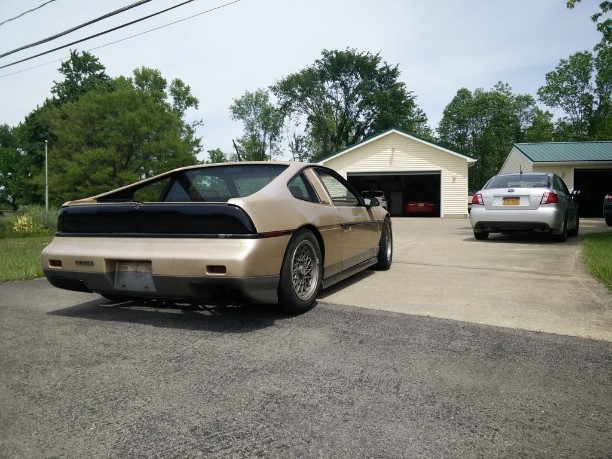
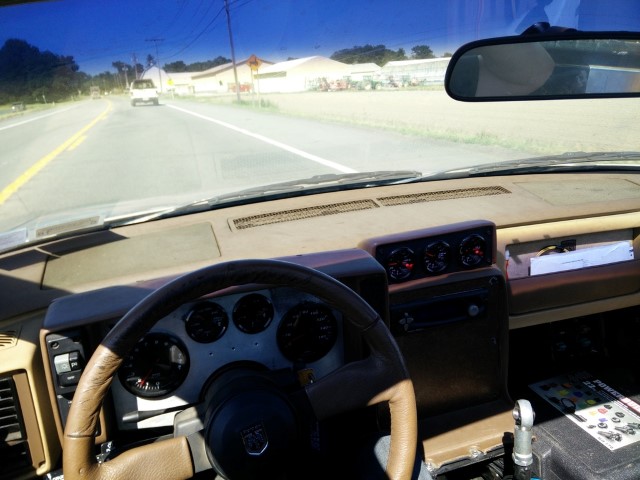
Oh, I forgot about this thread. I finished and registered this stupid thing. Here are a few pictures:
Fuck yea, bitches! First time I’ve driven this car in ten years. Can’t tell you how excited I was. Smiling ear to ear. Explained EVERYTHING about the car to an older gentleman in an Advance parking lot. He fucking loved it. I’ve never felt better.
But alas, I can’t win. It overheated like a whore in Texas and I just couldn’t fix it. Yup. Head gaskets were garbage. So, I spent 190 minutes [I timed it] and I ripped the subframe out and ripped the heads off.
And I found these wonderful specimens when I ripped the head bolts out. I knew this would happen. In fact; I WANTED this to happen. I know these motors well now. To get any kind of longevity out of them, the heads need to be pulled and insert-style studs installed in the block. DexCool, in combination with lack of maintenance, heat and time do this to the block.
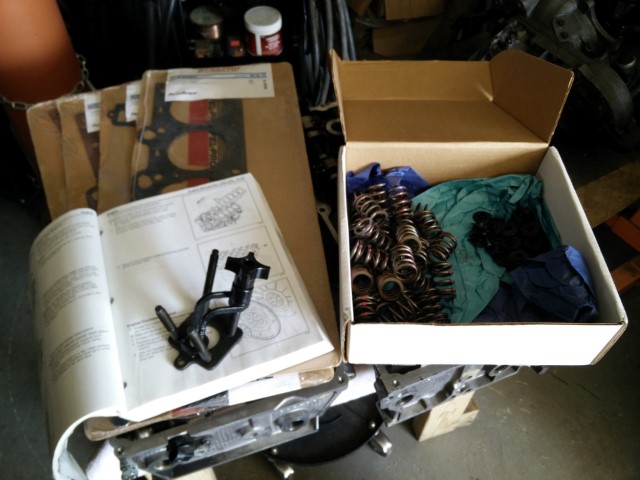
The threads either pull right out of the block, or they’re just goo from galvanic corrosion. They used about a 3/4" engagement with an M11x1.5 fine thread STEEL bolt in ALUMINUM block with no factory thread sealer. Torqued to a gajillion foot pounds. Fucking GM. The repair is to drill those bastids out and tap for 5/8-11 UNC. Then you install custom CNC CroMo hardened studs and use hardened washers and nuts to reclamp. Still waiting on the studs. Another ‘while I’m in there’; I bought stiffer valve springs and custom CNC machined retainers. Bumps my redline to 8K. Holy fuck. 8K. 8" from my head. Worth $550, for sure.
Anyway, I wanted to build the heads tonight, but I got drunk instead and my shop is like 20 miles away from my apartment. Dangerous. Maybe tomorrow. Hopefully the studs show up soon, then I can finally put more than 30 miles on this bitch.
I started documenting this build on Pennock’s, but interest kinda dwindled. Oh well. I finally drove this car again and as soon as I get my studs, I’ll put her back together. Everything else seems to work pretty well, clutch and brakes included. I’ve got the next five days off, then I work two; then off another ten days. If I can’t finish it in that time…
Plans? I’m 'onna drive the shit out of it. But seriously, though; I’ve got the parts for a 5x4.75 hub-swap, so I might do that this winter. That would give me more options for wheels and brakes, so I’m looking into a few things. I’m thinking Wilwood quad pistons and 13" rotors up front or some factory Corvette package. It doesn’t really need much. Stops fairly well with manual factory brakes. I want to put a turbo on it, but if I do that I’ll likely do an aluminum sheet metal intake and dry sump oil pan. Copper oil tank with an electronic, ignition controlled solenoid. I could practice my aluminum and copper welding over this winter, too. Sheet metal, gas and TIG rod are cheap enough. Did I mention I bought a TIG machine, too?
Hah, did you recognize WD Henry & Son there or did I say I’m in Eden? Yea, my parents have lived there for 5 years now or so. I’ve noticed that with the police. Brant is waaaay worse, but they’re corrupt from the officers all the way through the judges. I mostly behave in Eden, so I haven’t run into too many issues.
Heading over there now to see if my studs are there. If they’re not; I’ll work on the heads a bit. These DOHC heads are huge. I feel bad for this block and what it has to hold up.
Yea, I’ll probably spend some time with that once I get it running properly. I think I still have the vents and strut tower brackets for them, so those should pretty much go right back on. It looks like I’ll be able to fabricate a few brackets for pinning the actual decklid, likely with those lever-type latching ones that screw/rivet into the decklid itself and snap down to lock. Something like these:
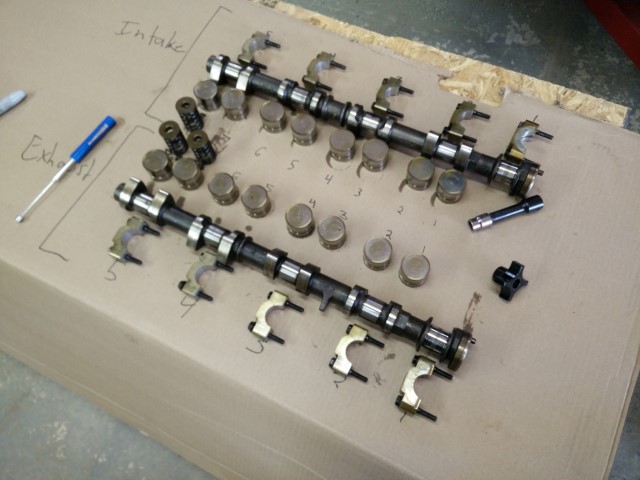
Worked on the heads tonight. I brought my girlfriend with me and even though I had her help, she started to get bored after a couple of hours, so I was only able to finish one head. There’s a lesson learned.
I love this spring compressor. It’s super badass. I replaced the thumbwheel with an M10 flanged nut so I could use a 3/8" socket wrench and 15mm socket instead. Worked much better. I just had to tap on the valve with a chunk of wood and a rubber mallet to release the valve keepers. Not my fingernails here, clearly.
I made sure to keep all of the parts labeled, separated and organized so the head would go back together easily. Here’s about a quarter through pulling the old springs and retainers.
The new springs are 100lb on the seat vs the factory 50lb. At factory lift, the stock springs are 100lb and these are about 180lb. Can’t wait to see how they do.
-500x500.jpg)