:tup:
Thanks for ruining the surprise with my new truck…
:tup:
Thanks for ruining the surprise with my new truck…
3 tonez!!!
I am jealous of how quiet your car was! Thanks for the buisness bud!
i can come back with the cutout open and ruin your parking lot if you like. thanks for the quality and fast service, Joe. will definitely be coming back
I thought that place looked familiar
So youre gonna fix your AC?
The car seems like a real hoot…
Yeah, these last few summers have been miserable without.
Thanks Joe, I am trying to drive it more often.
i’d love to be in a position to buy it but i need to get a truck if anything 
buy the car, transfer all parts to a cheap E39 wagon, boom done!
E39 wagons can’t tow 7,000 pounds
Small update.
It is hot.
Inside the garage, no airflow will do this
 image by Norbert Ogiba, on Flickr
Got my hands on HPTuners, working on perfecting the driveability. Did I mention that it’s hot?
 image by Norbert Ogiba, on Flickr
Restored the headlights. I need to get some “after” pics, they came out looking brand new. This picture is after a pass with the 3000 grit, just before compounding and polishing.
 image by Norbert Ogiba, on Flickr
Took a break from the car to work on the garage. The old “to-do” list, with chalkboard paint:
 image by Norbert Ogiba, on Flickr
I was always running out of room, so I expanded it
 image by Norbert Ogiba, on Flickr
and added tool storage to free up room in the toolbox:
 image by Norbert Ogiba, on Flickr
Got the IHKA apart and soldered so that it would trigger the GM PCM for AC using the OEM BMW snowflake button.
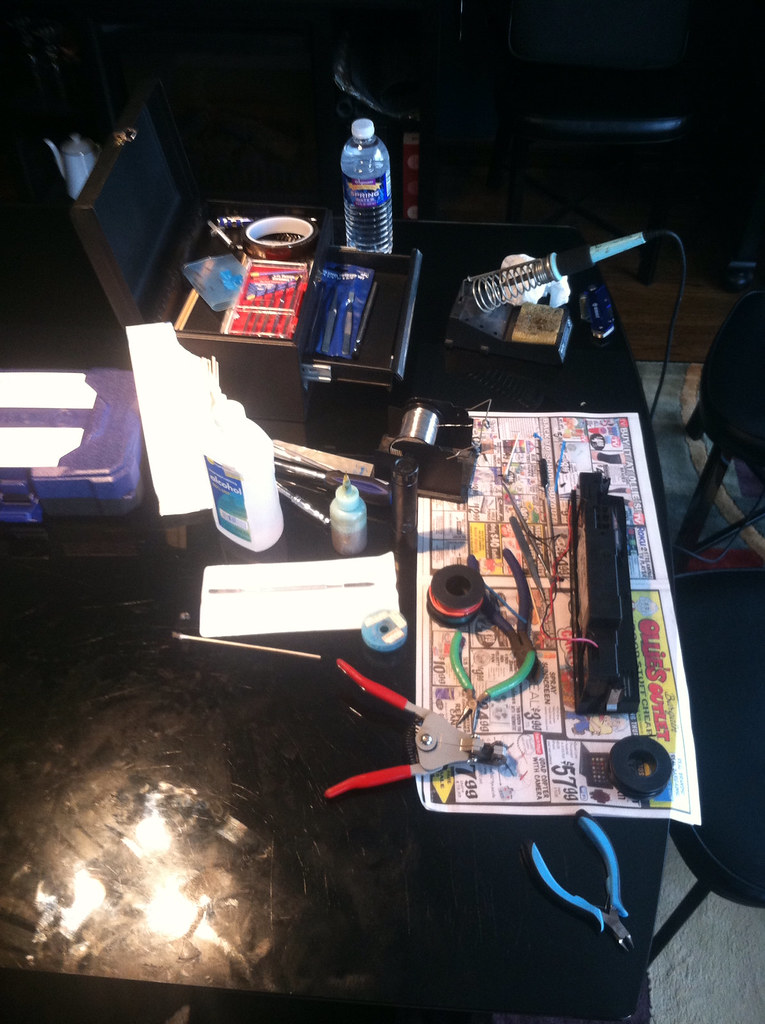 image by Norbert Ogiba, on Flickr
Big thanks to @LUKE_L for the pro soldering job on the tiny LED, and to @LZ1 for HPTuners, you guys seriously rock.
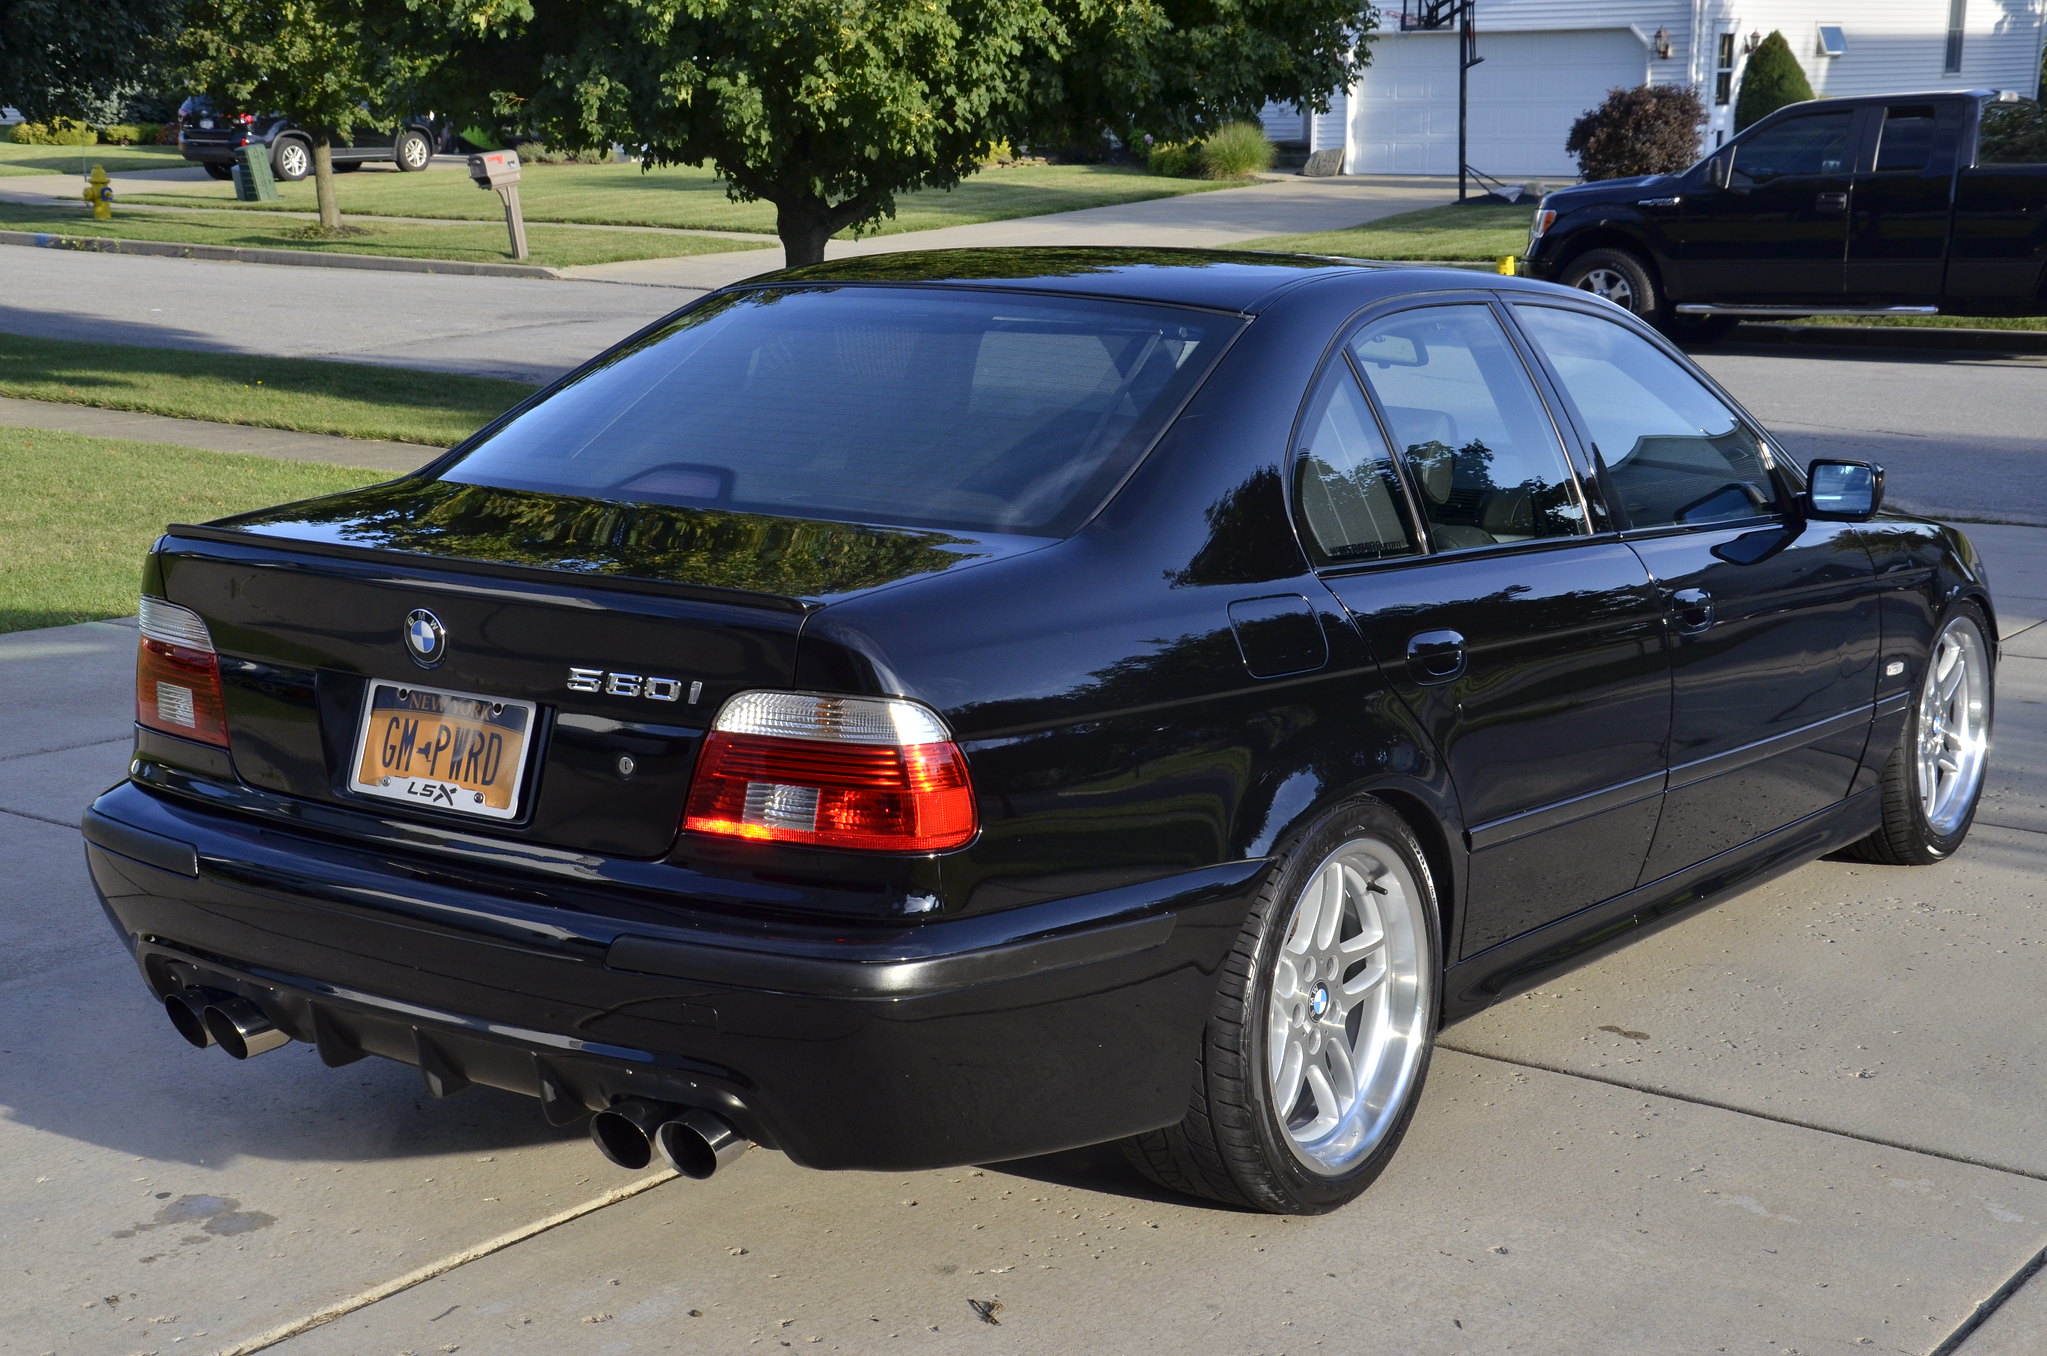
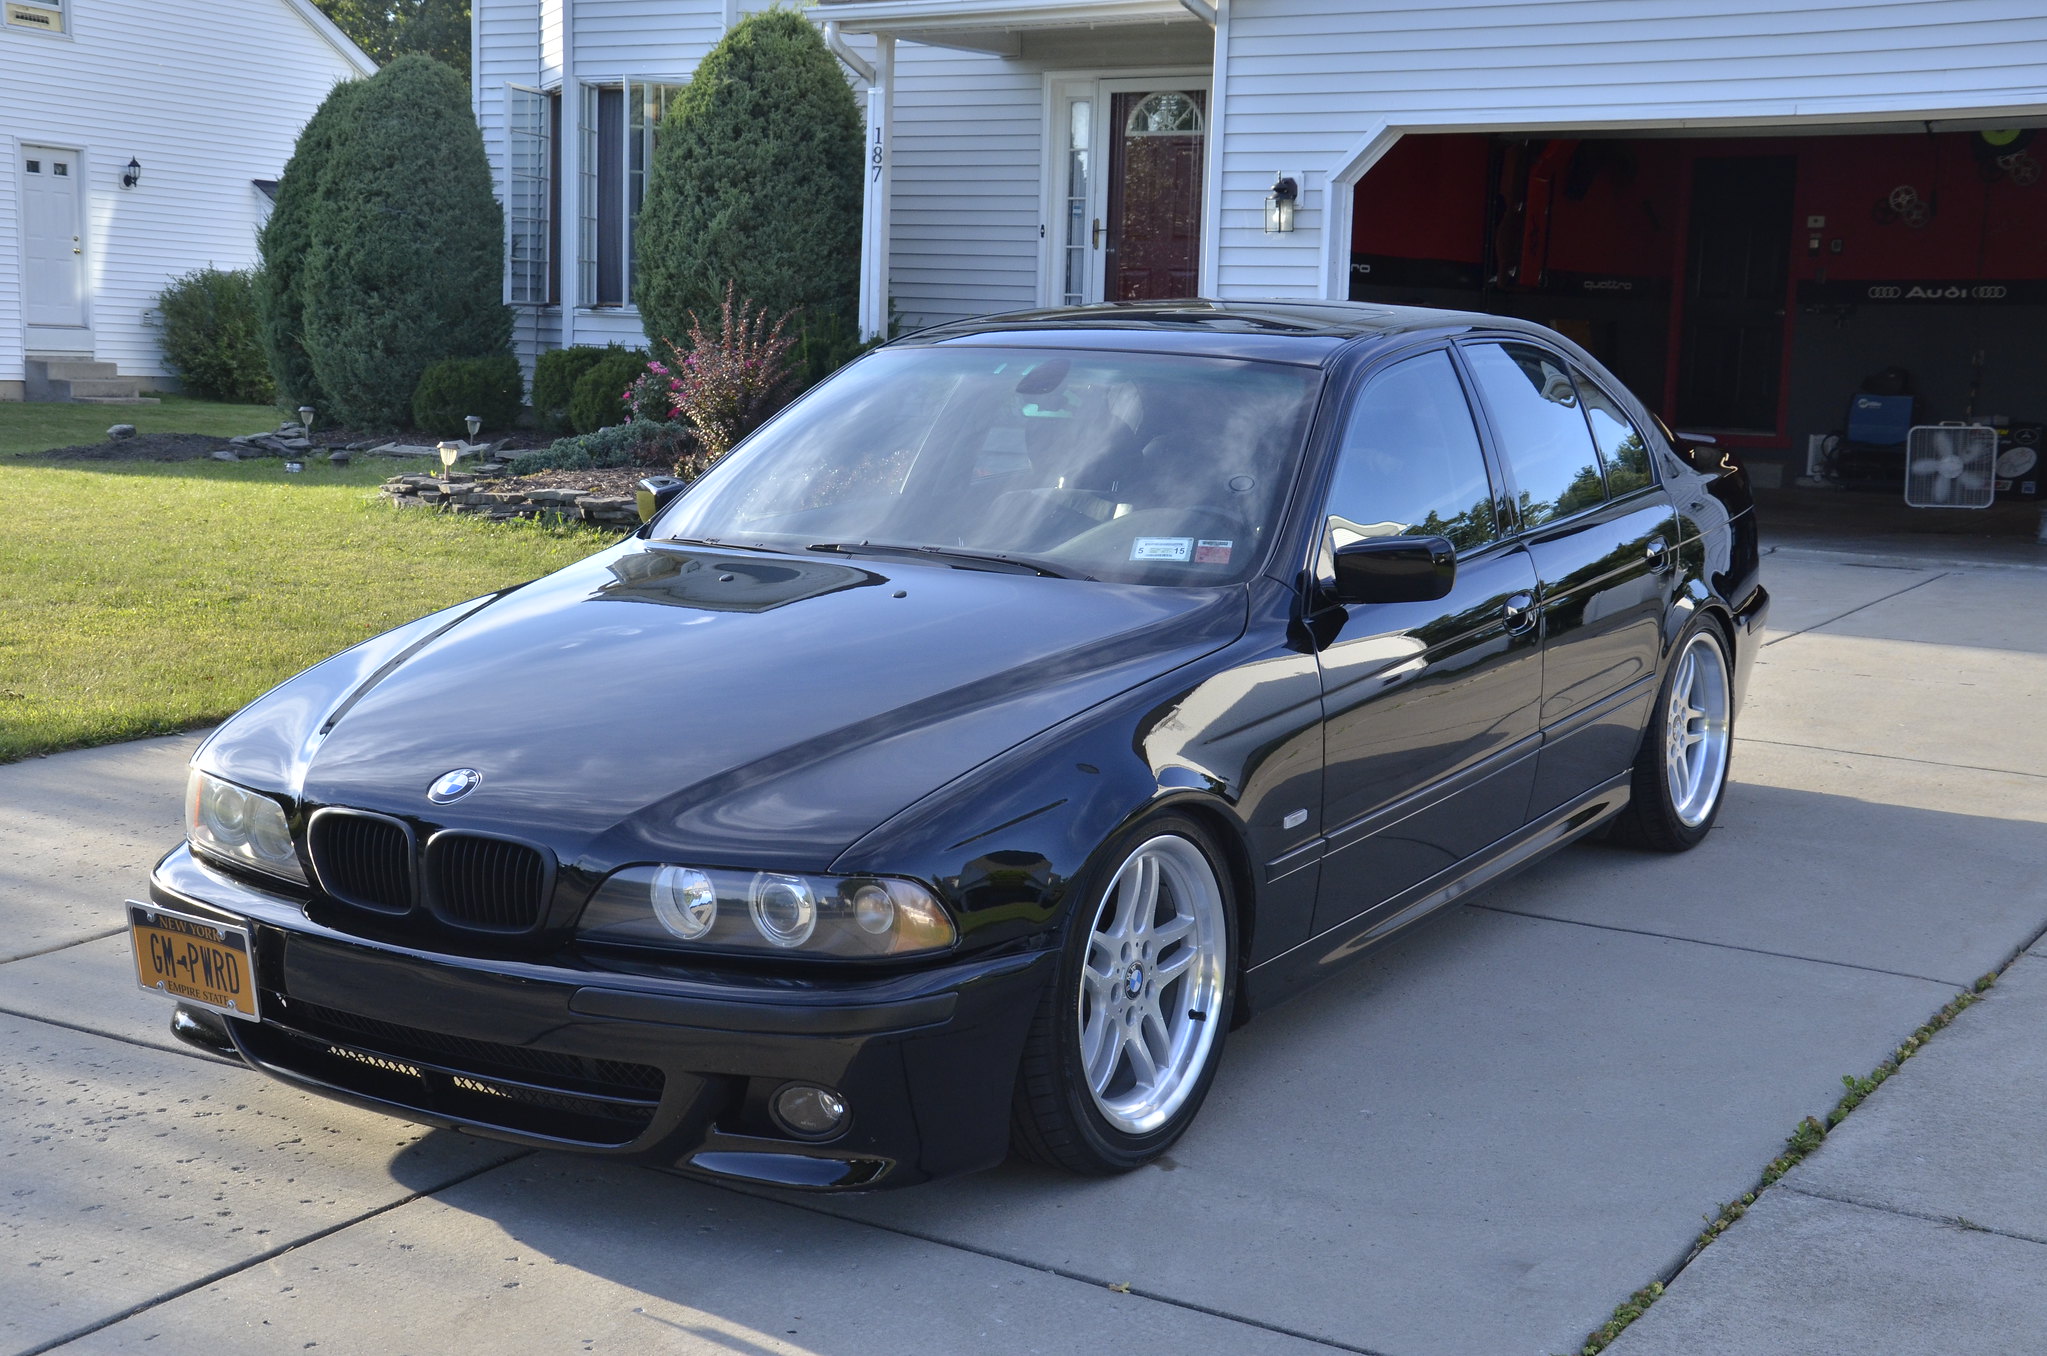
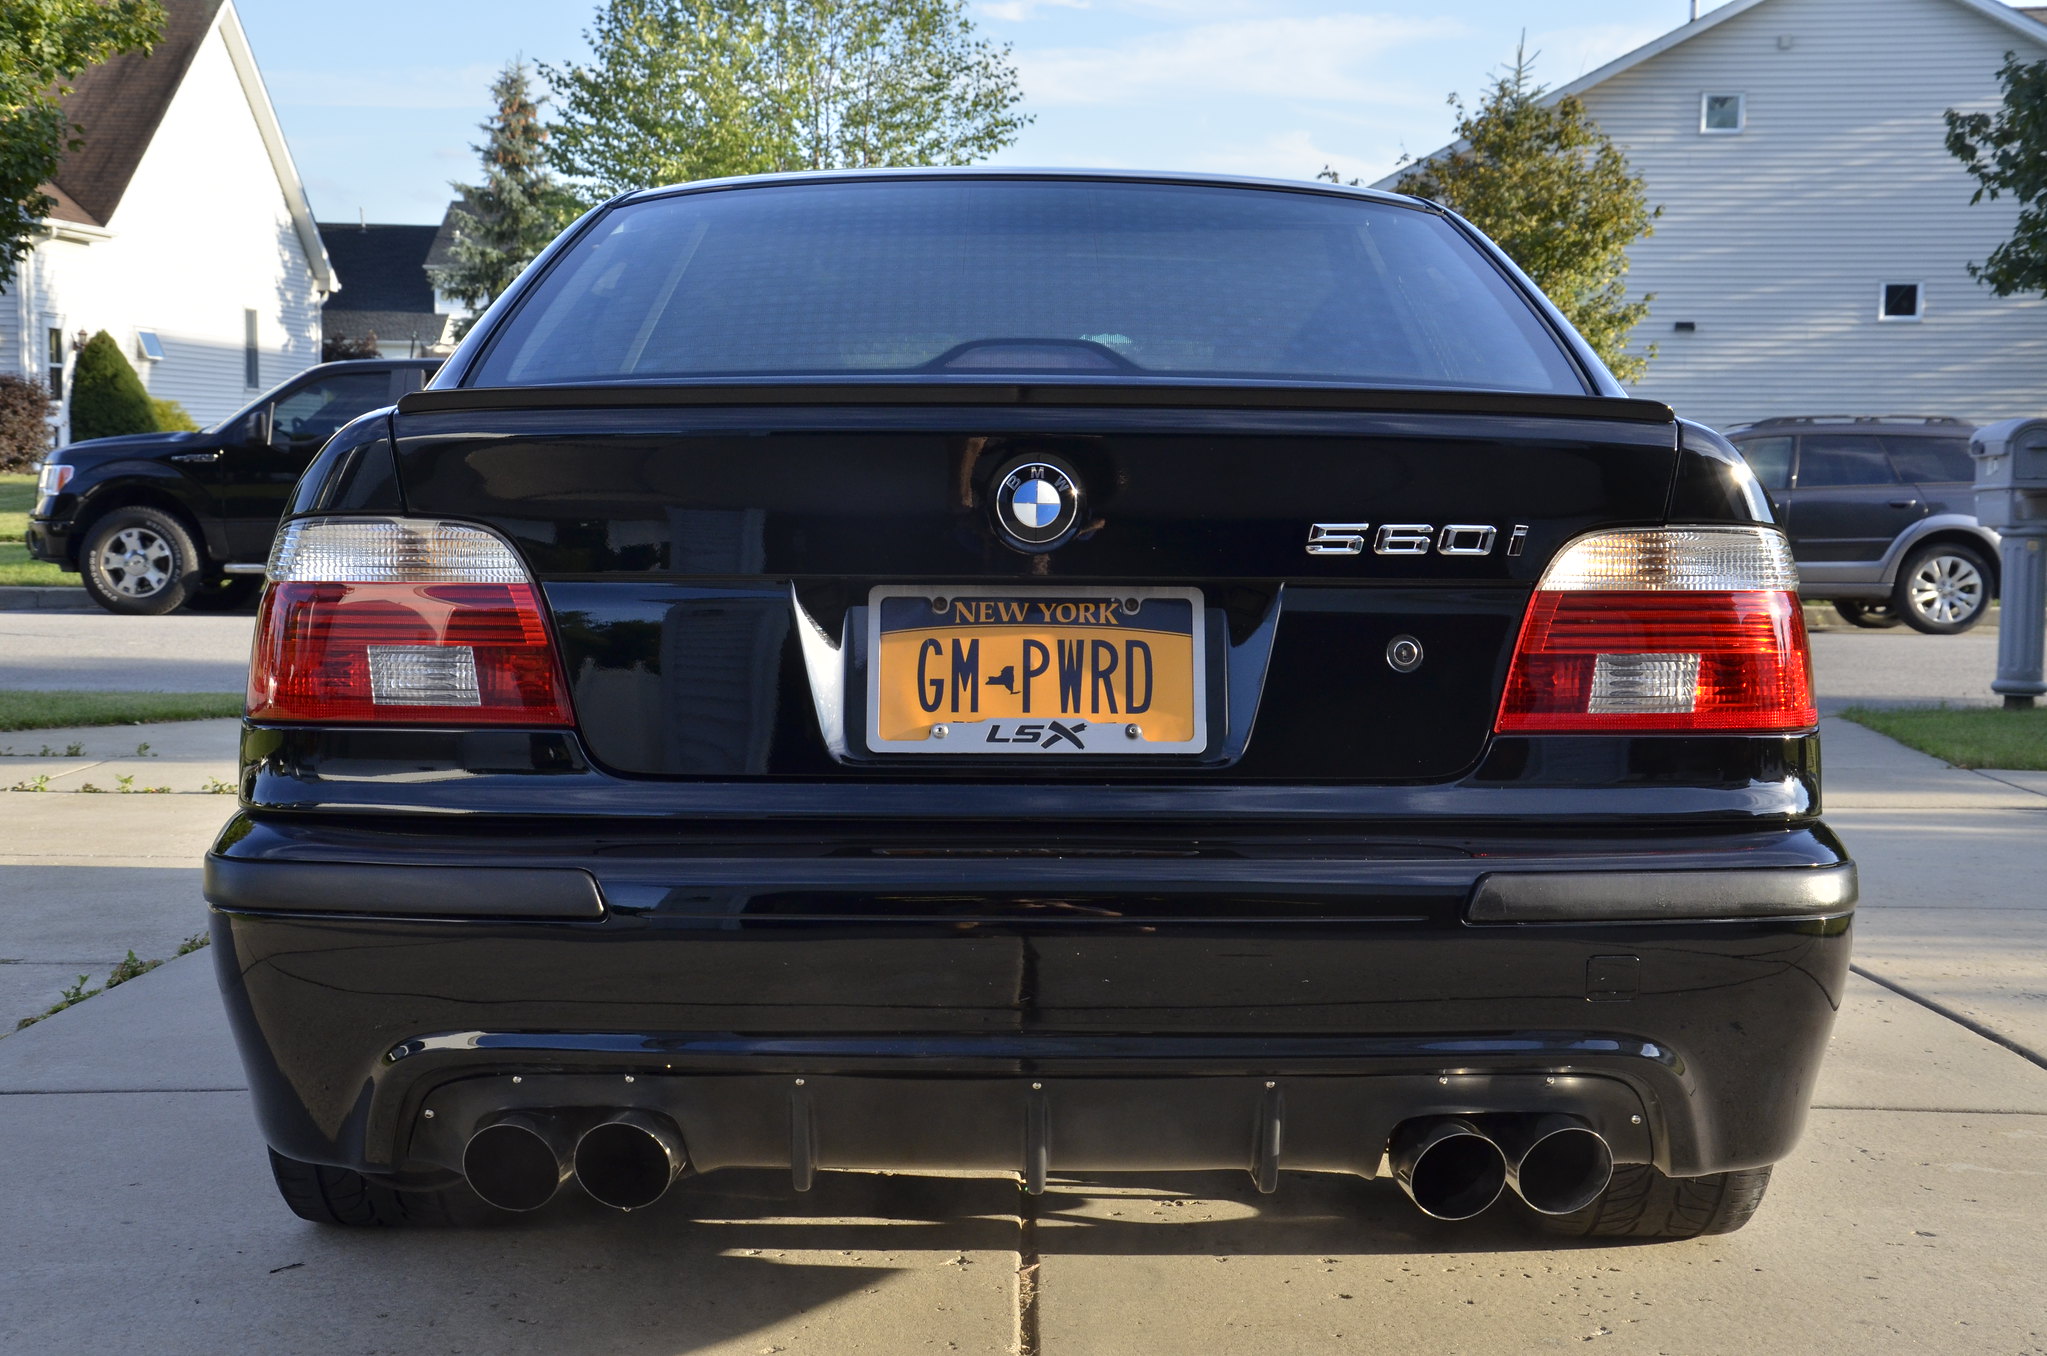
I had a professional 2 step paint correction done over the weekend on the 560i. about 20 hours total invested. The results were fantastic, the Jet Black really got a few shades darker after the work was done. Pictures to follow.
He does awesome work.
some crappy pictures in my driveway. I highly recommend Brian with Sheer Luxe Detailing, the experience and results were great.
Quick Before:
 photo 2 by Norbert Ogiba, on Flickr
 photo 3 by Norbert Ogiba, on Flickr
Restoring Bumper Trim:
 photo 4 by Norbert Ogiba, on Flickr
Quick shot of compounding, before and after.
 photo 1 by Norbert Ogiba, on Flickr
Final Results
 _DSC4107 by Norbert Ogiba, on Flickr
 _DSC4108 by Norbert Ogiba, on Flickr
 _DSC4110 by Norbert Ogiba, on Flickr
 _DSC4111 by Norbert Ogiba, on Flickr
 _DSC4112 by Norbert Ogiba, on Flickr
 _DSC4113 by Norbert Ogiba, on Flickr
 _DSC4115 by Norbert Ogiba, on Flickr
 _DSC4117 by Norbert Ogiba, on Flickr
 _DSC4120 by Norbert Ogiba, on Flickr
 _DSC4118 by Norbert Ogiba, on Flickr
 _DSC4119 by Norbert Ogiba, on Flickr
The car will be featured on his blog in the next few weeks, will post a link when it’s available.
like… whoa.
Looks great :tup:
i fucking love this car
A+ man, looks awesome.
No problem!!! Thanks for bringing your project over…!
^ Thanks for checking back. I rigged up that radio shack circuit by the way…ended up wrapping it all up in tape like you recommended. Stole 12V+ from a large circuit in there to power up the relay, and ran a long wire as the “output” of the system…sure enough, with engine running, when I pushed that little snowflake, I got 12V+ at the output wire. Luke is the man.
 Capture by Norbert Ogiba, on Flickr