1965 Beetle Project

Got started on my beetle project. After about 15 years I finally have the time, space and money to take on the work the way I’d like to.

https://fbcdn-sphotos-a-a.akamaihd.net/hphotos-ak-prn2/1531757_10105793242966544_440499309_o.jpg

https://fbcdn-sphotos-d-a.akamaihd.net/hphotos-ak-frc1/1502625_10105793244623224_1057786804_o.jpg

https://scontent-a-iad.xx.fbcdn.net/hphotos-prn1/1525268_10105793244139194_1471061687_n.jpg

https://scontent-b-iad.xx.fbcdn.net/hphotos-ash3/1604465_10105793244892684_446617164_n.jpg

      • Updated - - -

There is some relatively minor dings and rust I hope to take care of throughout the process

https://scontent-b-iad.xx.fbcdn.net/hphotos-prn2/1503932_10105793240291904_636075028_n.jpg

https://scontent-b-iad.xx.fbcdn.net/hphotos-prn1/1522275_10105793241065354_390610004_n.jpg

https://scontent-b-iad.xx.fbcdn.net/hphotos-prn2/1533901_10105793238440614_1140352705_n.jpg

https://scontent-b-iad.xx.fbcdn.net/hphotos-ash4/999143_10105793240721044_513374333_n.jpg

      • Updated - - -

Started by pulling the motor. It is a relatively easy job and should have only taken 10 or 15 minutes but I broke a ratchet and discovered that many newer style box end wrenches don’t fit into the space allotted for a wrench in 1965…so I had to run out to buy the most standard size and shape 17mm I could find.

https://scontent-b-iad.xx.fbcdn.net/hphotos-prn1/1528695_10105793237302894_874918367_n.jpg

The motor is basically held on by 2 bolts into the engine and 2 nuts on studs from the engine and of course the fuel line and accelerator cable…but that is pretty much it. Unbolt and lower down on a jack.

https://fbcdn-sphotos-c-a.akamaihd.net/hphotos-ak-prn2/1604868_10105793236998504_1293253797_n.jpg

Then jack up the back and wheel it out.

https://scontent-a-iad.xx.fbcdn.net/hphotos-ash3/1557607_10105793236105294_844189602_n.jpg

https://scontent-b-iad.xx.fbcdn.net/hphotos-prn2/1525439_10105793235097314_1048508018_n.jpg

https://scontent-b-iad.xx.fbcdn.net/hphotos-prn2/1604983_10105793234403704_1578798256_n.jpg

      • Updated - - -

Next came the body removal. Whole car up n stands to remove the 2 dozen-ish bolts that hold the pan and body together. Access to some of the bolts requires removing pretty much the whole interior and the gas tank…most are accessible from below though. Only managed to snap 2 off which isn’t bad for 50 year old bolts that haven’t been touched since they left the factory.

https://scontent-a-iad.xx.fbcdn.net/hphotos-frc3/1511291_10105793232497524_1774020532_n.jpg

Tank out

https://scontent-a-iad.xx.fbcdn.net/hphotos-frc3/1512333_10105793232262994_713959533_n.jpg

https://fbcdn-sphotos-g-a.akamaihd.net/hphotos-ak-ash3/1014247_10105793231973574_1245421959_n.jpg

Then the fun, unfamiliar part…lifting off the body. With a little shake to break the seals loose it popped right off. It doesn’t weigh terribly much so I was able to lift an end at a time and place it on saw horses. I’ll have to make some wider horses to transfer it onto so I can roll the pan out from underneath.

https://scontent-b-iad.xx.fbcdn.net/hphotos-prn2/1524920_10105793231185154_1351876380_n.jpg

https://scontent-a-iad.xx.fbcdn.net/hphotos-ash3/1555407_10105793230785954_1535860498_n.jpg

https://scontent-a-iad.xx.fbcdn.net/hphotos-prn1/1526533_10105793230047434_419217395_n.jpg

Once I get the pan out I’m probably going to be cutting out the old pan sections as they are getting pretty brittle in a few places. Then work will begin on suspension modifications hopefully to lower and modernize the feel a bit

Where do you live? I can swing by with an engine hoist and help you out with the body.

Heh, I wondered if you still had this. That is a really clean car, too. What are your plans for it, aside from the drop?

This brings back memories…

about 30 miles north of pittsburgh…so not exactly conveniently located. it really isn’t all that heavy…i would guess 350-400lbs with all the glass in and the doors on…if i remove all of that i bet it is less than 300. i just need to get some 4x4x8’s to make up a couple of horses tall enough to roll the chassis out from underneath.

      • Updated - - -

Front suspension-
Narrowed beam 2-4" to accommodate wider wheels
Add adjusters and drop spindles to lower a few inches
Upgrade steering damper
Add disc brakes
Shocks

Rear suspension-
Lowered and lengthened spring plates- they are what hold the axles to the torsion tube suspension
Add disc brakes
Shocks

Drivetrain-
Some mildly upgraded motor…aiming for around 100hp
New transmission with a longer top gear for highway driving

Exterior-
Bodywork / paint

Interior-
Completely new interior
Add some modern electronic conveniences

Chassis-
New pan sections
Por-15 the whole thing
Add sound deadening
New gas/brake lines
Transmission brace for added engine power

I’m sure there is more and things will change as my time and money situation develops further

Cool project I’ll be looking forward to seeing this build progress. Having ridden around in a type 3 squareback for the first 9 years of my life I have a soft spot for air cooled VWs.

in. do something neat.

got around to rolling the pan out from under the body…

https://scontent-b-iad.xx.fbcdn.net/hphotos-prn1/t1/1549552_10105834600226264_1916230943_n.jpg

https://scontent-b-iad.xx.fbcdn.net/hphotos-frc3/1497456_10105834600780154_2048870912_n.jpg

https://scontent-b-iad.xx.fbcdn.net/hphotos-frc3/1528539_10105834603235234_304188000_n.jpg

it would make a sweet hover craft

https://scontent-b-iad.xx.fbcdn.net/hphotos-prn2/1509025_10105834611309054_839164657_n.jpg

definitely going to have to cut out the pan halves and replace them

https://scontent-b-iad.xx.fbcdn.net/hphotos-frc3/1504957_10105834619597444_848647520_n.jpg

next up remove the transmission and the front beam

Removed the front beam tonight

https://scontent-b-iad.xx.fbcdn.net/hphotos-prn2/1513270_10105849113501544_287318336_n.jpg

https://scontent-a-iad.xx.fbcdn.net/hphotos-frc3/t1/1525626_10105849107987594_1492578757_n.jpg

It will be losing 2-4" of width to accommodate disc brakes and some wider wheels. Chances are I will just buy a new beam and put the original in storage in case I ever want to go all stock someday down the road.

Started to disassemble the rear suspension as well

https://scontent-a-iad.xx.fbcdn.net/hphotos-ash3/1522855_10105849104055474_1082154524_o.jpg

https://scontent-b-iad.xx.fbcdn.net/hphotos-prn2/9833_10105849109115334_1681132896_n.jpg

Hopefully by the end of the weekend ill have the rear suspension and transmission all out

Got the rear suspension disassembled and the transaxle pulled out. Got started taking out the axles but without a bearing puller it was a bit of a pain in the ass…I’ll probably pick one up tomorrow before tackling the other side.

There is a convoluted process to get the rear torsion bars out of their tubes.

https://scontent-a-iad.xx.fbcdn.net/hphotos-prn1/t31/1502766_10105859274898024_1714841936_o.jpg

https://scontent-b-iad.xx.fbcdn.net/hphotos-ash3/t1/942492_10105859276684444_1382363266_n.jpg

https://fbcdn-sphotos-e-a.akamaihd.net/hphotos-ak-prn2/1544540_10105859281015764_2021943075_n.jpg

Torsion bars out
https://fbcdn-sphotos-c-a.akamaihd.net/hphotos-ak-ash3/t1/1528605_10105859281360074_1778108231_n.jpg

Transaxle out
https://scontent-b-iad.xx.fbcdn.net/hphotos-frc3/1498130_10105859281809174_1474692407_o.jpg

https://fbcdn-sphotos-f-a.akamaihd.net/hphotos-ak-ash3/69263_10105859283600584_82659761_n.jpg

Next up is drilling out a hundred or so spot welds

Keep it clean, or…

http://www.crankandpiston.com/brain/media/2011/02/5432282434_b75fd76184_b-728x455.jpg

Probably closure to the first… I don’t want to do anything that can’t be relatively easily reversed…depending how this project goes and the ghia project to follow the next beetle will be a more substantial project.

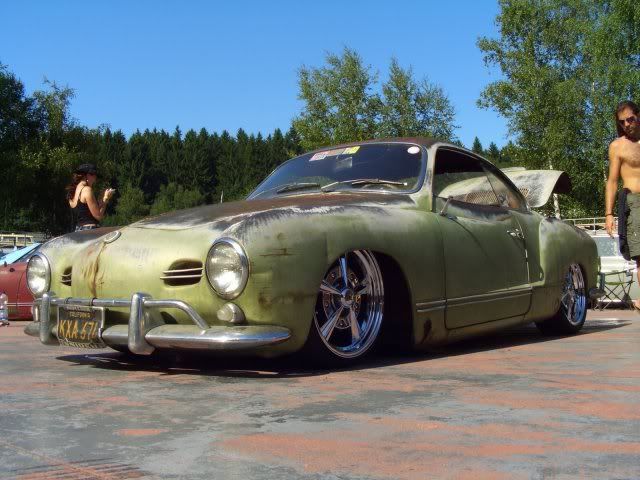
I’m thinking of going with a similar color combination as this. T-bars instead of bumpers, no white walls and different wheels

![http://i.ebayimg.com/00/s/MTIwMFgxNjAw/z/x5IAAOxyONBSWvRG/$T2eC16NHJIIFHJ+qwpdhBSWvRB(U9g60_57.JPG](http://i.ebayimg.com/00/s/MTIwMFgxNjAw/z/x5IAAOxyONBSWvRG/$T2eC16NHJIIFHJ+qwpdhBSWvRB(U9g60_57.JPG)

Maybe these wheels in the 17" variety

http://i262.photobucket.com/albums/ii98/smurfenmeister/CIMG0053.jpg

In looking through the options on the beetle I’ve come to the conclusion that ill probably completely swap out the front and rear suspensions on the ghia to a modern bolt on coil over suspension.

http://images.thesamba.com/vw/classifieds/pix/3705217.jpg

I have always wanted to do a California style Beetle…sky blue with cream sides on fuchs with a rake.

I love this project

Personally I hate t-bars, I wish I started with a 65 and had awesome bumpers

Either way, great project, thanks for sharing

Sent from my iPhone using Tapatalk

I don’t really care for the blade style bumpers and the originals with over riders and all are nice but aren’t the style I’m going for this time around.

So tonight I wrestled with this dirty tranny…always a night well spent. Getting the retaining clips out of the differential to release the axles was rough.

nice. cool project! i really like that rat rod/chopped looking one.

Ordered new pan halves…should be here in a couple days. I don’t want to cut anything out before I have the new ones in hand in case I need to adjust the new parts a little.

Looks like this will be a fun project. In for updates.

Dan

Got a present from FedEx today…new floor pans

https://fbcdn-sphotos-e-a.akamaihd.net/hphotos-ak-frc3/t1/q91/s720x720/1497150_10105917750208034_2034804768_n.jpg

https://scontent-a-iad.xx.fbcdn.net/hphotos-ash3/t1/q90/s720x720/1017371_10105917750722004_1265849247_n.jpg

Hopefully I’ll get around to cutting out the old pans this weekend when it isn’t so damn cold

got around to cutting up the floor pan…

up until this point I feel like I could put the car back together and have it running in a weekend’s time…now this the point of no return and the project must go on to the end.

https://scontent-a-iad.xx.fbcdn.net/hphotos-frc3/t1/1424318_10105965161111204_1466818035_n.jpg

I didn’t realize how bad the pans were until I had them out…lots of parts just flaked off

https://fbcdn-sphotos-d-a.akamaihd.net/hphotos-ak-prn2/t1/1890984_10105965159195044_91714922_n.jpg

The replacements fit perfect.

https://scontent-a-iad.xx.fbcdn.net/hphotos-ash3/t1/1797347_10105965158586264_355472074_n.jpg

https://fbcdn-sphotos-a-a.akamaihd.net/hphotos-ak-prn2/t1/1902074_10105965158331774_1159830709_n.jpg

https://scontent-b-iad.xx.fbcdn.net/hphotos-prn2/t1/1654336_10105965157573294_323955325_n.jpg

Just have to weld them into place now. I’ll be plug welding them to mimic the factory spot welds of which there was 1 approximately ever inch…should be exhausting