good question, I wonder if it just takes regular analog inputs and converts them internally? They couldn’t have used CANBUS back then
No I’m not planning on bothering with it, more of a headache than it’s worth. I’ll just make a custom dash insert and run Auto meter’s.
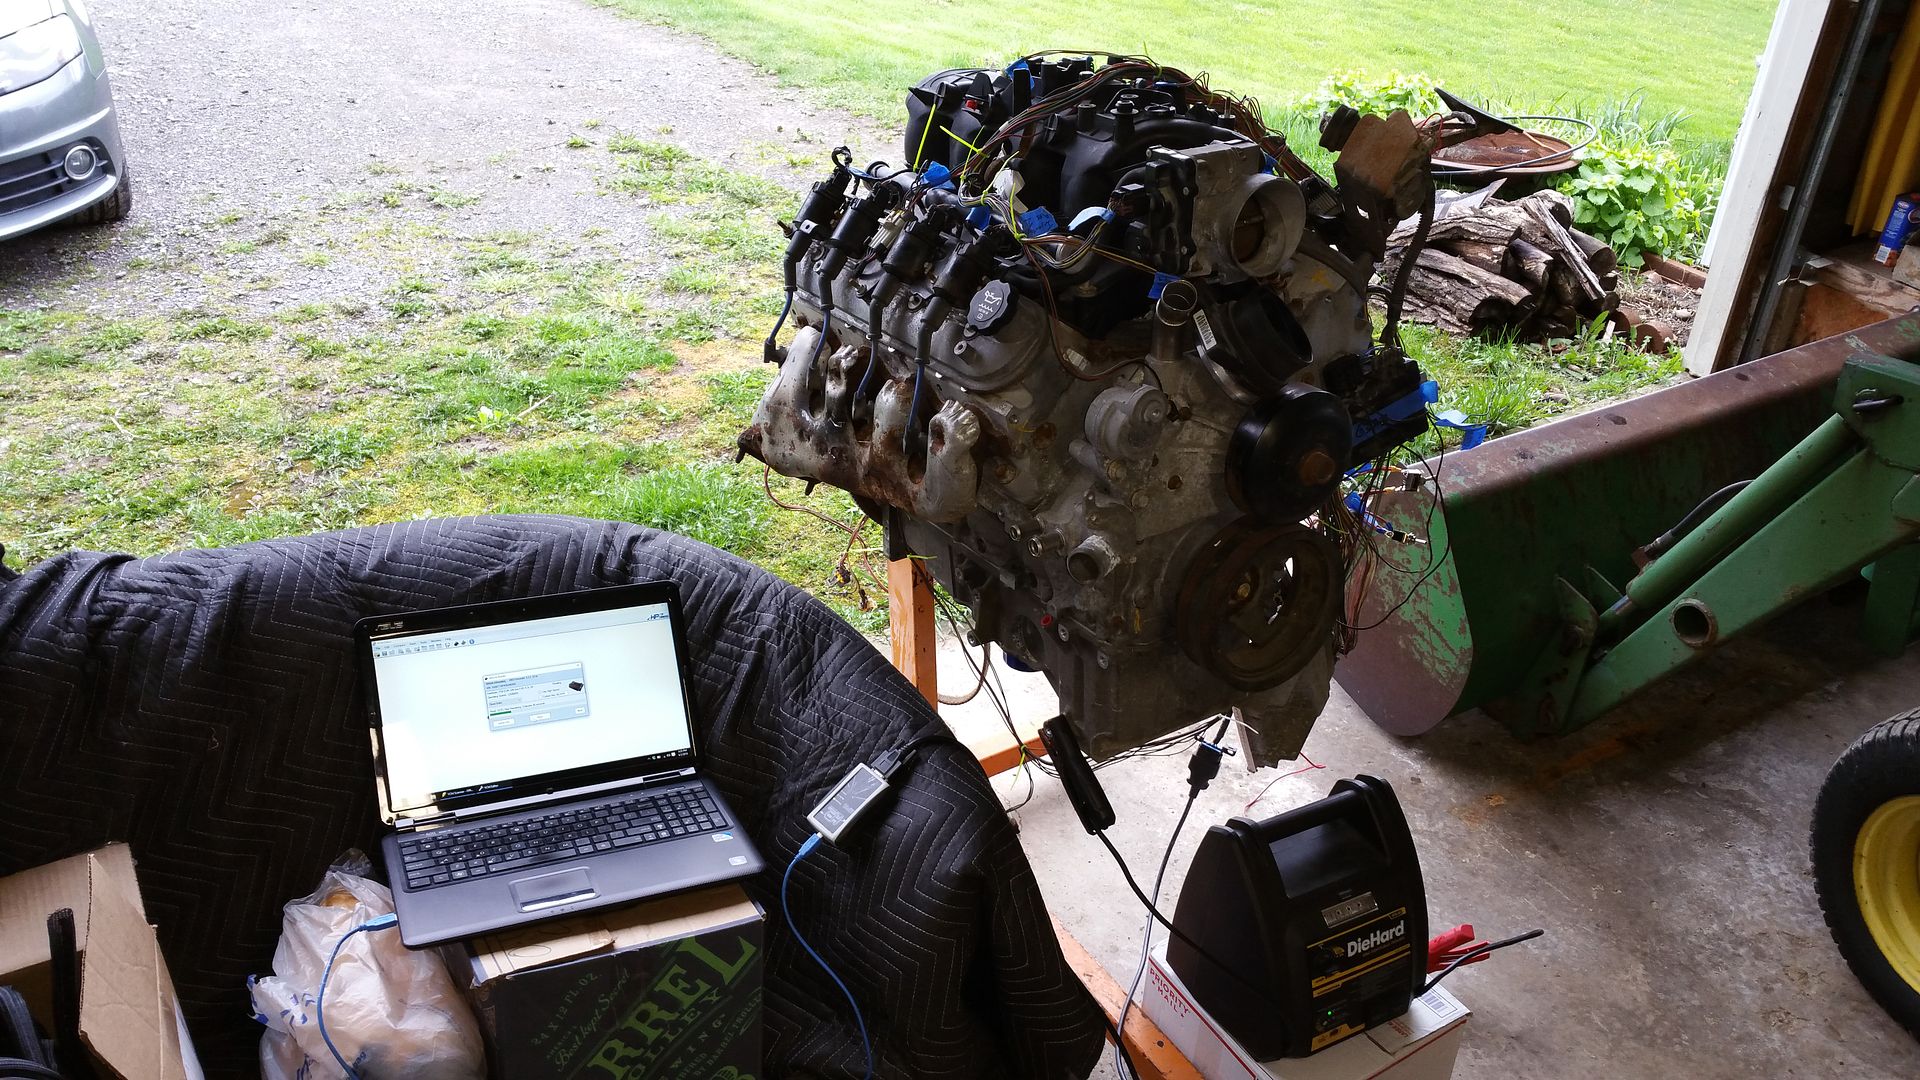
I’ve been working on the harness here and there, finally got it to the point that I can power up the PCM and connect to it with HP Tuners. Now I just need a starter and fuel pump/lines to fire it up on the stand.
:bigtup:
Nice!
My drive by wire throttle wasn’t working, so I pulled the DTC codes and traced some wires, turns out it wasn’t grounded, lol. One step closer to firing it up.
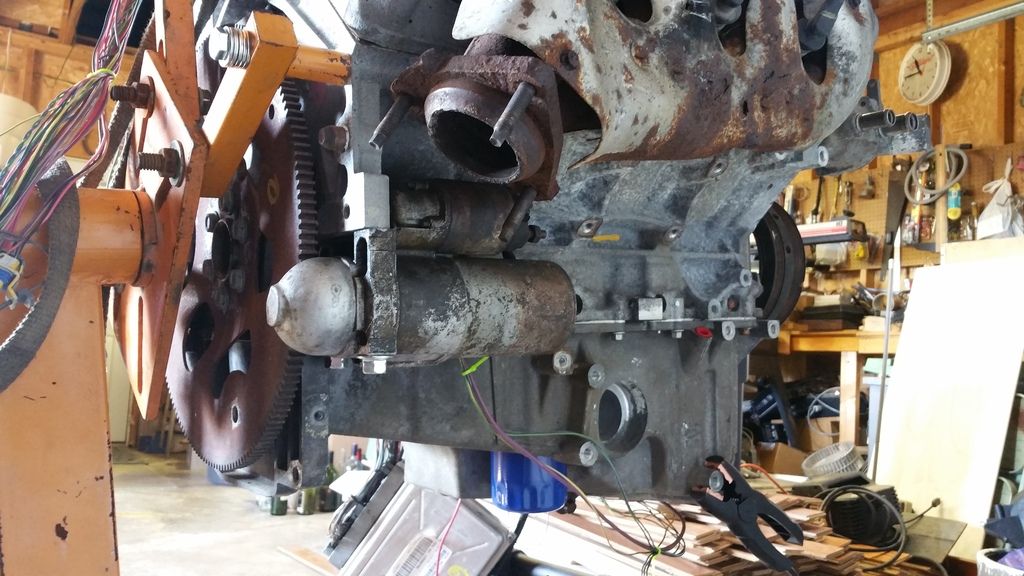
Picked up a 6.0L starter motor from the junkyard and some new bolts from Advanced Friday. Installed it and wired it up to a momentary switch Saturday, surprisingly the solenoid hasn’t cooked my 20 amp momentary switch, lol
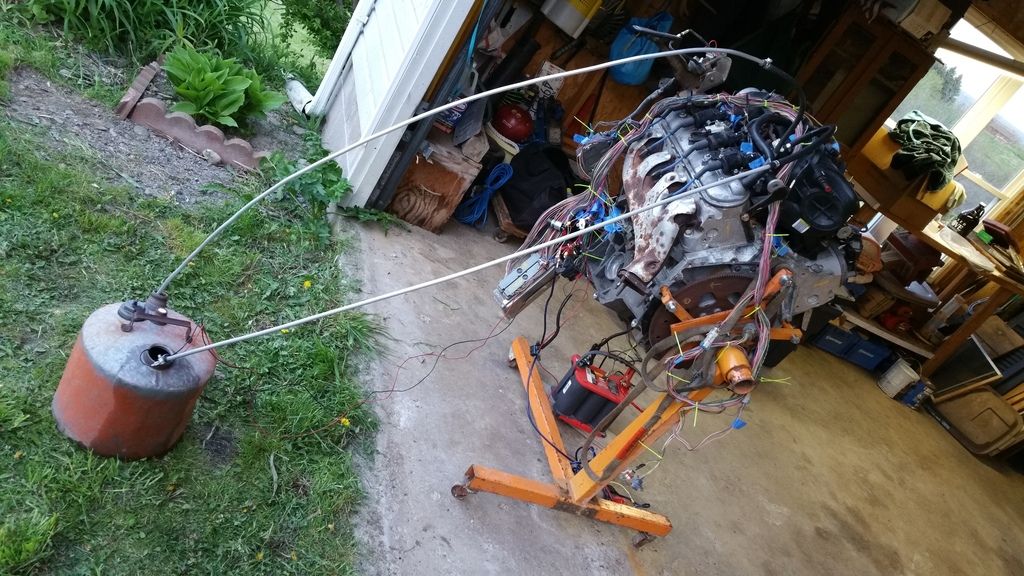
Picked up a Walbro GSS340, Racetronix fuel pump install kit, some 3/8 aluminum hard line and fuel hose. Spent last night getting the stand alone fuel system set up. Surprisingly it fired right up! Haha

I’m surprised it didn’t flip over on the stand.
Nah, they’re more stable than you’d expect
scroll scroll scroll
aluminum fuel line, meh
scroll scroll scroll
oh I bet thats loud, a vid would be sweet!
scroll scroll scroll
VIDEO!!!
Four years later…
Well it won’t start anymore, and the clutch must have water in it, but this Saturday Steve and I spent about a hour dragging this thing across my parents lawn and winching into dad’s garage. Didn’t take long to start tearing into it.


The worst designed accessory system in the world and exhaust removed


Then Brad showed up and we removed the hood


And with a bunch of messing around the engine and trans came out


Lastly we split the trans and bell housing off so I could mate it up to the new engine at home

Spent some time cleaning the car up and pulling the interior, which was water logged and home to a few mice that made it smell great. The Targa top leaks, something to do with 34 year old rubber, so I need to get that replaced soon so I don’t end up with water in the car again.
A pretty amazing contrast between the rear carpet that was covered vs uncovered.

Rear carpet and padding pulled out, and mouse crap vacuumed up


Seats were surprisingly easy to pull out, even though I can’t seem to get anything electrical to work after pulling the engine. Must be missing a ground somewhere or something.


Now I need to find the replacement gas struts I bought for the rear glass 4 years ago…

Started working my way through the engine double checking everything is torqued, and making sure I have everything I need, which I don’t, haha.
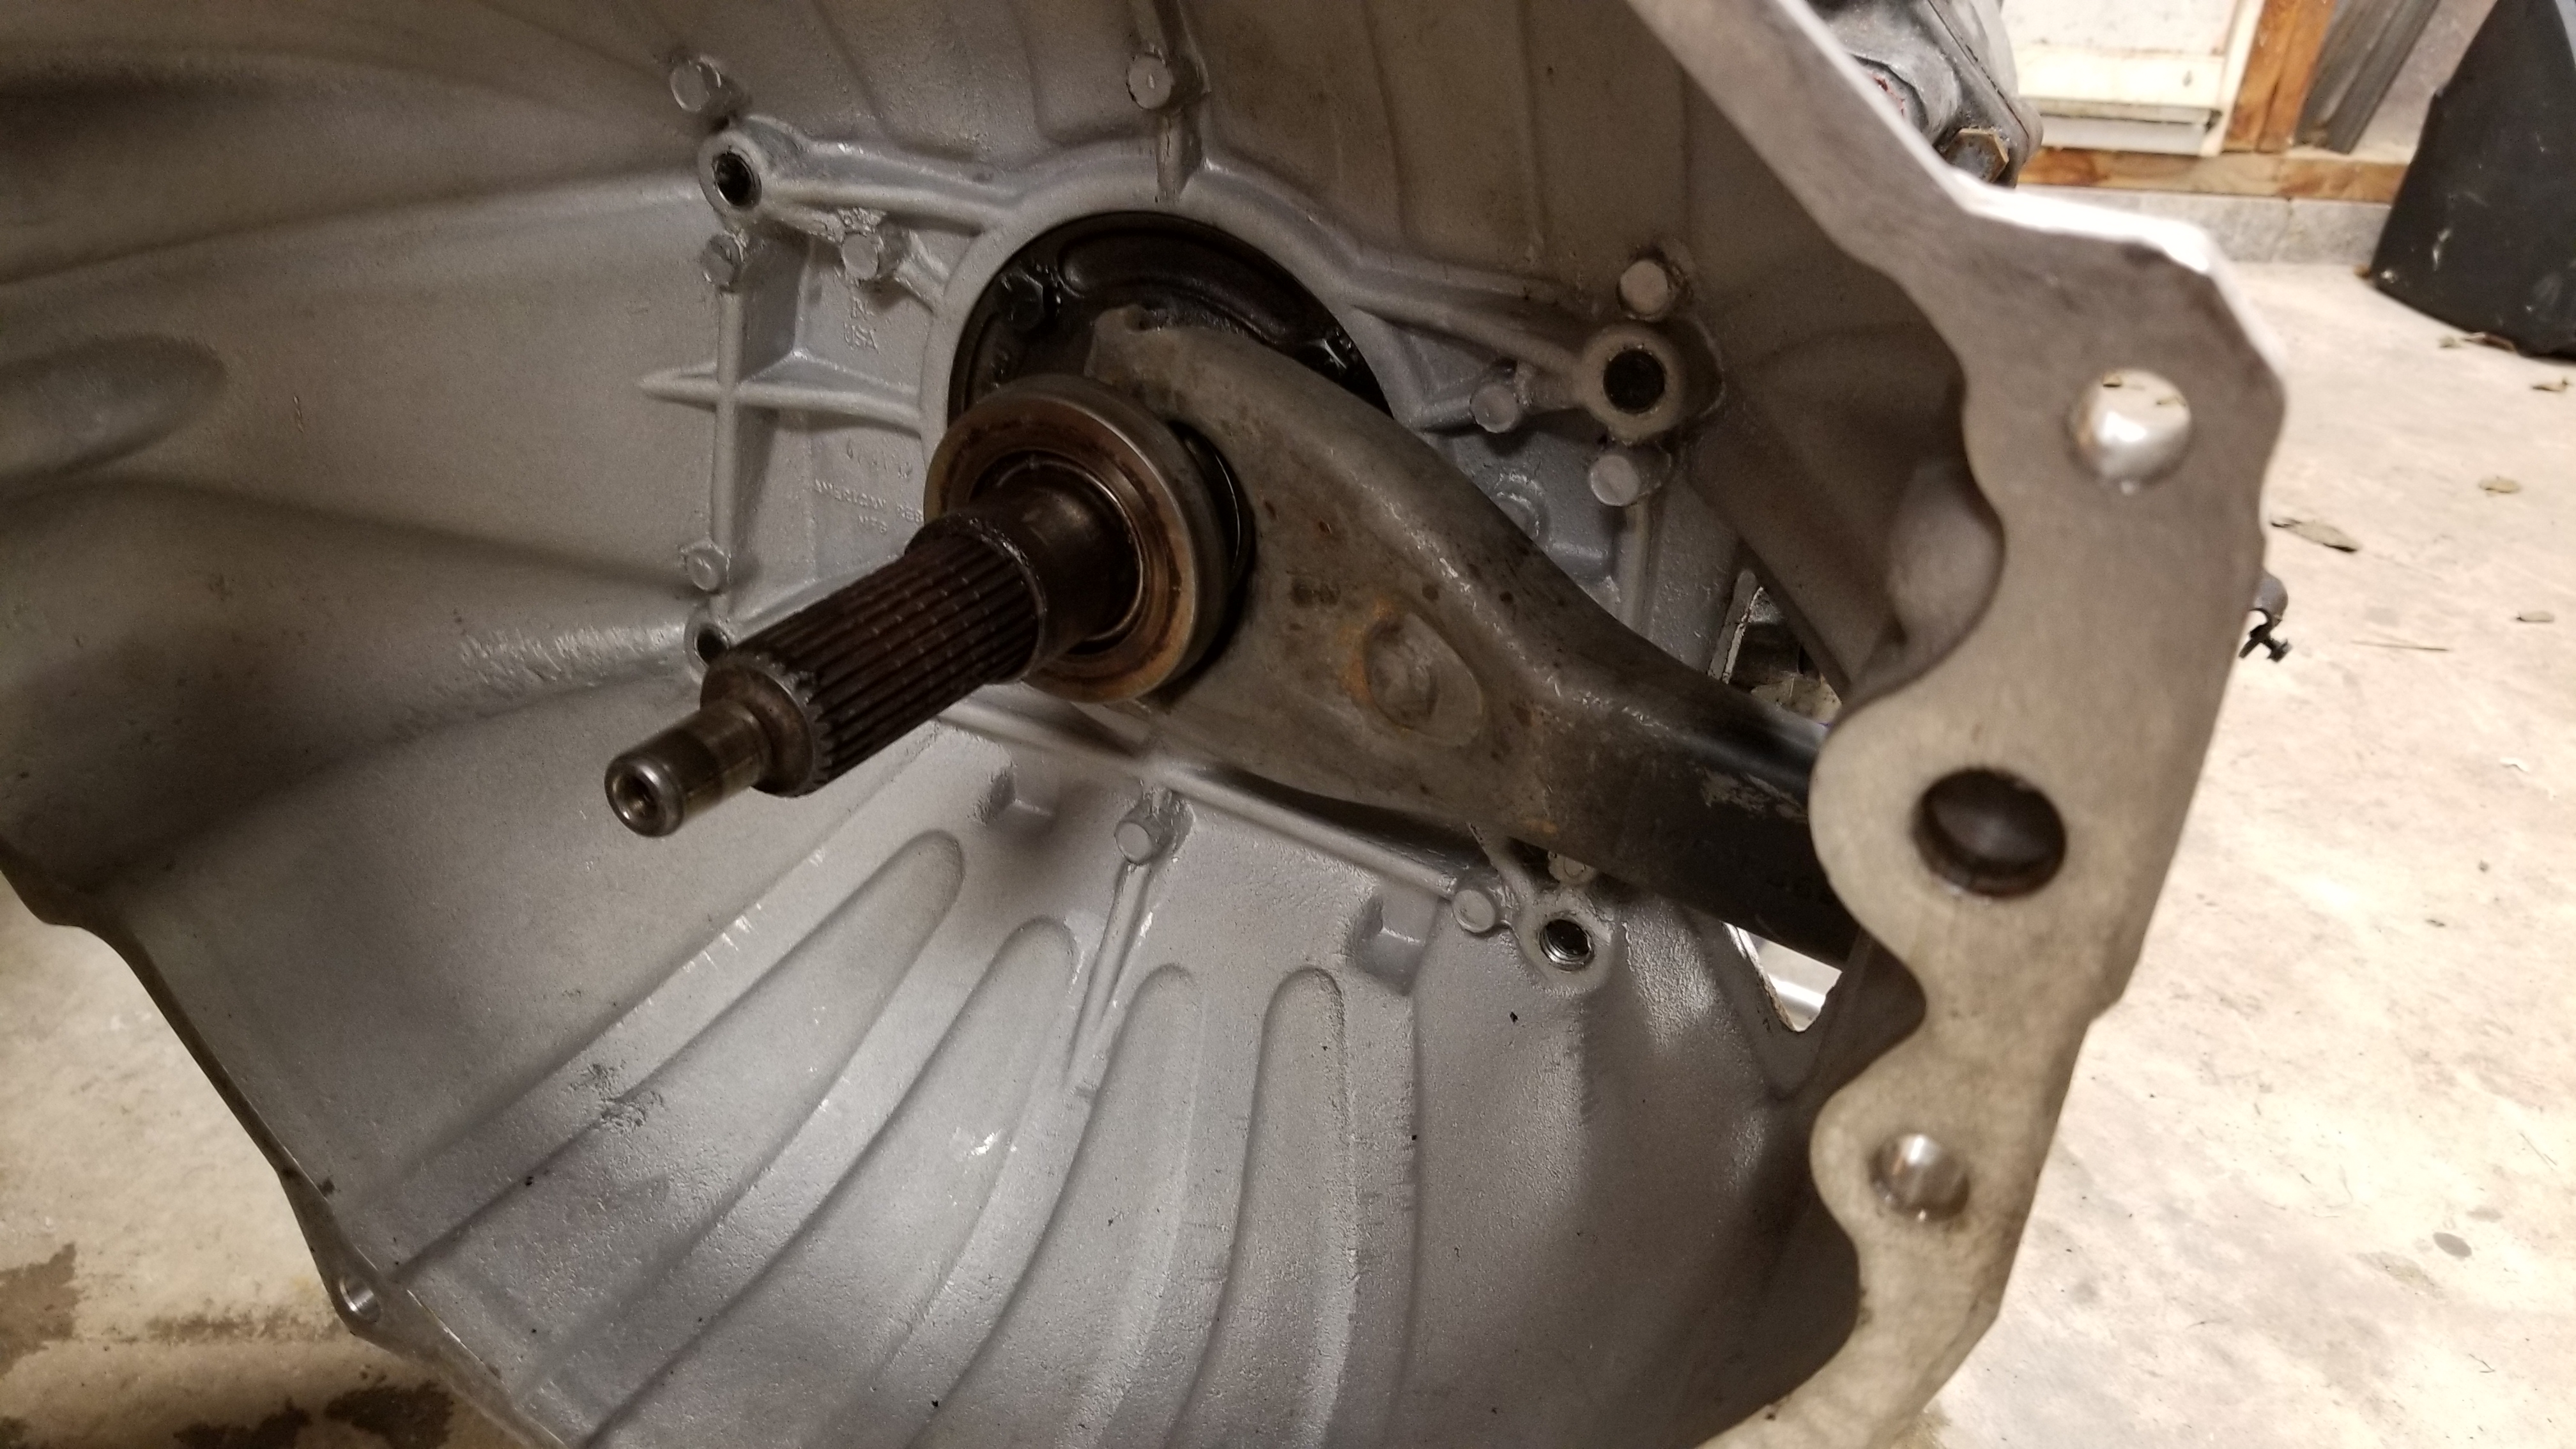
621 bellhousing is making everything bolt up nicely, and the pilot bearing and clutch are stacking up fine (pictures show actual locations). Also installed the pilot bearing in the crank while I was at it.


Next up, figuring out if I’m going hydraulic throwout bearing or adapting the stock slave cylinder and fork.
Bump how is this coming?
It’s up and running and I’ve been driving it on and off over the last year. I’ll dump my progress from another forum in here for those interested.
[QUOTE=Transporter7220;1567141]Still making progress, just not the exciting kind. The stock throwout bearing, fork, pivot ball, and even trans mounting bolts all bolt right up to the 621 bellhousing. Planning on bringing the bellhousing to Dad’s shop so I can fab up a slave cylinder mount that will run off the bellhousing to engine bolts.
Also been ordering all the stuff I either didn’t think of or didn’t want to buy until I knew they were going to work. Stuff like a new clutch master and slave, Targa gaskets, power steering line, clutch alignment tool, copper crush washers, LS PCM pin crimp tool and pins, found a cracked spark plug so some extra plugs, and a trans filter and gasket kit.
Still need to buy all fluids, c6 exhaust manifold 2 bolt flanges, 45 deg exhaust tubing to adapt to the stock exhaust, fuel filter/regulator fittings to adapt to the stock lines, and 90 degree fittings for the heater core.[/QUOTE]
[QUOTE=Transporter7220;1567250]Headed to dad’s Saturday and spent the day trying to get the clutch pedal that I bent due to a seized clutch master out of the car. That required pulling pretty much the whole dash out. To say it was a nightmare is an understatement. Also found 3 more mouse nests in the dash, so I guess it’s good to just get it over with.
I’ve pretty much decided the dash isn’t going back in. I might reuse the top pad, but the rest I’m thinking will be aluminum plate. That’s quite a ways down the road though.


Also pulled the throttle pedal out as well, which was way easier than the clutch. Interesting fact the throttle pedal arm is all aluminum, pretty cool to see the extents they went to to keep weight down. I guess you need it with the crap engine they threw in it, lol. But plan is to use the pedal to create a copy of it with the truck drive by wire pedal I have.
Lastly I pulled the EVAP system out of the car, used that space to move the vacuum reservoir into, and used that space to fit the LS PCM. I poked around the car for a while, this just seems like the best place for it. It will require extending the harness, but not the end of the world.

Plan is to get the harness all depinned this week so I can get the new layout all figured out with all the measurements I took this weekend while it’s on the stand, and before I bring the engine to dad’s next weekend and drop it in to see how things are going to fit.[/QUOTE]
[QUOTE=Transporter7220;1567263]Finally got my MIG up and running with some flux core wire last night. Used it to build up the last broken exhaust manifold stud left in the head since it was broken below flush. Dad had already tried and failed to pull it with an easy out, the welder works much better.
[/QUOTE]


[QUOTE=Transporter7220;1567313]Spent Sunday marking every wire with it’s corresponding pin location, depinning the two PCM connectors, and separating what I’m keeping from what I’m not.

Pile on the left is what I’m deleting, just over 2 pounds of emissions and auto trans wiring. I’m extending the harness so I’ll probably make that back up though. Pile on the right is what I’m keeping.
[/QUOTE]
[QUOTE=Transporter7220;1567366]I’m just hear to complain. I had been trying to remember how much the minutia kills you on stuff like this, I thought I knew how bad it got from everything crazy I did with the cavalier, but this is another level. I just hit $1000 on bullshit, which includes $150 just to put new fluids in everything, and $170 in hoses, fucking hoses.
Anyway, earlier this week I straightened the clutch pedal that I bent the shit out of due to a seized master, picture is from before I fixed it. Hopefully it’s straight enough to work now.

Also got started modifying the truck DBW throttle pedal to bolt in. If the stock pedal was steel instead of aluminum it would have been cake. But that just means I get to make stuff. Holes drilled for the two mounting bolts, and pedal cut off.


And over the last two days I only had time to plug all the connectors into their matching sensors and drape the bare wires over the engine. Hoping to get it all zip tied together into tidy groups of wires tonight so I can pull it off the engine and extend it on my spare time without the engine. Main reason for that is I’m shooting to have the engine and trans bolted into the car this Sunday to check for any fitment issues and get a good idea of how things are going to come together. My main unknown is if C6 exhaust manifolds are going to work. Most everyone runs C5 manifolds or long tubes. I think they will but just need to know for sure, and then I can take measurements for adapting to the stock exhaust.[/QUOTE]
1 Like
Lots of progress this weekend.
Wires ran on the engine and zip tied together in their final orientation. Still need to add grounds, injector plugs, wideband input into the EGR for logging, and power, but I can do that on weeknights. Also picked up dad’s spare harness so I can steal wires out of it to extend the harness using the same wire colors.


Pulled the harness back off and starting loading everything up to bring to Dad’s.


Cleared out the engine bay as best as I could to make room

Installed and torqued the clutch and pressure plate, then bolted the bellhousing and transmission on.


Dad also made me a crank pinning jig from some spare steel and a turned down used crank bolt. Then he drilled, reamed and installed two 1/4" solid pins.


Steve and I hotwired the fuel pump to drain the tank, and he pulled the front bumper to make room for the engine hoist.


And with lots of messing around the engine and trans are currently sitting close to where is going to stay. Ran out of time before we could get the mounts bolted in, and I think I’m going to have to do some trimming on a few things.
[/QUOTE]
[QUOTE=Transporter7220;1567498]Last weekend I got the engine pushed back and the transmission bolted to the ladder bar. After much confusion as to why I was having clearance issues everywhere I realized that the engine was sitting about half an inch further back that all the other swaps out there. No one else has used this transmission from what I can tell, so the stack up was different. Current plan is to put the ladder bar in dad’s mill and slot the front two holes to allow the engine to move forward to the next set of holes in the mount adapter plate. That should give me all the clearance I need. Other than that most everything other than the C6 exhaust manifolds I had are going to work.


Heater core lines will be pretty simple

C5 accessories and lower radiator hose, F body upper hose mocked up


Slightly scary, found a broken off oil cap hanging out with the rockers when I pulled the covers to get the engine in

Also pulled the last of the AC components out, which makes lots of room for an intercooler…

Made decent headway on the harness, I’ve extended all but a couple wires. Still need to solder in the new injector plugs, run all the power wires to relays and fuses, and wire in the grounds, ran out of solder though.

And lastly my gauges showed up, $70 refurbished eBay 10" android tablet running Torque Pro connected to the PCM with an OBD2 WIFI adapter. Still need to order the ram mount for it. Hard to beat the price, weight, simplicity, and flexibility of a tablet dash.
[/QUOTE]
[QUOTE=Transporter7220;1567569]Two weekends ago I pulled the fuel sending unit expecting to just swap a Walbro 340 into it and move on, turns out the thing was covered in rust, had a hole from water freezing under the flange, and the level sensor was only working intermittently. Instead of fighting with it I grabbed a brand new stainless replacement for $100 on eBay. Only took a few minutes to bolt the pump in, cut the factory connector off, and crimp the Walbro connectors on. Just need to check polarity on the car before I plug the blade connectors into the Walbro connector.
[/QUOTE]

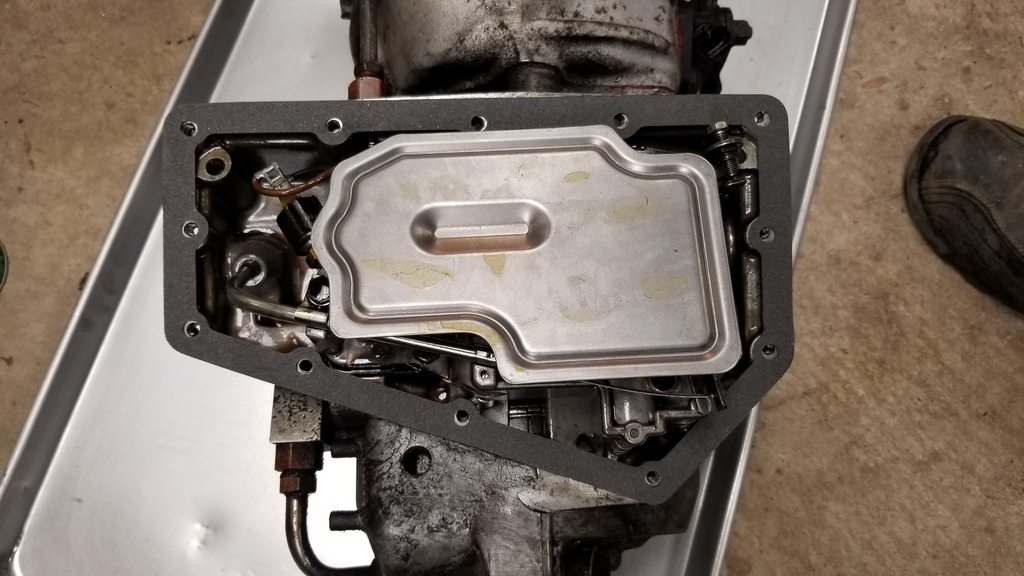
[QUOTE=Transporter7220;1567849]Lots of progress lately, last week in the spare 30 minutes I had on week nights I drained the transmission oil and pulled the pan and filter. Had to muscle the 75lb transmission down a half flight of stairs into my basement to warm up for a day and to heat the dino oil up enough to drain. Lugging it back up the stairs was especially fun. I let it drain for a full 24 hours since it was in the teens in the garage that night and the oil cooled down quick. The next night I threw the new filter and gasket on.
[/QUOTE]


[QUOTE=Transporter7220;1567853]I got up early Sunday and headed to dad’s to make some more progress. When I got there he was already setting up the ladder bar in the mill, I needed to move the engine forward half an inch, so he slotted the holes 1/4" in each direction.


While he was doing that I made a template for the clutch slave cylinder mount, then handed it and a piece of 1/4" plate off to dad to drill and bend as needed. He also drilled and tapped a second hole in the bellhousing to mount the plate. Plate turned out great until I realized I was too close to the firewall to mount the hydraulic line, so I’ll have to extend it 3/4" so it sits lower.


I cut the old fuel injection harness out of the car

Installed the filter/regulator in the OEM location, forgot my box of good clamps at home so I’ll have to replace the worm clamps later.

Then Steve stopped in, and without too much trouble the engine and trans went back in, now sitting 1/2" further forward, and surprisingly even the motor mount bolts went in pretty easily. He bolted the wiper motor back in as well.

Threw the accessories and intake manifold on, and plumbed the power steering so it wouldn’t puke all over when turning the wheel.

Brad’s old C5 manifolds fit great with tons of clearance


Set the hood on, lots of room for a supercharger…

And then we pushed it out of the garage for a much needed rain bath, and to make room for dad to paint some parts for the next couple weeks.

1 Like
A very fortunate series of events escalated the plan for this car. About a month ago the cam I was looking at went on sale for $100 off, so I bought 5 and flipped 3, netting me 2 cams at $75 a piece. Then eBay had a 15% off everything sale and I ended up grabbing a bunch of stuff I needed to finish it up. PAC 1218 springs, Cipher seats, valve holder, and spring compressor.
This weekend I swapped the cam in. It’s a JEGS 200582 with a .585 lift and .228/.230 duration, aka the Sloppy Stage 2. It will make for a very choppy idle and around 100whp gain NA. It is more of a boost cam, so it doesn’t make a lot of low end grunt NA, but boost will fix that. Surprisingly I didn’t have to move the engine.
Rockers and pushrods out

Crank puller just barely fits between the power steering lines

Sprocket off, water pump bolts installed

New cam with assembly lube

Cam plate off and wooden rods to hold the lifters

And New cam in and back together


I then got started on the valve springs, but the double spring compressor I bought works horribly so I gave up on that until I can borrow one that actually works after it look me longer to do two than it should to do 8.
So I moved on to installing the seats, they fit the car great even though C4’s are extremely narrow at the rear seat pivot location. Even got one mounting bar finished before I ran out of oxygen and this cold rolled steel wouldn’t bend cold without cracking.


Spent my lunch break yesterday copying all the VE and idle tables over from another tune to mine to create a decent base tune to get it running and idling with the cam. Also found a great injector scale calculator last night and got the injector tables updated to the 45lb/hr injectors I’m running. Then flashed it to my PCM with the couch harness. With any luck it’ll just start up, but I’m sure I’ll run into some issue.
Old pic, but it’s better than no pic

1 Like
Borrowed a single valve compresser from Danger and the valve springs went much more smoothly this weekend. About half way through I had it figured out and was moving quick.


Pushrods and rockers back in

Also picked up some 1/8" thick steel to make the seat brackets lighter, got the driver’s seat bracket finished.


Lastly I replaced the short bit of flex line from the sending unit to the hard lines with high pressure fuel line, installed a couple quality hose clamps, and installed the fuel pump/sending unit.

Had some time last night to plug off the EGR ports in my C5 manifolds. You’ll notice all that weld splatter comes straight from the factory… Lol. Dad got me a Millermatic 110v MIG at an auction for my birthday last October, this is the first chance I’ve really had to use it other than pulling exhaust manifold studs out.


Also randomly found an oxy acetylene torch in a pile of stuff on the side of the road, turns out it even has gas left. I’ve been having a hard time getting one broken exhaust manifold out and figured this would persuade it, but after sitting for 2 weeks PB Blaster did its job and the bolt came right out.


Picked up a set of wheels from Van Bortal/Turner Automotive for cheap, for when you need that 80’s bling but all 4 wheels is too much. This steps me up from 16’s to 17’s, doubles the available tires to choose from, and goes from 255’s to 275’s on all 4 corners.

Also dropped my gear ratios into a calculator because I was curious, 0-60 in first gear, #C6ZR1Status 

Working hard to try to get this thing driving ASAP. Saturday I installed the driveshaft, adjusted and installed the shift linkages, and filed the OD with Dextron III ATF.


Also decided the heater box was too close to the exhaust manifold for comfort, so I pulled the cover off to be modified.

Then finished up the day by getting the stock exhaust and C5 downpipes trimmed to fit together. I got lucky on the first side with a perfect cut, then messed up the angle on the second side so I’ll have to weld in an extension and cut again. I’m waiting on downpipe nuts so I didn’t want to weld anything without it all bolted up. The stock exhaust will be restrictive for now, but plan is to delete the cat and install a cutout, and I can remember it not being a quiet exhaust the couple times I started it up anyway.


Pushed her outside and hosed the dust off

Then Sunday I spent another 4-5 hours on the harness, which is mostly just time digging for the right color wires out of the two spare harnesses. I’m down to several sensor wires and running grounds and power to the harness.


I’ve been dreading buying tires for this thing, on a whim I checked Craigslist for something used to get me up and running and I got really lucky.
Pretty much brand new set of NT05’s with roughly 1000 miles on them for $450. Dropped them and the wheels of yesterday to get mounted and balanced. I was pleasantly surprised to see only 1/4 oz on 2 wheels and 1/2 oz of weights on the other two.


Couldn’t believe I got them all in there loose


The rear end’s days are numbered…
1 Like
Welp, if this forum isn’t going to accept I’m embedded images, what’s the point.