Just call me Harada - My 50th Anniversary Edition Z31 Build

Was pretty busy Monday and today. The rust problems are 80% sorted out.
As shown in the pics below, I attacked all the spots with rust down to the bare metal, then
used a Rust spray (the purple/black looking stuff in the pics below) that forms a chemical bond to the rust in order to keep it form spreading. You can then sand it down and paint over it. For most of the spots, this is OK. For a few, however, there needs to be some filler/bondo added over this to get the body line straight, or in the case of the rear bottom 1/4, sheet metal welded in because the rust ate all the way through.

Since the motor is now coming next weekend instead of this weekend, I will try and have the entire car at least primed or maybe even painted (weather permitting) before dropping the motor in.
Before priming, I want to get the entire rear interior hatch area bedlined after repairing the interior rust, which I have also sprayed with the Rust spray but is much harder to work on down to the metal due to its location in the rear area.

I also want to get the seats figured out so when the motor does come in and we finally get it running, there’s somewhere to sit :wink:

As far as getting her running - Still need to get an EFI, but now I have another week and a half. Motor should now be coming on the 5th.

Enjoy some pictures of the carnage/progress:

spots needing filling:
http://i256.photobucket.com/albums/hh187/jbaker1121/300zx%20Project/IMG_4785_zps92d7d3d5.jpg
http://i256.photobucket.com/albums/hh187/jbaker1121/300zx%20Project/IMG_3988_zps67ce1ce3.jpg
http://i256.photobucket.com/albums/hh187/jbaker1121/300zx%20Project/IMG_6586_zps4ef9ea3a.jpg

dent in this section that will need bondo
http://i256.photobucket.com/albums/hh187/jbaker1121/300zx%20Project/IMG_1951_zps1ced57a3.jpg

I’m planning on deleting the antennae (that hole was the cause of most of the rust issues back here, anyway.)
http://i256.photobucket.com/albums/hh187/jbaker1121/300zx%20Project/IMG_1080_zps9543a5c1.jpg

http://i256.photobucket.com/albums/hh187/jbaker1121/300zx%20Project/IMG_3319_zps1e155a78.jpg

http://i256.photobucket.com/albums/hh187/jbaker1121/300zx%20Project/IMG_3673_zps3f769972.jpg

http://i256.photobucket.com/albums/hh187/jbaker1121/300zx%20Project/IMG_4620_zpsa68cb065.jpg

Also, The existence of a Kouki Z done up in 50th AE style was brought to my attention:
The front of the car is essentially how mine will look (minus the 200ZR vent, I’ll be re-using the 50th AE vent in the zenki location over the turbo…just pretend it’s over to the right)

http://i256.photobucket.com/albums/hh187/jbaker1121/Z31s/z31club-408c_zps671440f3.jpg
http://i256.photobucket.com/albums/hh187/jbaker1121/Z31s/z31club-408b_zpsc54aea83.jpg
the rear, however, is Kouki of course…

So, I did a photoshop to see how the rear should look on my Zenki w/ Kouki bumpers:
50th AE, Kouki rear bumper, low on bronze watanabes.
http://i256.photobucket.com/albums/hh187/jbaker1121/300zx%20Project/50thAE_KOUKI_REAR_photoshop_1_zps473c8b1c.jpg

After seeing this mocked up I may stick to a recess in the bumper for a plate - not kouki rear.(those damn humps ruin it for me) This way I can still utilize the MSA XENON rear valence I have for the zenki rear bumper. (I’ll have to cut into both pieces for a bumper recess :eek:)
However, it is pretty cool to see how my car may look when completed :smiley:

I’m excited to get back in the shop Friday (warm weather ahead) to finish up the body prep.
Stay tuned…

Making progress :tup:

yessir! want to be ready for the motor next weekend.

Spent a few hours today sanding the entire exterior of the car - trying to get it as smooth as possible. Got any un-poppable dents down to bare metal in order to apply bondo. Next week a friend of mine is plastidipping the entire car for free (I know, I know, it’s plastidip. I’m holding off on a real paint job for now. plus its free) so I want to have the car primed and ready to receive a fresh coat.

Sanding
http://i256.photobucket.com/albums/hh187/jbaker1121/300zx%20Project/IMG_6997_zpse0788754.jpg
http://i256.photobucket.com/albums/hh187/jbaker1121/300zx%20Project/IMG_2732_zps16c0c3e1.jpg
made a bit more work for myself since the p/o had painted the door handles, I used paint remover. A bit too much, since it screwed with the paint surrounding it. Nothing some serious sanding couldn’t fix.
http://i256.photobucket.com/albums/hh187/jbaker1121/300zx%20Project/IMG_7880_zpsbe92b68d.jpg
http://i256.photobucket.com/albums/hh187/jbaker1121/300zx%20Project/IMG_1476_zpsac170f98.jpg
http://i256.photobucket.com/albums/hh187/jbaker1121/300zx%20Project/IMG_7630_zps9ecf902b.jpg
http://i256.photobucket.com/albums/hh187/jbaker1121/300zx%20Project/IMG_7744_zps97062bd5.jpg
http://i256.photobucket.com/albums/hh187/jbaker1121/300zx%20Project/IMG_8673_zps93d92135.jpg

these areas are still a big concern. was thinking of just filling the gaps in and sanding/priming for now. (like this on both sides)
http://i256.photobucket.com/albums/hh187/jbaker1121/300zx%20Project/IMG_1416_zps747aaf7f.jpg

after sanding everything (including trim) I masked off and plastidipped the window trim/moldings and the side mirror
(ran out of ‘good’ tape when I got to other side - long story short it was too cold for cheaper painter’s tape to work right and the 1 roll of 3m was the only one that would stick - heated the can of plastidip before using for the most even coat possible from a can - when my buddy sprays the car he’ll use it from a gun with some thinner for an even coat)
http://i256.photobucket.com/albums/hh187/jbaker1121/300zx%20Project/IMG_1824_zps28c18748.jpg
Dry after about 4 coats. there were a few spots that were pulled because I waited too long to remove the tape. Will simply redo them later.
http://i256.photobucket.com/albums/hh187/jbaker1121/300zx%20Project/IMG_8465_zps4b7290f7.jpg

Then, I mixed some bondo and filled in the more serious dents around the car nice and thick to ensure even lines.
http://i256.photobucket.com/albums/hh187/jbaker1121/300zx%20Project/IMG_9686_zpsfa8a122a.jpg
http://i256.photobucket.com/albums/hh187/jbaker1121/300zx%20Project/IMG_2066_zps645f7269.jpg

letting it cure overnight/for a day before touching it to make sure it’s solid and ready for sanding.

I removed the front bumper in order to pull the radiator and look for any hiding rust while I was sanding the car… can’t wait for my motor to come in!
http://i256.photobucket.com/albums/hh187/jbaker1121/300zx%20Project/IMG_2532_zpsd3776fb3.jpg

I got a 240 rear bumper from one of the guys I share the shop space with - the license plate recess should work perfectly for my plans to graft it into the oem bumper.
http://i256.photobucket.com/albums/hh187/jbaker1121/300zx%20Project/IMG_6147_zpsc09f1065.jpg

Yes, the bumper does not fit - I’m not using the entire bumper, however. Just the part where the license plate goes. Going to cut a hole in the oem bumper for it to fit in, and set up license plate lights for a nice OEM look. No license plates screwed into the bumper here. I want my Z clean.

Should be back at the shop in the next few days or so to finish up the body work and lay down some filler primer, sand, and prime again.

Also, my CLSD came in today. I will probably not install it right away - my motor comes in next weekend and there are a few other things that need to get done in order for the install to go smoothly. I still need my EFI harness, which is pretty important for the motor :wink:

I also need to get these seat brackets done so I have somewhere to sit in the car that is actually attached to the floor…

PLus, still need to get those pesky 302 mounts out, install factory mounts, and cut out the super-rusty rear passenger quarter panel piece and weld in some sheet metal in order to have a nice solid body back there (as well as some other repairs)

Here’s a new, more accurate “final product” render:
MSA Xenon rear lip on 50th AE zenki rear bumper, with license plate recess I plan on creating from 240sx rear bumper (I got one) - Just need to cut rectangular hole in bumper, put recess in, and graft/bond them together. Not sure on exact height/location of plate recess compared to where the MSA lip attachs (I’ll try to keep it clean!) but for the render let’s hope for a clean straight line…
The hatch is black because the hatch on my car happens to be black. I like it because it sort of flows well with the spoiler into the taillights without the break of body color silver…
I think it’s going to look great.
Now I just need to play with wheel ideas…

http://i256.photobucket.com/albums/hh187/jbaker1121/300zx%20Project/50thAE_REAR_photoshop_1_zps7a103f83.jpg

Stay tuned…

I’ve figured out that I want to run some Epsilon/Southern Way mesh deep dish wheels. I’ve found a set “local” to me (45 min from home, but right now I’m 6 hours from home at school) These wheels were built in the same era as the car, so would be a “period-correct” set of wheels to run. they are also pretty rare.
If you scroll up, they’re actually the same wheels on the 50th AE (black mesh w/ lips) that I did the kouki front photoshop of.

here are the wheels:
http://i256.photobucket.com/albums/hh187/jbaker1121/300zx%20Project/00b0b_a524whz2A48_600x450_zpscef42ce8.jpg
http://i256.photobucket.com/albums/hh187/jbaker1121/300zx%20Project/00101_kdW7cdYFtr6_600x450_zps767ebded.jpg


HARNESS CAME IN!
MOTOR CAME IN!

Now I just need to do some wrenching to replace ~20 gaskets, some studs, do some maintenance, spark plugs, oil, etc. And I should be good to drop the motor into the car.
This is the first time I’ve gotten this “deep” into working on a car.
First time doing the bodywork, first time stripping a car clean,
First time working on a motor to this extent… it’s a steep learning curve.
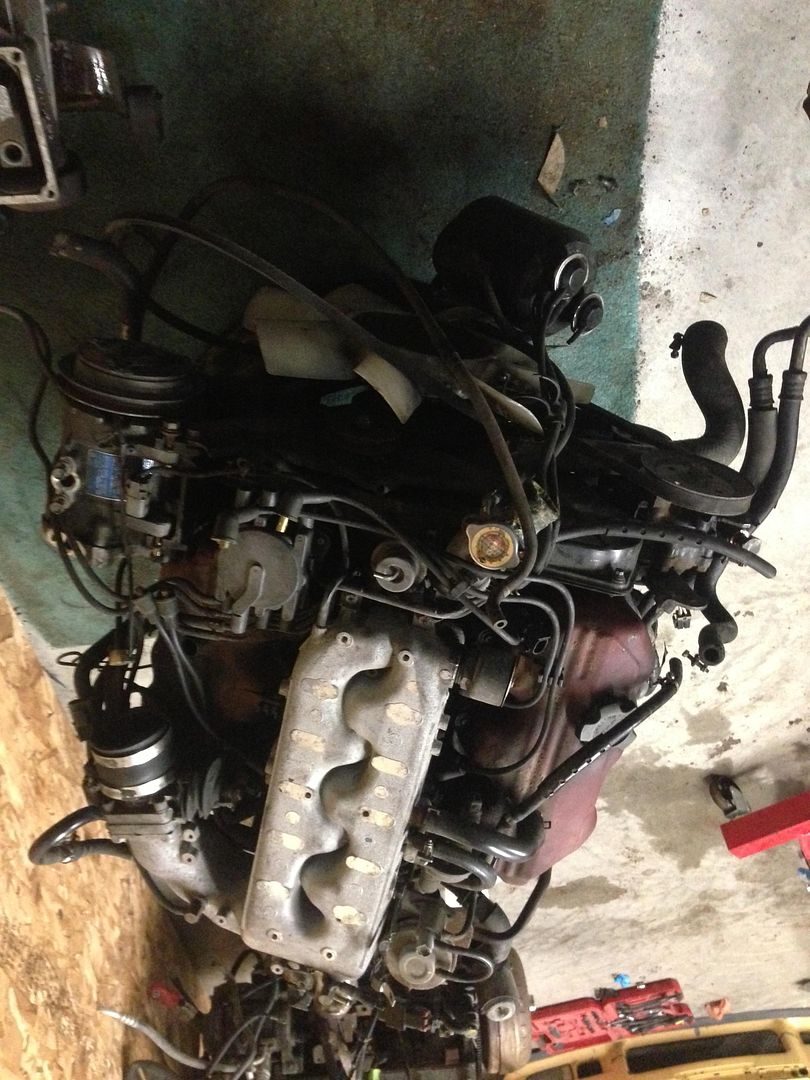
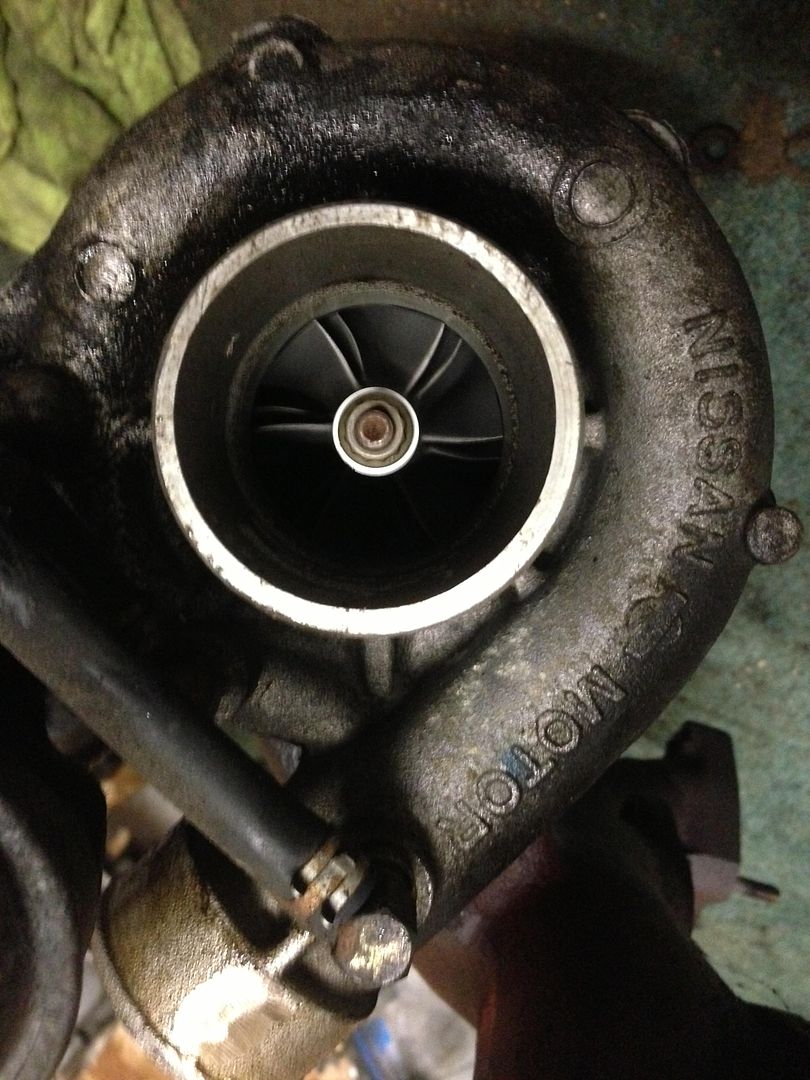
MOTOR!
A 1986 VG30ET with 92k original miles. No problems other than a leaky valve cover. With these motors, the problem areas are the exhaust manifold gaskets and the valve cover gaskets. On this motor, both needed to be replaced due to small leaks, however I would want to replace these anyway because I would like to clean up the valve covers (shine up that red color!) and have the exhaust manifolds “easy” to remove when needed.

The cool thing about this motor is that it’s from an AUTO zx, so it come with a clutch cooler and an oil cooler, both which didn’t come with the Manual cars. So, I’ll have the benefit of extra cooling parts without needing to go aftermarket. I just need to ditch the auto flywheel for a proper m/t one, and change the bushing/bearing.

http://i256.photobucket.com/albums/hh187/jbaker1121/300zx%20Project/IMG_6626_zps4f2615da.jpg

http://i256.photobucket.com/albums/hh187/jbaker1121/300zx%20Project/IMG_6627_zpsd474ca9f.jpg
http://i256.photobucket.com/albums/hh187/jbaker1121/300zx%20Project/IMG_6643_zps33d9351a.jpg

http://i256.photobucket.com/albums/hh187/jbaker1121/300zx%20Project/IMG_6644_zps2130018d.jpg

The hairdryer
http://i256.photobucket.com/albums/hh187/jbaker1121/300zx%20Project/IMG_6641_zps383df332.jpg

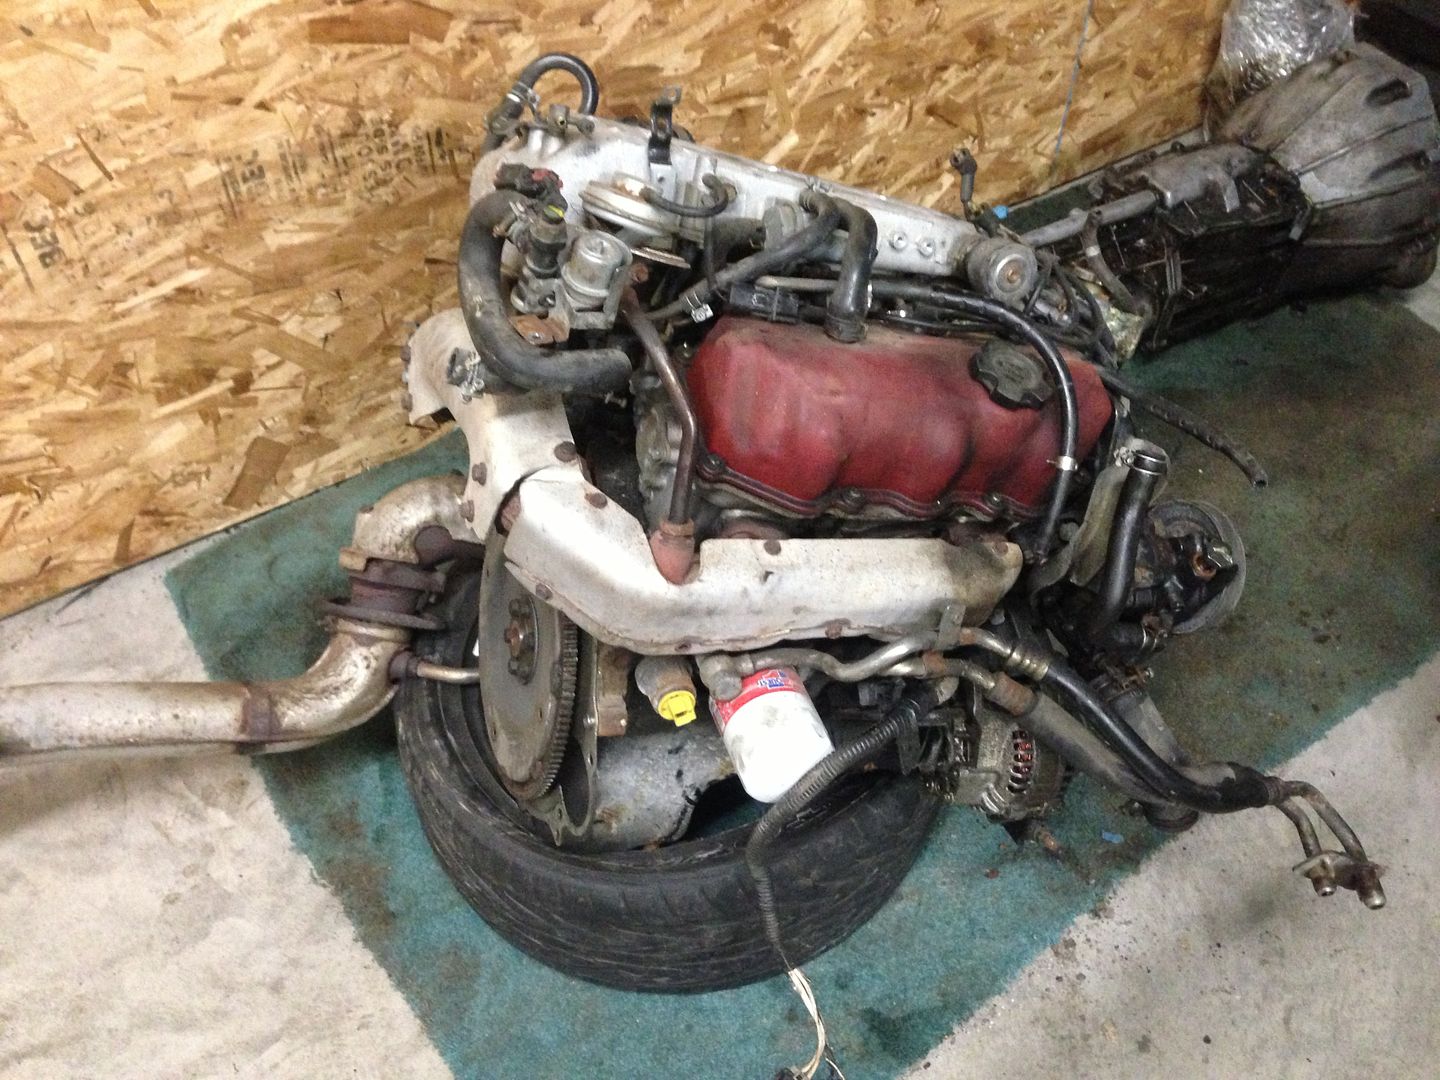
First thing I did was ditch the Air conditioning. I may regret it later with summer coming up, but the lines in the engine bay were cut anyway so that would be more money out of my pocket to get it working rather than just hooking it up again. Removing it makes the motor look cleaner anyway. (and shaves a few pounds…. Power/weight yo!) plus I have T-Tops!

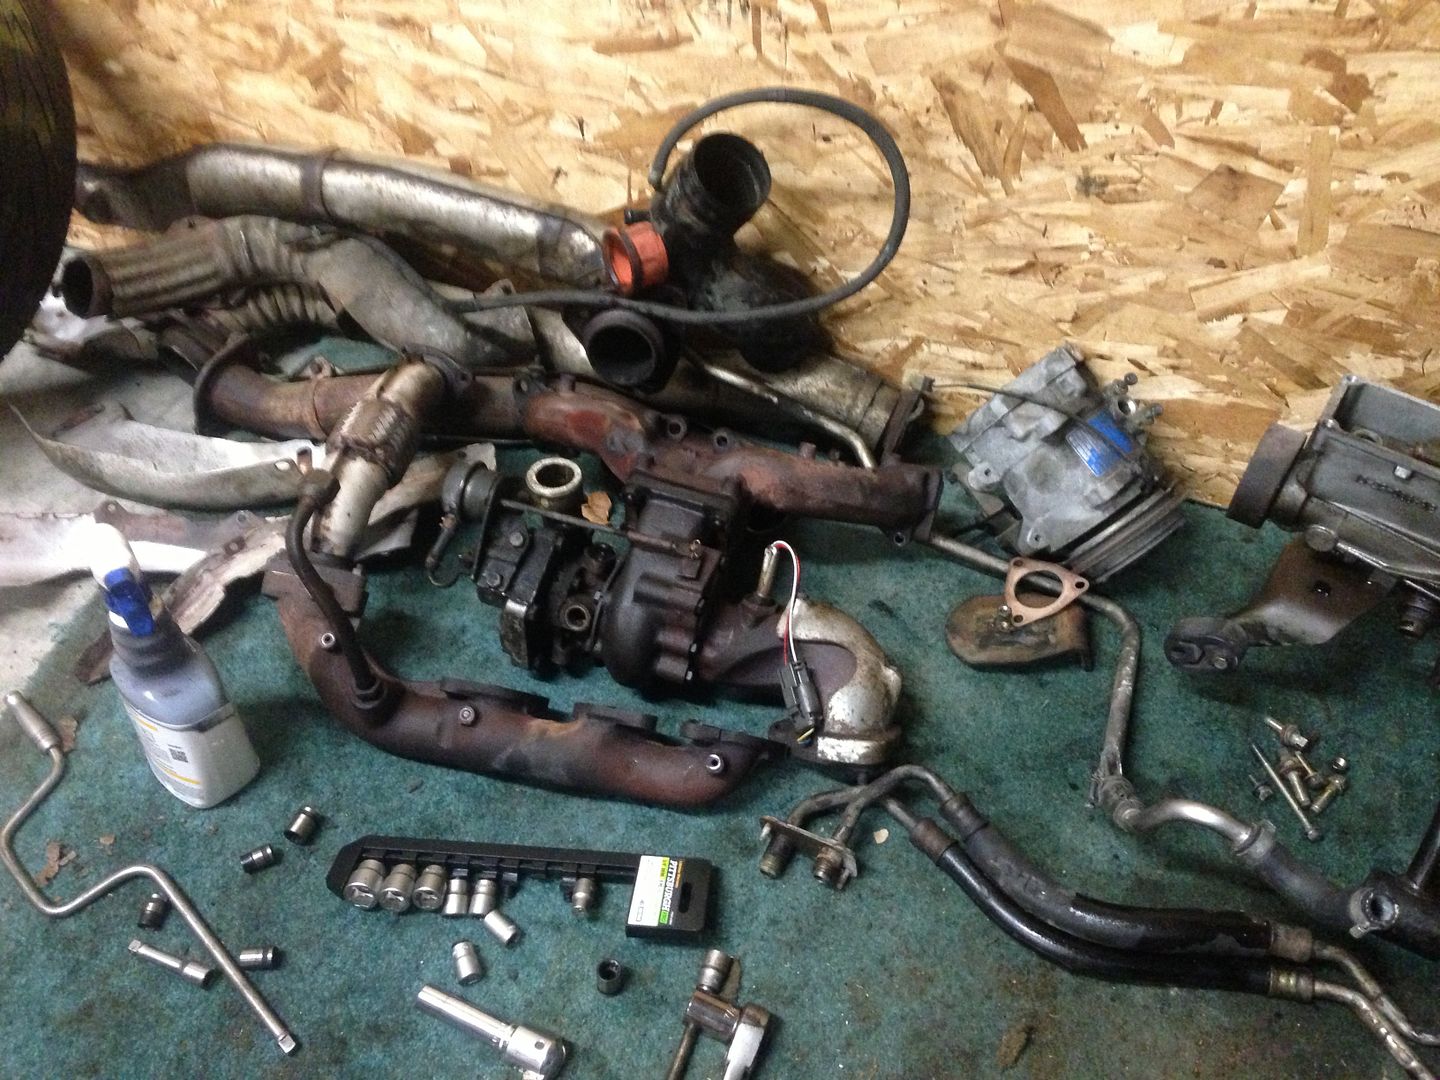
Bolts and Nuts that have been sitting untouched for ~30 years (motor is an ’86, ar is an ’84) really need some “convincing” to be removed…and now I see why it’s sort of a given that you need to replace the studs on the exhaust manifold after you remove it for the “first” time…. All but 3 of them came right out. Luckily none broke, and the only bolts I stripped were ones that are easily replaceable.

Due to my inexperience and the lack of organization of my friends’ tools, it took me ~4 hours to remove a few things from the motor. This included spraying PB blaster + waiting, searching for the right extension, staring and trying to figure out what needs to get removed first in order for the thing behind it to be removed…
However, I’m glad I stripped it all down.

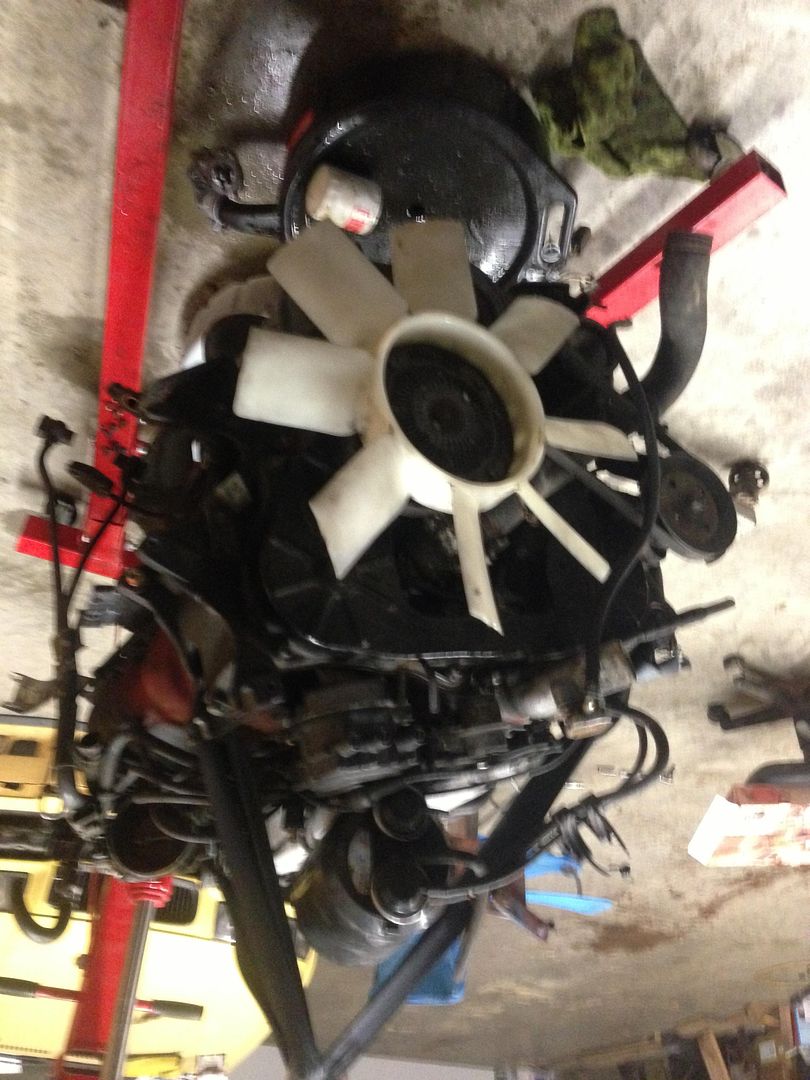
All the gaskets should be in by Friday, and I should have them replaced, new plugs in, new timing belt/tensioner and hopefully all other motor “stuff” finished by this weekend, including the harness wiring. Hopefully I can even attempt to drop the motor into the car by this weekend!
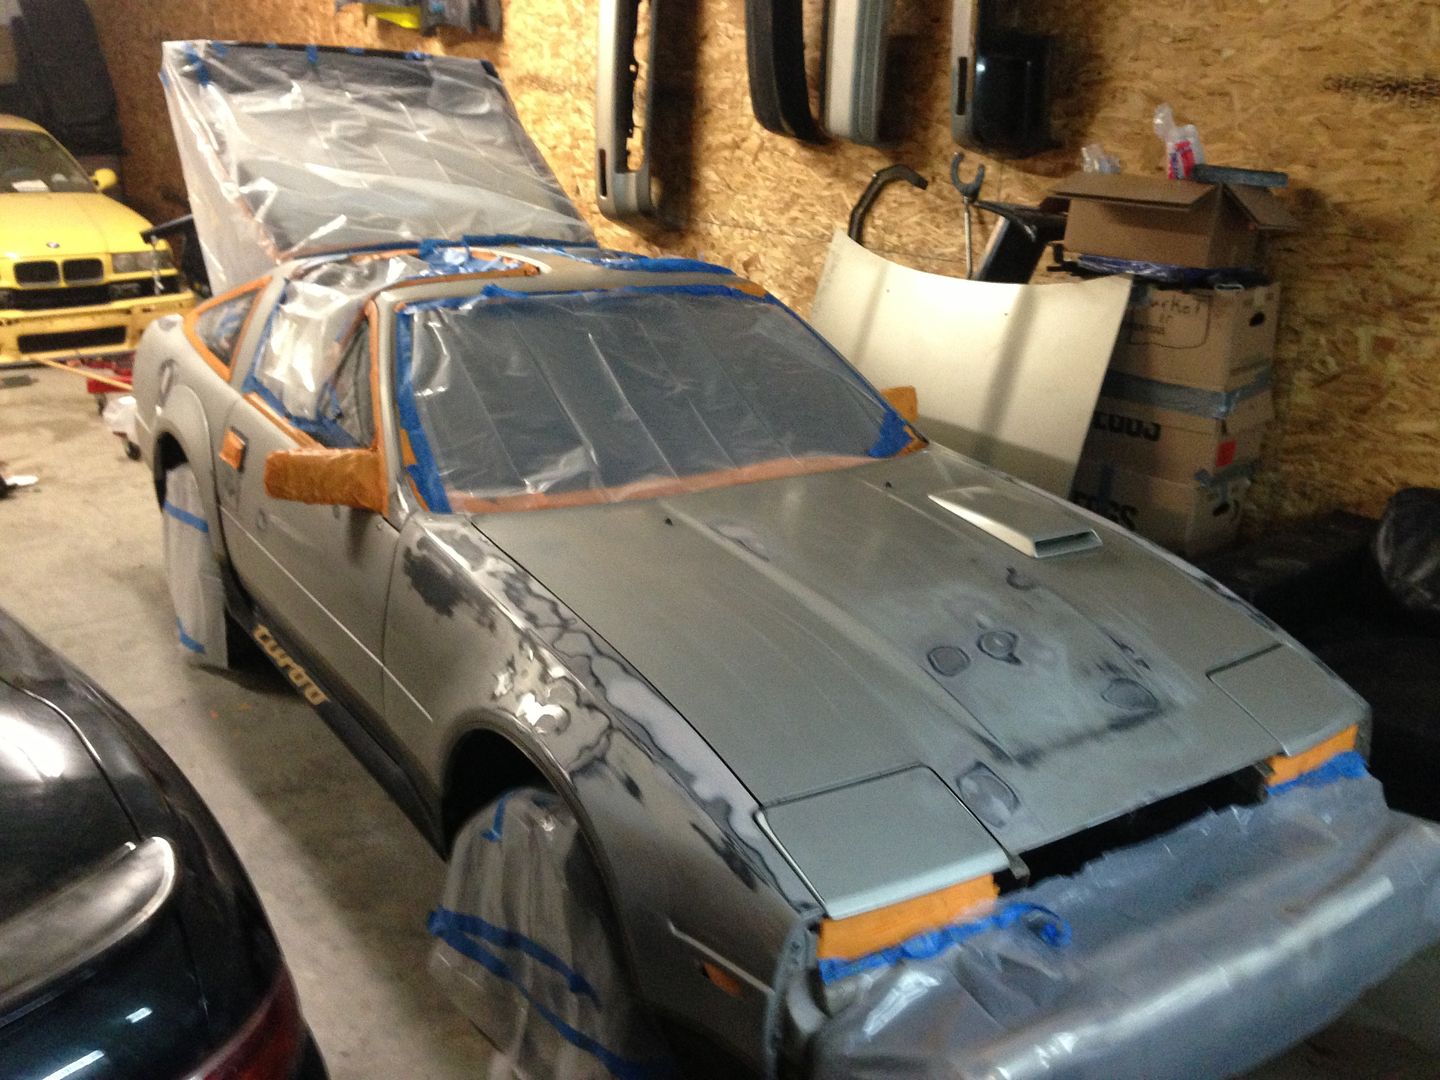
BODY!
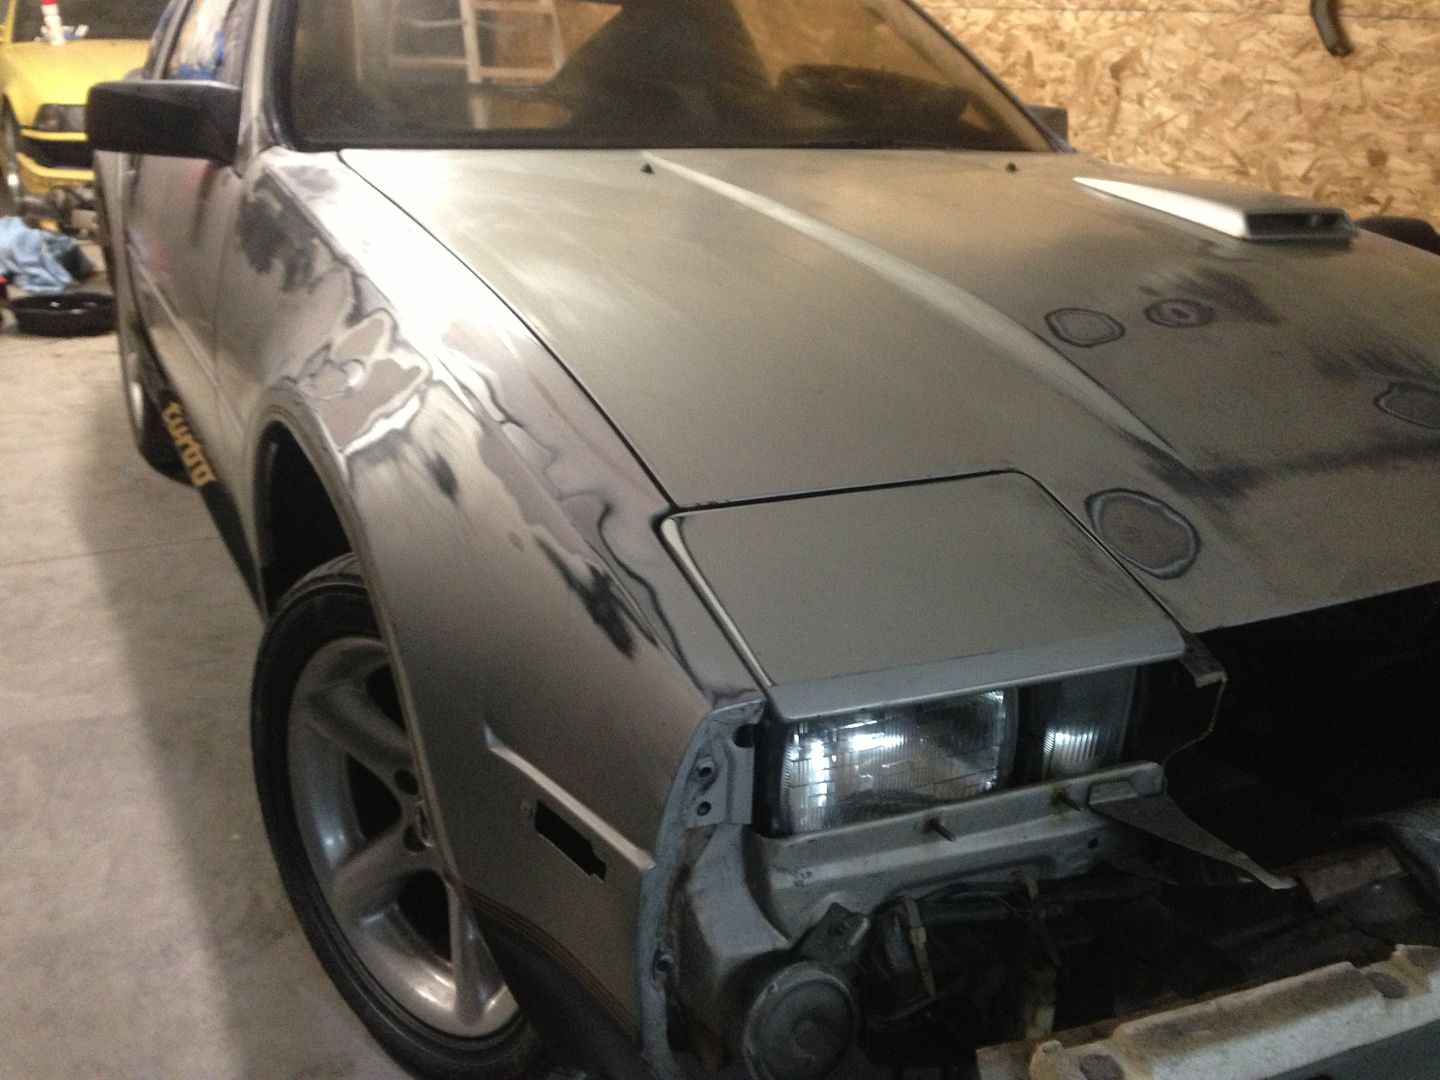
As for the car itself: ready for paint/dip
Going with an Aluminum/black two tone with silver metallizer gloss topcoat.
factory look with a little bling. Sort of like the GTR super Silver w/ black on the bottom.

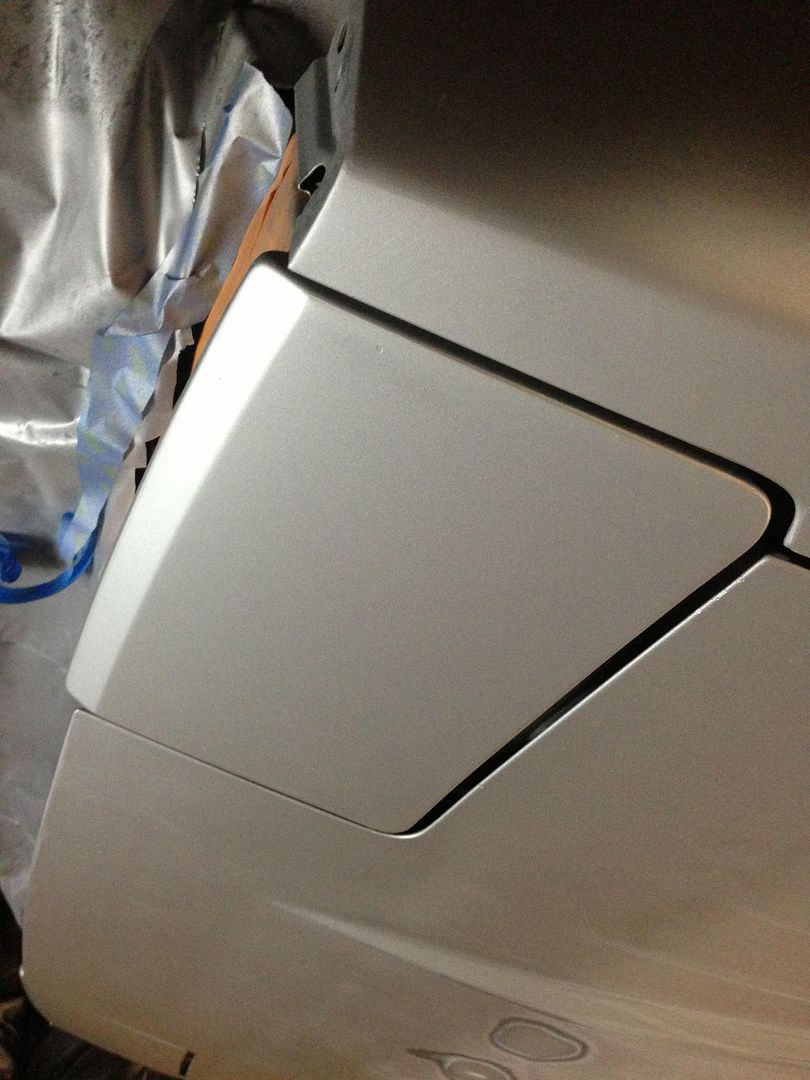
Sprayed some aluminum on the headlight cover/fender to test it out. It should look great with about 4 more layers and some silver metallic flake.
http://i256.photobucket.com/albums/hh187/jbaker1121/300zx%20Project/IMG_6634_zpsb3a9132f.jpg

Plastidip gallons cost a lot more than I thought, but it’s still cheaper than getting the car painted. After all, this is sort going to be a drift car/car to tinker with. However, after masking the car all up and preparing for paint, I found out it would cost me $500 to get it dipped “professionally” so I said “screw it” and I’m going to do it myself. We have a compressor in the shop anyway, I just need a regulator and paint gun with a 1.7-2.0 nozzle. (I know it sounds “easy” but we shall see)

For Dip materials in the color I want, it is still about $300. Maybe I’ll hold off until after the motor is in since there are still things I need to purchase (plugs, fluids, etc)

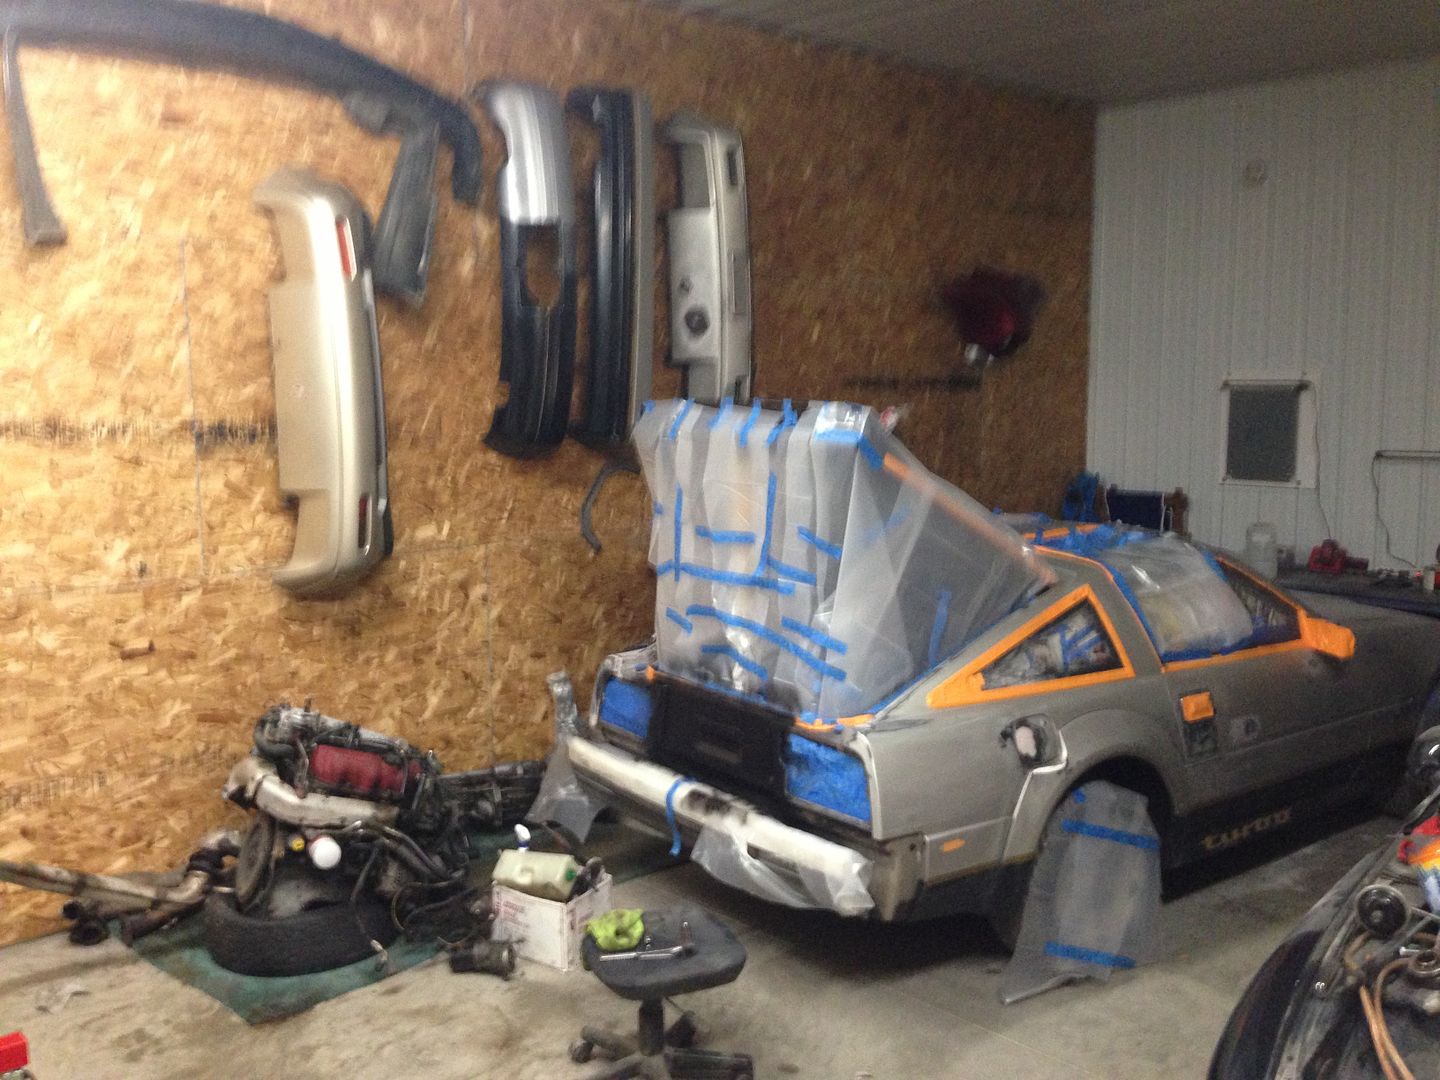
The parts for the Kouki front in came in, but one of the headlights is cracked and I need to wait for a replacement. The hood also needs some body work. I may hold off on these for now until the car is running since I would rather devote time to that.

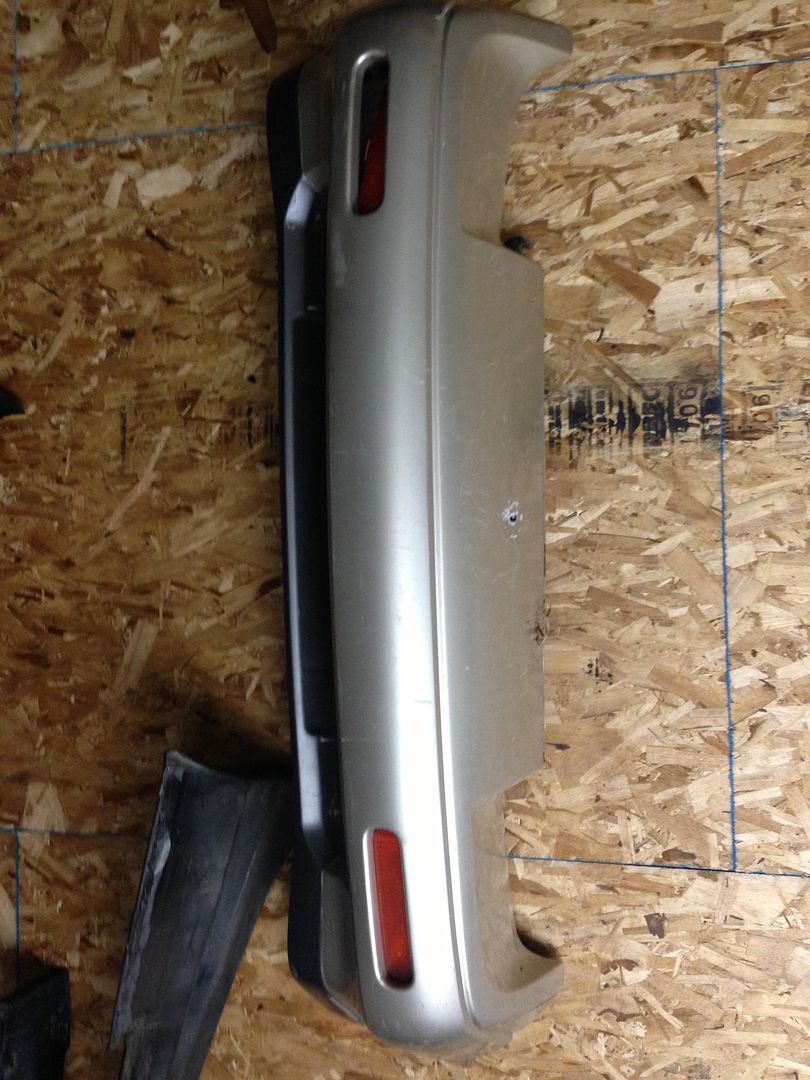
I also haven’t even begun to work on the modified rear bumper w/ license plate recess, although I have everything I need to get it done. Again, I’d rather devote my time to getting it running

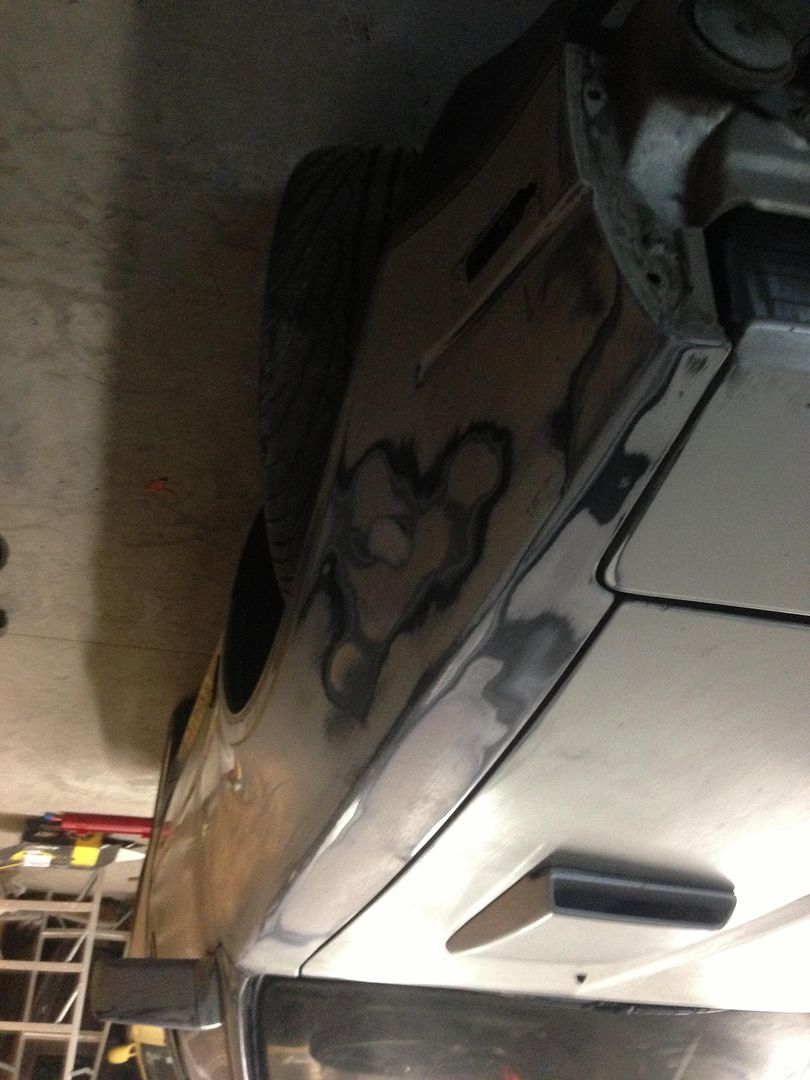
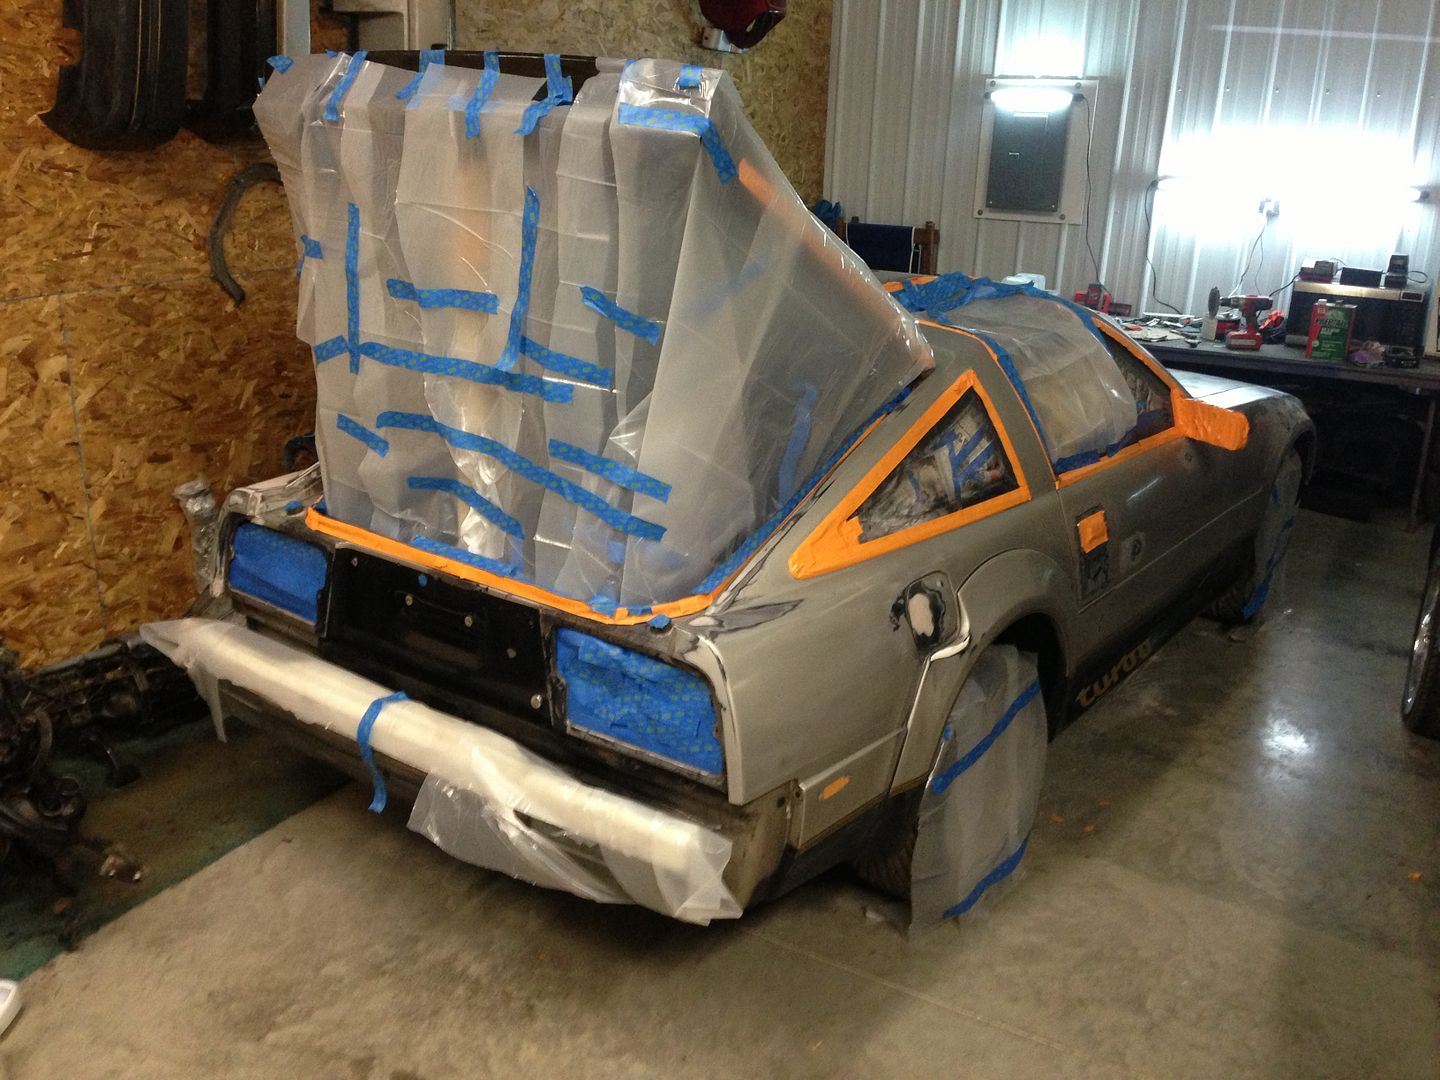
So, how the car sits while I’ve been wrenching away at the motor:
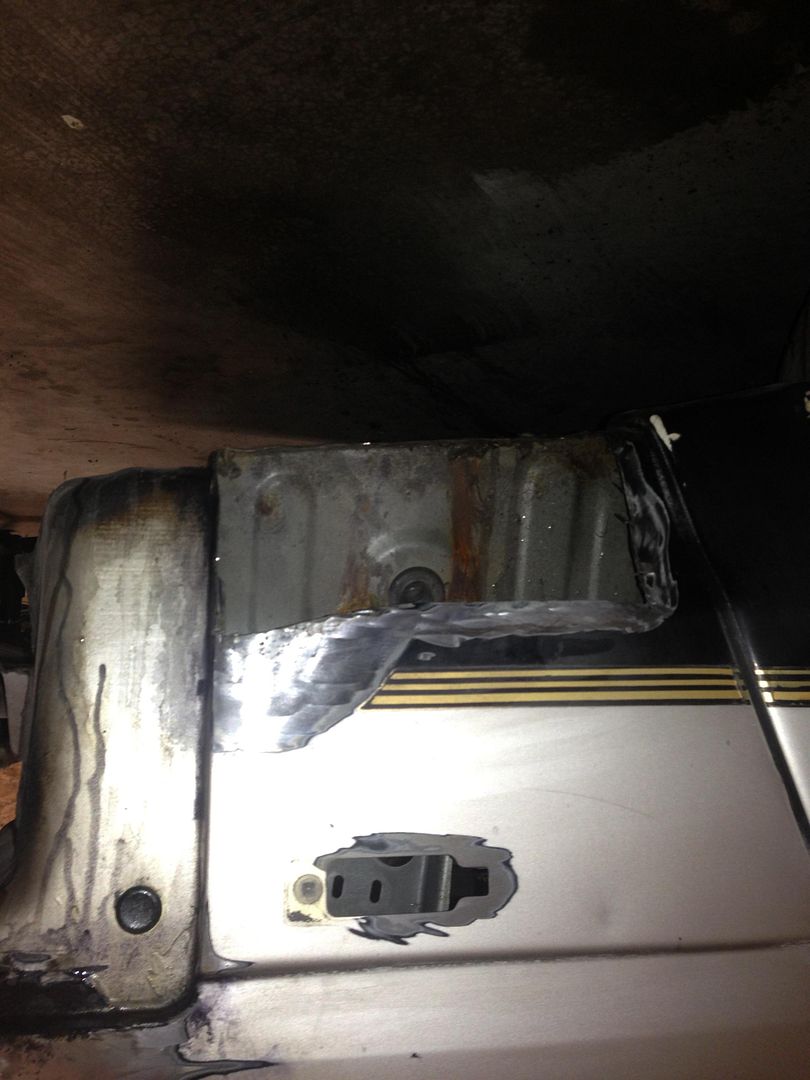
dat bondo
http://i256.photobucket.com/albums/hh187/jbaker1121/300zx%20Project/IMG_6619_zps521aa666.jpg

http://i256.photobucket.com/albums/hh187/jbaker1121/300zx%20Project/IMG_6620_zpsbabec074.jpg

cut out the rusty section. There was much less rust through the metal than I cut, but at least the rear valence covers this area :-/
http://i256.photobucket.com/albums/hh187/jbaker1121/300zx%20Project/IMG_6624_zps632b1bde.jpg

http://i256.photobucket.com/albums/hh187/jbaker1121/300zx%20Project/IMG_6628_zps81039b78.jpg
http://i256.photobucket.com/albums/hh187/jbaker1121/300zx%20Project/IMG_6629_zps4857e5a6.jpg
http://i256.photobucket.com/albums/hh187/jbaker1121/300zx%20Project/IMG_6637_zps1daf0169.jpg

kouki bumper:
http://i256.photobucket.com/albums/hh187/jbaker1121/300zx%20Project/IMG_6638_zps975c5c69.jpg

PERFORMANCE PLANS
As far as plans for the car, popular upgrades are Holset HX35 turbos “relocated” to a top mount location for cooling / awesomeness. However, that’s another ~300 in piping (ss) then the downpipe needs to be altered, another ~$300. For now, I just want to get her running, so it may be best to use the factory turbo in the factory location and turn the boost up a bit with a manual boost controller. I have an intercooler for it (plus the oil cooler!) , so this should be good for ~9-13 safe psi now until I have the money to throw at aftermarket goodies. Plus the stock ECU map doesn’t really handle boosting over 13psi, - the car will run too lean. This should set me at approx. 275hp at the wheels with an open downpipe.

The goal now is to do maintenance, drop the motor in, and get it running. The car needs to be running for the aftermarket goodies to do anything, anyway.

So, this is where the project stands. Tearing down the motor, waiting for parts to arrive, but still trying to hurry this along to get it running very soon.
Unfortunately, this week is a little busy at school so I’ll probably only get 1 day in besides the weekend. This gives all the parts time to arrive, however.

Wow, terrific progress…

I love the mesh/deep dish wheel combo on this! Looking good so far.

Thanks! Trying to move it along since Finals are coming up in a month so after this weekend I prop won’t work on it that much for the next few weeks… Honestly hope to have it running by next week.

Yeah I’m feeling the old school look.

A bunch of stuff showed up today (gaskets, seals etc) so tomorrow I’d like to get the motor apart and gaskets seals replaced AND get at least 1 coat of dip on the car because I have to move it down the street to Donovan’s for the motor mounts to get repaired

I definitely did not see this on Campbell the other day!

No you didn’t, it must have been the other local guy with a 50th AE. Mine is sitting in the shop without the motor or trans in, lol.

:ham: Humph

hopefully it’ll be on the road soon though

http://buffalo.craigslist.org/cto/4443434845.html

That was short lived.

Lame.

THIS WAS THREE DAYS AGO!!!

I put it up to see if I got any offers. Partially because of a “bet” that I wouldn’t. I did. I am going home for the summer in a week, so if I got my asking (didn’t actually expect to) I would drop the project and pick up something else.
the car isn’t going anywhere.

Yes, and the car HAS BEEN SITTING IN MY GARAGE FOR MONTHS SO IT WAS NOT ME. lol

Fair. I just like to see projects finished, and this one has promise for more than 1 reason. A) It’s rad. B) I’ve never met you but you seem like you have your shit together.

Finish it man!

I have finals this week but am sticking around for a little bit to try and get the Z running. I really don’t want to pay monthly to have the car sit in the shop where I can’t work on it, but I don’t have a hitch to tow it 6 hours home either. I want to try and get it running, and possibly in driving shape just to get it down home for the summer where I can tinker with it.

update: been home for the summer (outside NYC) and working full-time in manhattan. Haven’t had time to arrange to get the car down here to wrench on, nor would I really have the time to work on it if it were down here. I likely won’t even see it til august when I go back to Buffalo for my last year of school. May fly up for a long weekend to try and get it running, if I can find a cheap flight (and a free weekend)

stay tuned

so, getting close to having her running again.

This past weekend we got the new wiring harness in, engine back together and were ready to bolt it to the transmission + drop her in, but realized (after a deep clean) that the flywheel I had bought second hand was toast. hairline fractures, scorch marks, etc. not resurface able, and likely not safe. So, I’ve been trying to find a replacement. OEM flywheels new from Nissan cost $269…but for $340 I can get a fidanza aftermarket 11lb flywheel, so I think it’s worth the extra few bucks to go aftermarket.
My pressure plate was just as bad, so I’ve decided to get the AMS clutch kit for a new one (although the exedy clutch I have is actually fine/ pretty new)

I also need new plugs and wires. So, there’s another $500 i reluctantly need to spend just to get the motor and tranny ready to go in…

Besides that, the z31 bolt guide I found on xenon gives the wrong size for the bell housing bolts - it says m10 x 20 while I think I need closer to m10 x 90mm to bolt the bell housing to the motor block. So, I need to verify the size and get that bolted onto the motor.

After this is done, Should be a straightforward drop-in. driveshaft is already on car. However, I am still missing a few random things here and there that weren’t in my shell nor came with the motor when I got them.

I have an intercooler, so it’s okay that I am missing the entire stock intake system because I have the FMIC anyway.

Another issue that came up (although this could be caused by not having everything plugged back in) was when we got the new harness in and connected the battery, the fuel pump did not turn on at all. (also, the digi dash did not light up besides security lights and a few others…no green)

so, looks like there are a few hurdles to jump over before the car will be running, but we hope to get it at least running this weekend after parts come in by friday.

This will decimate all, after I … overnight parts from Japan.

update: found a new OEM flywheel for $90, and ordered all the tranny bolts I need… we’re in business.

And on the 8th day, the lord created the Z.