hey mike… hope all is well. If you still have the passenger side K mount bracket can I have it?
yea, I’ll make sure not to toss it. I may have to move back up to CP for the summer if I don’t get cleared by the docs on Sunday.
damn man good luck
Good luck, either way, sir!
Well, its official. I’ll be headed back to NY a bit earlier than expected. I’ll have July to prep the car so it can sit on the trailer.
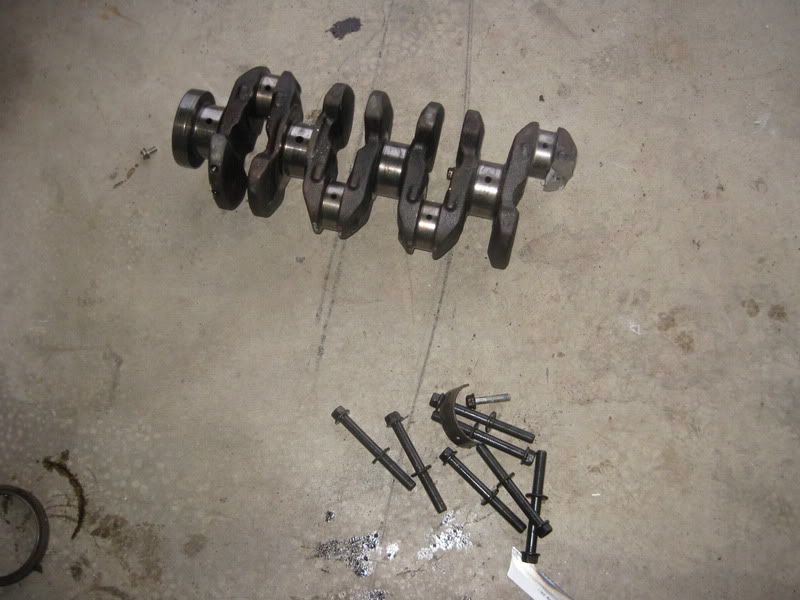
Well, I’ve started putting the car back together so I can move it up to CP at the end of the month. One thing I decided to do before that was to lighten up my mockup motor even more. I needed the end of the crank for the pully mount so a did this, lol:
Also put together my to do list so I can try to get as much done as possible when I’m hanging around August.
Rear Firewall
-Cutout Pass. Side panel
-Weld pass. side panel to chassis
-Create top panel template
-Check Clearances
-Fabricate top panel from aluminum
-install dzus fasteners
Radiator support:
-plasma cut mounting brackets
-fabricate tubular support structure
Front firewall
-Create templates from cardboard
Engine mounts
-Get rear mount plasma cut from sheet
-evaluate/modify side mount design
-fabricate side mounts
-weld mounts to chassis
-mount motor
Fuel Cell
-Design fuel cell mounting brackets
-order bracket material
-fabricate brackets
Suspension setup:
-See jpg
-redesign bell cranks
-machine bell cranks
-modify push rods
-modify shocks
-weld bracket to LCAs
-order spacers
-Weld bellcrank mounts
-fabricate shock mount
-weld shock mount brackets to strut bar
Axles
-order half shaft
-check axle stub clearance
-Measure axle length
-Order axles
Plumbing
Wiring harness
-make list of all connectors/sensors
-make string mockup
-make materials list, assess cost
-order materials
Shifter Cables
-Order shifter mechanisms
-Measure Cable length
-Find custom cable supplier/order cables
Coolant
-fabricate radiator mounts
-design coolant pump block off plate
-purchase coolant pump
-fabricate aluminum tubing for coolant lines
-run coolant lines/hoses
Oil
-select oil cooler location
-measure/fabricate/run oil lines
Cosmetic
Hood:
-finish fiberglassing damaged areas
-Sand and finish edges
-Vinyl
Sideskirts
-Trim for wheel clearance
-Fiberglass end cap over cuts
-cut holes for fender removal
-instal quick release mounts
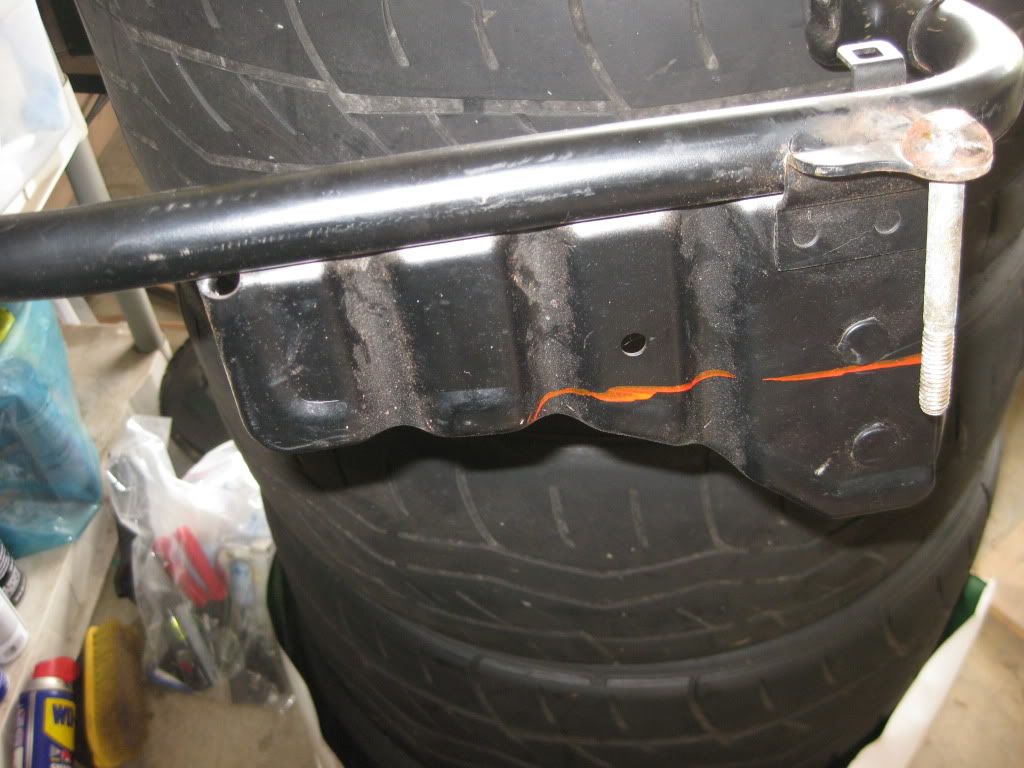
Rear bumper support
-check price for replacement 71540-SR2-000 ~$75
the suspension work:
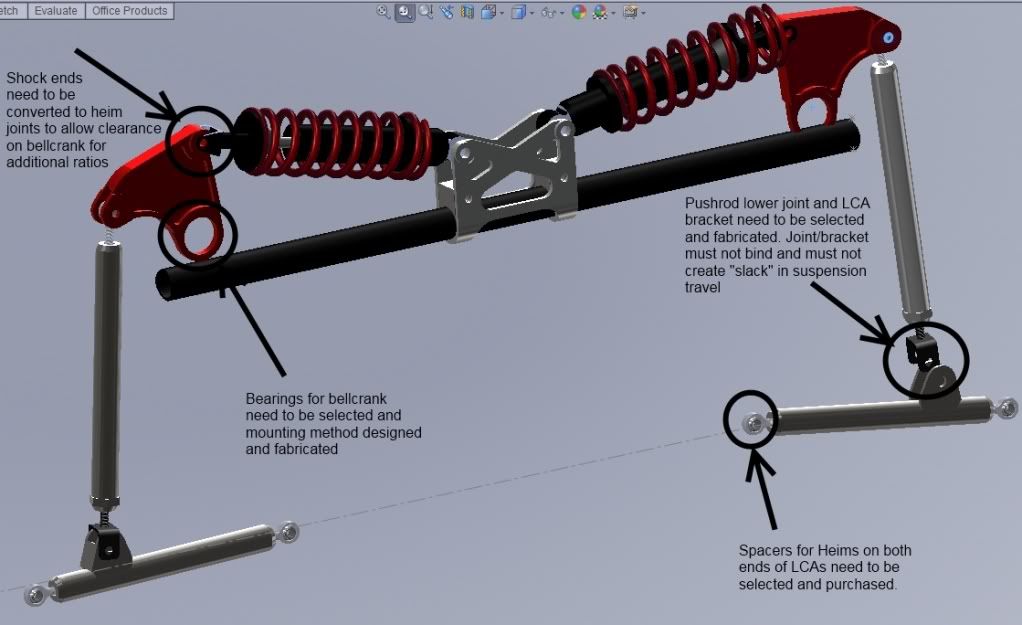
I have a source for the bellcrank bearings with built in thrusts.
can you send me info on the ones you can get so I can work them into the design of the bellcranks
You wand Nedella Combination needle bearings with built in thrust bearings.
http://www.nadella.us/pdf/WL2008E_Needle_Bearings.pdf
starts at page #112
Adam, the ones I ended up narrowing in on were ID of 10mm OD of only 18mm. Most of the FSAE bell cranks i’ve seen appear to have much thicker bearings in them. Was I looking at the wrong thing or does it not matter?
Some new things;
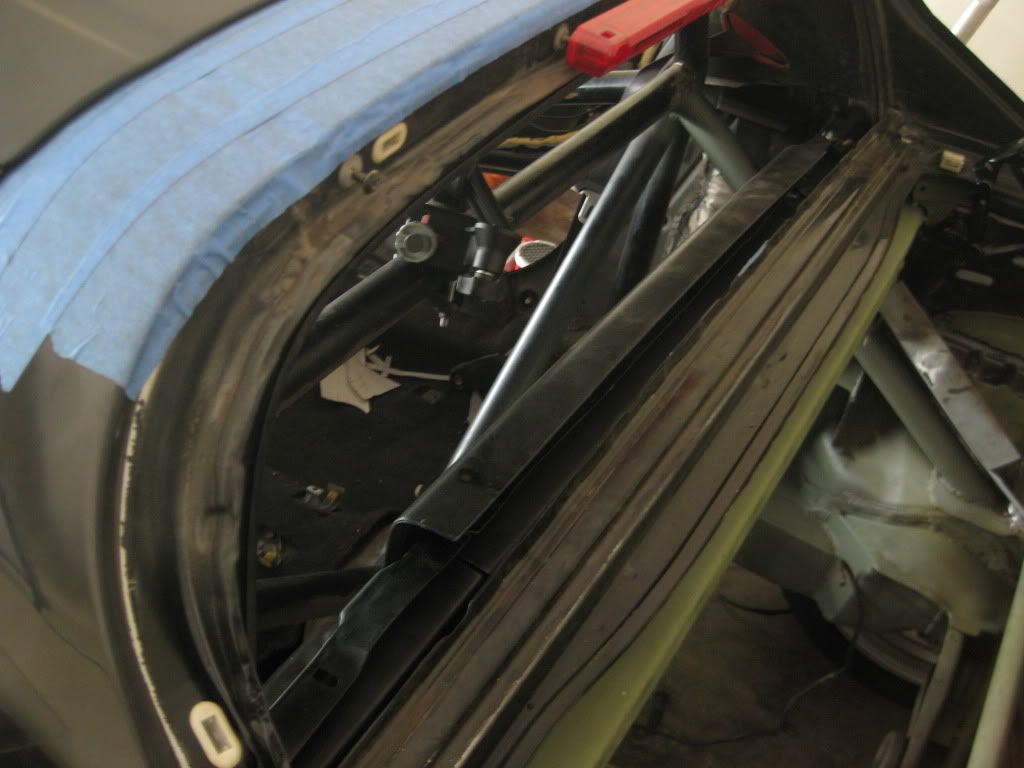
As I reassemble the car in preparation to move it again I was looking at the rear panel which I had intended on reinstalling in order to allow me to reinstall the stock interior with the exception of the rear boxes. Should be a real sleeper look. The issue I ran into is that I can’t install it with the cage in place from the top. The old one had cut outs at the top corners for the rear bars allowing it to be installed from the bottom. My solution is to locate a second panel and create an overlapping center piece that would be bolted into place. The factory stamping should allow it to align easily and keep its strength.

I’m also considering a redesign of the engine mounts. I am beginning to feel like my tube/gusseted plate design is a bit more complex than it needs to be. I came across some inspiration and might redesign to look a bit more like these:


The rear firewall will be finished with heat shielding on the interior and carpet on the exterior but for some reason I’m looking for an excuse to bead roll it like this:

Kind of makes me wish I bead rolled the end plates before I welded them in and made them out of thinner sheet.
oh, and I put a couple teasers of the build on honda-tech without giving it all away. Give me some votes, start putting the build up there, or keep it quiet and local?
Well do you need a self esteem boost? If so put it on HT and let the nutswinging begin! :rofl
I’ve had it down here for 6 months and all I’ve done is caused a rust free car to rust, cleaned off the rust with chemicals that made it rust more, then cleaned the rust off every other week as I left for and came back from training.  maybe I do need a self esteem boost. lol
Edit: btw, I finally defeated the rust. No chemicals, these little things are amazingly efficient at getting rid of rust: http://www.amazon.com/Scotch_Brite-Surface-Conditioning-Medium_Maroon-25_Pack/dp/B000XHMAJ4/ref=sr_1_16?s=automotive&ie=UTF8&qid=1310431231&sr=1-16
gave me a great excuse to buy an angle die grinder too.
Needle bearings require the use of hardened inner/outer races to ride in, which typically are not included with a standard needle bearing. If you use a caged needle bearing, the outer race or case is part of the bearing and is pressed in as a unit. You’d then either run it on a hardened pivot/shaft, or have a hardened sleeve pressed over the pivot/shaft.
These inner/outer races can make a bearing appear bigger than it actually is.
The Nedellas’ incorporate a thrust bearing into the roller setup to take up the thrust load associated with bell cranks not mounted in perfect plane with the pushrod. If the setup you’re working with has the rockers in plane, the needle thrusts are not required but still make a huge difference in suspension movement under sever load. Cheaper setups use shims and/or machined surfaces to take up rocker slack which is fine for awhile, but they wear and gain slop which leads to sever bind and choppy suspension.
So I was looking at the RAX 400,
-needle thrust bearing,
-thick outer ring
-without retained thrust plate
Another one, raxpx400 has the option of a retained thrust plate.
Would this be recommenced? I don’t know anything about these bearings and have just been reading through that pdf for the options, pros, and cons of each.
I looked through this thread and I’m very impressed. Thing should be crazy when finished
400 series can be use but are way overkill. the 700 series is more suited for this application. I’ve doubled up RAX730’s in my rockers.
ah, ok. Back to my print out…
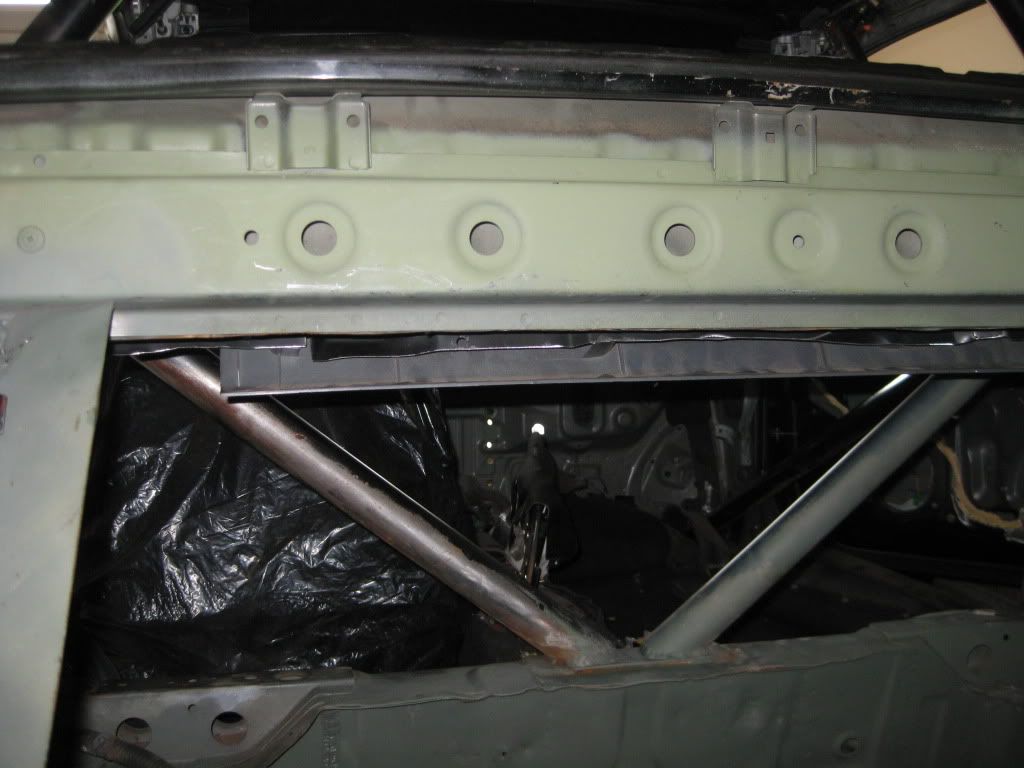
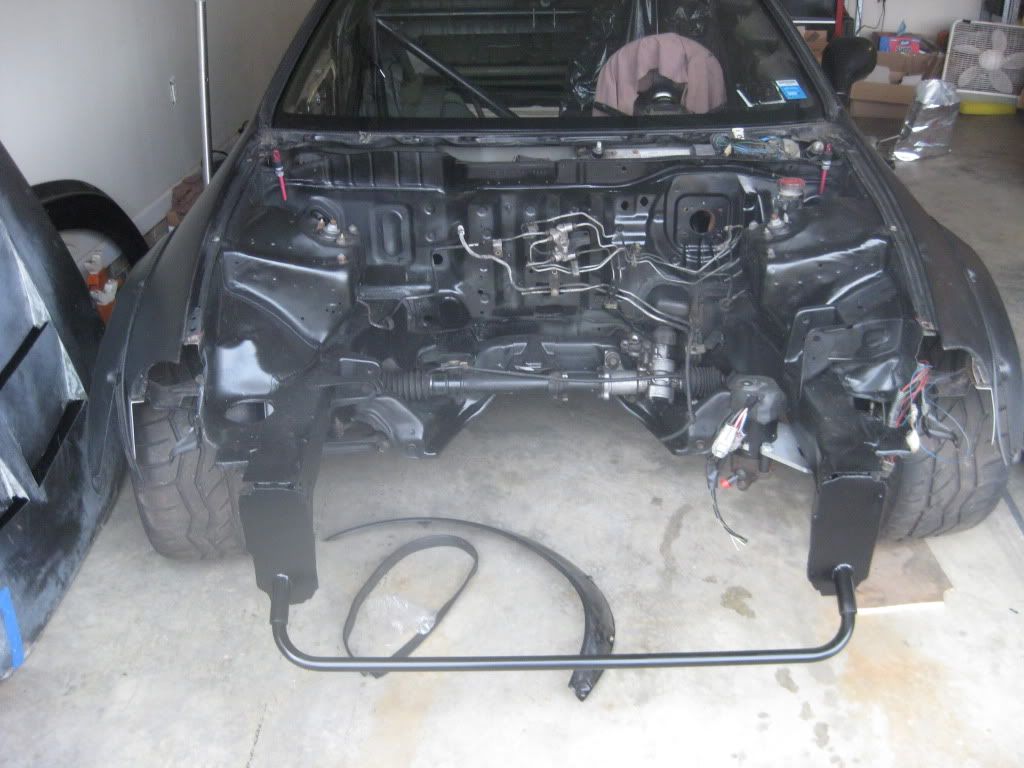
Got her back on the ground and cleaned up for the trip back north:

damn finger print or something on the camera lens, but her is a shot of the front bar painted. I still have more to do sanding and cleaning up the welds then drilling the mounts for a pin, but I wanted to paint it after I cleaned off all the rust so I won’t have to do it all over again.
Did a little more work reassembling the car for the trip back,
trunk mounts fit perfectly with just the bottom corner ground off
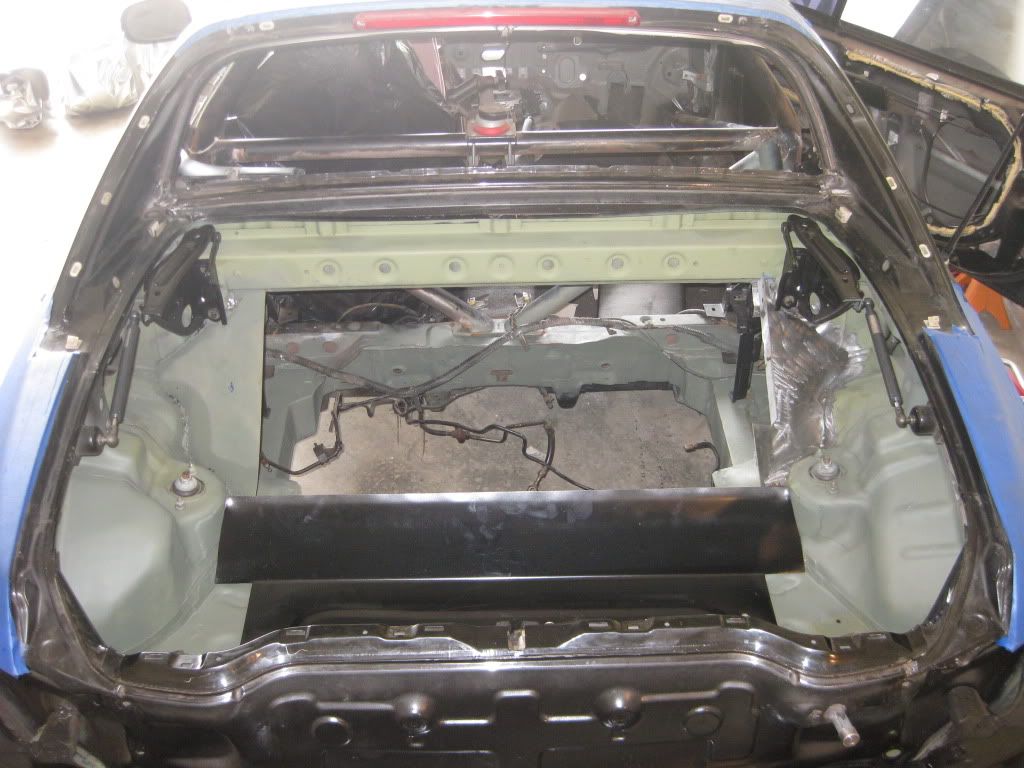
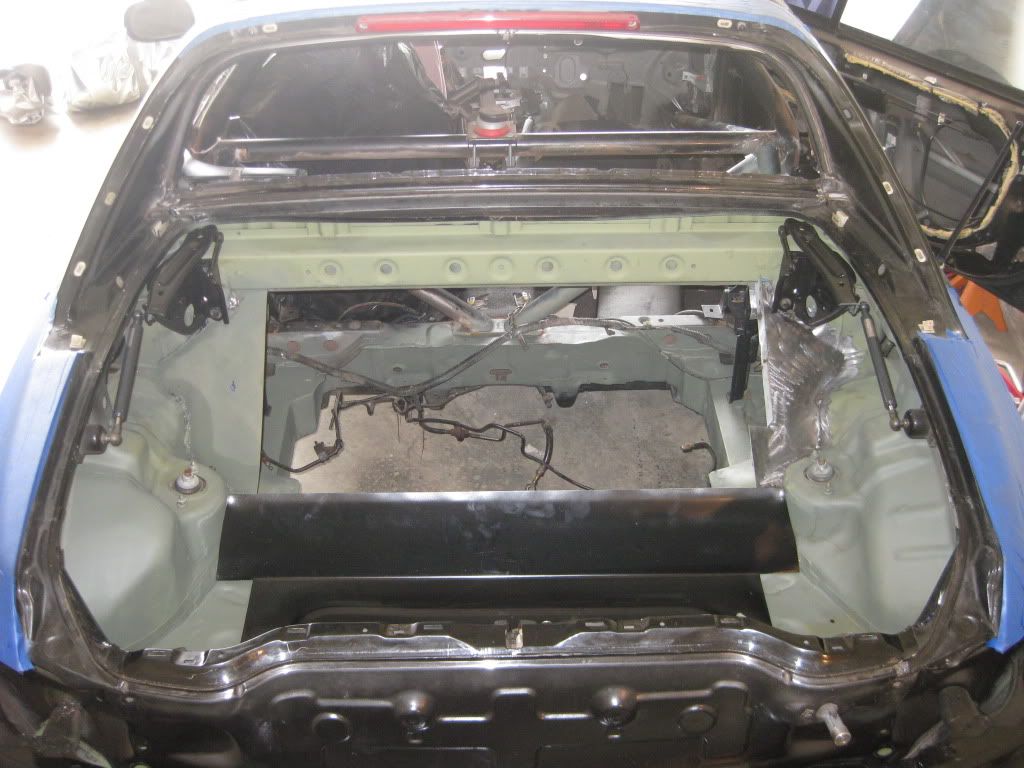
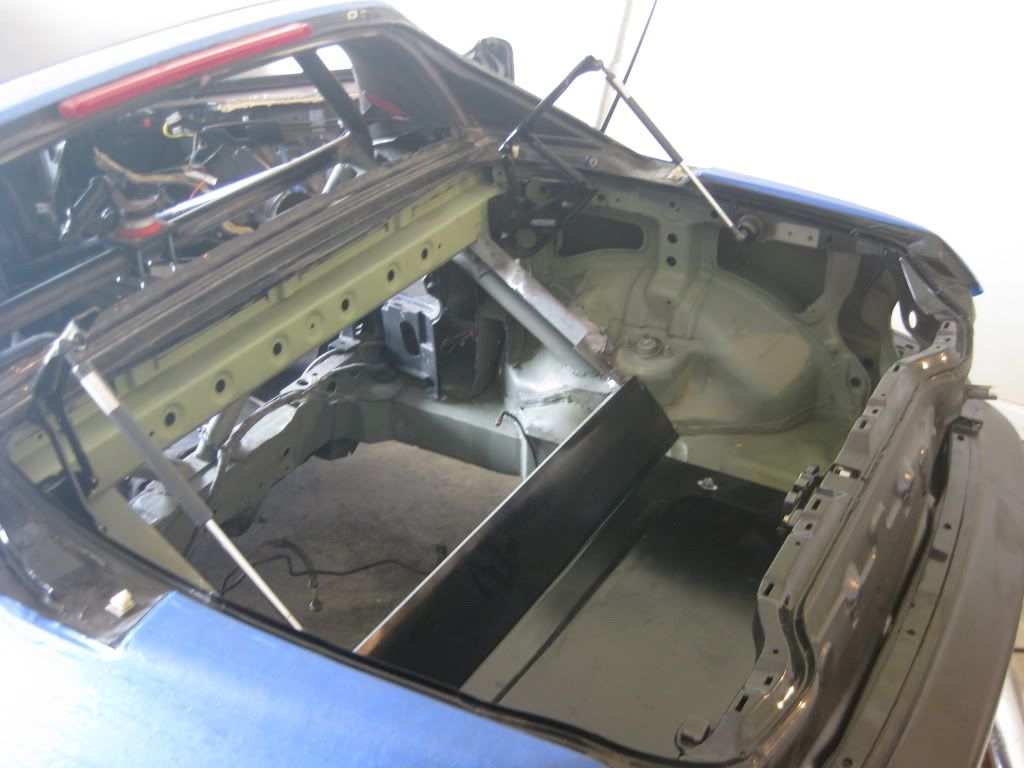
Also cut up my back panel and used my old cut up interior to see if I’ll be able to keep some of the pieces I’ve been thinking I could
Looks like I still won’t be able to have rear speakers, but at least the cover can be installed to keep the interior appearing stock

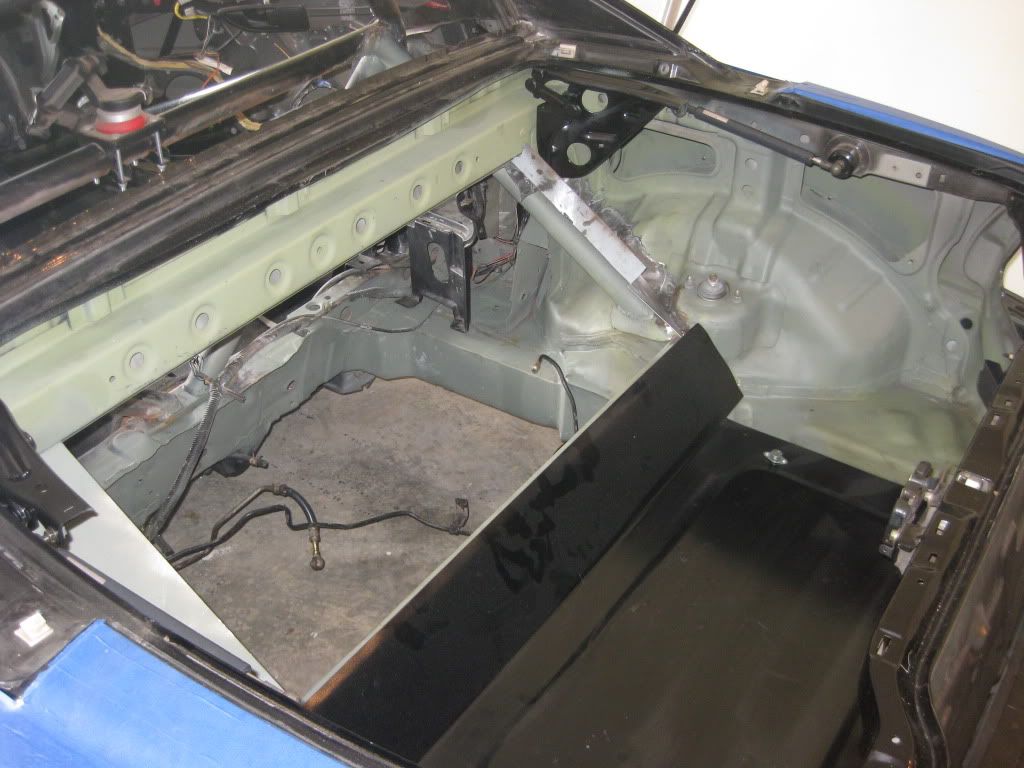
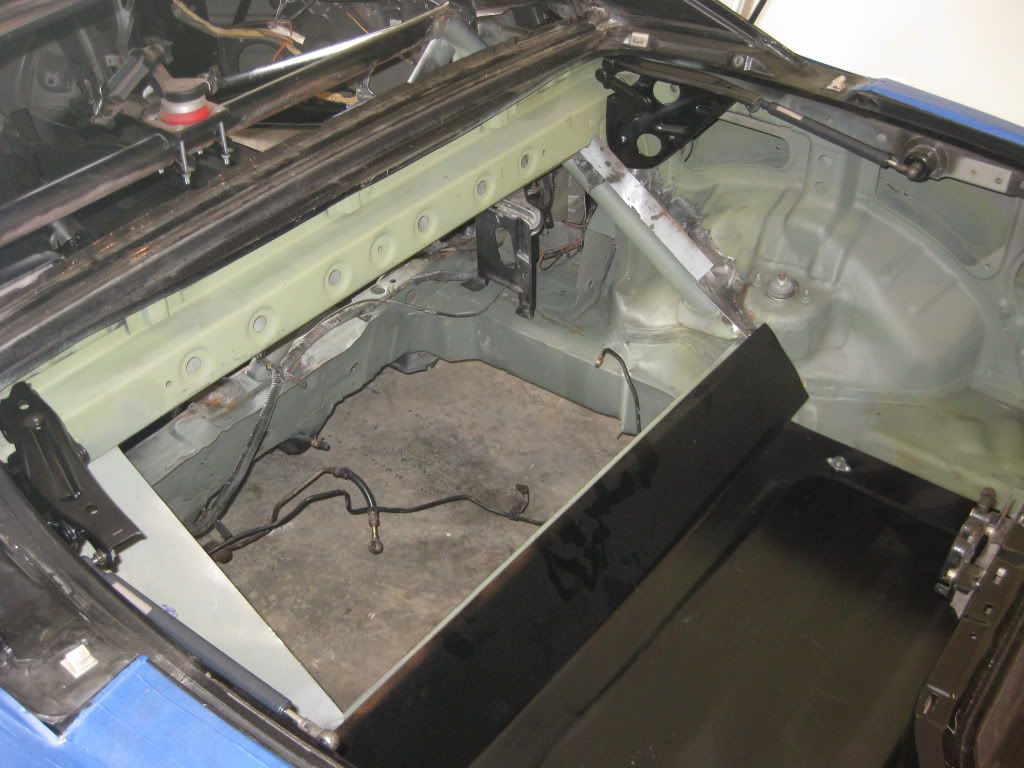
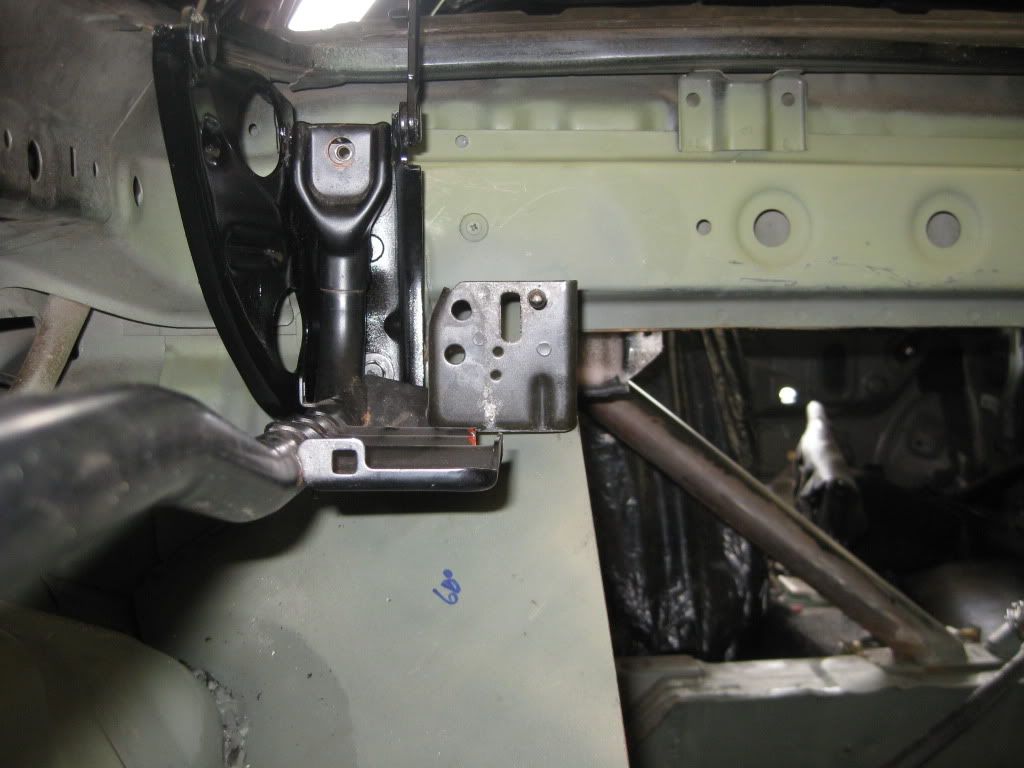
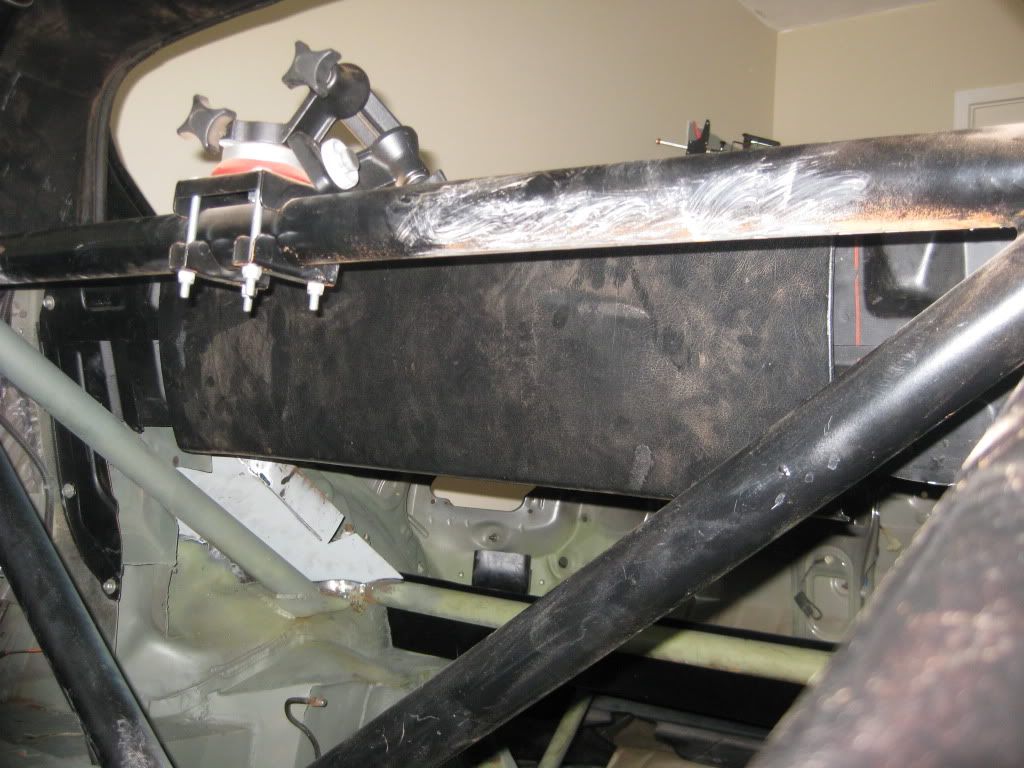
Side view of it all. I’m trying to figure out how I’m going to have the “front” fire wall clear the engine and blend with everything in the interior
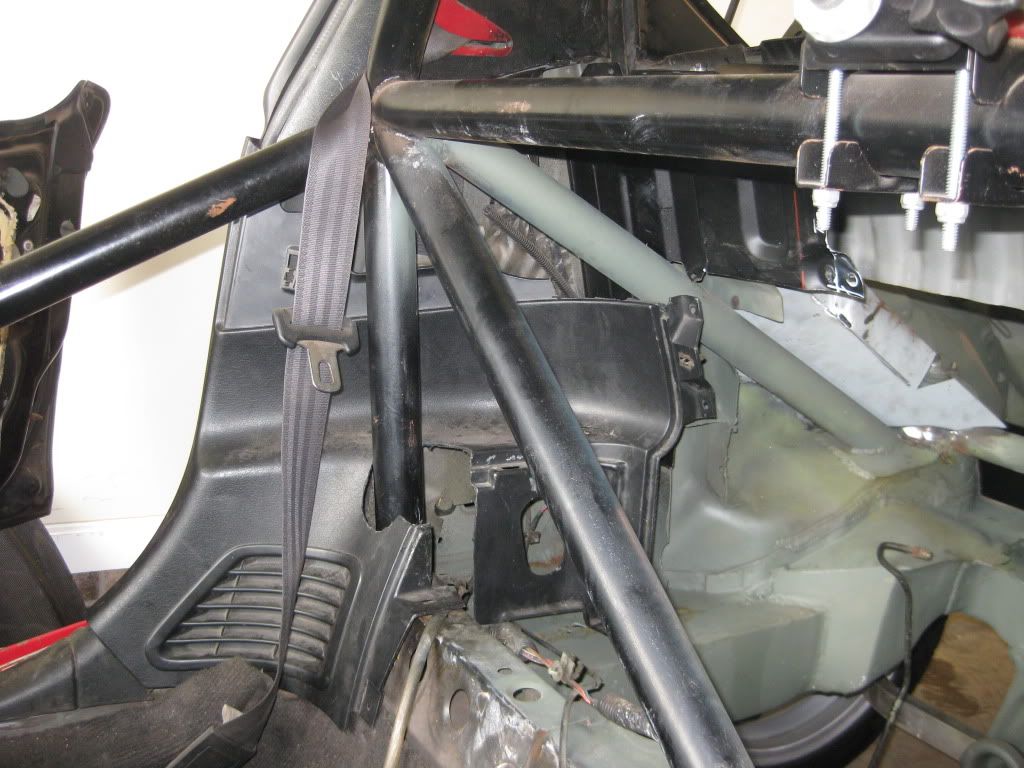
The targa holder was a bit trickier than I thought it would be. I lacked clearance on my firewall (to be) and had to trim the holder.
This allowed me to install it without the plastic and pegs that hold the targa in place, however, after a test fit I’m not sure I’ll be able to get the pegs to fit. This might require some creative ideas.

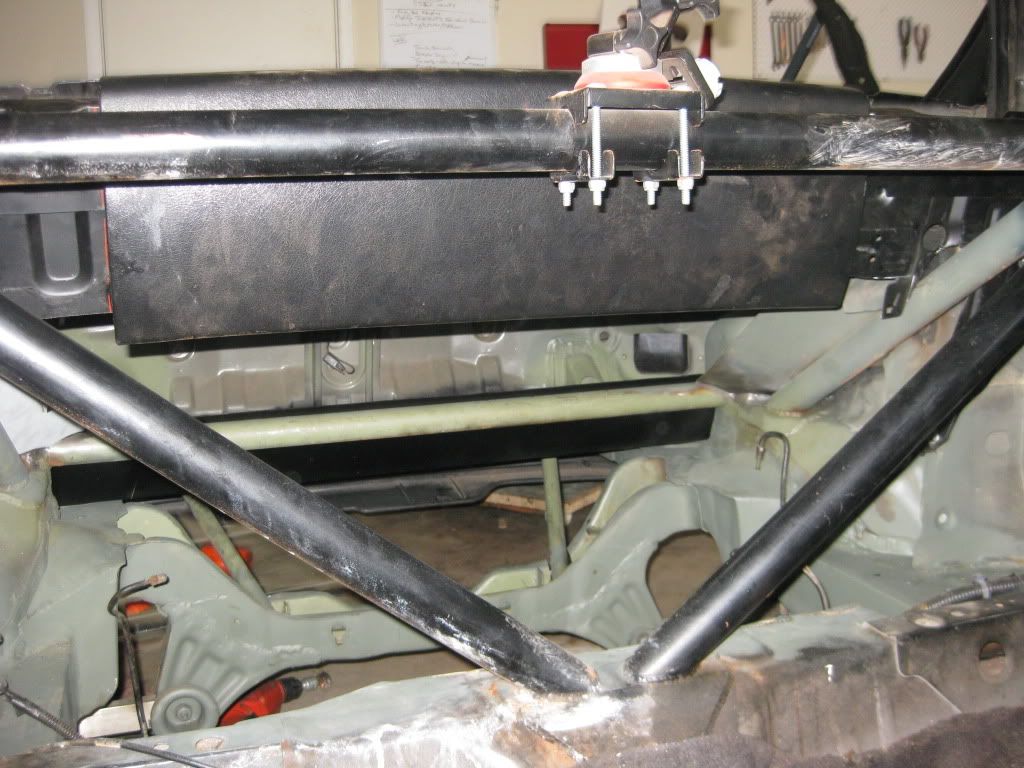
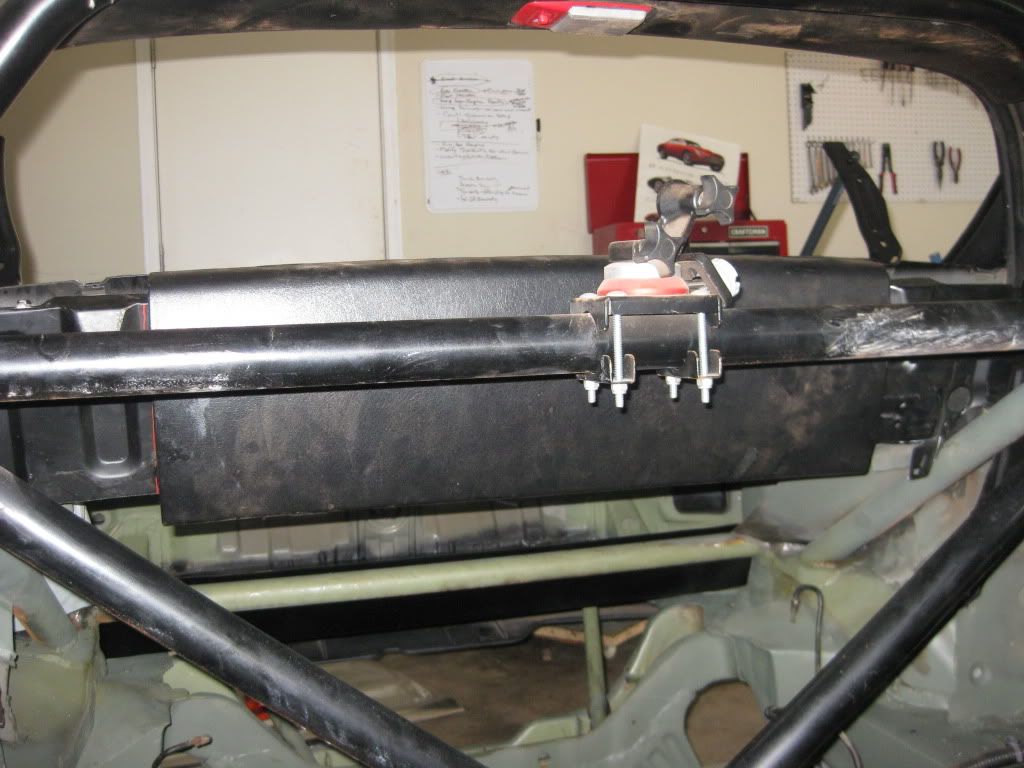
Here you can see the bolt on bracket that has a peg on the top right. That peg locates the targa in place. By my estimates, if I get that peg above the bulkhead then I will clear the firewall. Obviously the area under the peg will need to be trimmed off.
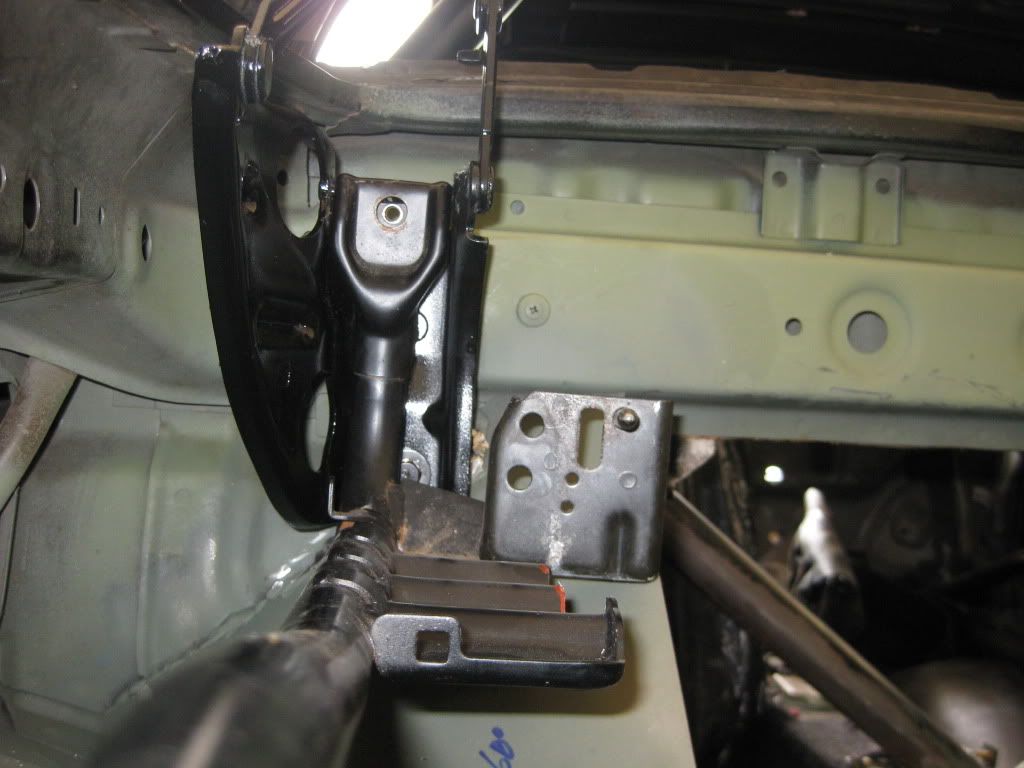
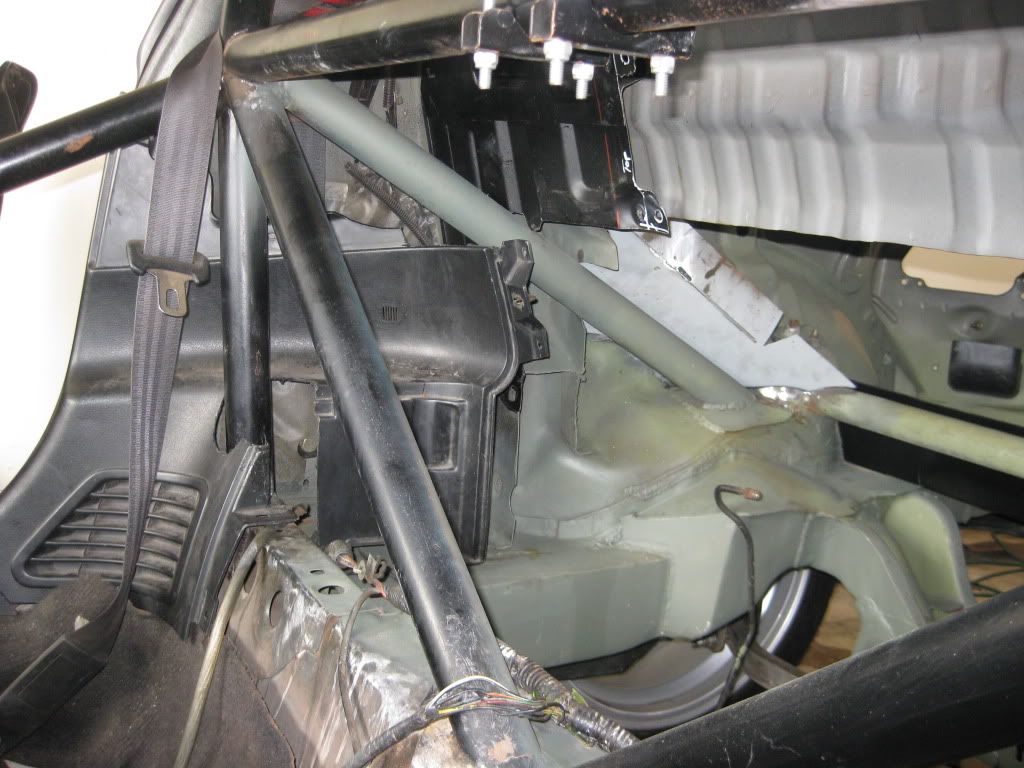
Here it is with a couple washers under it. I think just 1/4" would be sufficient.
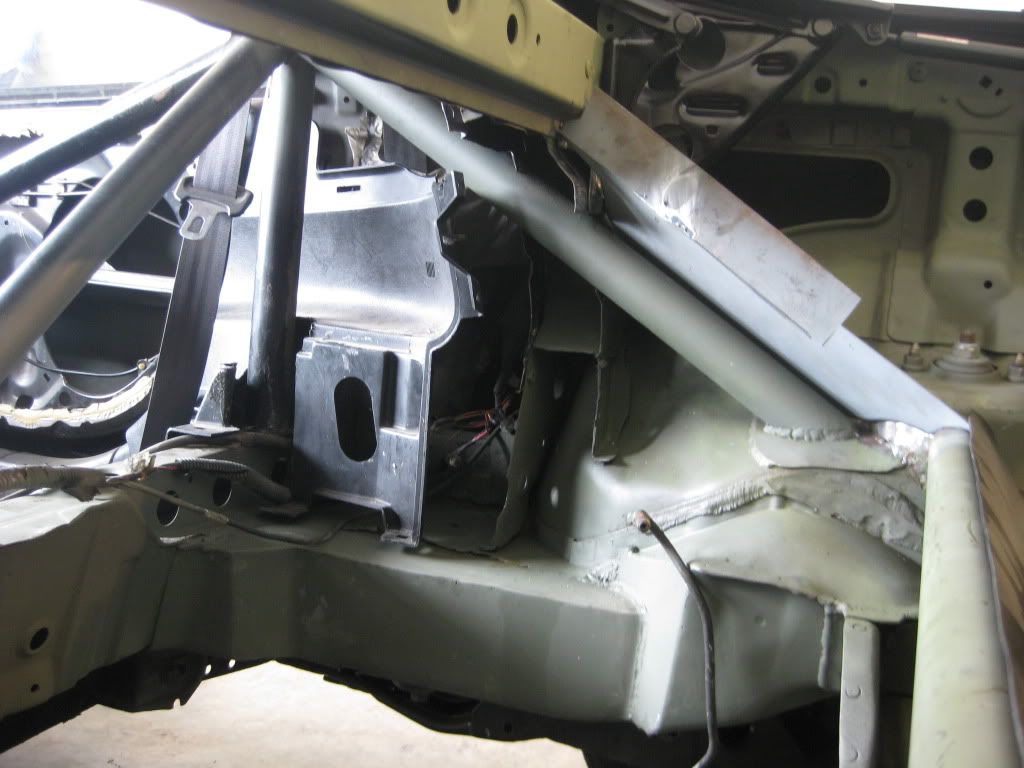
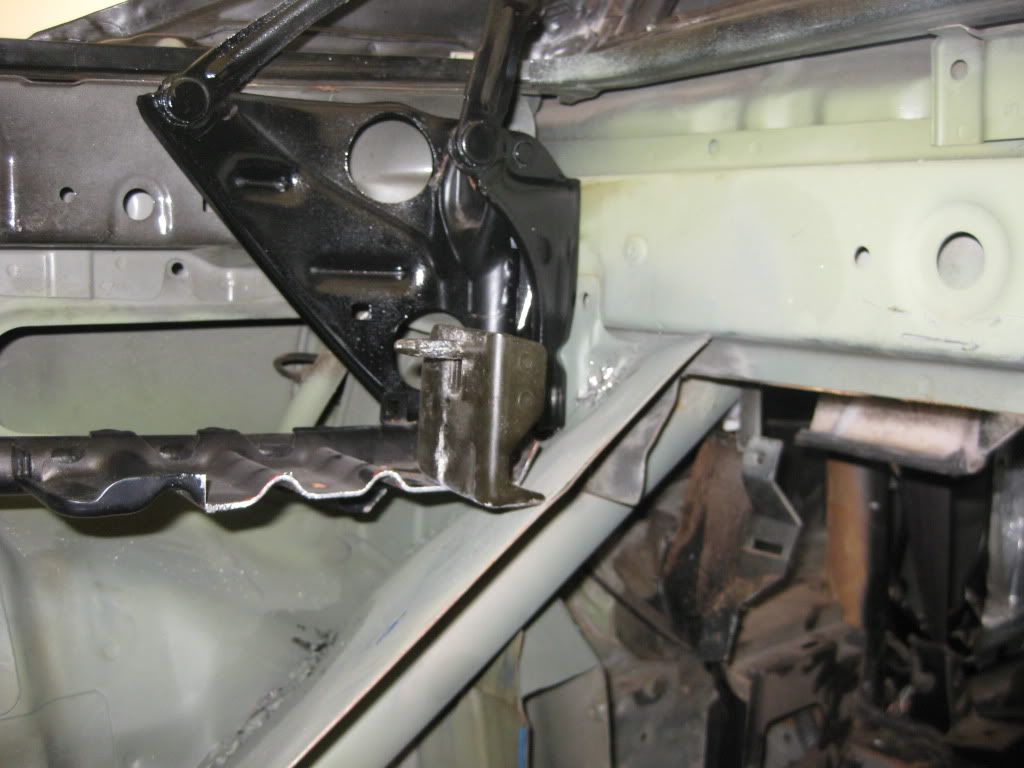
For the rear window panel, I don’t have a second piece to overlap and bolt together for strength but I used the interior panel to hold it in place.
It looks like I will be able to install this panel even with the firewall. I probably will have to trim the bottom edge of it by an inch or two.