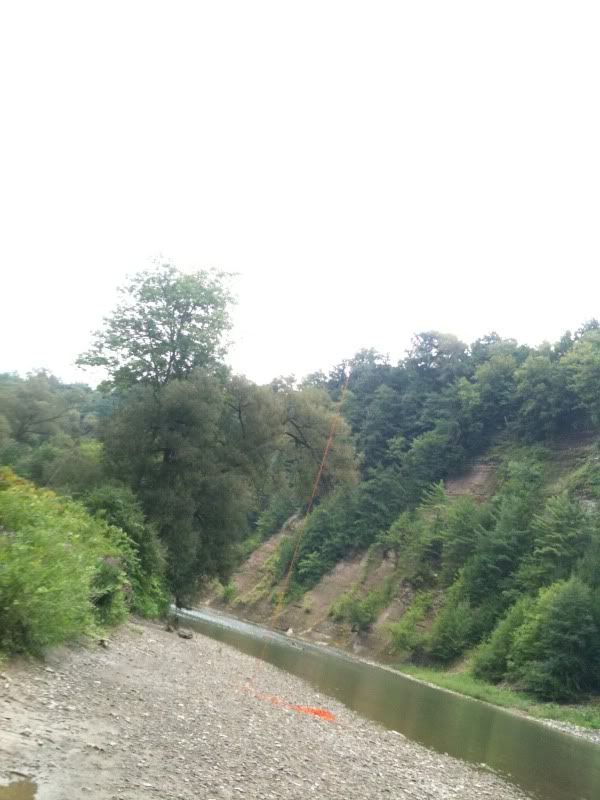
The gnarlier of the 2 rappels I did yesterday wasn’t as well documented, so I only have a few pictures… more may surface.
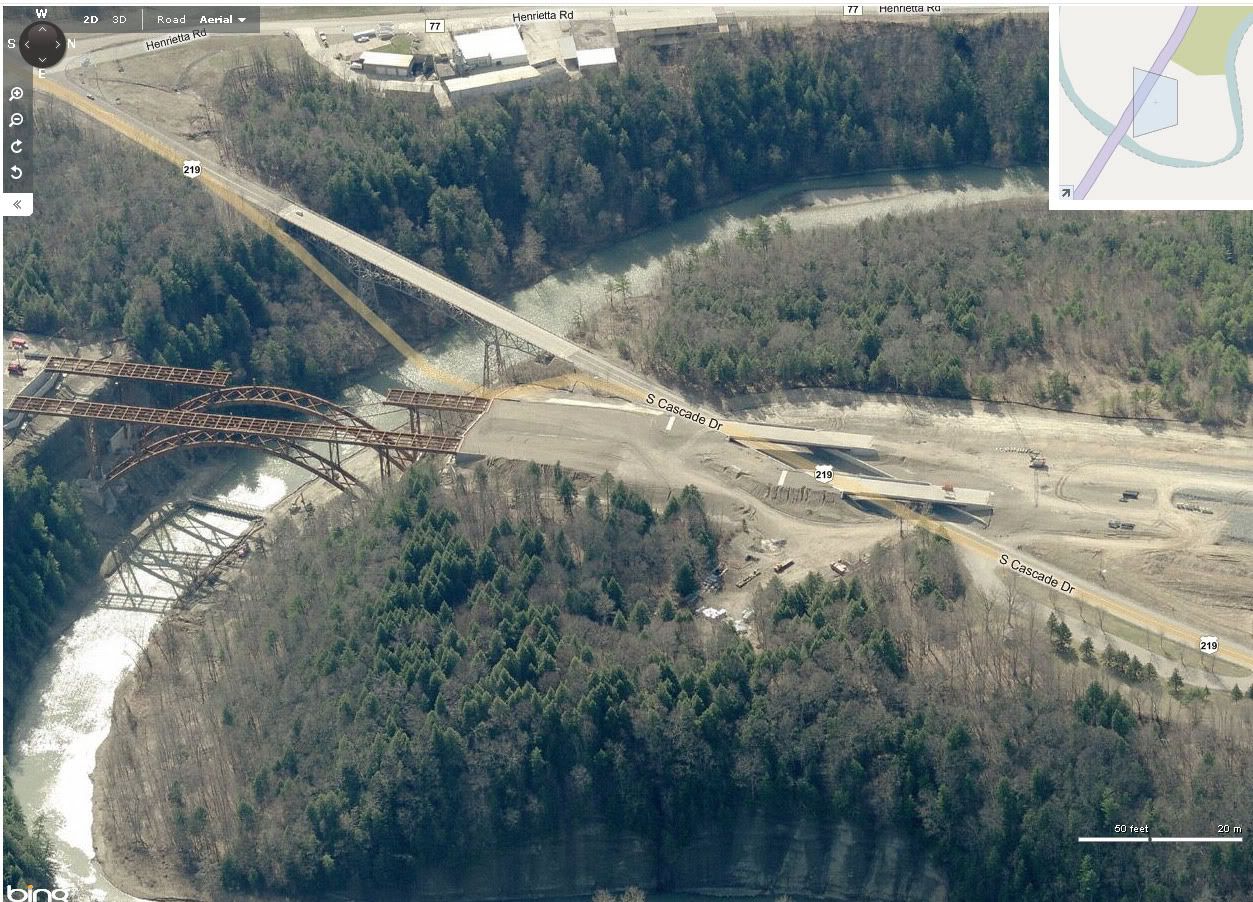
I did the new 219 bridge in Springville.
If you’ve ever driven over the old 219 bridge, you realize that it’s really high. Well, the new one is about 50 feet HIGHER than that.
Fortunately the new bridge isn’t in use yet and you can’t see onto the deck of the bridge from anywhere on the road. Perfect.
The bing maps view is a little out of date, but it gives you an idea of what’s up…
The initial plan was to use my car as an anchor, but once we walked up there I found a suitable anchor (a bolted down grate for a storm drain). Also, there was NO way I was getting a car up there… maybe a truck.
Anyway, I only have two 200 foot pieces of rope. You can buy longer lengths, but I’m not ready to drop 600 bucks on a spool of static line. sooo…
I decide to tie my ropes together. This presents a problem, because the knot that the ropes are joined with will obviously not pass through the rappel device, so you have to “jump” the knot midway down. (more on this)
The drop actually wasn’t as far as I thought. I figured it’d be about 300 feet, but it was actually more like 250… But still the longest rappel I’ve done to date… and now I’m confident I can do a drop closer to 400 feet.
hanging this high off the ground is a really insane feeling… however, each time I become less and less scared… I don’t know if that’s a good thing or a bad thing. I don’t ever want to get careless…
Anyway, here are the pics that I snapped on my phone… I wish I had more…


Since I like doing write-ups on stuff, I snapped a few pics to describe the technique to “jump” the knot.
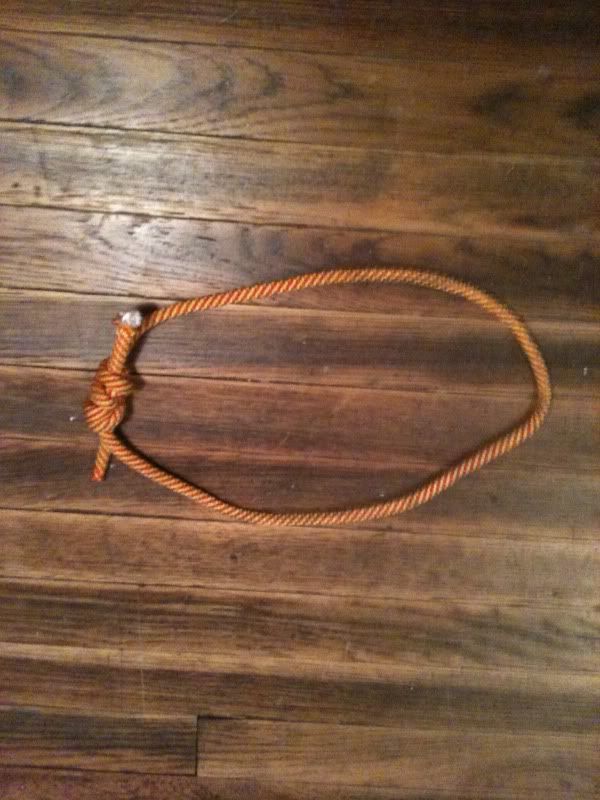
Before you do anything, you need to make a prussik loop and a radium load release hitch.
A prussik loop is just a length of load rated cord, no larger than 7mm tied in a loop, using 2 double fisherman’s knots.
A radium hitch is created by using a clove hitch to tie a 48" sling to a locking caribiner. A second is clipped onto the bottom:
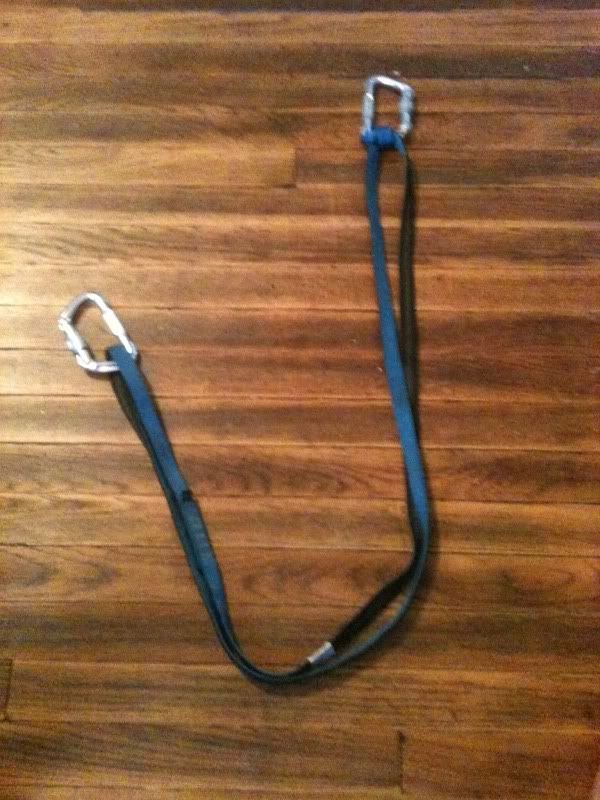
You then loop the sling around itself, effectively creating a 4:1 mechanical advantage for the free end (minus friction), then secure it to itself with 2 overhand knots.

Clip these 2 items to your harness and begin.
First: Tie the two ropes together with a threaded figure 8, then back up each rope with a double overhand stopper knot

Second: Rappel down to about 8" from the top of the knot
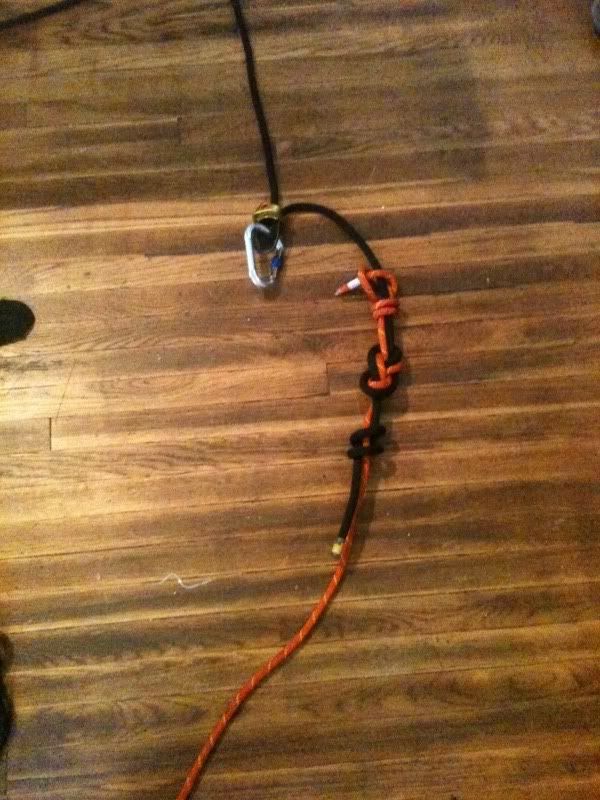
Third: using the prussik loop, tie a prussik knot to the upper rope (above your rappel device). The prussik knot is basically a sliding/locking knot. If the free end is loaded, it will not move, if it’s unladed it slides freely on the rope. You can also use a “shunt” for this, but they are about 60 bucks and the prussik works great.

Fourth: attach the top of radium hitch to the free end of the prussik and the bottom of the radium hitch to your harness. At this point, all your load is still carried by the rappel device.

Fifth: release tension on the brake line, allowing all your weight to load the prussik/radium hitch. Your weight is now totally supported by the prussik/radium hitch and the rappel device is loose (though still attached in case of a prussik failure)

Sixth: Since you’re going to have to shortly unclip the rappel device from the line, it’s not a good idea to 100% rely on some 7mm cord to hold you. If it happened to give out while you were changing it from the upper rope to the lower, you would fall to the ground. In order to avoid that, pull up about 8 feet of the brake rope from beneath you and tie a figure 8 on a bight. Using a caribiner, attach this to your harness. In the even of a fall, this safety line would catch you (though you’d probably now be stuck)

Seventh: now that you’re hanging off the radium hitch and securely backed up, unclip the rappel device from the upper line and move it to the lower one.

Eighth: Since you’re now back “on rappel” you can remove your safety and untie the figure 8. Once this is disconnected, untie the radium and lower yourself down. This is probably the hardest part of the operation because you need to hold the brake with one hand while you release the hitch with the other. Eventually, the radium hitch will unload and your entire weight will finally be back on the rappel device, but now below the knot!

Now, simply remove the radium and prussik from your harness and from the line, stow them and rappel down the remaining portion of the rope.

All said and done, it takes about 2 minutes to complete this, though I recommend practicing on a low wall, as it’s very easy to get “stuck” by letting the knot come too close to the rappel device or by not mounting the radium hitch high enough on the upper line. I brought along some extra gear to make some footloops and prussiks in case I needed to free myself.
So there you have it. Go rappel off some stuff…!!!