Miter for sho, for anything that requires precision.
Did you tape the ends up where you made cut(s)?
well i didn’t use Pergo, but no. The ends will all be covered up by your baseboard molding anyway.
Unless his room is longer than his wood…
Unless I am brain-farting, you would lay down as many pieces as you can (uncut, straight from the box) until you get near the wall, at which point you choose a piece of flooring that needs to be cut. Plan it out so that your last board isn’t just a tiny little piece, but a nice 1-2ft board. Then use a 3-4ft board, cut down as your last piece of the row. You make the cut, then you take the excess piece of flooring and bring it to the other side of the room to start the next row. That way you end against the wall in the previous row with a significant board, and start the new row on the other side of the room with another decent board. That way you never have a cut piece in the middle of your floor, always against the wall. You also cut down on waste by using your scraps to start the next row.
Actually, IIRC you cannot use a cut piece in the middle, because you need the tongue/groove on the ends to line up and fit into each other. So cut pieces are always against a wall.
I’ll give some more tips.
First, decide which way you want the boards to run. With traditional hardwoods you want to go perpendicular to your floor joists. This is for strength purposes. Sort of ties things together. You don’t have to do it this way, but you probably should.
Then decide which side you’re going to start on. This is important because you want things the flooring to flow nicely from room to hallway to room. Start on one far side or another. Don’t start on a hallway that is in the middle of the house. Start one far side, then progress to the other far side. This will ensure that the floor flows nicely.
Lay down a STRAIGHT chalk line for the first set of flooring boards. Don’t trust your wall to be flat, because it probably isn’t.
Leave an expansion gap between the flooring and wall. 1/2" or so should be enough. Heat and cold will cause the floor to expand and contract no matter how many nails you put in. The first time I took a long weekend in the summer and left the house with the a/c off we came home and then entire floor was crackling under our feet because it had expanded and not settled back in. No harm, but it proves that the floors do need some space to expand.
:tup: Thanks!!!
iirc pergo flooring you want a pattern. hardwood you don’t (well i know hardwood you don’t because the pieces are different lol.) usually it’s like 6/12/18/24/36/42/48
Pergo or similar flooring the only rule in regards to pattern is that you don’t want 2 joints to be any closer than 12" from each other, 18"-24" is better.
I don’t get what you’re saying. it’s a cut on the end as a starter and then full pieces the rest of the way. Why would there be 2 cuts that close to each other? and if you’re talking about in the next row you can’t have that joint closer than 18-24" , you’re going to have an extreme amount of waste. And it’s going to look like shit because you’re only going to have 1 cut then a full piece then 1 cut then a full piece each starting row.
If a joint closer than 24inches is going to fall apart, then why wouldn’t the piece next to it fall apart? it all locks in. don’t worry about it.
You also do not want a joint to end within a door way.
You’re not going to have an extreme amount of waste deebo, you use each side.
Say your last piece is 18", that leaves over a 29" piece to start your next row. Then you go on, etc etc… The flooring I used was actually 47 1/4", so I just had to remember that so I didn’t fark up cuts.
If you get one with a joint that’s close, just cut a new piece. Then take the cut off down to the opposite end of the room for use down there. It’s actually very little waste. I had more waste because I live in a crooked old house, and had to go around a big hearth I made up. The seams in the flooring are honestly not very bothersome at all visually. I didn’t stagger them all like some guys do, doing 12/24/36/48… I usually did something like 12/36/18/48/12/30/48… It keeps your floor from looking like a set of stairs. But even if seams do line up a few rows apart, it’s not really obvious or ugly. I don’t know how to explain it, but it’s really not that bad.
Probably 80% of my waste came from ripping the boards to fit along the walls. I tried to use them on the opposite side when I got there, but usually they were too small.
A miter saw was used for straight cuts. Home Depot sold a blade specifically for Lamiate flooring, it was ~$60 bucks… It got dulled out pretty good by the end of my project. The flooring I used (Pergo XP) was thicker than most Laminate so if you go cheaper it’ll probably last longer. Most people use a 40T carbide blade it seems, but this blade was fairly new on the market so I figured I’d give it a shot. Always very clean cuts, no chipping, no tape used or anything else. Even if it DID chip, your cut is hidden under moulding so it’s not the end of the world. But the cut was flawless until I got in the last room after about 500sq/ft, when I noticed it would start to get a little rough… But no chipping.
For my cuts along walls (going in 3 rooms, I had to rip about 40’ of flooring for the bedrooms and 60’ of flooring for the living room) I used my regular circular saw with a Plywood blade. Cut everything perfect, no chipping, sped through the flooring. Some people say to use a jigsaw… I just used the circular saw, including for cuts along door jambs. made my lines, made the cuts, then cleaned it out with a chisel… No chipping even with the chisel.
you definitely have to make sure you floor is smooth and clean of debris. Some floors come with attached underlayment, some you have to put down yourself so make sure you figure in that cost as well! Don’t buy an expensive floor and cheap out on your underlayment.
Oh, as stated above… the proper expansion gap for the flooring I used was 3/8". (not 1/2", but that’d be fine too!)
The base molding that is used with this flooring is 9/16", so it gives you a little tolerance if you make it bigger than 3/8"
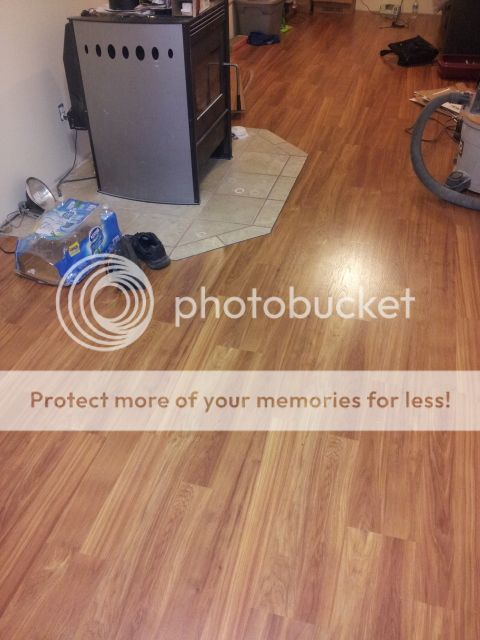
EDIT: Obviously moldings and a lot of work is still needed, but you get the idea. If you look in the living room picture, you can see the same pattern repeat over and over. My only pet peeve about the floor.

Hass: by expansion gap… do you mean gap to leave between new floor and wall???
im doing a laminate floor tomorrow. Ill let you know the brand/quality/supplier… maybe take pictures.
My rule of thumb for expansion gap is 1/4" +/- in summer and 3/8" in winter. In general, summer humidity is higher (some dsys more than others) so the wood portion of the product is at it’s maximum size. Winter, humidity tends to drop. Natural and man made wood products will expand / contract at different rates. Larger areas may require more overall room to expand as there is more material shrinking and expanding. Others (who shall remain nameless) may disagree, but that’s what I do. Check manufacturers specs if unsure.
curious…
Just finished, took about 4 hours with 180sq/ft. first piece cut off 12inches, then full piece, then that cutoff from the other end , repeat. Used 1/4to 3/8 gap. Used “Shaw laminate flooring” I havent done laminate in a while, but it went in pretty easy. Seems like pretty good quality and nothing was chipping. Used “simple solutions” pergo accessory Kit, a hammer, “Roberts tongue and groove tapping block” and a small cutoff piece when the floor needed some persuasion lol. Underlayment was just the standard foam stuff
Sent from my LG-E739 using Tapatalk 2
yeah, what qikz said. ![]()
His is a great guideline I’d say… You’re also supposed to let the floor acclimate to the room, they want you to leave all the boxes unopened in the room the flooring will be installed in for 48 hours.
You’re supposed to, but you don’t exactly have to… I don’t think contractors will drop off all the boxes then say “ok, I’ll be back in 2-3 days after the floor is the same temp/humidity as your house!”.
looks nice deebo.
for the flooring I used it was tool less except for the walls where I just used a small prybar and piece of scrap floor to make sure they’re joined in.
deebo - looks good. Where did you end up shopping for the flooring?
I don’t know, customer bought it i just installed it. It looks like Home Depot carries This particular brand.
fyi, this wont last long but a guy at work bought a bunch of pergo from home depot the other day. apparently when depot ordered 20 units from the warehouse the warehouse screwed up and sent 70. said it was 68 cents a square foot as theyre trying to get rid of it fast.
Which HD?