To most people on here, an LSD install is an adventure completed. However, having learned first-hand that the open-diff in my 1989 240SX is the DEVIL I’ve decided to make a few pointers for anyone new out there on the few snags you might encounter along the way that most other install guides online miss (or I was unable to find).
For a full detailed install guide, go here:
http://www.importfanatix.com/Forums/showthread.php?t=1741
The mule car was my 1989 240SX and the LSD was a 2-way Tomei unit I ordered from FRSport.com.
Problem One: working room. If you are a broke-ass bitch like me and all you are working is with is a jack and two jack stands, you will not be able to jack it high enough to do anything. We used two 2x12 pieces of wood to start the jack that much higher under the diff (someone might have to get a hernia lifting the back of the car to jam the jack under there). Even then, I strongly urge you to invest into a high-lift jack or if you are true baller, a lift. (I have since got a 3.5 ton high-lift jack from Princess Auto since with coilovers a normal jack can’t even fit under the car.)
Now, two things are going to be interfering with your progress to sideways goodness: exhaust and the sway bar. Exhaust should really go. Its not a huge impediment, but you will bang it more than enough times to curse yourself for not getting it out of there. As for the sway bar, a lot of forums say to remove it. We, however, found that when you are working on a budget, it comes in quite handy as a temporary holding place for the front of the diff pumpkin when you are removing it and most importantly when you are putting it back on. Safe or sensible? No. But if you were safe or sensible, you’d be getting a shop to do this. Heh.
Problem Two: dropping the old pumpkin out of the car. Its held by two nuts and two bolts at the rear, two massive nuts going straight up into the frame, four nuts and bolts connecting the driveshaft, and twelve nuts/bolts (six each) connecting the rear axles.
Before you even think about touching any of the others, make sure you can undo the axles. This is where we hit the biggest problem of all. In a twenty year old car, those nuts and bolts are so rusted up, there isn’t anything that will get them off. Unless you have some sort of magical super-slim ratchet set that I never heard of, its going to be two 12mm wrenches and a pair of vice grips that you’ll be working with here. If you gut the stubby no-name brand wrenches, give up now. In our all-Canadian vehicular, however, no amount of WD40, hammering, torching or preying would get any but two of them to move. With ten to go, we resorted to one of the more sinister tools on Canadian Tire shelves: the nut-buster! $13 bucks and some bruised knuckles later, we split each nut in two at which point wrenching them off became a breeze. Replace them with M8x1.25x30mm bolts, nuts and lockable washers. The other bolts should not give you any problems after a bit of WD40.
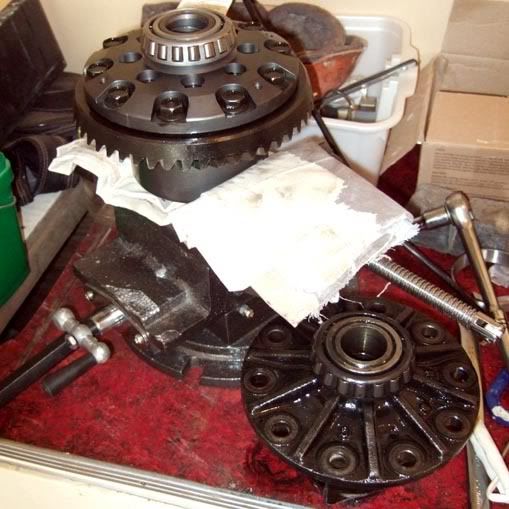
Problem Three: getting the old diff free of the old gear ring. There are twelve bolts connecting the old diff to the massive gear ring. You will need a solid vice bolted to something serious before you can get these off. Some say to use big pipes for extra leverage. I stumbled upon an easier solution. Grip the old diff at an angle towards you using the flat part (wrap it in towel or rag for extra stability) and than jam a crowbar under the vice. I used a large torque wrench and bracing the crowbar against my thighs, was able to get more than enough torque to get those bastards off. Not easy, so be prepared for some serious grunting. Here is an image of the old diff and the ring gear on the new one:
The rest is easy enough to garner from other online forums so I’ll leave it at these three things which slowed down our process. If anyone wants to correct me is some ways or ask questions, please feel free.
(This is a re-post with some minor additions. To find my original post, go here: http://revdrift.com/forum/index.php?topic=324.0)