Nice photos BUT the top one is real good but you need to tone down that parking garage you got to select all of that and sharpen and knock that contrast down
How?
I think your biggest culprits are:
Time of day: Direct sunlight or not enough sunlight will create unwanted glare and nasty reflections, especially with a glossy black finish. There are a couple ways to work around this; one is shoot early in the morning during sunrise and about 45 minutes after and the other is shooting 45 minutes before sunset and right at sunset. Since I am not a morning person I chose the afternoon sunset. This time of year from 6:30PM to about 7:15PM will give you the best light to shoot in. The reason you want to shoot during this time frame is the sunlight has a warmer, softer, more pleasant tone to it. Plus its at an angle that will help compliment the subject. Overcast days are usually more photo friendly too being that the sunlight is not as harsh. A general rule of thumb is keep the sun to your back. Using a good quality CP filter (circular polarizing) will reduce glare and reflections a lot as well.
Angle/view of subject: Before you shoot walk around the car and see what angle makes the car look its best. A hot girl looks hot from any angle but can be made to look better. Crouch down with the camera to get a more direct angle in line with the vehicle, dont be afraid to move your feet around. Taking a shot just standing up doesnt always create a great image. A good pose (just like with a hot chick) helps too, maybe angling the front wheels usually helps to accentuate the wheels on the car and draw a viewers attention in. The rule of thirds is a good rule to follow, but its one that I often break, just because sometimes I have to and I’m not a pro so I can 
Being aware of your surroundings: Try to pick a background that isnt too overpowering for the subject. I see a great spot from the top of that parking deck that would work great:
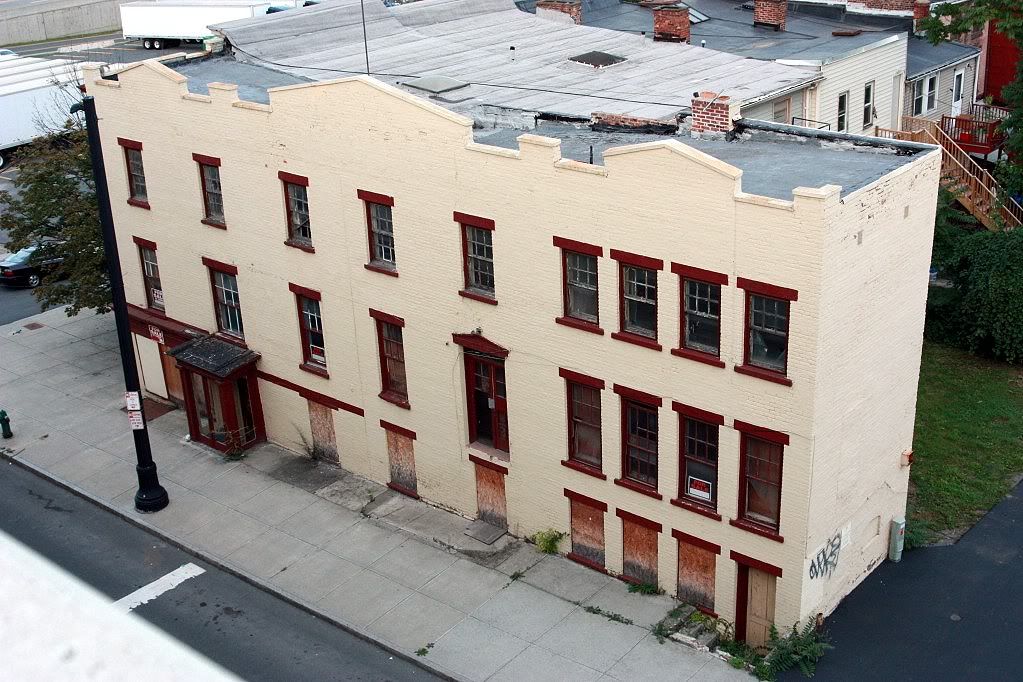
On the street in front of that building or off to the side where the graffiti is would make for a great neutral colored, non-overpowering background. It has a nice dirty urban environment feel to it.
But as mentioned before, shooting everyday and of the most random objects or subjects will make you get better.
Im still trying to figure out the whole aperture, ISO and exposure compensation and shutter speed stuff. I didnt think this camera was that complicated haha
Anyone will to meet up and give me a crash course im better with hands on than trying to read and figure shit out.
ISO is more of a “film speed” thing. Higher the ISO the more noise that will be in the photo, but the more light it will let in. So if you have a high ISO you can shoot in lower light more easily. A lower ISO will give you a more saturated shot but require a longer shutter speed to compensate.
Shutter speed is how long the camera shutter stays open allowing light to hit the sensor. This is all measured in fractions of a second; 1/60th is about the average slowest shutter speed you can take handheld without have a blurry subject. Some can do a slower shutter speed fine, others cant.
Aperture is how much light the lens allows to enter the camera through the lens. It works like the pupil in your eye. A smaller aperture number allows more light and a larger number allows less light. A smaller aperture number will give you more background blur while a larger aperture number (such as f/22) will have everything in the photo in focus and very little blurred.
All three effect each other. If you have a large aperture, like f/1.2 its going to allow more light to enter the camera, so this will have to be compensated with a lower ISO and faster shutter speed. If you want a longer exposure time, a lower ISO, and larger aperture will be needed.
When you look through your viewfinder you will see:

The scale on the bottom that is in the middle that looks like: -2…-1…0…+1…+2, is your light meter. When you have the camera on full manual mode, this is how you adjust your exposure/shutter speed. A setting of “0” or right in the middle on the big divit mark is a proper exposure based on light and surroundings. It will change based upon where you aim it. A negative side of the scale is underexposed (darker image) and the positive side will be overexposed (lighter image).
The way I learned is just putting the camera on full manual mode and shoot. It takes practice and patience, you wont learn it overnight.
Here is a little more info that can help you too: http://forums.mycanikon.com/showthread.php?t=1939
http://forums.mycanikon.com/showthread.php?t=4284
WOW Thanks man im gunna take some pictures tonite at our weekly GTG and fuck around with it some more how long have you been taking pictures with a DSLR?
tell rita stop being a picture whore!!!:hug
HAHAHAHA im telling here you said that
Okay I read everything that everyone had to say and they are also correct while you are taking the photos, BUT since these photos have already been done, are you using photoshop to edit these? Photoshop is a major key in photography. Also another key is this MAKE SURE you are using the raw format on your camera instead of jpeg. Bigger File size but way worth it if you like doing photography
Anyone else?
rut roh :ahh
pic shoot my truck and the dub some time soon…
Sure when i need all the practice i can get. haha
Any more pics for us to rip on? :lol
You’re doing great Fyi, black bird thank you for helping out. This is a good thread for anybody new.
Actually i have about 150 pics from lake george this past weekend some are way over exposed but over all most came out pretty good ill upload and post them up in the up coming days. Stay tuned folks