L47/Aurora 4.0L powered Fiero.

Free-air subs, while useful in some applications, aren’t the most ideal. Their overall stiffer suspension allows them to take a bit more power without bottoming out sans enclosure, but they’re still not moving a whole lot of air. This also makes them less sensitive, and thus; efficient. Truthfully, to get the best output from any speaker, it’s really got to be in some type of enclosure. Most tweeters are already in their enclosure when you buy them. Mids and mid-woofers are mostly infinite baffle drivers, but still kind of use the door as an enclosure. A car door doesn’t seal well, though and it’s definitely not a calculated port. Again, not ideal. The CDT HD-M6 mid woofers that I have in my daily Subaru actually came with box specs for both sealed and ported applications. I’ve been seriously thinking about making enclosures for them for years. Likely the same for the Fiero and its CDT ES-04 Mids. I bought an open-source 3D printer kit (a MendelMax 1.5) a bunch of years ago with the intention of making custom ABS door enclosures for dedicated mid drivers, but I kind of feel like that’s a slim market. I can at least make them for myself, I suppose. Still haven’t finished building it anyway. Hah.

http://www.clutchsuperclutch.com/images/fieropics/IMG_20170603_080138.jpg

So, I was required to work today from 7.5A until around 6P and the entirety of my accomplishments includes wrapping up around a dozen 100ft extension cords. Anyway; I had a lot of time to kill.

Somehow I got into looking at the interworkings of nondescript open-wheel racecars, and I noticed a common theme. The vast majority of these cars have air jacks. I’m sure expedience and convenience play a significant role, but keep in mind that these cars are basically slammed to the road surface for aero. There’s no way to get a jack underneath them. Believe it or not, I have similar issues with this car. There’s about a maximum of 2" under this car before a jack hits something. It’s fucking low. So, air jacks.

I did some pneumatic math. If I use 2.5" diameter cylinders and I feed 225psi, I can lift 1,104lb per cylinder. If I use two in the back and one up front for a total of 3 cylinders; I can lift 3,312lb. That’s [roughly] a 35% safety factor for a car of ~2,400lb. Don’t worry, teach; I’ve shown my work.

http://www.clutchsuperclutch.com/images/fieropics/IMG_20170523_152904.jpg

I looked for cylinders and wasn’t really able to find anything available in a single-acting spring-return cylinder of 10-12" stroke in order to usably lift a car. I think the piston diameter is the limiting factor there as far as shelf-stoked manufactured units go. Anyway; I’ll have to make my own cylinders. I found hydraulic seals at TheORingStore.com and given they’re properly installed, will hold hydraulic pressures. I’ll need to CAD the piston, rods, cylinder and cylinder caps for posterity. I’d use a regulator on the car to slowly bring the pressure up to easily extend the jacks so as to prevent them slamming down. A combination of a 600PSI WOG dump valve and internal cylinder return springs would retract them fully. Afterward, close the valve to put a small vacuum on the piston seals to help the springs hold the cylinders up.

Anyway, 225psi from shop air? Turns out that refrigerator coolant compressors have commonly been repurposed as bootleg super quiet, high pressure air compressors for a while now. Apparently, if left to a closed system and their own devices, these little compressors will build almost 500psi. Fairly quickly. That’s rad. Just need a high pressure receiver to steady the air flow. Enter large propane tanks! Any propane tank used these days has to conform to DOT regulations, which requires the tank to withstand a working pressure of 240psi. The regulations state that the proof pressure of such devices must be 4x working pressure, or 960psi. All of that came from this report. Brand new 100lb cylinders are available brand new for around a C-note. Anyway, use a pressure switch to shut the compressor off at ~250psi, plumb in a 300psi relief valve and run the tank upside-down if possible so it can be drained without being modified. Several gauges, a regulator and ~300psi rated fittings and hose later; air jacks.

Here’s some math on air volume in the cylinders and a standard 23lb propane tank at both 14.7psi [sea level] and 225psi.

http://www.clutchsuperclutch.com/images/fieropics/IMG_20170524_145153.jpg

What can I say? I was bored.

Managed to get over there today and scrub down the parts that have been soaking for a week.

http://www.clutchsuperclutch.com/images/fieropics/IMG_20170604_170833.jpg

http://www.clutchsuperclutch.com/images/fieropics/IMG_20170604_170839.jpg

Nice ‘n’ brown.

Since everything was soaking for a week in either a fairly weak Purple Power solution or diesel; everything scrubbed clean pretty easily and came out nice and shiny.

http://www.clutchsuperclutch.com/images/fieropics/IMG_20170604_184111.jpg

And everything all pretty, ready to go back together.

http://www.clutchsuperclutch.com/images/fieropics/IMG_20170604_200259.jpg

My boss sent me a text a couple of hours ago telling me.not to bother coming in tomorrow. Guess he thinks I worked hard enough during the week last week. Rad. Having said that, my goal is to get the bottom end reassembled and at least get the head bolts holes re-drilled. We’ll see.

Got the bottom half of the motor back together today.

http://www.clutchsuperclutch.com/images/fieropics/IMG_20170605_171019.jpg

http://www.clutchsuperclutch.com/images/fieropics/IMG_20170605_194201.jpg

Still need to scrub the crap out of the upper block, it looks pretty rough on top of the shiny lower crankcase/oil pan. I’ll work on scrubbing that after I get the rest of the bottom half sealed up this week.

I uncovered a few things today as well. I won’t be using the oil level sensor in the pan and for some reason, I don’t really like the idea of putting the sensor in there and just leaving it. I spent a few minutes gutting my old sensor that already had a broken connector.

http://www.clutchsuperclutch.com/images/fieropics/IMG_20170605_183238.jpg

http://www.clutchsuperclutch.com/images/fieropics/IMG_20170605_183250.jpg

Looks like there’s already an o-ring in there, so I’m thinking I’ll just whittle up an aluminum plug on the lathe, press it in and re-crimp the cap over the plug. Or I could measure the thread and make the entire thing from scratch and avoid all of the BS. I’ll solve that problem this week sometime.

Another issue that I ran into was the oil cooler line fittings that go into the oil filter housing. I didn’t have one of the factory hoses when I bought the original fittings and I wasn’t able to locate one, so I didn’t realize that they’re basically gigantic tube nuts, much like power steering hoses. Anyway, I didn’t have this set up properly, so it leaked. Shocker.

http://www.clutchsuperclutch.com/images/fieropics/IMG_20170605_130249_01.jpg

As you can see, I need to turn the tip down to some diameter for some distance to add a shoulder [at the proper depth] to crush the o-ring against the filter housing. I still need to take all of these measurements and scratch out some drawings. I’ll do this at work tomorrow and modify the parts this week.

Managed to get one indicated in the lathe and then had to walk away for the night.

http://www.clutchsuperclutch.com/images/fieropics/IMG_20170605_170255.jpg

A list of o-ring sizes that I’ve had to hunt down so I don’t lose them.

Oil Filter Adapter - 4mm x 21mm Buna-N 70D
Oil Cooler Hose Fitting - AS568-013 1/16" x 7/16" Buna-N 70D
Crankshaft Position Sensor - 2.65mm x 15mm Buna-N 70D
Fuel Injector Intake - AS568-110 3/32" x 3/8" Buna-N 70D
Fuel Injector Rail - AS568-203 1/8" x 5/16" Buna-N 70D

Went over to the shop for a few hours today.

First thing I did was re-chuck that fitting in the lathe. If you look at the last picture, you can see it’s all cocked. I fixed that before I did anything.

This is what I fully intended to do with those fittings.

http://www.clutchsuperclutch.com/images/fieropics/IMG_20170606_182939.jpg

Turns out that after measuring a bunch on the filter housing and realizing that this gigantic chamfer required that I lose .140" off of the thread length to get to a point on the chamfer where the ID is a maximum of .430"; I had to reformulate my plan.

Chamfer:

http://www.clutchsuperclutch.com/images/fieropics/IMG_20170605_170255_01.jpg

I also realized this was in the ID of the fitting.

http://www.clutchsuperclutch.com/images/fieropics/IMG_20170606_085230.jpg

Basically a gigantic shoulder that reduces the cross-sectional area of the oil passage by what must be at least 30%. I didn’t do the math. Just plowed that fucker out. I decided on .500" ID as the -10AN side is already there, and the o-ring landing is now irrelevant. I decided to simply machine the fitting to the depth of the filter housing ports and add a shoulder for RTV.

http://www.clutchsuperclutch.com/images/fieropics/IMG_20170606_200930.jpg

Pretty seamless path for the oil now;

http://www.clutchsuperclutch.com/images/fieropics/IMG_20170606_202325.jpg

Finally, I put some Ultra Grey around the tips of the fittings and torqued 'em down. I kinda wish I had M20x1.5 and 7/8-14 dies to make new fittings from scratch, but oh well. Maybe when I build the next motor.

It’s the small details that kill me. Hah.

I headed over and tried to fix all of the head bolts holes tonight. Apparently I forgot how much of a pain in the dick it was because it took me like three hours to only finish half of them.

http://www.clutchsuperclutch.com/images/fieropics/IMG_20170607_194115.jpg

http://www.clutchsuperclutch.com/images/fieropics/IMG_20170607_194743.jpg

http://www.clutchsuperclutch.com/images/fieropics/IMG_20170607_202217.jpg

http://www.clutchsuperclutch.com/images/fieropics/IMG_20170607_214022.jpg

http://www.clutchsuperclutch.com/images/fieropics/IMG_20170607_214059.jpg

Tryin’ to head back tomorrow to finish the other half. Maybe get the motor back together this weekend.

Blah blah blah, time I could have spent working on the T140…

You’re not wrong. But if it makes you feel any worse; I finished the other bank of head bolts tonight. I didn’t have the time or energy to drop the heads on and torque them, though. I’ll be back on Saturday for final assembly.

I can’t wait to see this thing done

I’m getting there. I think this motor is in much better shape than the previous one, and I’m taking my time to make sure that I do a decent job of QC during reassembly. Double checking everything I did last time and making changes or modifications where necessary. Looking back; last time I rushed and was pretty sloppy. I’m ready to put the studs in and drop the heads on, so that’ll likely be the first thing I do tomorrow morning. I’m thinking I can have the long block assembled by afternoon, then I can work on getting the trans out to reseal that. This thing was a leaky pig last year.

Then just put it back together. Maybe on Sunday? I could easily put it back together in a day.

Sounds like a shitty Sunday. Guess what I’m doing Sunday? Going to buy a motorcycle to ride when I do some deferred maintenance on the Norton

Did a bunch today.

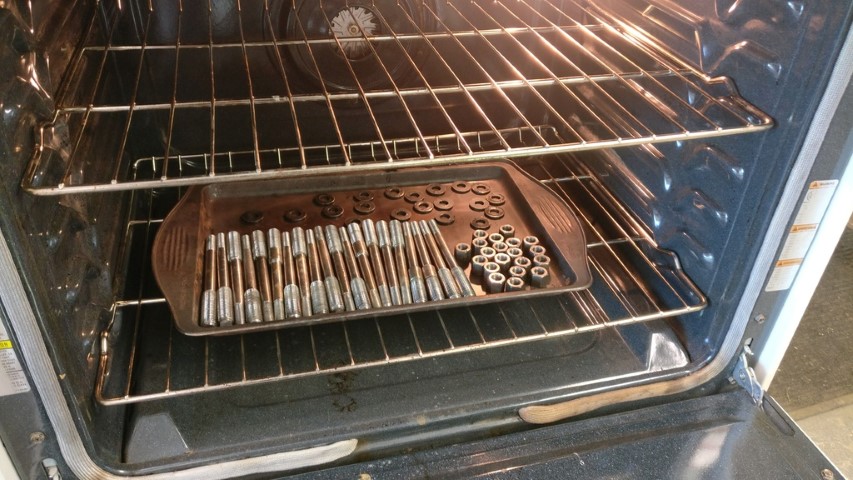
Started with scrubbing the studs/nuts/washers and baking then dry. That shop oven might be some of the best money I ever spent on a tool. I think I paid $50?

http://www.clutchsuperclutch.com/images/fieropics/IMG_20170610_142426.jpg

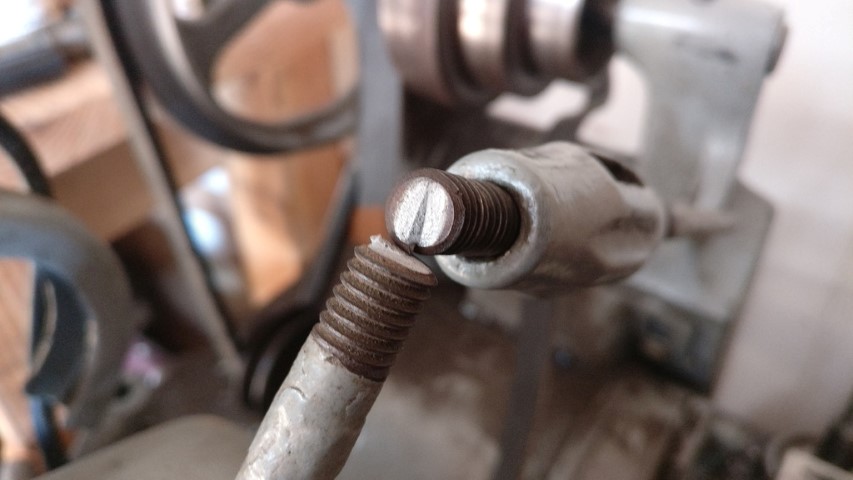
Applied LocTite and threaded in each stud.

http://www.clutchsuperclutch.com/images/fieropics/IMG_20170610_151807.jpg

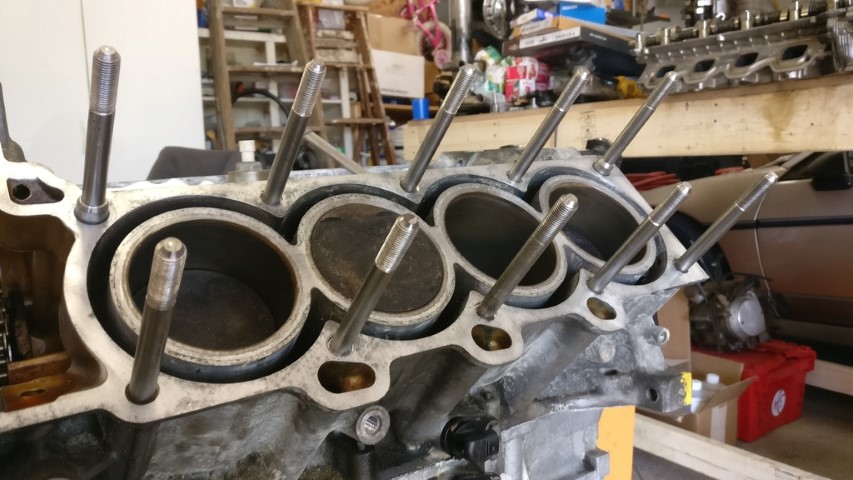
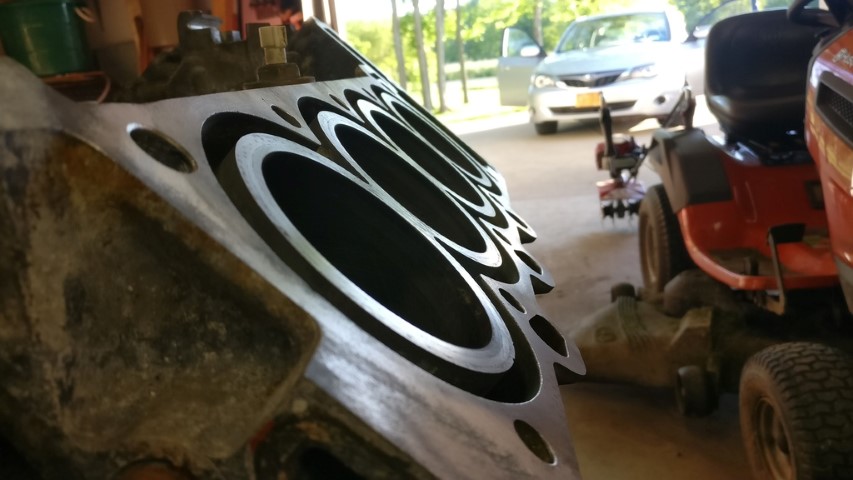
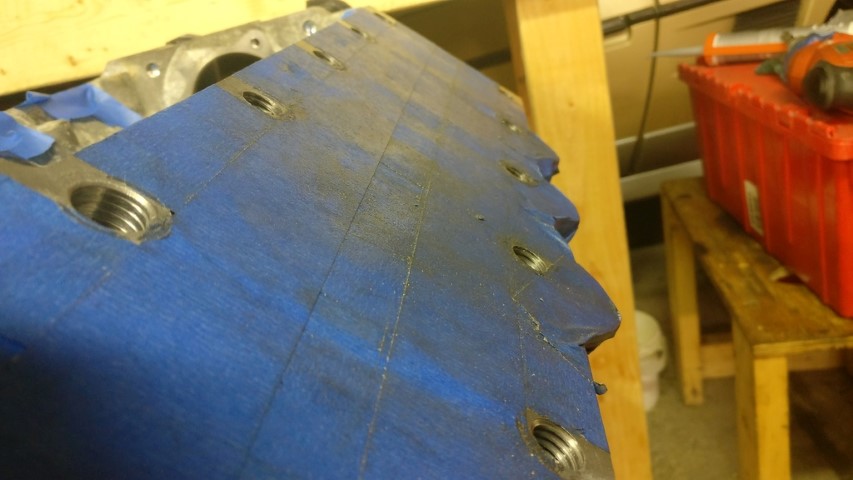
Dropped the head gasket and head on and torqued the nuts down. I was a bit gunshy, but no stud issues whatsoever.

http://www.clutchsuperclutch.com/images/fieropics/IMG_20170610_152023.jpg

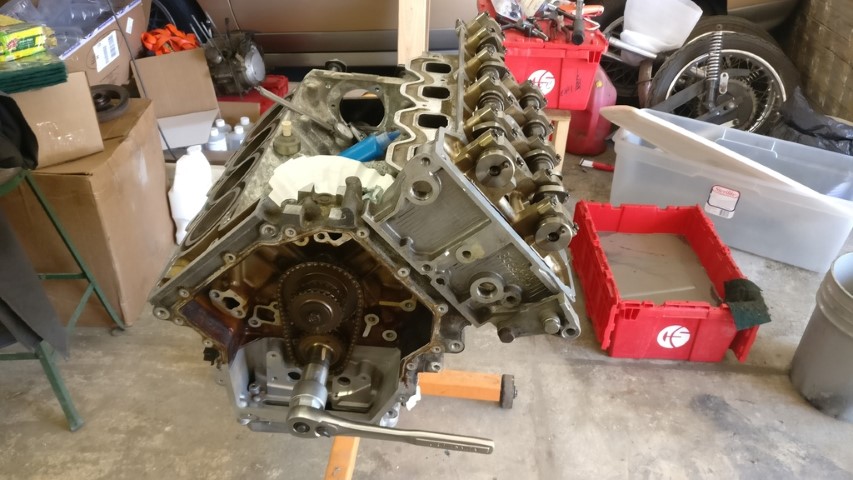
…and the other side. No issues here either. All 20 nuts to 75ft/lb with no incident. Stoked on that.

http://www.clutchsuperclutch.com/images/fieropics/IMG_20170610_160703.jpg

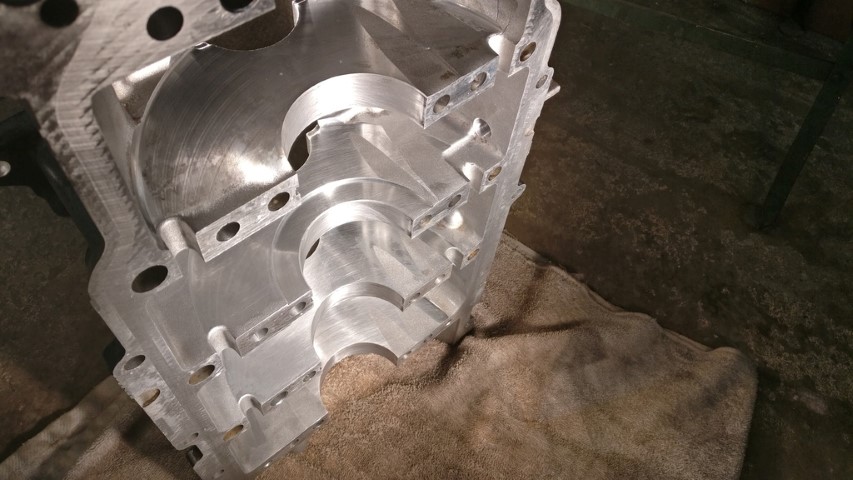
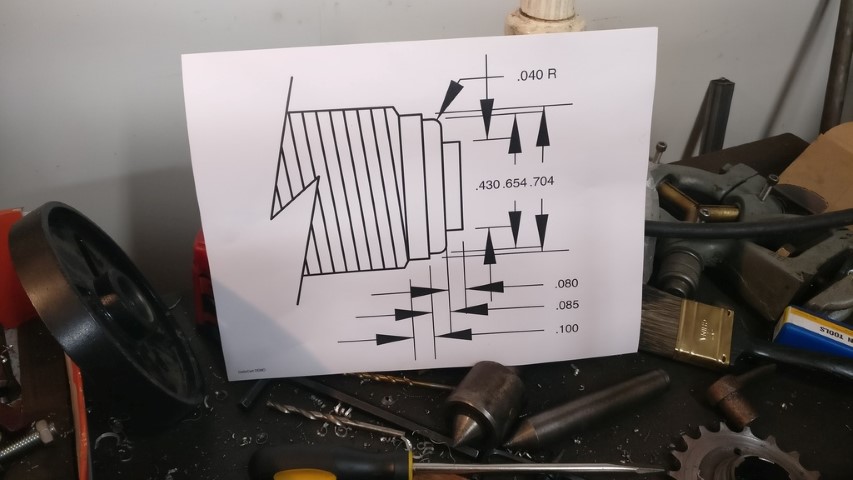
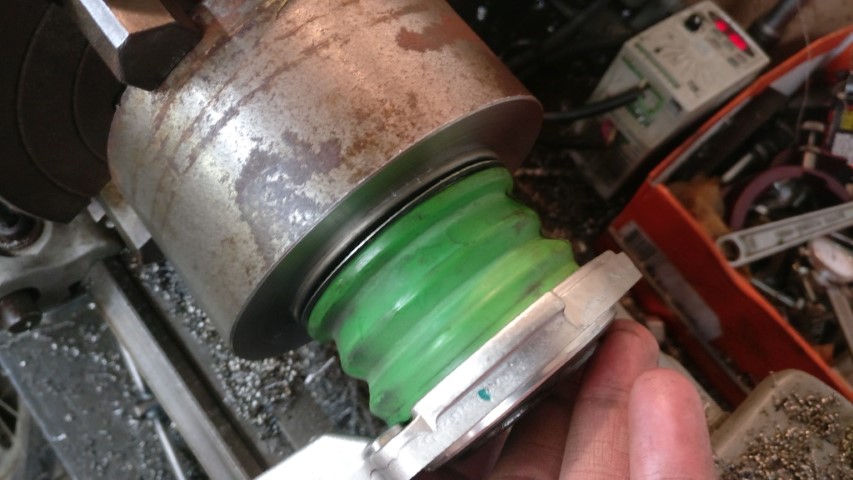
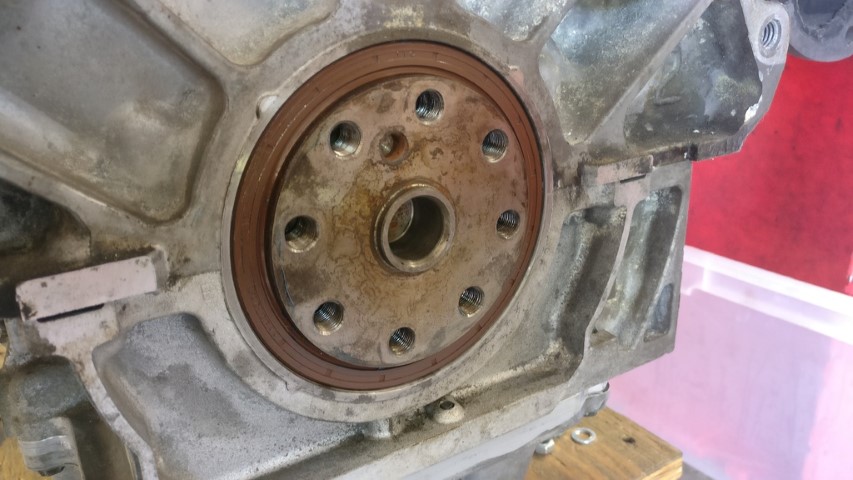
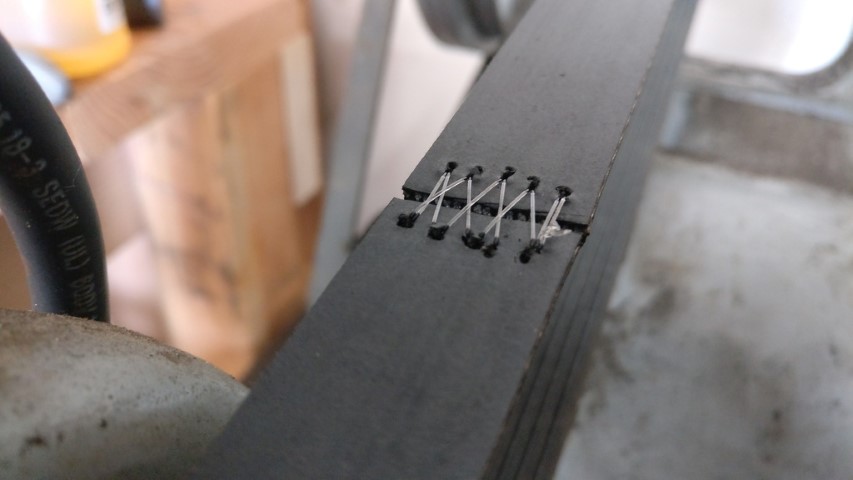
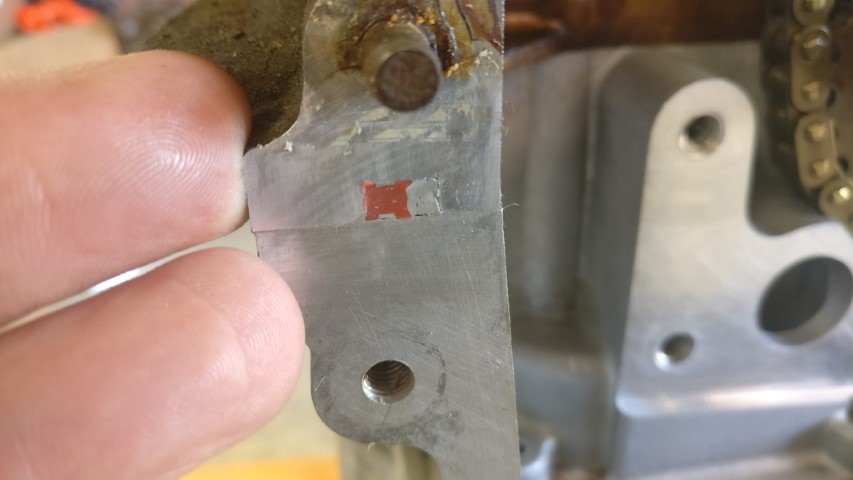
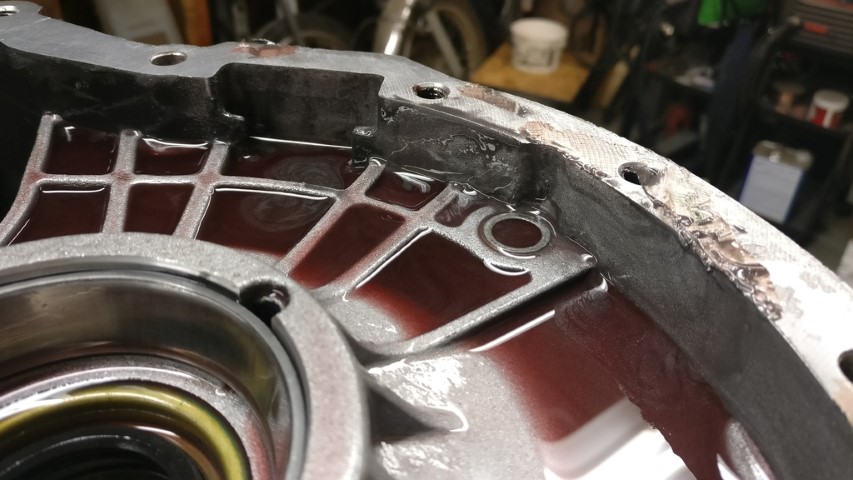
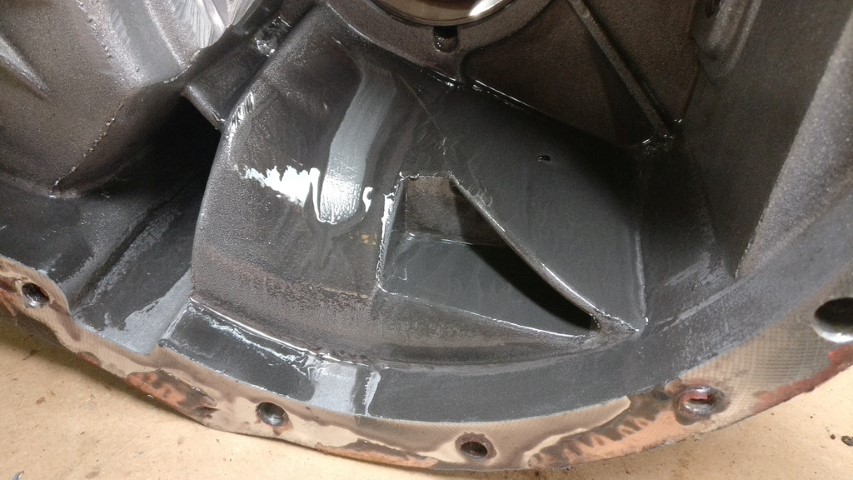
So, now that the bottom end is nicely resealed and the heads are back on; I continue assembly with the timing system. First, though, check out this cross section of the crankcase half seal. Sure looks pretty ideal to me. Orange is the OEM rubber seal, gray is Permatex Ultra Grey.

http://www.clutchsuperclutch.com/images/fieropics/IMG_20170610_143448.jpg

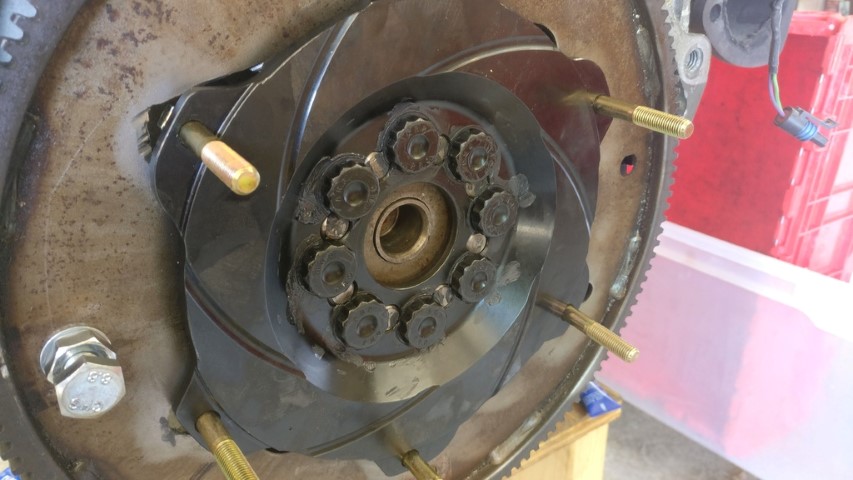
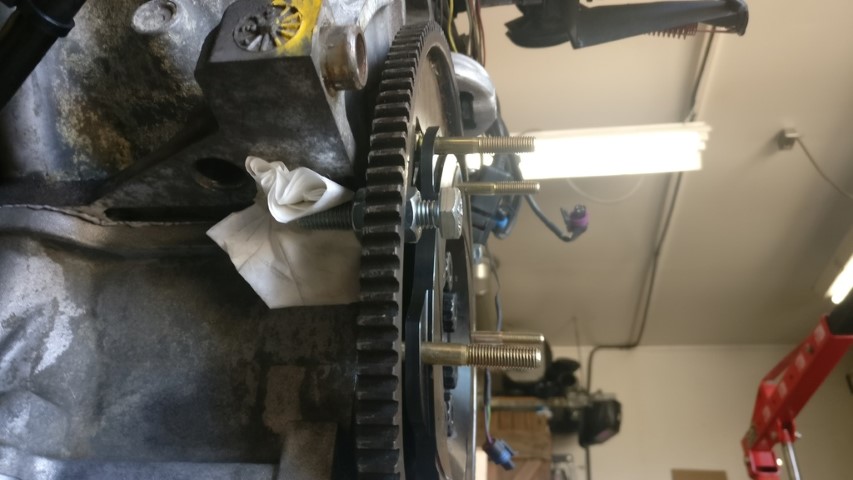
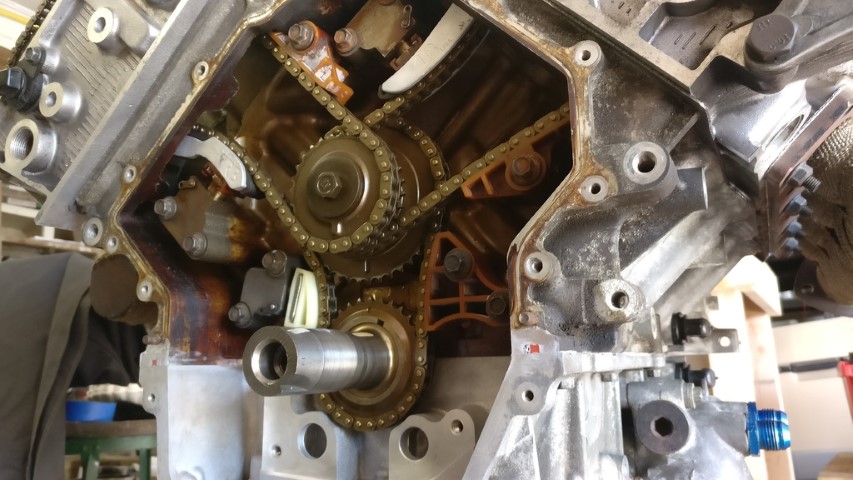
Here’s the fully assembled timing system ready for the cover. I did clean the flange before assembling with the seal.

http://www.clutchsuperclutch.com/images/fieropics/IMG_20170610_165911.jpg

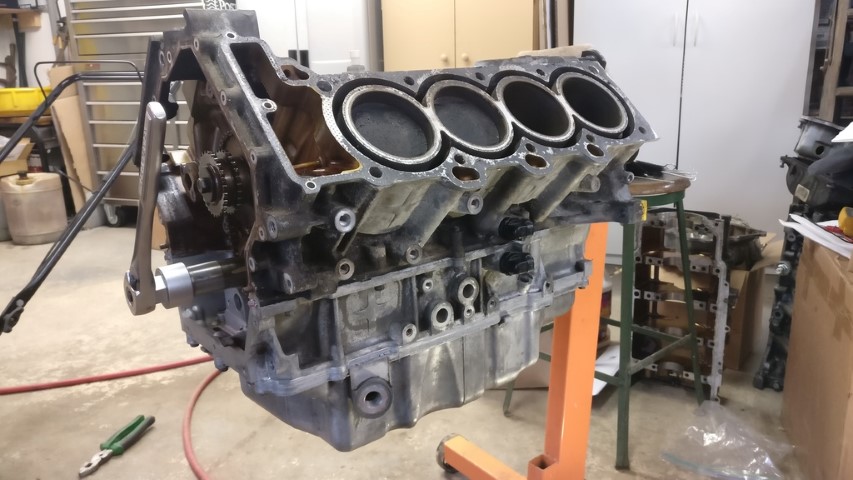
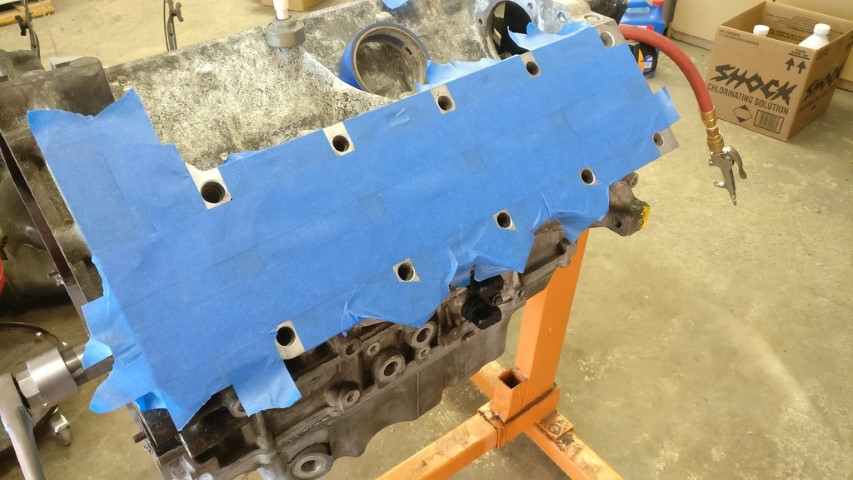
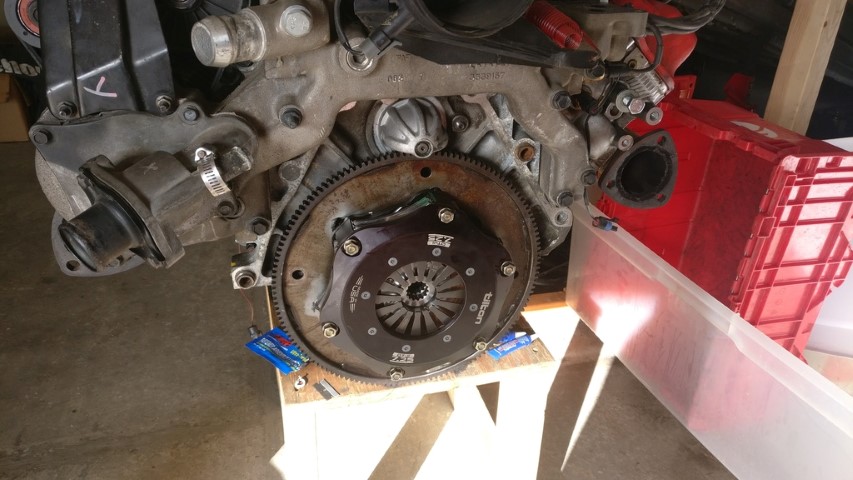
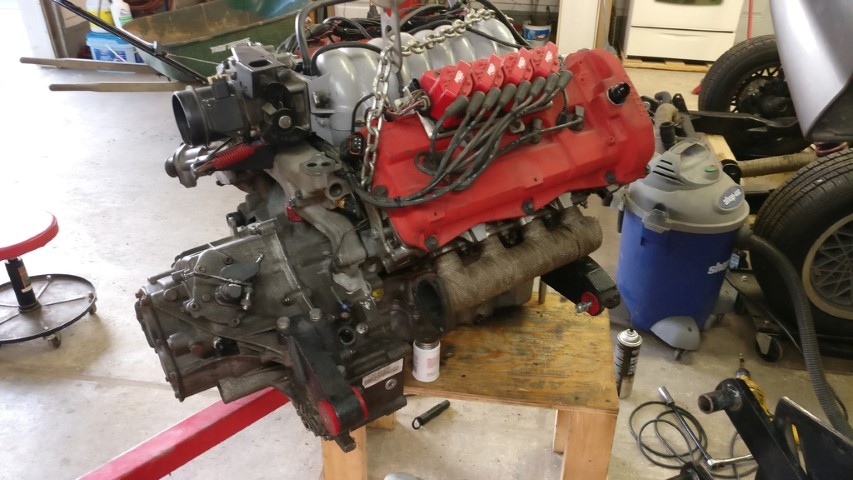
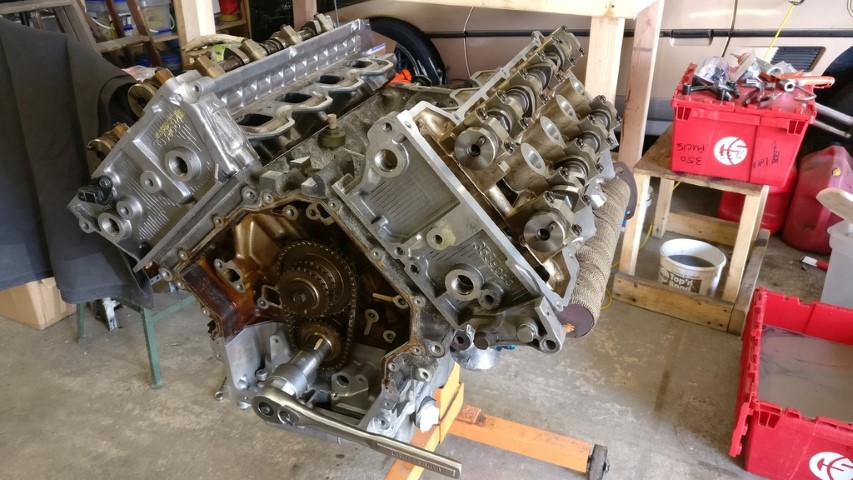
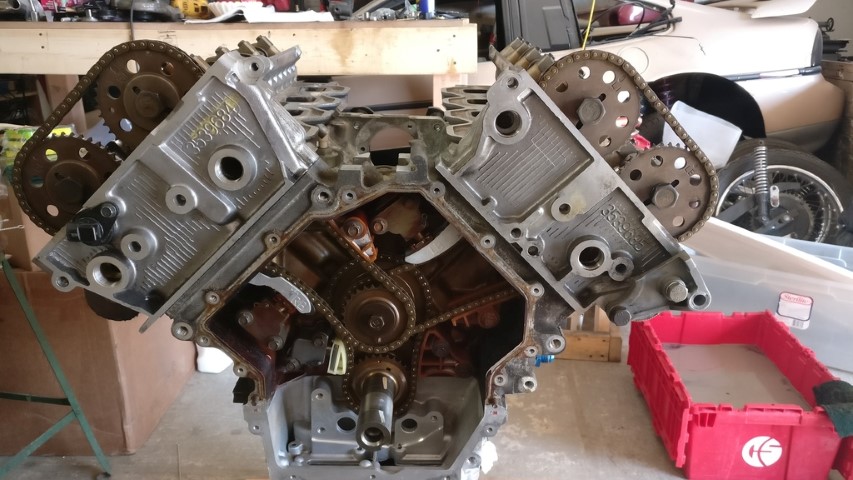
This motor is fucking yuuuuuge with the heads on. I love it.

http://www.clutchsuperclutch.com/images/fieropics/IMG_20170610_165917.jpg

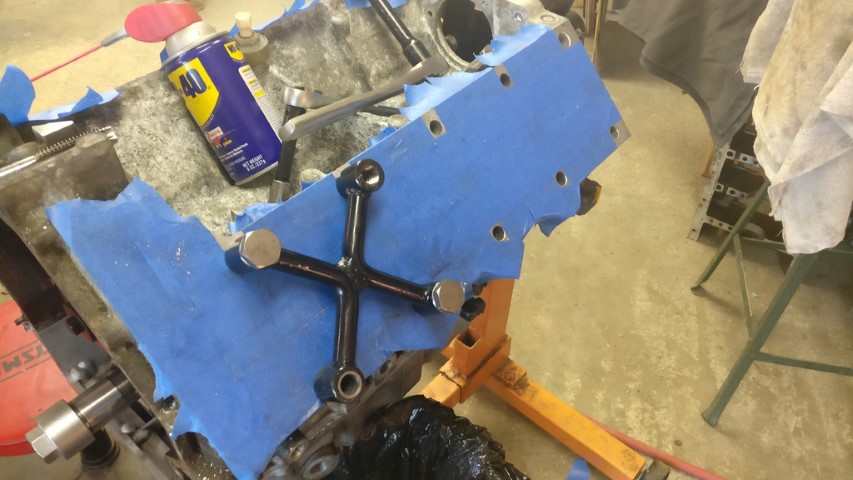
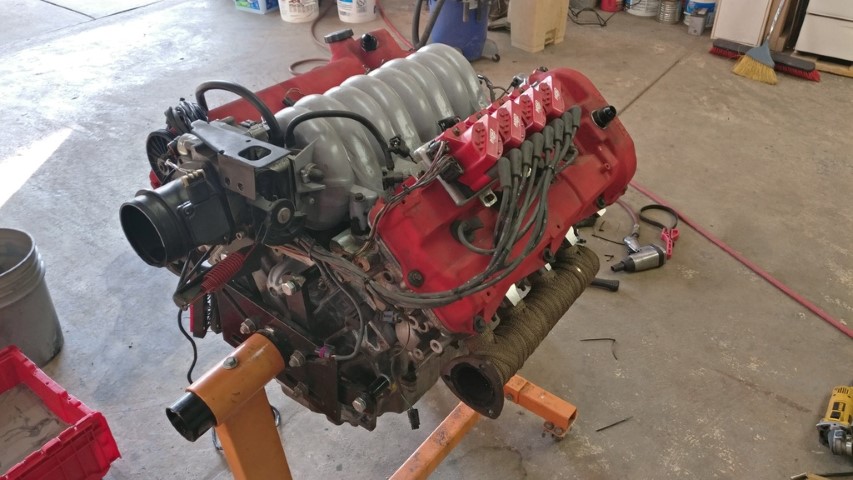
…and a bunch of bullshit later; a mostly completed motor. Can definitely finish that tomorrow.

http://www.clutchsuperclutch.com/images/fieropics/IMG_20170610_195141.jpg

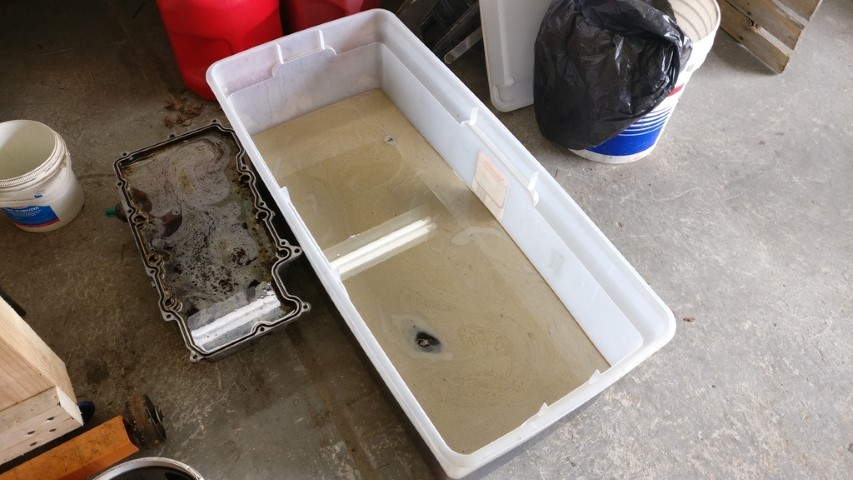
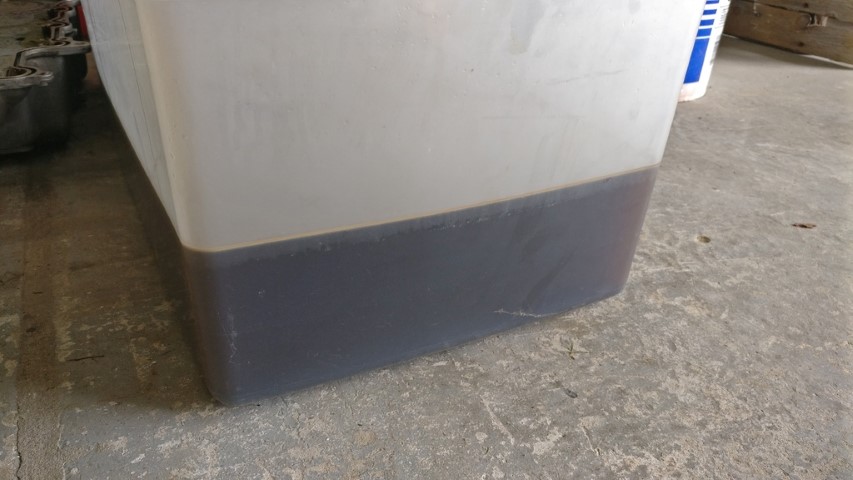
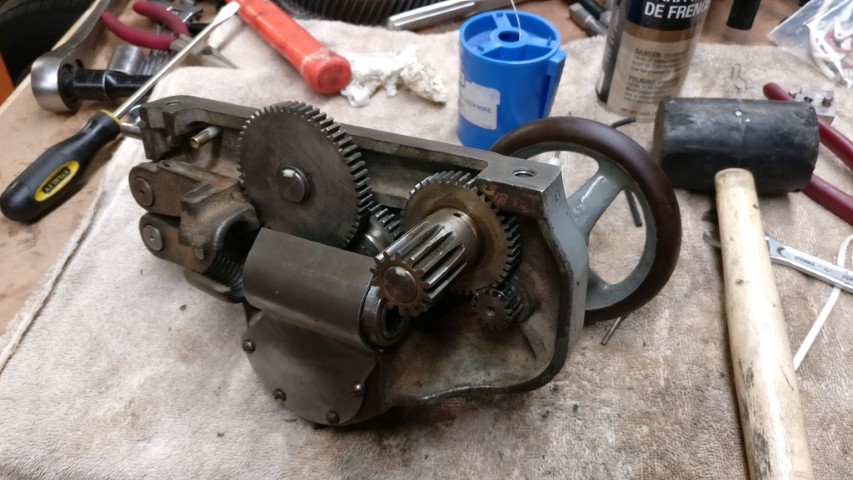
So, now that the motor is almost ready; I need to get that leaky ass transmission out. Looks like almost a half quart lake on the shop floor.

http://www.clutchsuperclutch.com/images/fieropics/IMG_20170610_203717.jpg

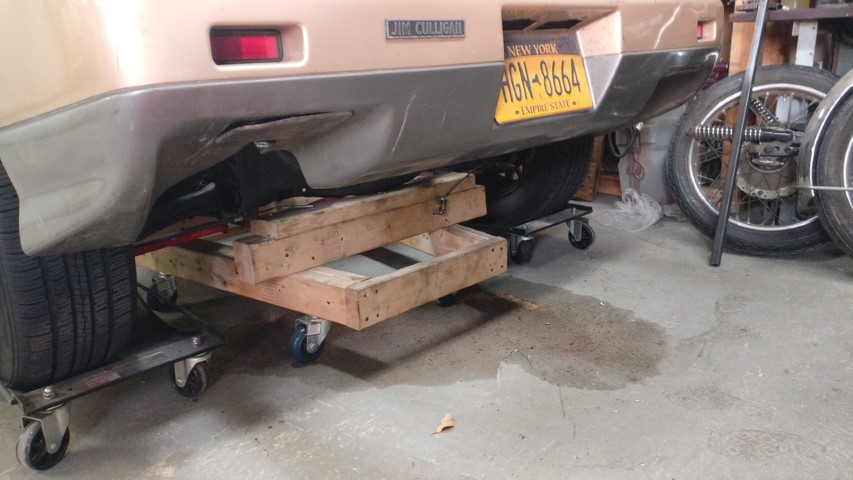
So, I lifted the ass end to get the cradle out.

http://www.clutchsuperclutch.com/images/fieropics/IMG_20170610_205401.jpg

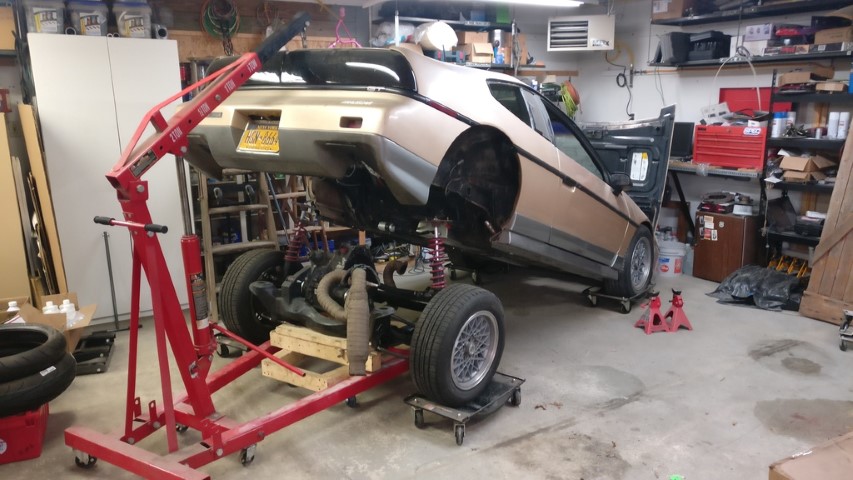
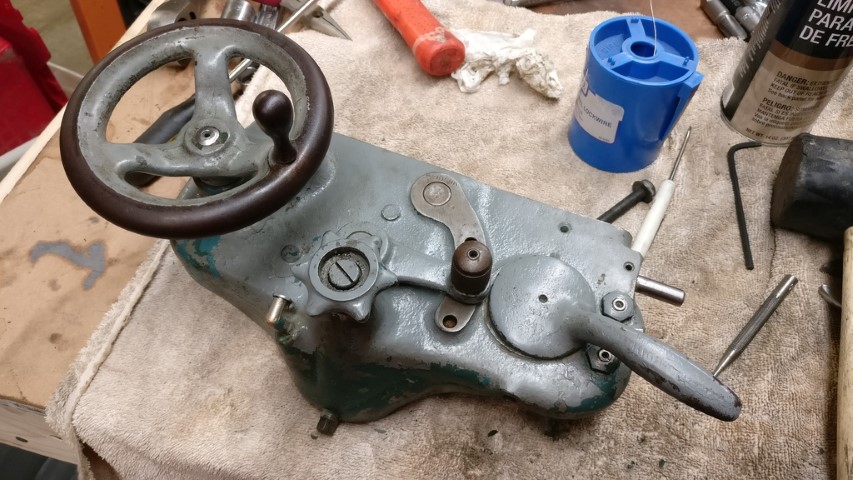
…and then I drained the trans, which actually still had what appeared to be two quarts in it. Popping the axles out and pulling the trans off the cradle came next. Wrestled it onto the bench so I could tear it down.

http://www.clutchsuperclutch.com/images/fieropics/IMG_20170610_213425.jpg

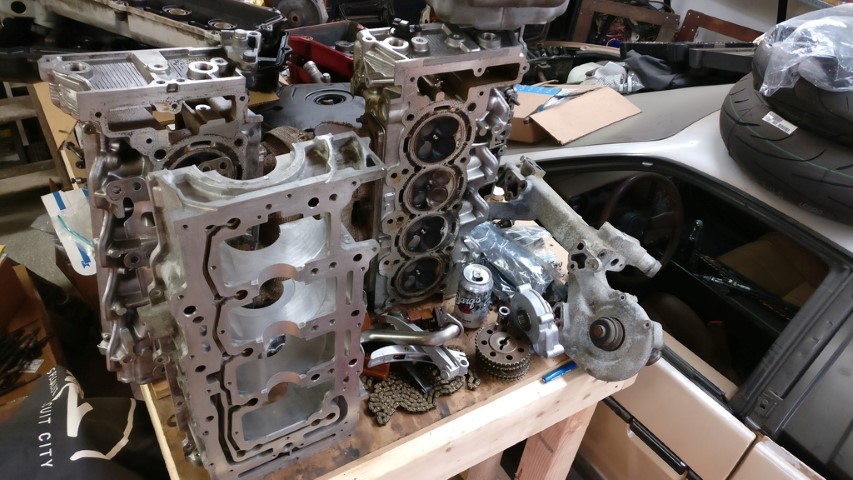
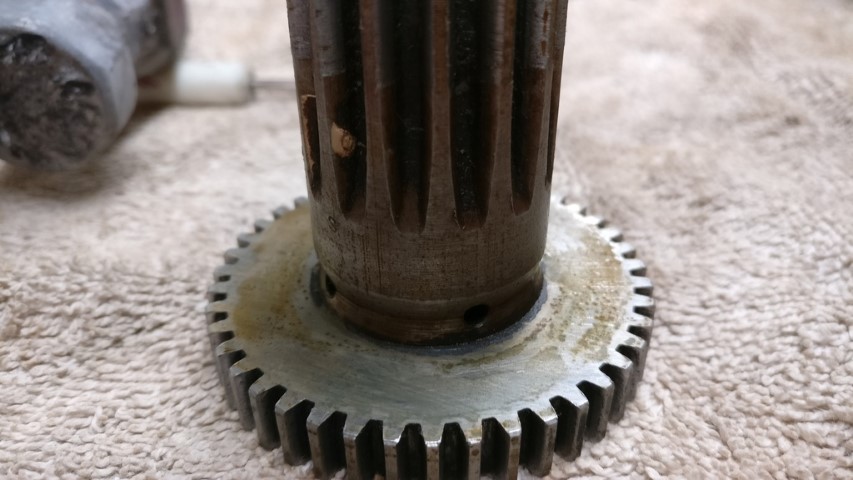
Found a bunch of interesting things in the trans, like this bearing missing a roller.

http://www.clutchsuperclutch.com/images/fieropics/IMG_20170610_215935.jpg

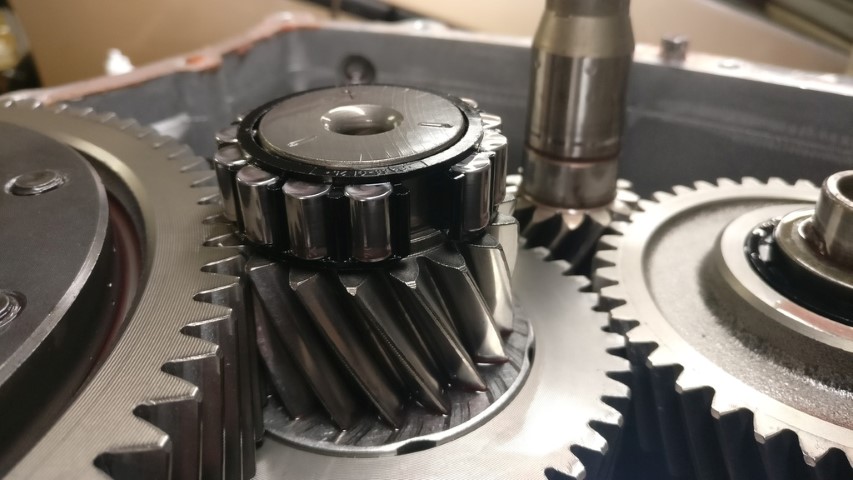
…and said missing roller was stuck to the magnet at the bottom of the case.

http://www.clutchsuperclutch.com/images/fieropics/IMG_20170610_215945.jpg

I can’t really explain that. There doesn’t appear to be any brinelling or other visible damage to the outer race, so I don’t really know what was going on there.

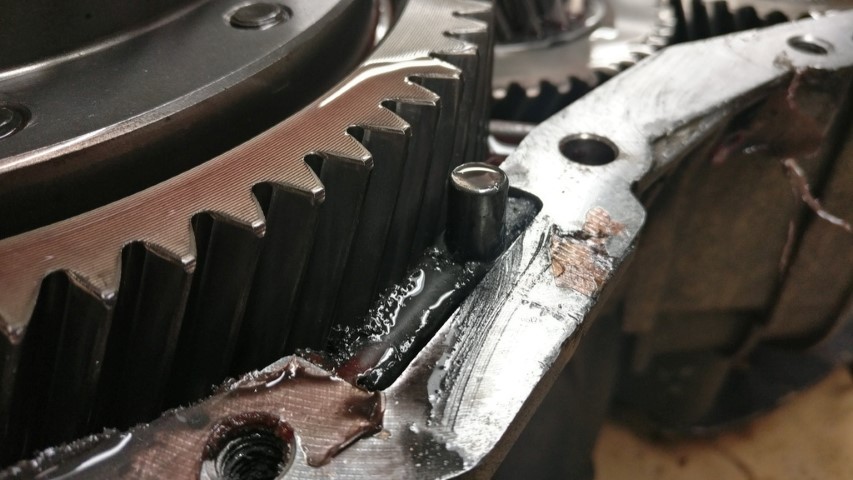
There is also a shit-ton of a sort of paste formed by the ATF and metal powder. It’s all extremely fine, like literal powder; so I’m thinking that stuff is from the new differential wearing in, lapping all of it’s gears against themselves. I’ll wipe all of this garbage out and refill with fresh ATF. The factory fill point in the trans is inaccessible when bolted to a Northstar, so I need to add a secondary fill point, or just pull the shifter mechanism. I shouldn’t have to be adding fluid frequently, if I can get the damn thing to stay sealed.

http://www.clutchsuperclutch.com/images/fieropics/IMG_20170610_221039.jpg

http://www.clutchsuperclutch.com/images/fieropics/IMG_20170610_221029.jpg

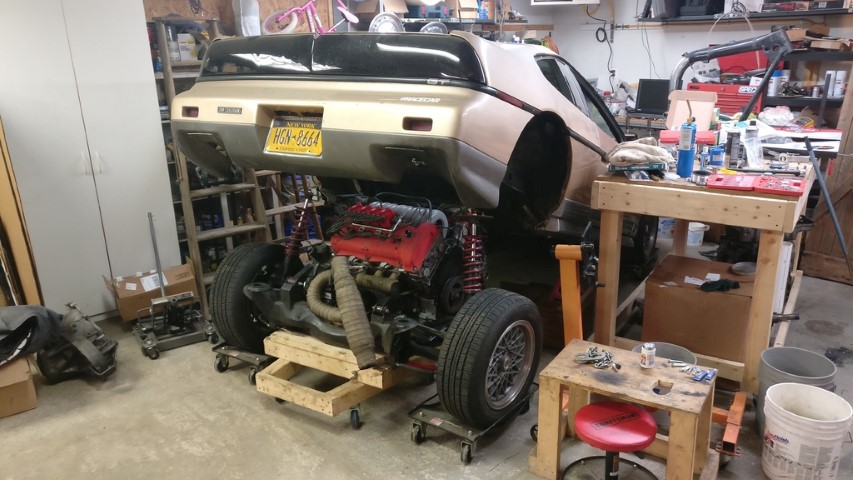
Heading back in the AM. If I play my cards right, I might be able to have the motor back in the car. Not functional, because I still need a few parts and to make a new set of fuel rails, but I can take care of that minutia this week. Gonna drive it this weekend. Fingers crossed.

Can’t wait to see this in action!

You and me both, mang. I’m working feverishly on it.

Today I wanted to get the clutch on and totally assembled so that I could measure and double check for clearance on everything. Not that I was worried, but still.

Got everything bolted up and noticed that I’d need to make some clearance holes in the flexplate for the bolt heads of the clutch cover. Took almost two hours in and of itself, but I got it done.

Then I realized that I’m a dumbass and ordered the wrong hardware kit with my clutch. The bolts are too short and did not include nuts. This was at 5P, so no good hardware stores were open. I ended up at Lowe’s and grabbed some cheap M8 hardware to at least get the damn thing assembled. But I did get it assembled. At least for measuring.

So, here’s the whole thing loosely piled together.

Then I threw it up against the flywheel and torqued the bolts down to compress the diaphram spring. Ever seen a Northstar with a twin disc clutch?

Everything looks pretty concentric. Maybe I haven’t fucked this up too badly after all.

Anyway, so now that all good; I wanted to get the bellhousing on there to measure for throwout adapter. Found this poor little fella’ in the ATF that remained in the gear house half.

Must have been attracted to the sweet smell, I suppose.

Anyway, I took some measurements and chucked up a big ol’ chunk of 4140 in my 4-jaw, mainly because that’s all I’ve got in a suitable base diameter.

I made a few cuts, but I’m not happy with them. I need to get my apron rebuilt. I think I’ll take tomorrow to do that before I get back to machining anything. I want to make some -AN fittings and injector bungs for my new fuel rails as well as this throw out adapter. Still trying to have it done by this weekend. We’ll see.

Only had a few hours today, but I managed to get over there and reassemble the apron on my South Bend 9A. I had torn it down several weeks ago with the intention of degreasing everything and reassembling with new wicks, and I finally got around to it. I got sick of cutting using the compound set at 0° to emulate the lead screw/apron/saddle combo.

After I pulled everything out of the kero, I scrubbed with purple power and rinsed. Then I laid everything out and got to work.

http://www.clutchsuperclutch.com/images/fieropics/IMG_20170613_211606.jpg

I didn’t take any progress pictures, but here’s the finished product. Just need to lube it up and reinstall it. I’ll replace all of the wicks and felts in the saddle while I’ve got it all apart.

http://www.clutchsuperclutch.com/images/fieropics/IMG_20170613_220101.jpg

http://www.clutchsuperclutch.com/images/fieropics/IMG_20170613_220116.jpg

I’ll finish the parts that I need to make for the Fiero and tear the entire thing all the way down to fully rebuild it before I get back to making Triumph parts. I’ll have moved by then anyhow.

Take a look at this:

http://www.clutchsuperclutch.com/images/fieropics/IMG_20170613_214418.jpg

According to the serial number, this machine was minted in 1952. There’s no evidence to suggest that the apron has ever been disassembled previously, so that tan/gray Cosmoline on that gear is likely 65 years old. Neat. I found a bunch of it all over the half nuts and lever mechanism as well, so I don’t think this machine has cut very many threads in it’s life. Love this thing. Now I need to find an old beat up Bridgeport to bring back to life and I’ll be set for a while.

I put that lathe back together the other day and started working on that throwout adapter.

http://www.clutchsuperclutch.com/images/fieropics/IMG_20170614_201904.jpg

http://www.clutchsuperclutch.com/images/fieropics/IMG_20170614_212729.jpg

http://www.clutchsuperclutch.com/images/fieropics/IMG_20170614_214344.jpg

http://www.clutchsuperclutch.com/images/fieropics/IMG_20170614_214401.jpg

I was struggling to get there. Turning the ID and counterbore the other day wasn’t too bad. Today when trying to turn the OD, the machine didn’t seem to have much power, surface finish was gummy and it chewed up the three inserts I had left right away. I ended up doing some research and discovering that I was spinning the spindle too slowly to get the recommended ~600SFM for 4140PH, which is like 30-32rc and I wasn’t cutting as quickly as recommended. At this point all that I had left was a boring bar with CCMT inserts and I started using that. Actually worked pretty well, until the ancient leather belt snapped.

http://www.clutchsuperclutch.com/images/fieropics/IMG_20170616_175323.jpg

So, I measured for a new belt and set out to PepBoys for the belt and some bypass caps. They seemed to be the only local-ish store to stock them. Anyway, belt was too long. Hah. Great. So, I cut it and stitched it together with fishing line. Now, when I tried to tension the belt with the lever, it kept spring back and relieving tension. I couldn’t understand why, until about the third time I applied the lever and the tensioning rod snapped.

http://www.clutchsuperclutch.com/images/fieropics/IMG_20170616_193512.jpg

Fuck. Guess that’s what I get for trying to actually use a 65 year old lathe.

So, I think I’ll get some 3/8" rod in the morning, then bend and thread it to replace at least the broken portion. I do have a 3/8-16 right hand die; I do not have a 3/8-16 left hand die. That’ll have to wait until I can get a hold of one. Then hopefully I can fix the belt and get it back up and running. I need this machine to finish this throwout adapter and injector bungs for my new rails.

Speaking of bungs, check these beauties out. They were like $3 apiece shipped. Couldn’t make 'em for that.

http://www.clutchsuperclutch.com/images/fieropics/IMG_20170615_192645.jpg

Anyway, I managed to get the flywheel and clutch fully assembled and torqued down with LocTite, ready to go.

Nice, new rear main seal went in first with that fancy white tool.

http://www.clutchsuperclutch.com/images/fieropics/IMG_20170616_142106.jpg

http://www.clutchsuperclutch.com/images/fieropics/IMG_20170616_142112.jpg

Then I assembled the flexplate and flywheel with the ARP hardware, red LocTite on the threads and UltraTorque lube under the heads. I finagled a pretty decent crankshaft locking tool.

http://www.clutchsuperclutch.com/images/fieropics/IMG_20170616_144522.jpg

http://www.clutchsuperclutch.com/images/fieropics/IMG_20170616_144515.jpg

And everything all torqued down with the water crossover back on the heads and block.

http://www.clutchsuperclutch.com/images/fieropics/IMG_20170616_182935.jpg

If I can get that lathe back together tomorrow, I might still have the motor back in the car this weekend.

Had to get over there today to fix that damn lathe, so I started with that. I got some 3/8" steel rod from Home Cheapo for like $5 and went to work.

The piece on the right is what I’m replicating, but with roughly 1-1/4" full inches of thread.

http://www.clutchsuperclutch.com/images/fieropics/IMG_20170617_143214.jpg

First I clamped the rod in the vise, torched with Propane and bent it.

http://www.clutchsuperclutch.com/images/fieropics/IMG_20170617_140654.jpg

Then I measured for length, cut the rod off, put a chamfer on the end of the rod and finally; tapped it with a 3/8"-16 die.

http://www.clutchsuperclutch.com/images/fieropics/IMG_20170617_143046.jpg

http://www.clutchsuperclutch.com/images/fieropics/IMG_20170617_143451.jpg

And after some more heating, pounding, grinding and filing; it works!

http://www.clutchsuperclutch.com/images/fieropics/IMG_20170617_145010.jpg

The rear [longer] rod has already been repaired, as you can see above. I need to replace that rod as well, along with get an appropriately sized continuous serpentine belt. I need to order a 3/8"-16 left hand die to make the rear rod.

I managed to sew the belt that I had together and put a little tension on it. Not in love with the stitched together job, but it does work okay.

http://www.clutchsuperclutch.com/images/fieropics/IMG_20170617_150348.jpg

http://www.clutchsuperclutch.com/images/fieropics/IMG_20170617_150354.jpg

Still want a continuous belt. I’ll make injector bungs this week and I should be all done with the machine for a bit.

Anyway, so I got back to work machining that throwout adapter.

http://www.clutchsuperclutch.com/images/fieropics/IMG_20170617_154355.jpg

Ended up with this.

http://www.clutchsuperclutch.com/images/fieropics/IMG_20170617_165715.jpg

http://www.clutchsuperclutch.com/images/fieropics/IMG_20170617_165729.jpg

http://www.clutchsuperclutch.com/images/fieropics/IMG_20170617_165754_1.jpg

http://www.clutchsuperclutch.com/images/fieropics/IMG_20170617_165810.jpg

So then I threw the trans up there and bolted it on. I ended up having to use my ~7ft conduit bar clamp (best damn thing ever) to pull the bottom of the trans onto the motor to make sure it seated properly. Well, it did. Clearance everywhere. There was much rejoicing.

http://www.clutchsuperclutch.com/images/fieropics/IMG_20170617_202134.jpg

Got it all back on the cradle as well.

http://www.clutchsuperclutch.com/images/fieropics/IMG_20170617_214556.jpg

Needs a few finishing touches, like a new set of fuel rails and all of the fluids filled and bled.

Almost back.

Looking forward to this project being done and enjoyed…always had a soft spot for Fiero’s…

Cradle is back in and the shifter cables, radiator hoses and wiring is all in place.

http://www.clutchsuperclutch.com/images/fieropics/IMG_20170620_194757.jpg

All that’s left is those fuel rails and fill/bleed fluids. This weekend is looking more and more reasonable for another maiden voyage. Hah.

FUCK IM EXCITEDDDDDDDDDDDDD