Agreed every time I needed a custom driveshaft I was told at least 4-6 wks. There is also Brookline machine in the city that does great work for a fair price
That’s what I was thinking, but the only “problem” (maybe unrealistic) is that the CSB is designed for lateral loads, not axial. For what it’s worth I have a new CSB sitting in the toolbox that I’ll have them install at the same time.
There are guys running a cammed LQ4/T56 combo and a Maggie’d LS2/T56 (making 540whp) in their E39s with the front and rear slip combo with no issues.
Reassembled the spool yesterday.
Let’s get started.
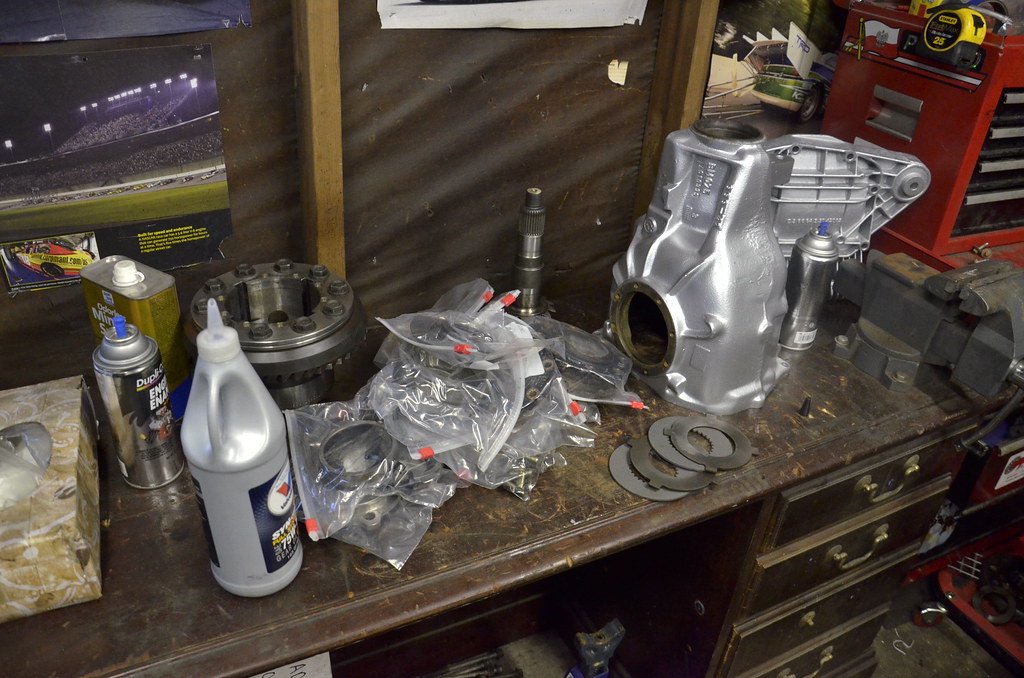
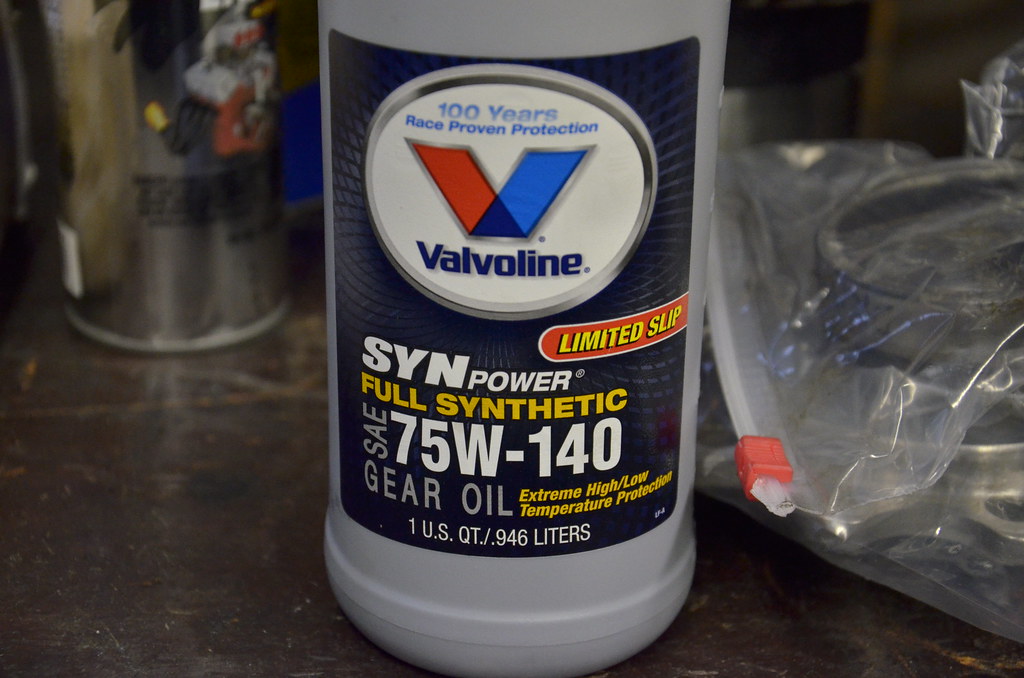
I’ll be using this stuff for break-in. It was the cheapest stuff. I’ll probably run Redline or Royal Purple when I change the oil in it a few weeks in.
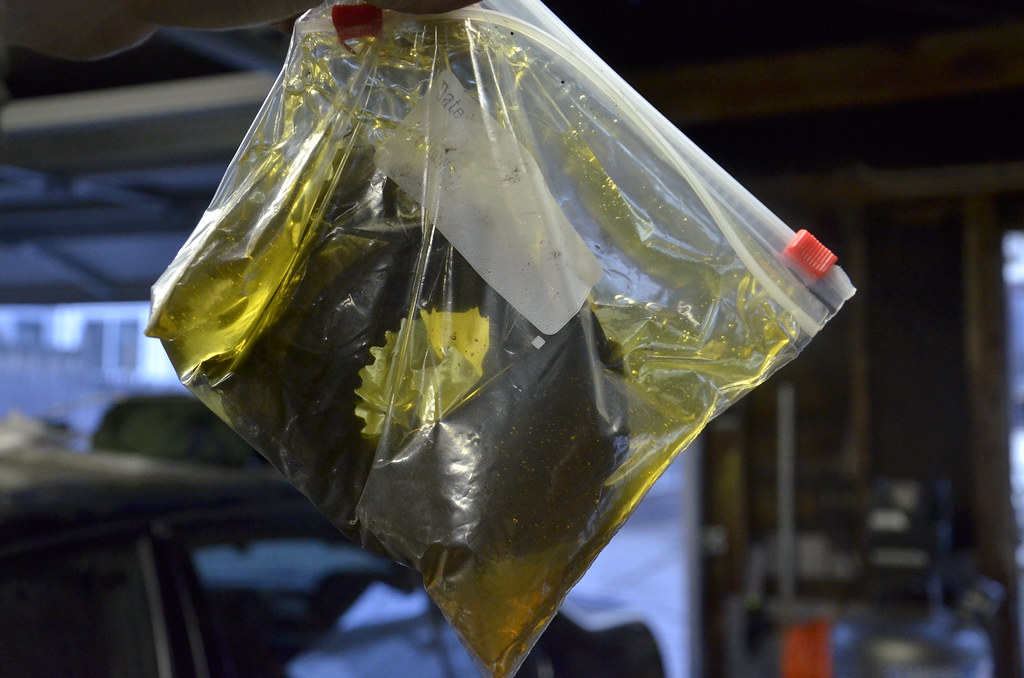
Soaked clutches and discs (double bagged it)
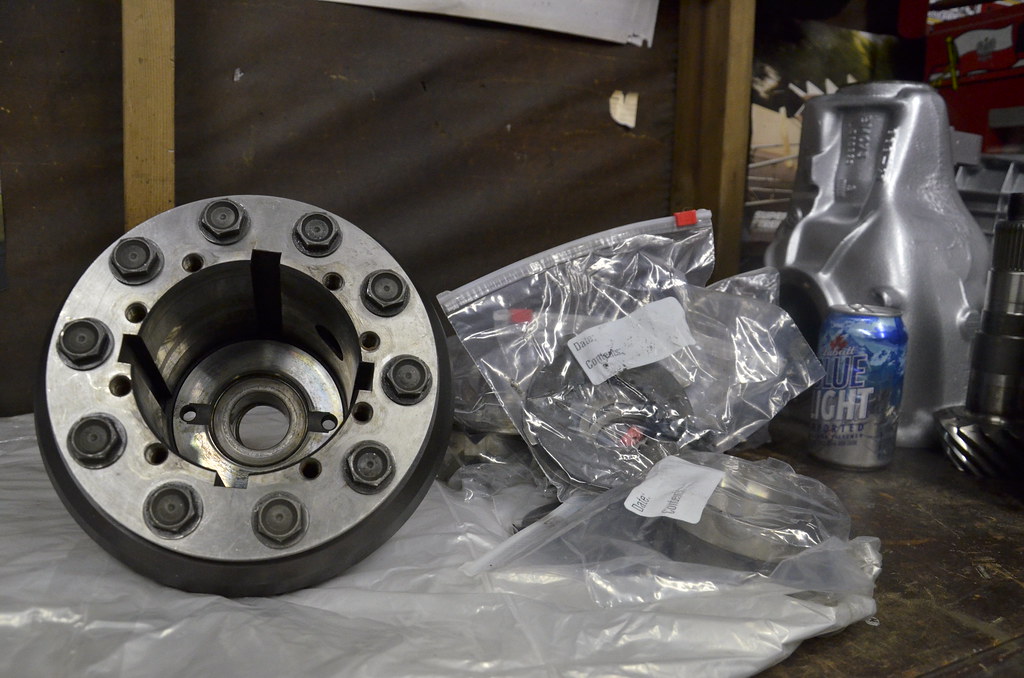
I assembled everything with the ring gear bolts facing up, obviously. That will be the way I refer to “up” and “down” while assembling.
First inserted the oil control ring, with these ridges facing down.
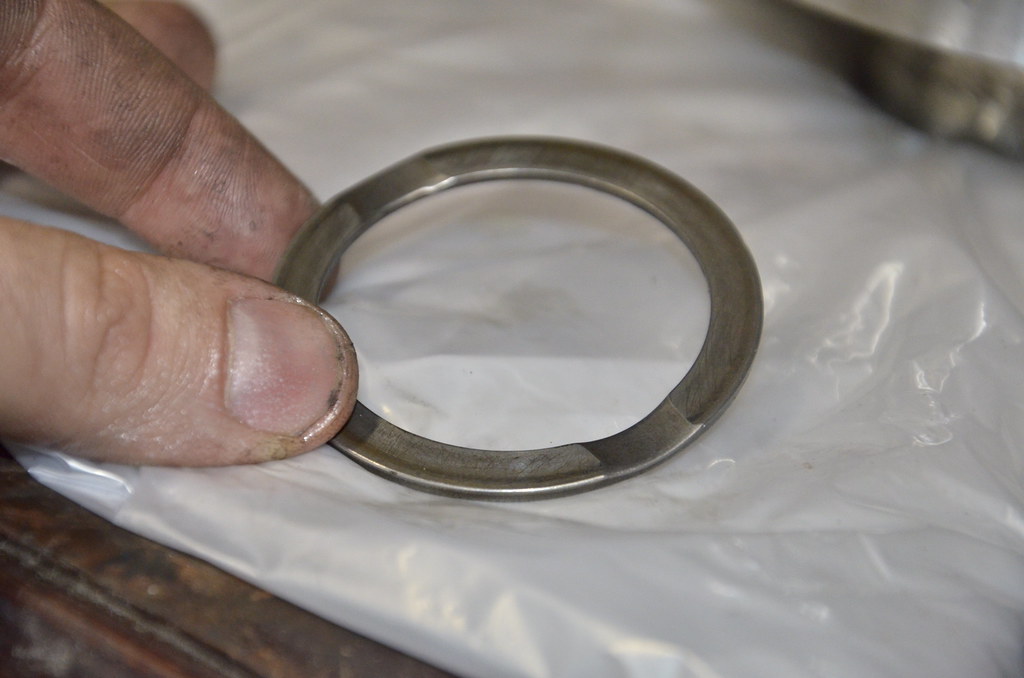
Small diameter spring washer, with the narrow cone end facing down.
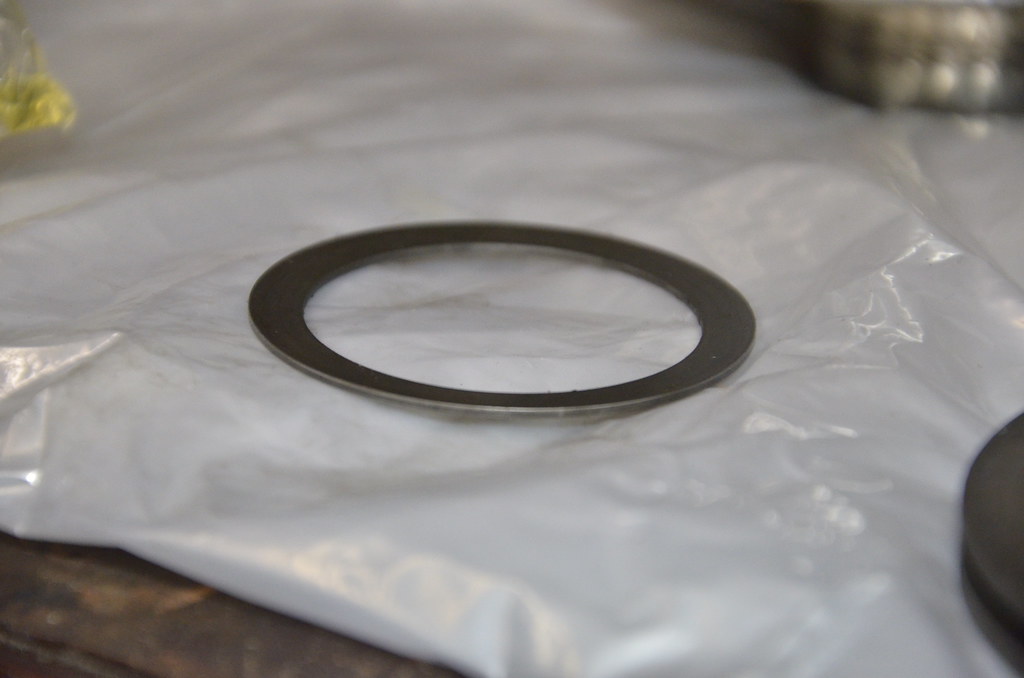
Another oil control washer, with the ridges facing up this time.

Bellevue washer, narrow cone end facing down.
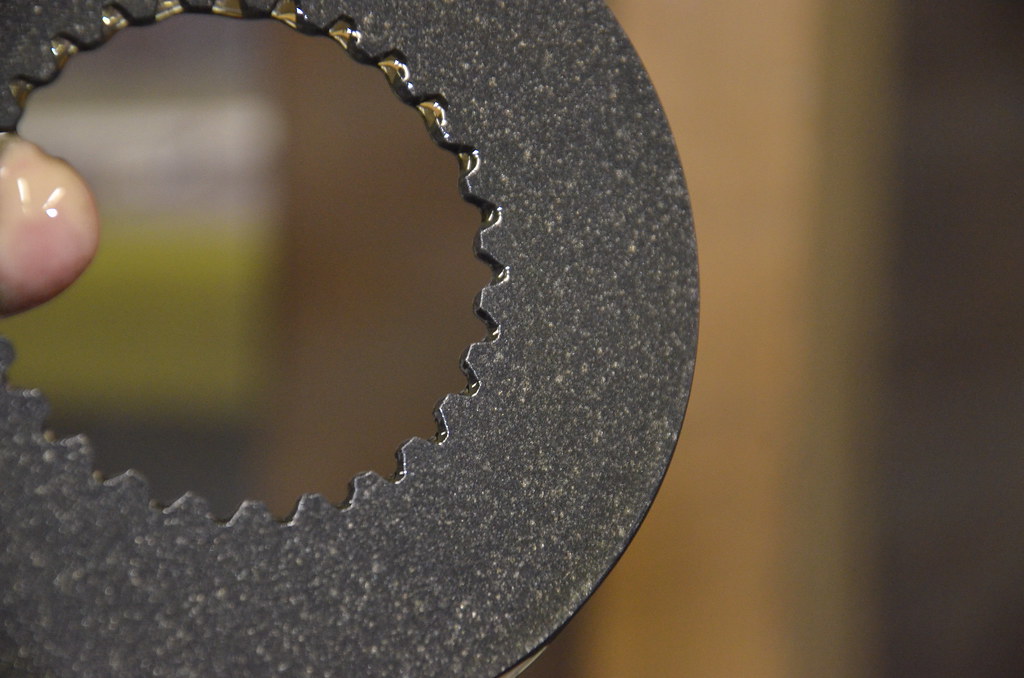
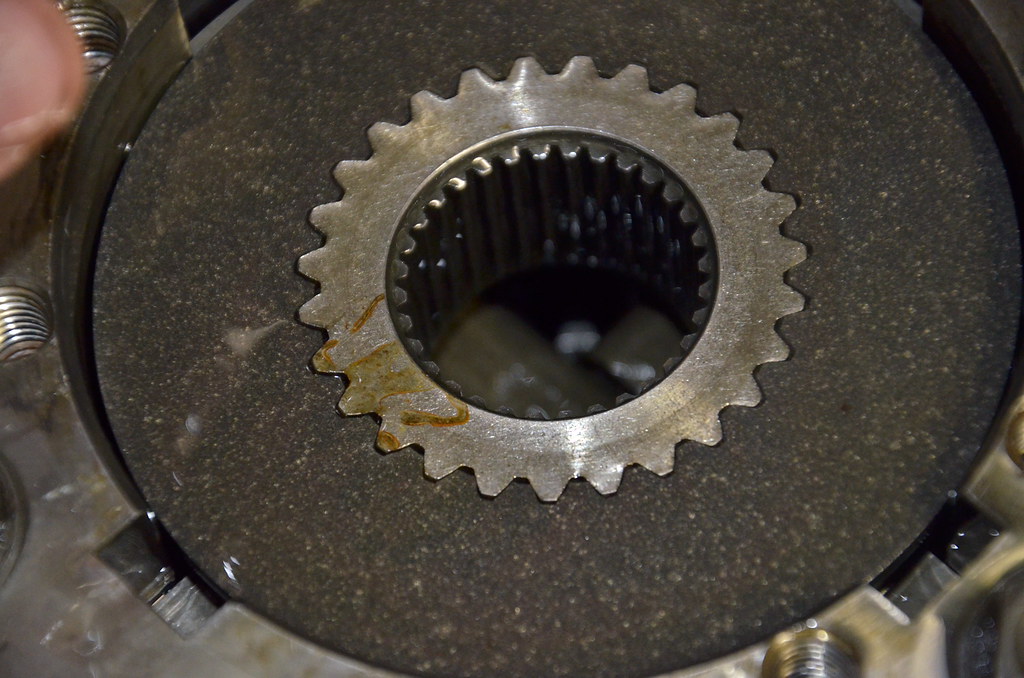
Next, a clutch.
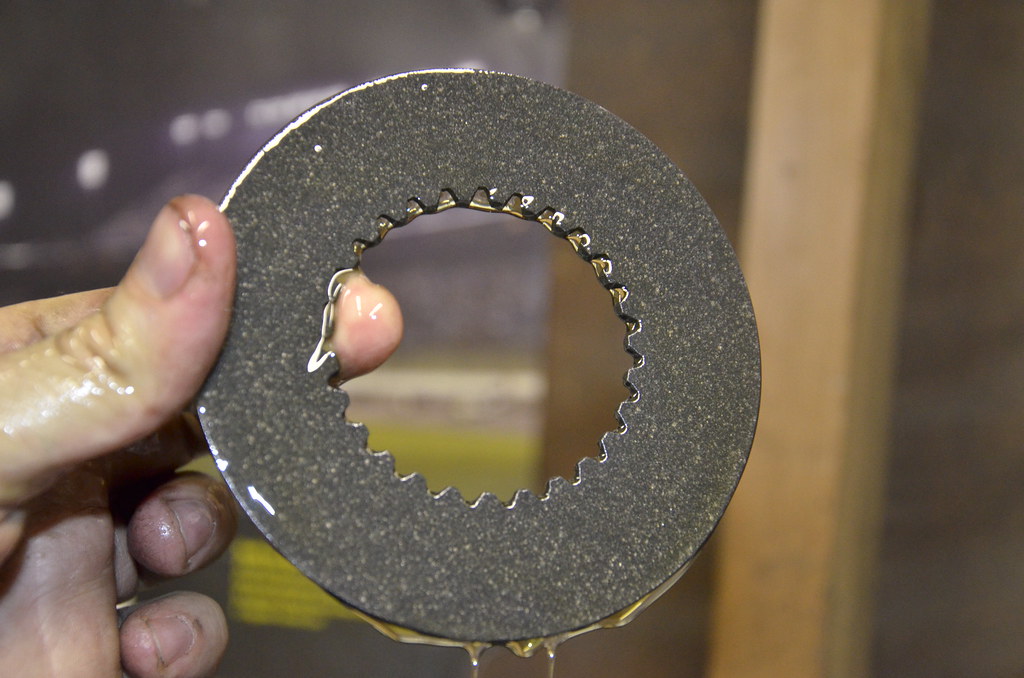
A detail of the friction surface.
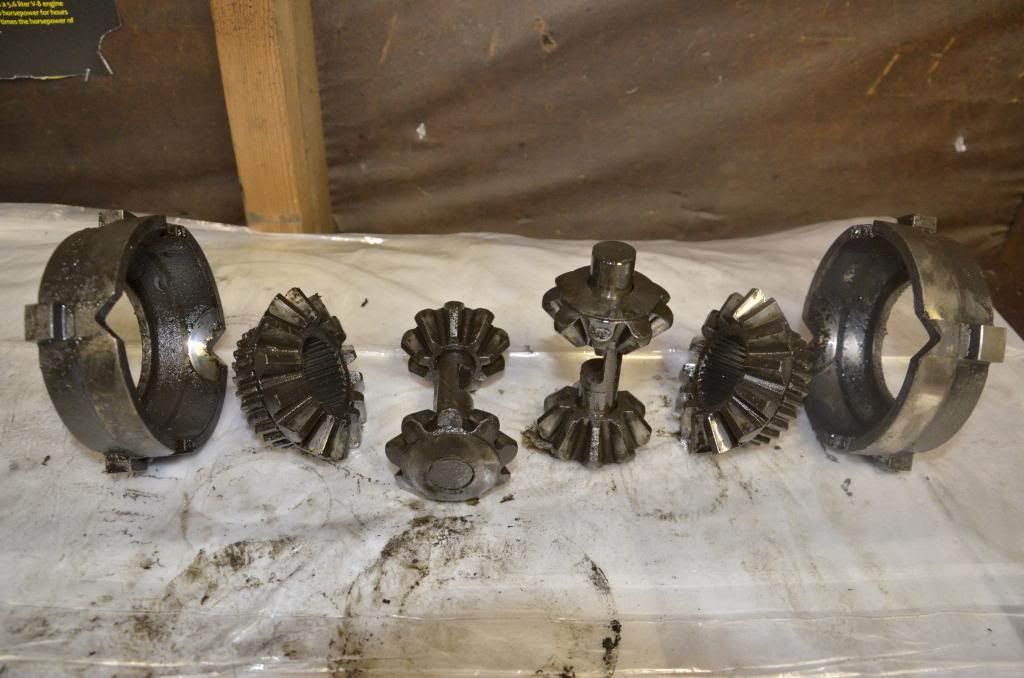
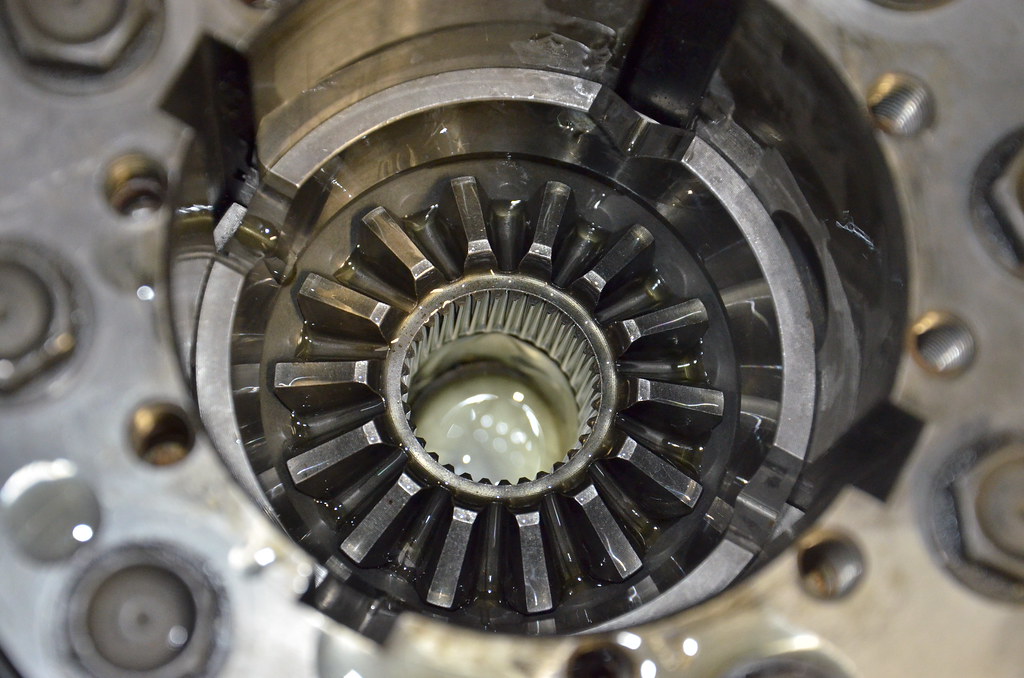
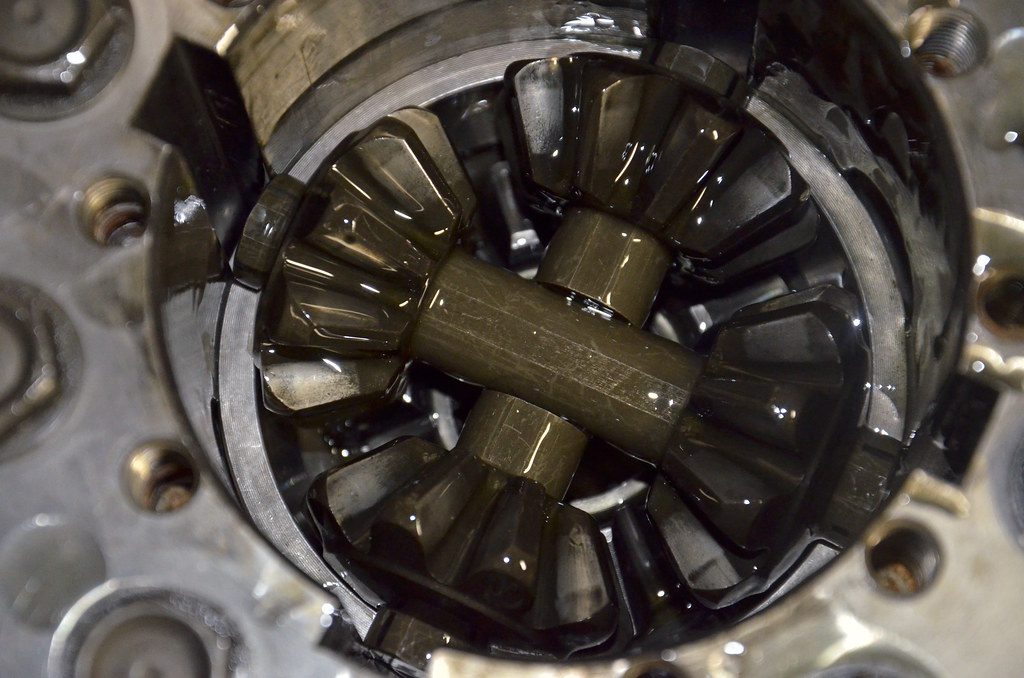
Now we install the center spool rotating assembly. I took this picture during disassembly, but it’s a good illustration of how it all goes together.
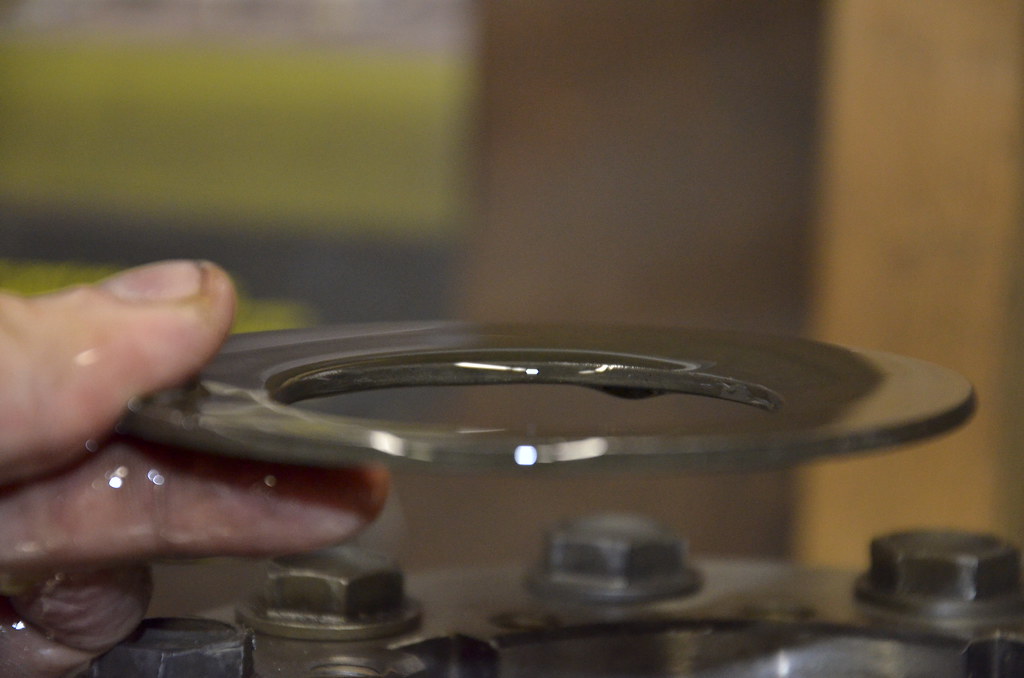
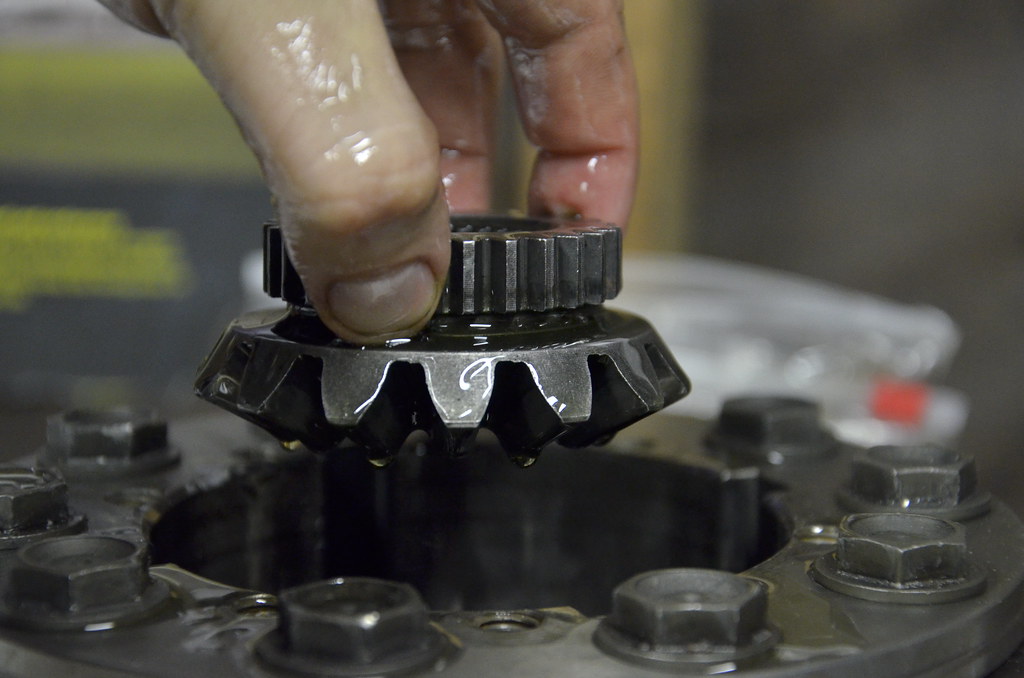
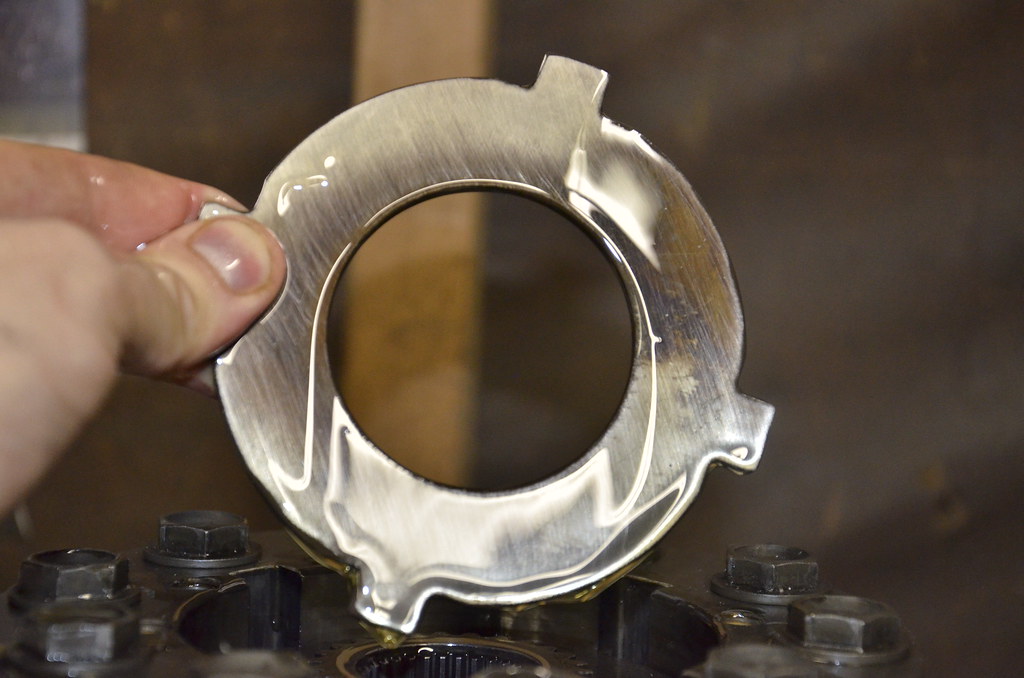
Then, a “crown cap”, with the friction surface facing down, and the V notches facing up (exactly as I have it in this photo).
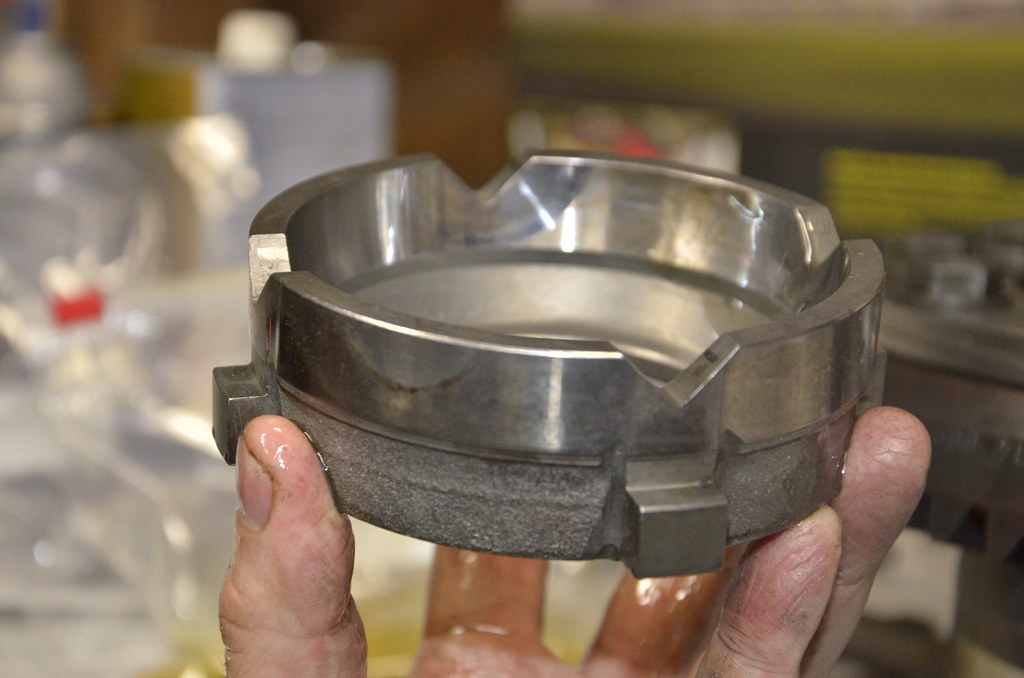
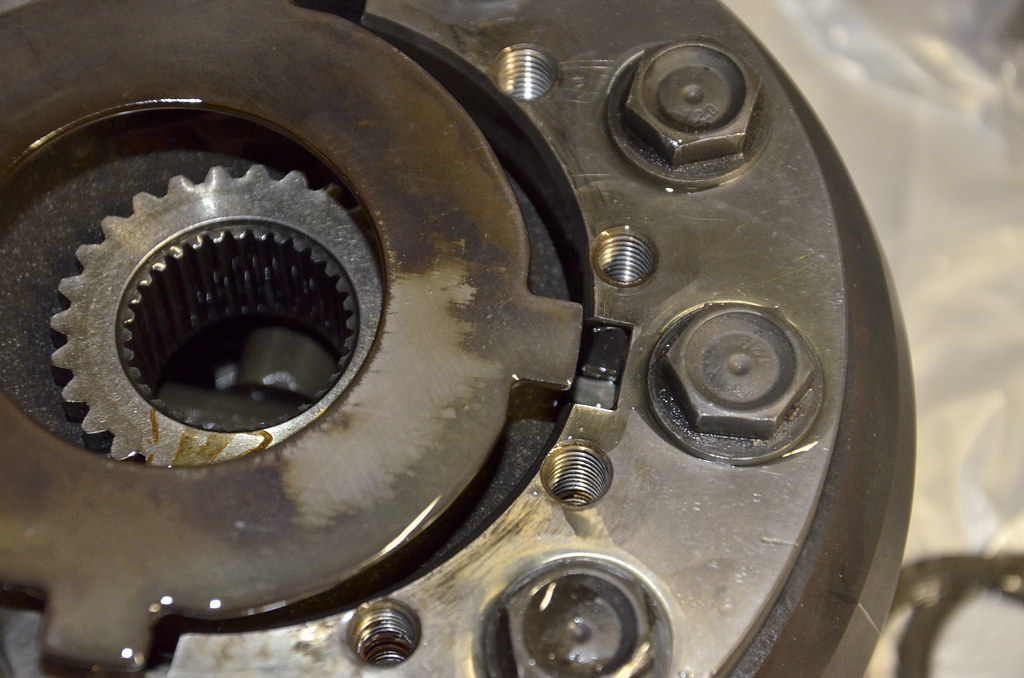
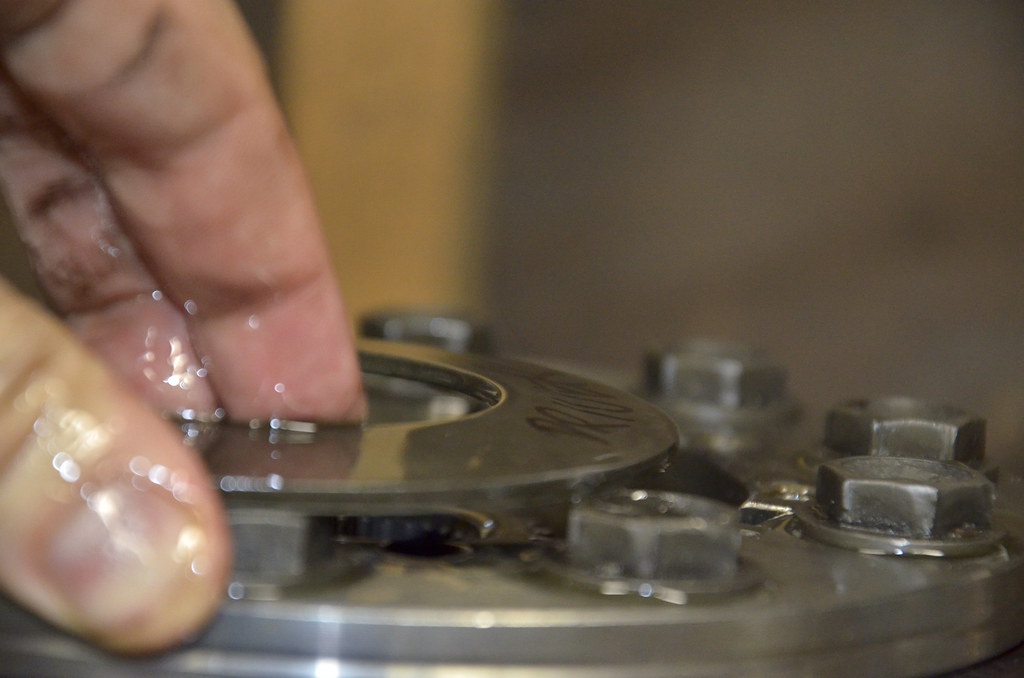
Slide the dog ears into the grooves, and make sure it’s seated down all the way. You can see the teeth of the clutch disc poking out underneath the crown cap.

Inserted one of the main side drive gears, just as shown.
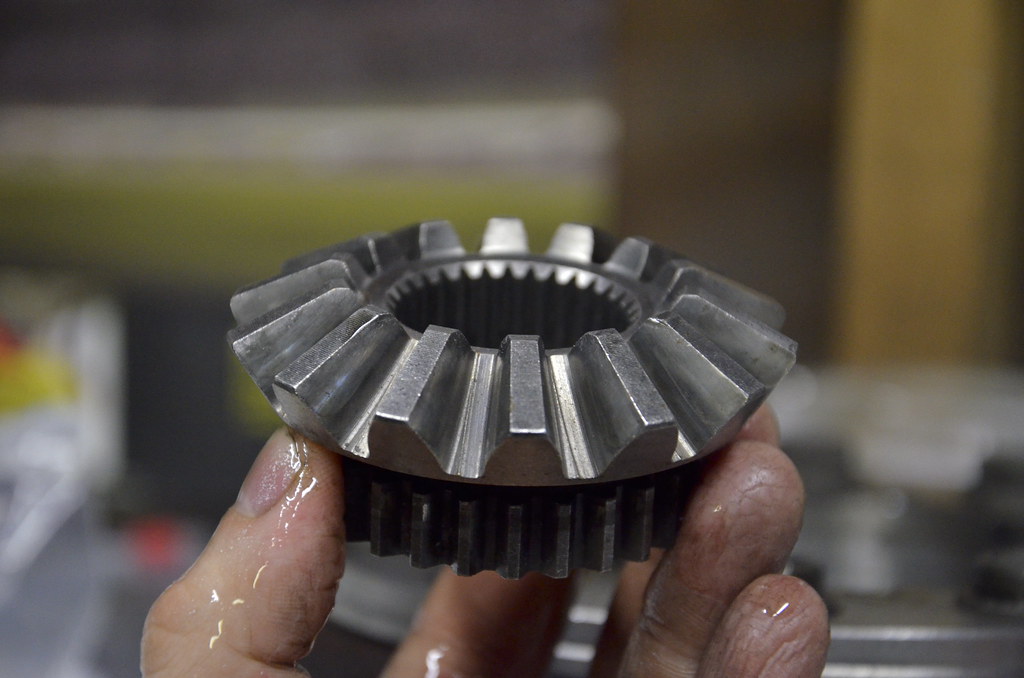
It slides in on a film of gear oil.
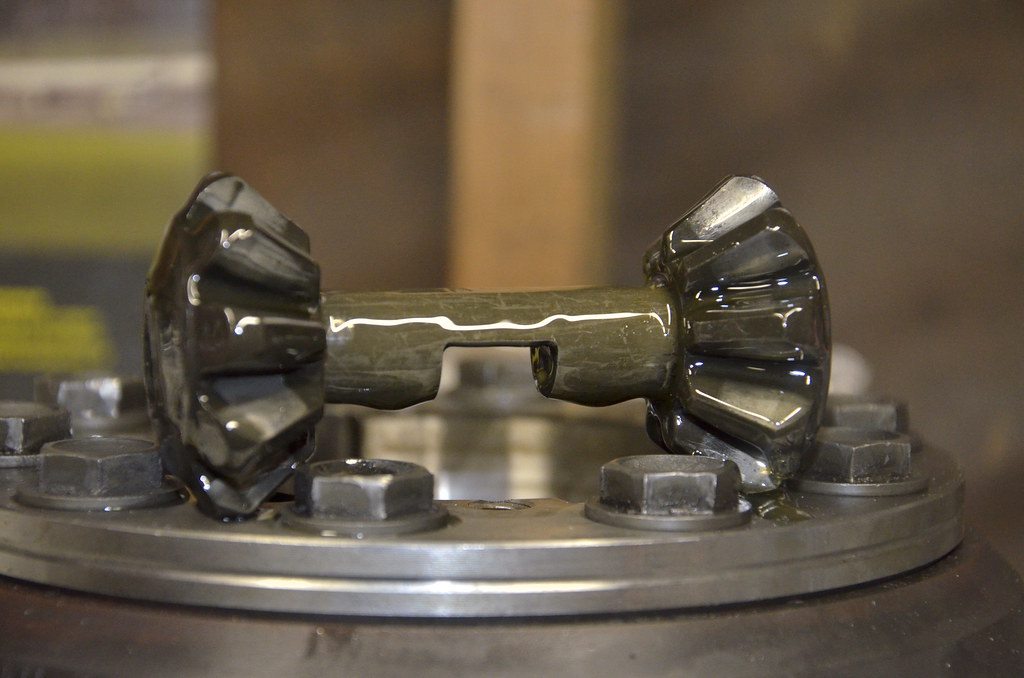
Assembled one of the “dog bones” with planet gears. Tough to keep together as the gears want to slide off on that film of oil.
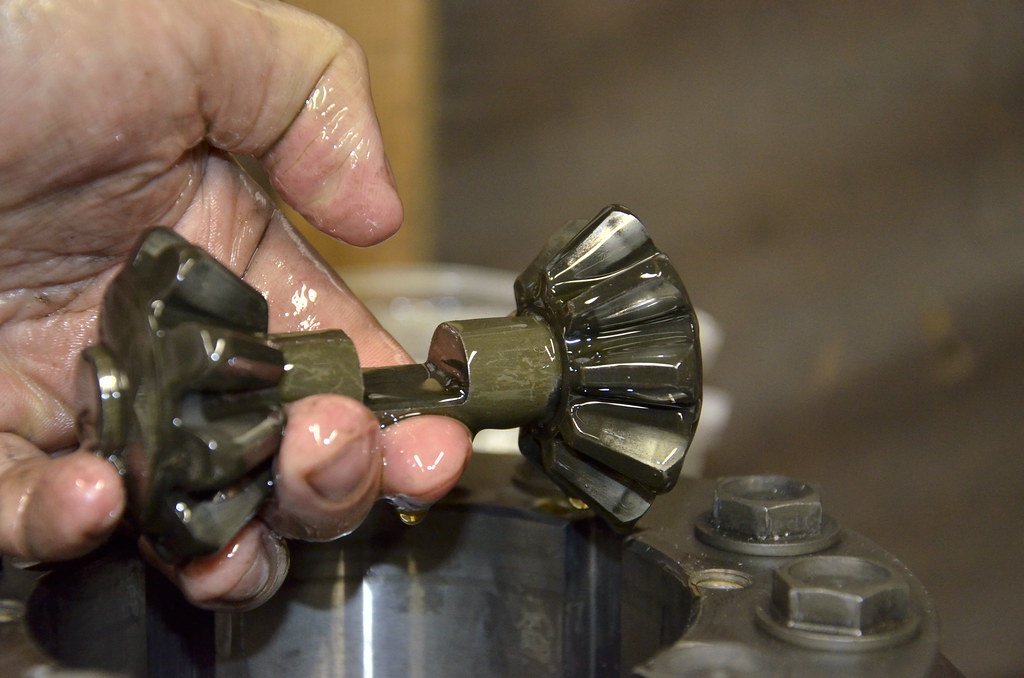
The teeth mesh nicely with the main side drive gear, and it all self-aligns.
Same goes for the next dog bone, just upside down.
---------- Post added at 02:41 PM ---------- Previous post was at 02:04 PM ----------
Everything is a mirror image from now on, starting with that second dog bone assembly. The “line of symmetry” is between the dog bones.
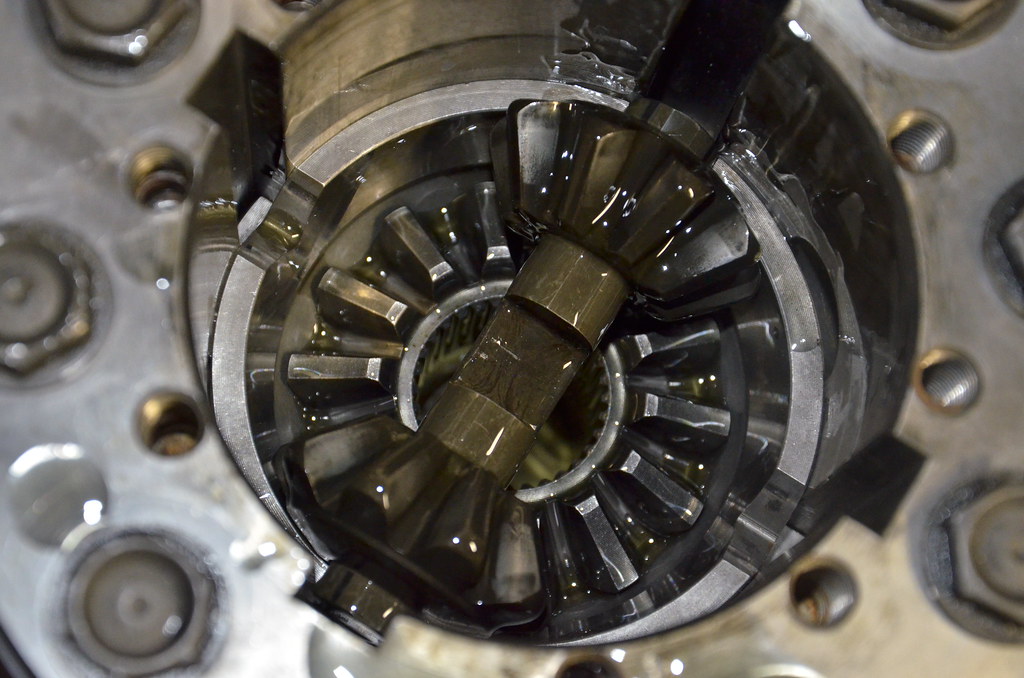
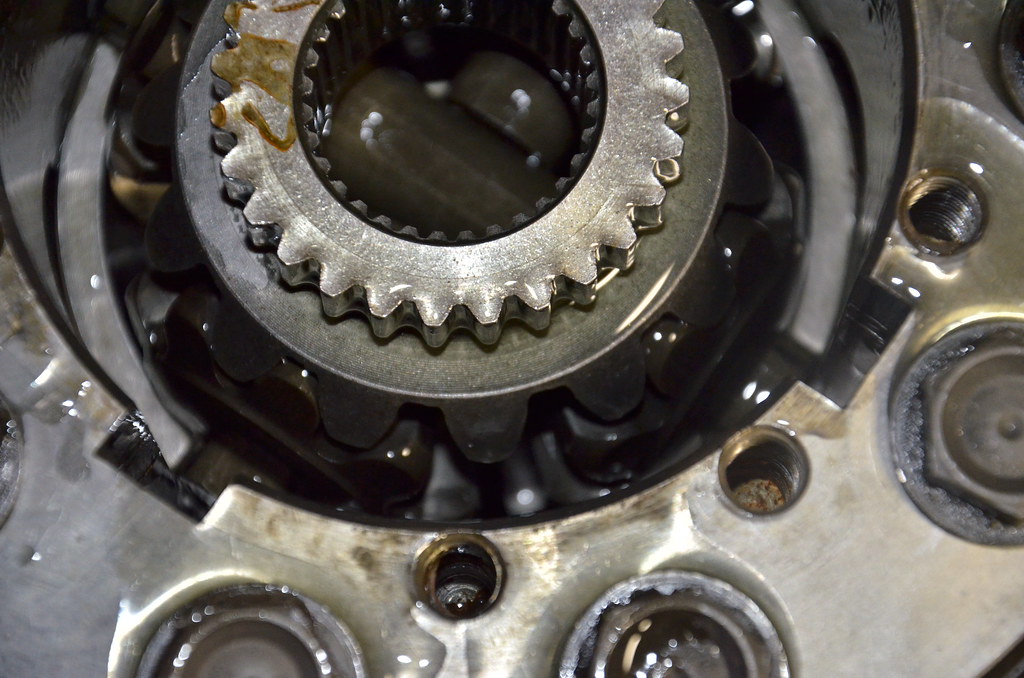
After the dog bones are together and in, the next main side drive gear goes in, teeth down.
You can see the drive gear teeth meshing with the dog bone planet gear teeth.
“Crown cap” goes next, notched V side down.
The ears of the crown cap fall nicely into the slots machined in the main spool case. Very tight tolerances so it all slides down slowly on a film of oil.

Another clutch disc

And the teeth line up nicely with the end of the main side drive gear.
Followed by a dog ear friction disc, which slides nicely into the slots.
Bellevue washer, narrow cone end up
It probably didn’t matter but I kept all oil control washers and spring/Bellevue washers side specific.

Oil control washer, groove down
Small diameter spring washer, narrow cone end up

Followed by the last oil control washer, groove end up.
---------- Post added at 02:56 PM ---------- Previous post was at 02:41 PM ----------
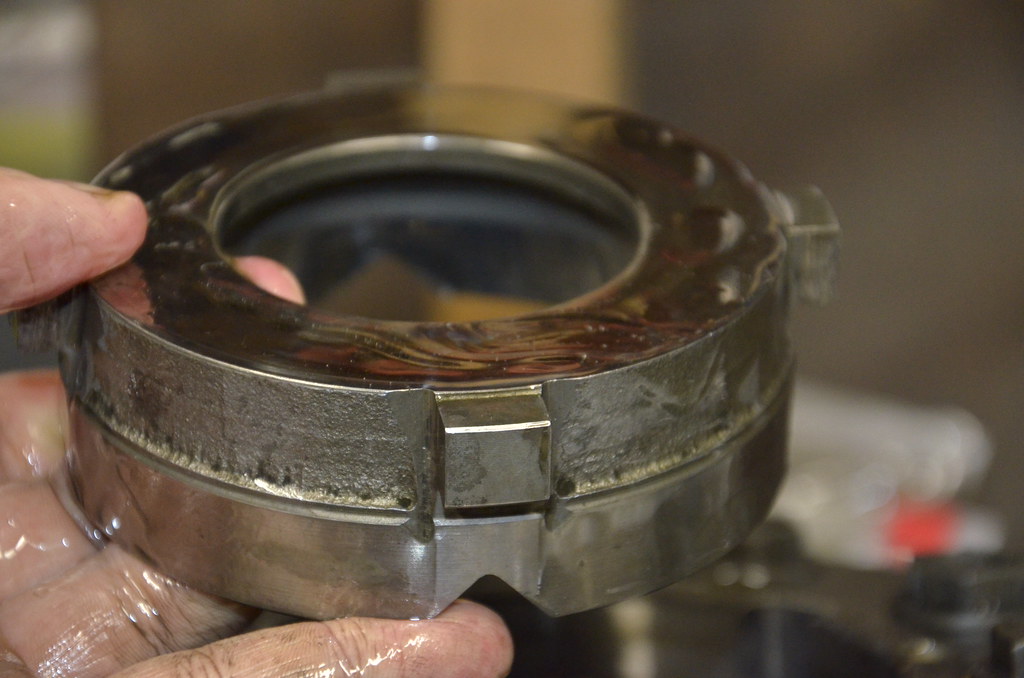
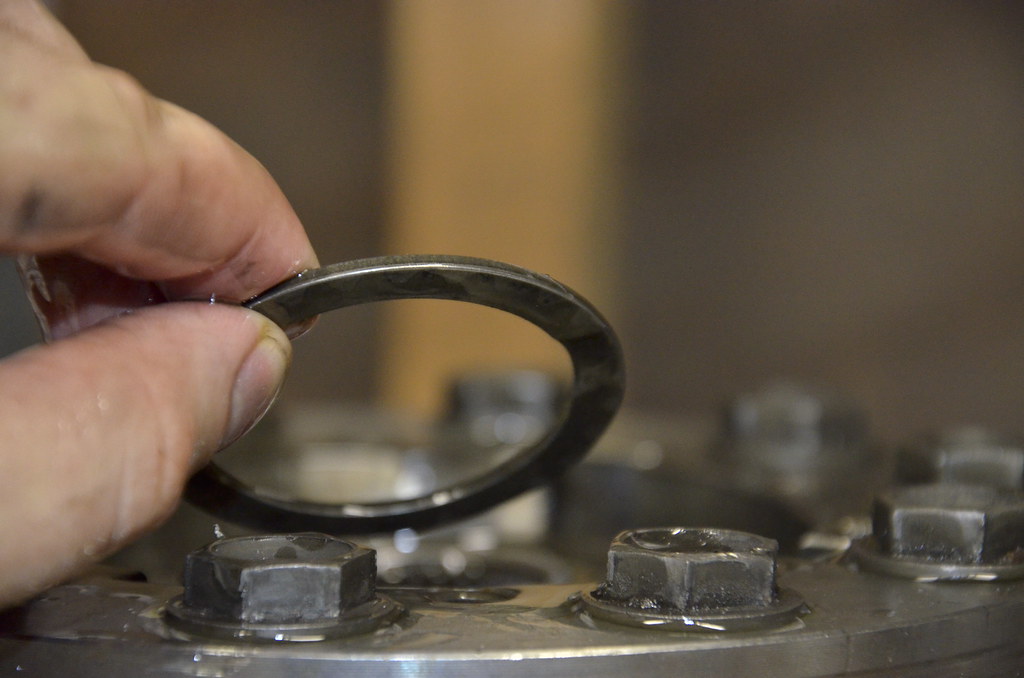
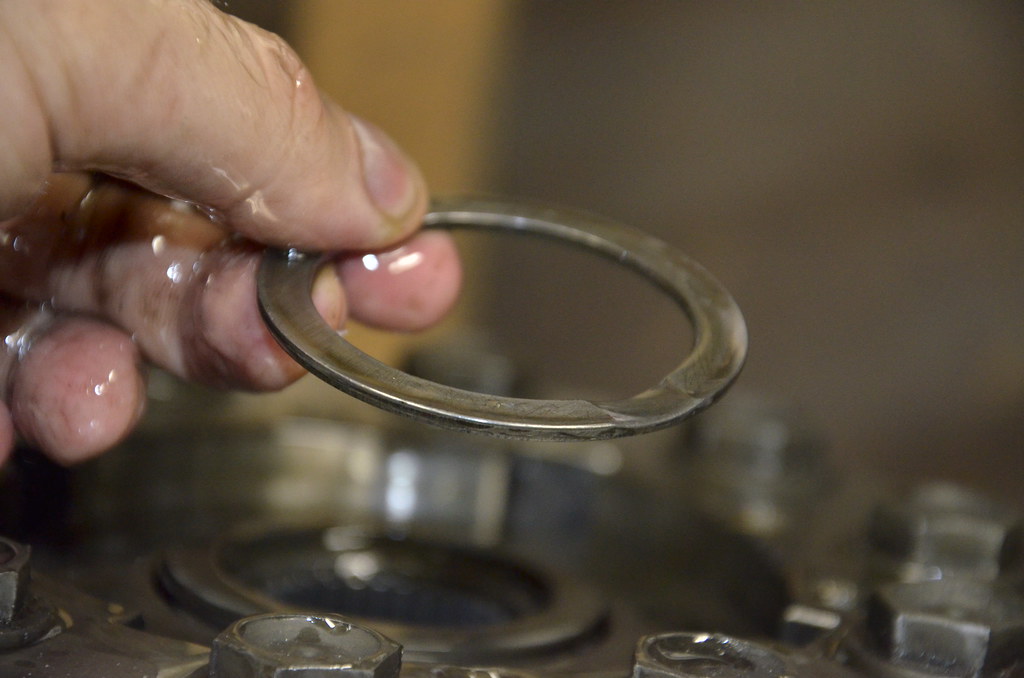
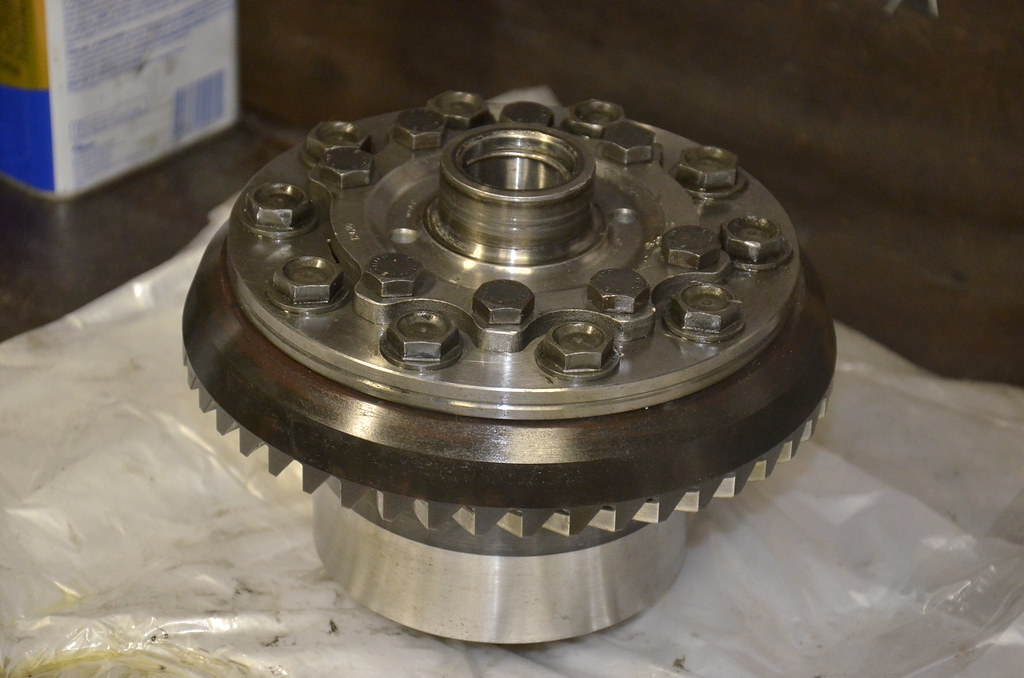
Finally the spool lid can be put back on. It took me a few tries to align it with the bolt holes in the spool case, all while making sure the I used the same method that I did installing the ring gear. Use bolts to get it started a few threads in, then remove bolts. The friction of the spool lid is so great that it won’t go anywhere once you remove the bolts. The key was to tighten them all equally (1 turn at a time or so) to make sure each end of the lid came down roughly at the same rate.

The cover is cocked in this picture, one of about a half dozen attempts to get it aligned perfectly. Once it’s close rotationally I used a rubber mallet to further seat the cover. It won’t ever fully seat without the bolts because the tension of the Bellevue washers resists that.
The bolts were pretty nasty. Remember, these were inside the spool lid, which is inside the main diff case, and somehow shit still got in there (in a bath of oil as well). I cleaned the threads with a fingernail, rag, and brake cleaner.
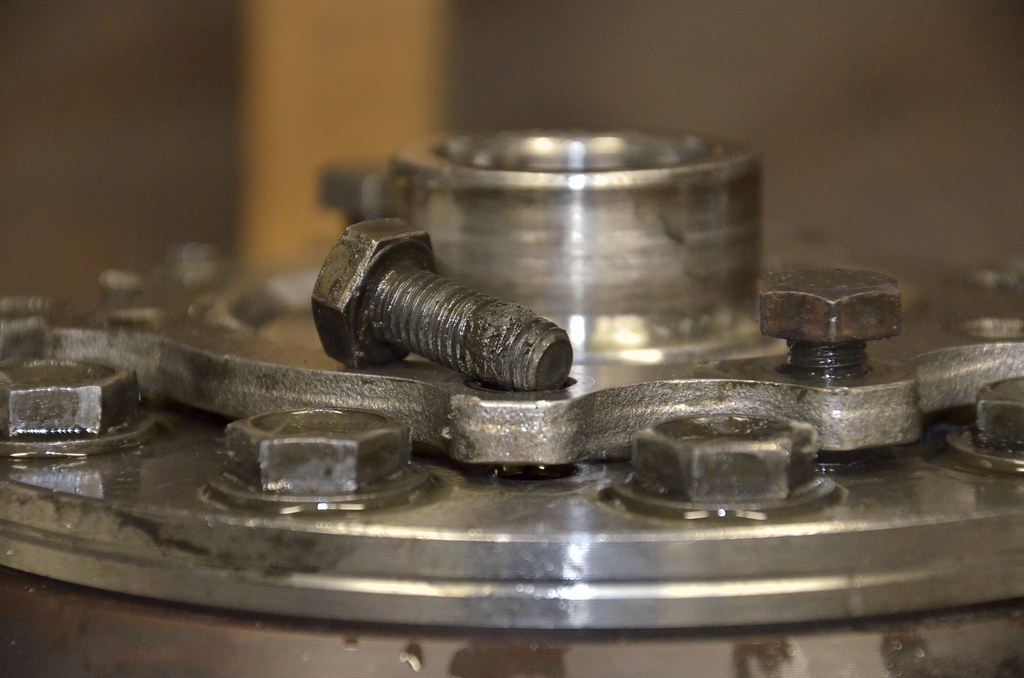
Before reinstalling the bolts, I blew out the threaded blind holes with compressed air and found a nice little specimen of OEM threadlocker.
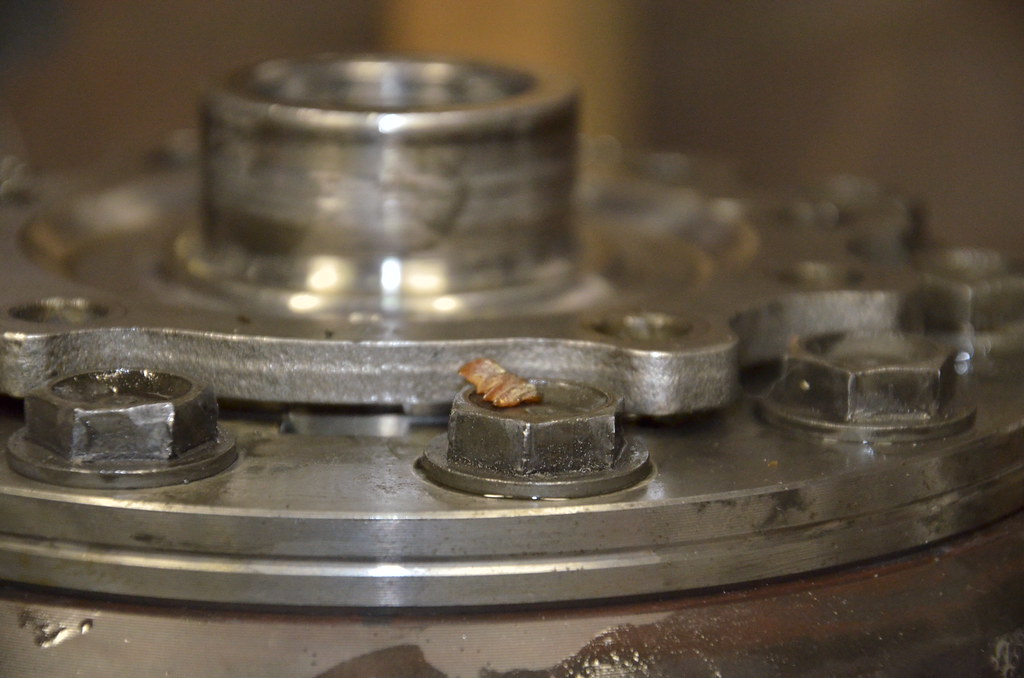
Bolts partially snugged down, about 25 ft-lbs with Red Loctite.

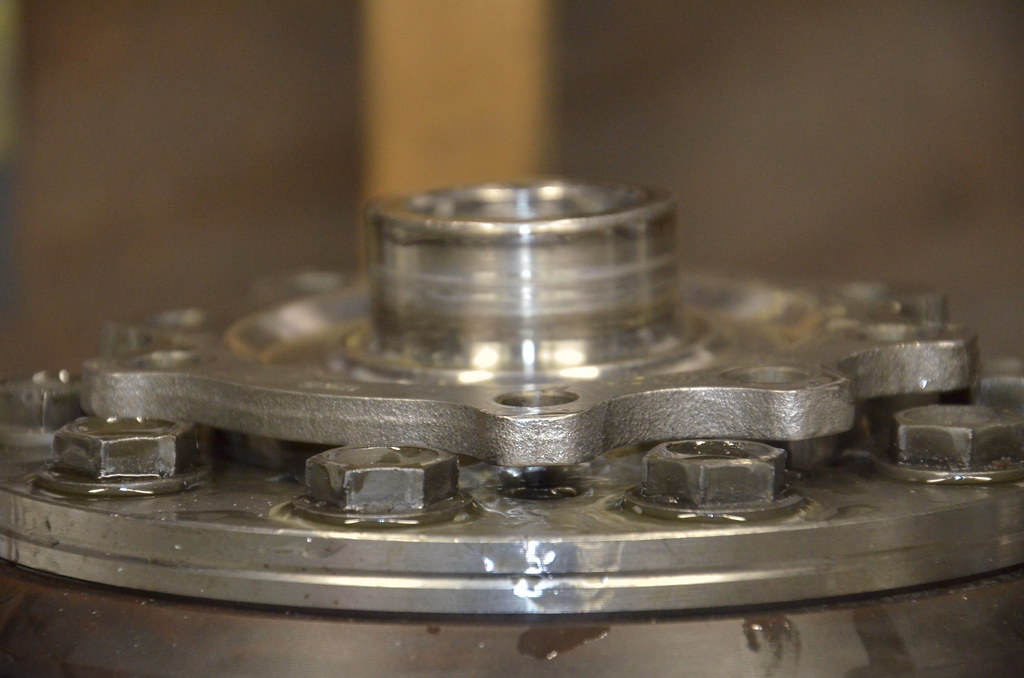
It really takes some torque on the bolts (evenly of course) to bring the cover down and compress the spring washers.

I torqued to 25 ft-lbs first pass, then about 60 ft-lbs second pass.
At this point it’s all ready for new races and bearings, that’s happening tomorrow morning.
:tup:
Awesome detail, this is what I love to see
weather is getting nicer. was able to work on the car with the door open for the first time in months.

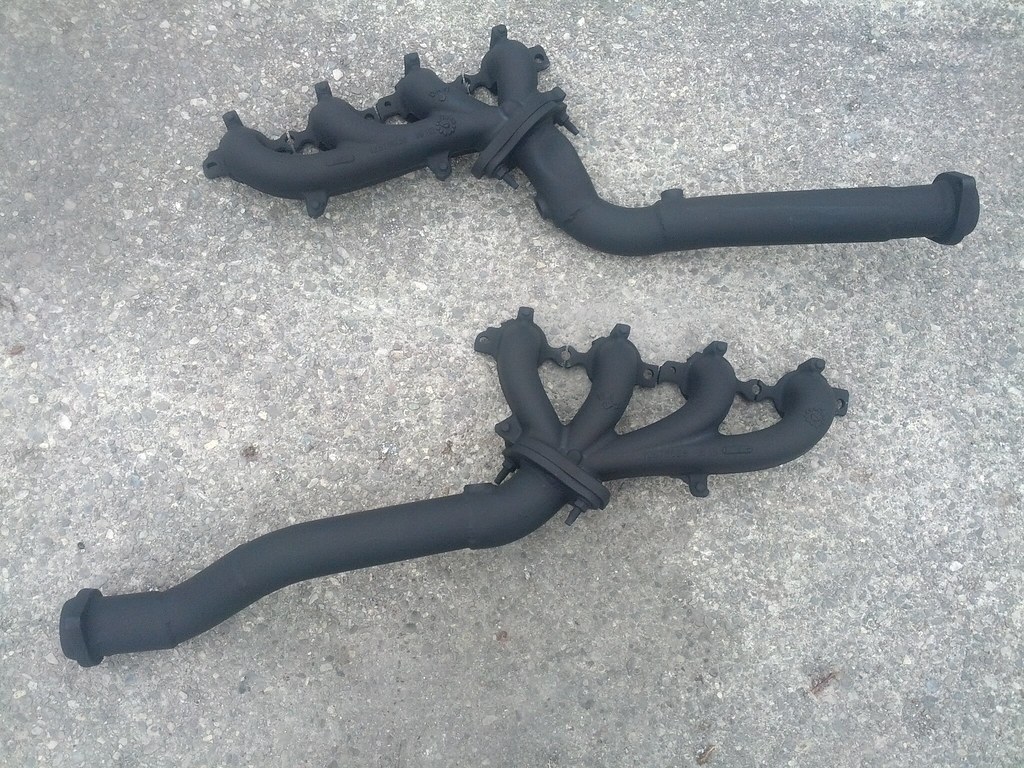
exhaust is done. CTS-V manifolds, stainless 2.25" mandrel piping

oil pan is on. it was warm out so my fiancee decided to help out.

Manifolds are finally done, painted with VHT Flameproof header paint
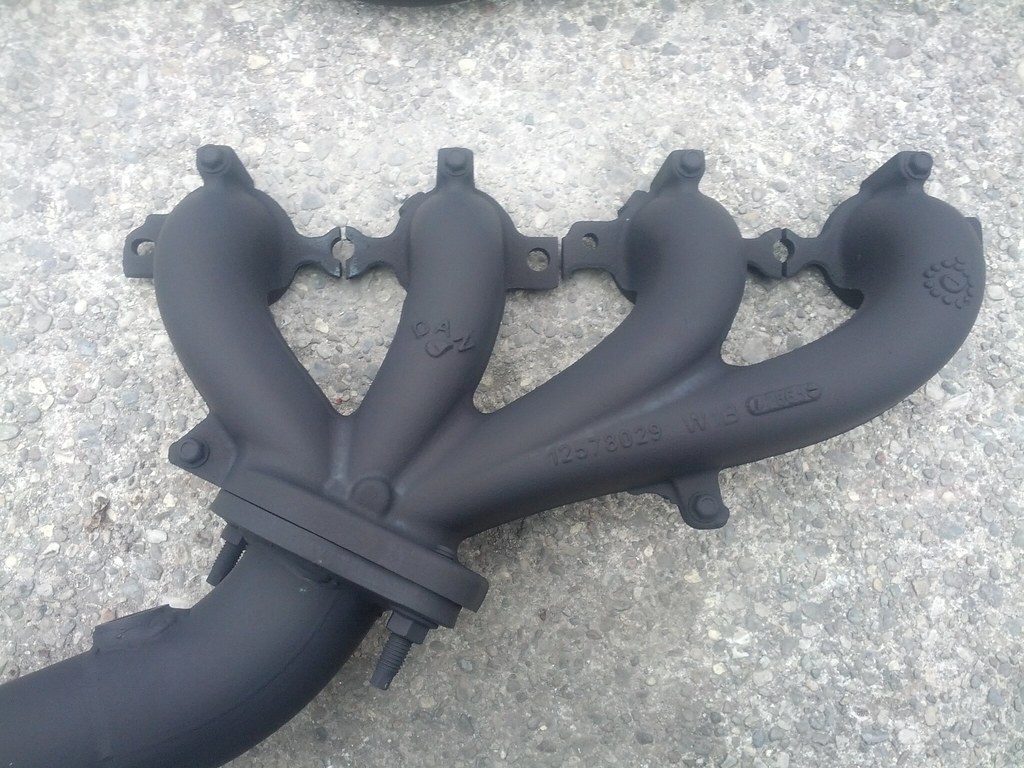
Luckily I didn’t have to trim any of the OEM manifold heat shields to fit the exhaust. Forgot to snap a picture of those bolted onto the manifolds.
My rebuilt Stage 2 T56 will be here Friday, along with the Diamond lightweight flywheel. I’ll bolt up the flywheel, Diamond Stage 2 clutch/pressure plate, and hopefully install the motor for the last time this weekend.
Also ordered a Tick speed bleeder to bleed the new system quickly and easily. I still need to figure out whether the new 4th gen F-Body clutch line can be modified the way the E36 guys do, since the E39 master may be different.
Can’t post pictures on here without a request for NOODEZ! haha, tell her I says hi.
Do work, is this done yet?
haha, wish i could get nudez myself…we’re an old married couple by now. she’s still enjoying the AUX input in her A4, thanks again for that.
i’m hoping this POS at least appears a lot more done by the end of the weekend. my buddy told me about Southern Worthersee in Helen GA, which is in mid May. I hate that stanced car show bullshit but I would love to take the car down there just for the sake of a road trip, to see the scenery, and to put some miles on it. The soft deadline is May 1st, 2 weeks of heavy shakedown, then maybe go down there…
Well, lots going on.
Ordered a 1330 slip yoke locally, it came in yesterday, test fit it today, and of course it’s the wrong one and doesn’t fit. I am going to return it and go to another, more competent shop locally (Denny’s Driveshaft).
Also wrapped up the clutch line. Rather than modify the camaro master cylinder fitting to match the BMW, i just had a local hydraulic shop mate the 2 lines. Installed and fits perfectly. I also installed the Lokar throttle cable; the outer sleeve was the perfect length, but the inner line was just a tad too short, so $5 later, a bicycle brake line trimmed to fit finished the job. I finished up the pedals, put them all back together, and we’re good to go. I would have bled the clutch but didn’t have any spare fluid on hand.

I rebuilt the driver’s side engine mount to clear the alternator, and was inspired to get creative with the sharpie…i think it was the brake cleaner fumes


These also came in. I need to buy one of those 45* filler necks so the oil filler cap lines up with the cover.

T56 came back from Texas Drivetrain

and it all went together smoothly.

Then, my daily driver decided to surprise me on Thursday morning

It was broken into 5 pieces, and shredded that tire. I grabbed a replacement spring from a junkyard and had it on the road again later that day.

I’ve got some pentosin for the clutch slave if you need some quick. I can leave it accessible at my place if you cruise this way for easter.
appreciate the offer. i’m going to make one big stop in a week or two and grab all the fluids i need: coolant, enough oil for a few changes, and brake fluid.
shit, whats up with the rear diff? text or pm me. totally slipped my mind with shop work building up.
Still convinced your cat drew that picture on the engine…
Back a page or two he did it himself.
Nah, I only assembled the internal limited slip portion. I stopped by John’s shop a few weeks back to have him press in the new bearings and races, and to set backlash, pinion preload, all that. Unfortunately we didn’t press in the bearings all the way, and also didn’t have the necessary shims required to finish setting it up.
I will take it to a local place in Kenmore/Buffalo area (RE Speed) that does this, to avoid further headache. At this point I am running out of time and for the amount it’ll cost to have it fully assembled and set up, I’d rather have them deal with it.
Chipping away at the little things…
Alternator mounted up, new eyelet crimped to batt (+) wire, hooked up to alternator
My fiancee helped me bleed the clutch using my Tick Speedbleeder (great product, I can’t even imagine doing it from under the car). I’ve never driven a 4th Gen F-Body before, but the clutch feels like what I would expect in one. At this point the pedals are completely wrapped up and done…it felt nice to sit and make vroom vroom noises while playing with the gas and clutch.
I also finally found the cranked 12V+ wire, so I will hook that up to the starter this evening, put some oil in it, and possibly bump the starter just to see if anything blows up (plugs are not in yet, coils aren’t hooked up, and injectors aren’t wired, so no harm).
Can’t wait to see this thing complete! I’m about to replace the worn out suspension on mine with some used M5 stuff, but I need to buy front strut mounts. One day I’d like to LS swap it!
Not sure what your car has on the front now but I have the stock Sport springs left over from my car if you’re interested (I have lowering springs on it now). I still have to eventually go through and diagnose a clunk in the front end. Already replaced LCA’s and thrust arms, so I’m leaning towards sway bar end links or maybe steering linkage/tie rods.
How are those oxygen sensors working out for you?
Sometimes you need to place vacuum on the master reservoir and leave it overnight to get the last bit of trapped air out. It makes a big difference in pedal feel