hooray for faggotry in a cool thread… sheesh
I must be old
hooray for faggotry in a cool thread… sheesh
I must be old
End results > the bickering here.
Besides, anyone in this thread who has ever modded a car and has said anything along the lines of Newman spending “a little more to get something better to begin with…” is a hypocrite. Think about it.
Not EVERYONE (just a vast majority ![]() ) on NYSpeed are pine-riding jerk-off’s who base their opinions on what someone else wrote on the internet.
) on NYSpeed are pine-riding jerk-off’s who base their opinions on what someone else wrote on the internet.
Dan’s taken a shell and built a race car out of it which he drives every summer in competition so he probably knows quite a bit about what he is talking about.
:tup:
thank you matt, for the props. I just want to give insite to the things that i lay in bed at night thinking about. (not newman,nor his project) just my own projects.
Didn’t Camarojoe have his car sodaRblaRsted? I remember the pictures. It looked lovely.
ever heard of “learned from expierience” ? notice the part “everyone has a budget” ? anyways im out on this thread. i do audio swaps not engine swaps anyways.
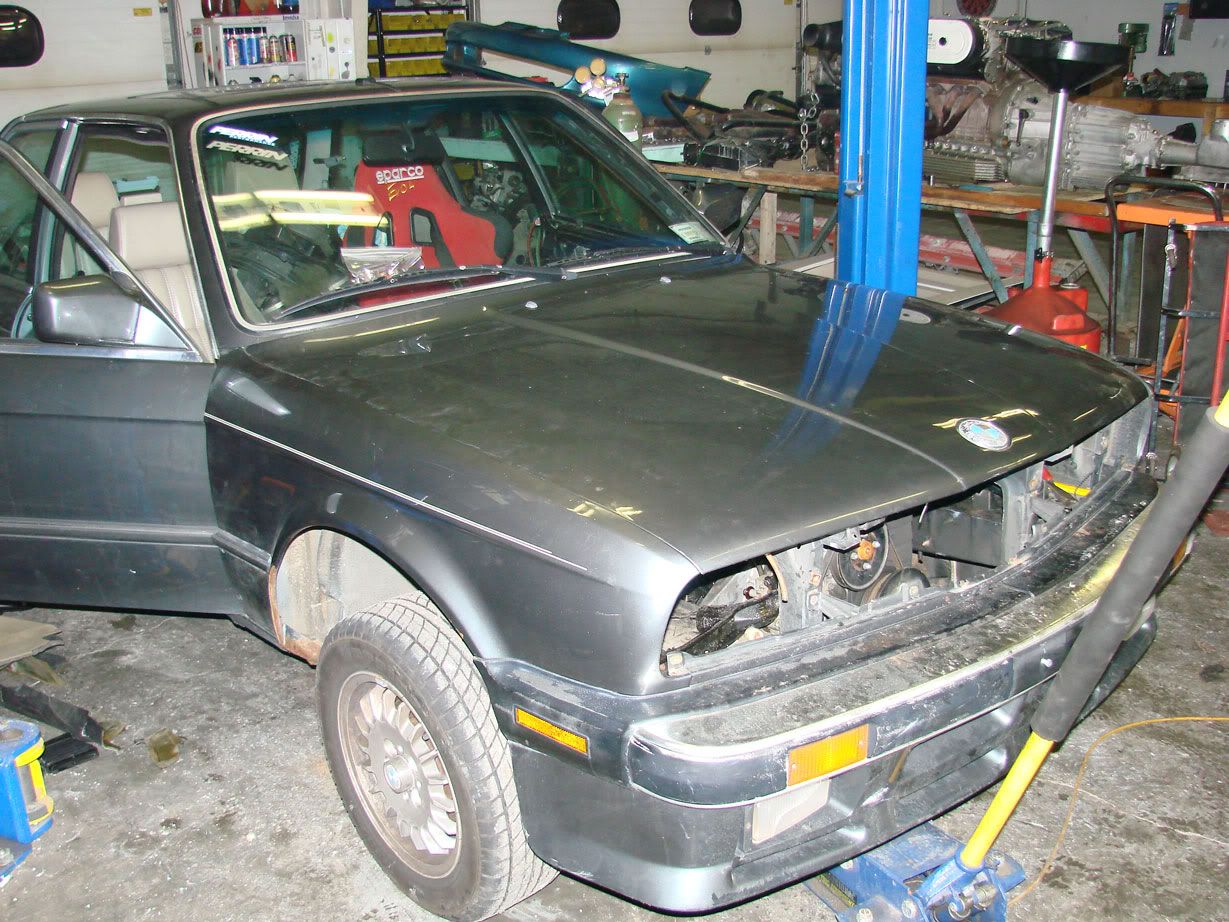
i guess im kinda torn on it. its an early model. i sold a rust free early model chassis to Paul for $500. then again, it may not need a TON of rust repair. also check in the bay by the shock towers, and rip out the trunk carpeting and check it out. another common area is at the license plate lights on the back of the car. and along the pinch welds on the undercarriage
you can try an e21 brake booster, if not e34 540’s had a remote setup. I’ve also heard of people using geo metro boosters, but i’d just go with the remote setup
Acid baths? Ditch the shell? Come on. For the same car that’s going to have a stripped interior for weight reduction?
You have to get down to bare metal or else it will just keep rusting. Remember Debbie Chung’s class on materials? (I assume you took it.) It’s an electrolytic chemical reaction, so once it starts you have to remove ALL the rust to stop it.
Just sand/grind/blast all the rust away that you can find. Then weld/gring/bondo/primer/spray and it will look fine. Just take your time and be diligent so that it looks seamless and you don’t get rust bubbles under your fresh bodywork within a year.
eh… it’s clean enough for what’s he gonna do with it. Apparently its rust at the BATTERY TRAY and JACK POINT. Not exactly hard to repair i would imagine.
A few extra hours sanding & welding.
For $500, good work.
And, I wouldn’t call a guy with an AWD CRX and a competitive racecar an e-mechanic. Not a potshot, just a general statement about generalizations (that get made every hour around here it seems).
In the end, it’s newman’s money… he’ll do what he wants, regardless.
you mentioned maybe an m3 body kit; that would require full modification. none of it lines up. wheel arches are different, fenders and quarters are different, c pillar is different, trunk is different.
it can be done, it just takes work.
or you can go m tech-1. they are made for early bumper cars (84-87). m tech II is for the later models (88-91) soooooo hotttt

and these are just the first 2 i could remember, not even the hottest by far. check out e30.de, then go to fotostories, for more pics of various e30s.
also i’ve got some wheels and tires for sale!

those rims are sickkkkkkk
I think this is a cool project for being diffferent. But I would much rather see this motor going into a Datsun 510. I personally have always wanted to build one of those and an RB in 510 would be tits.
Jeller
Alright. Another update. The chassis will be fine. Christ, I don’t want to spend 1500 bucks on a car that i’m going to be cutting the transmission tunnel out of anyway (more on that later).
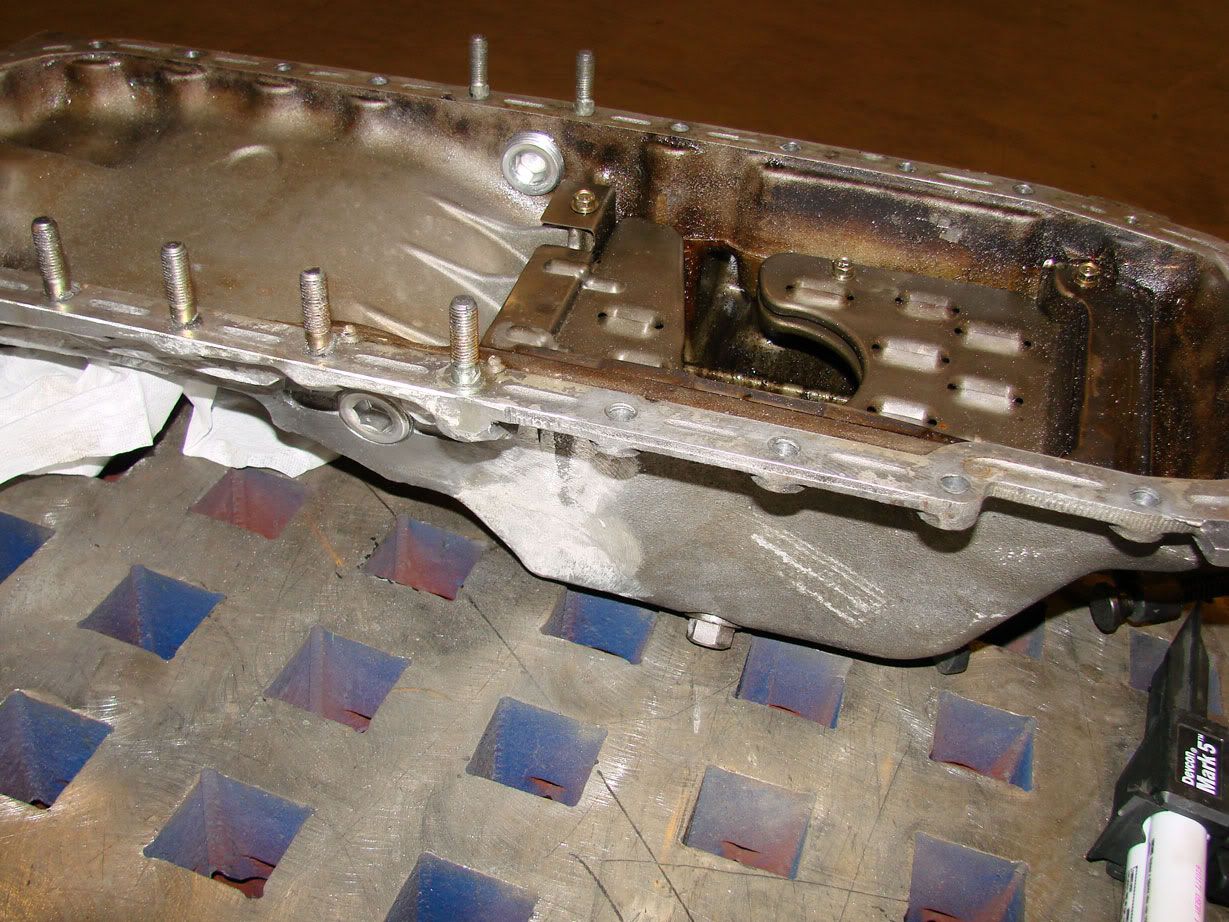
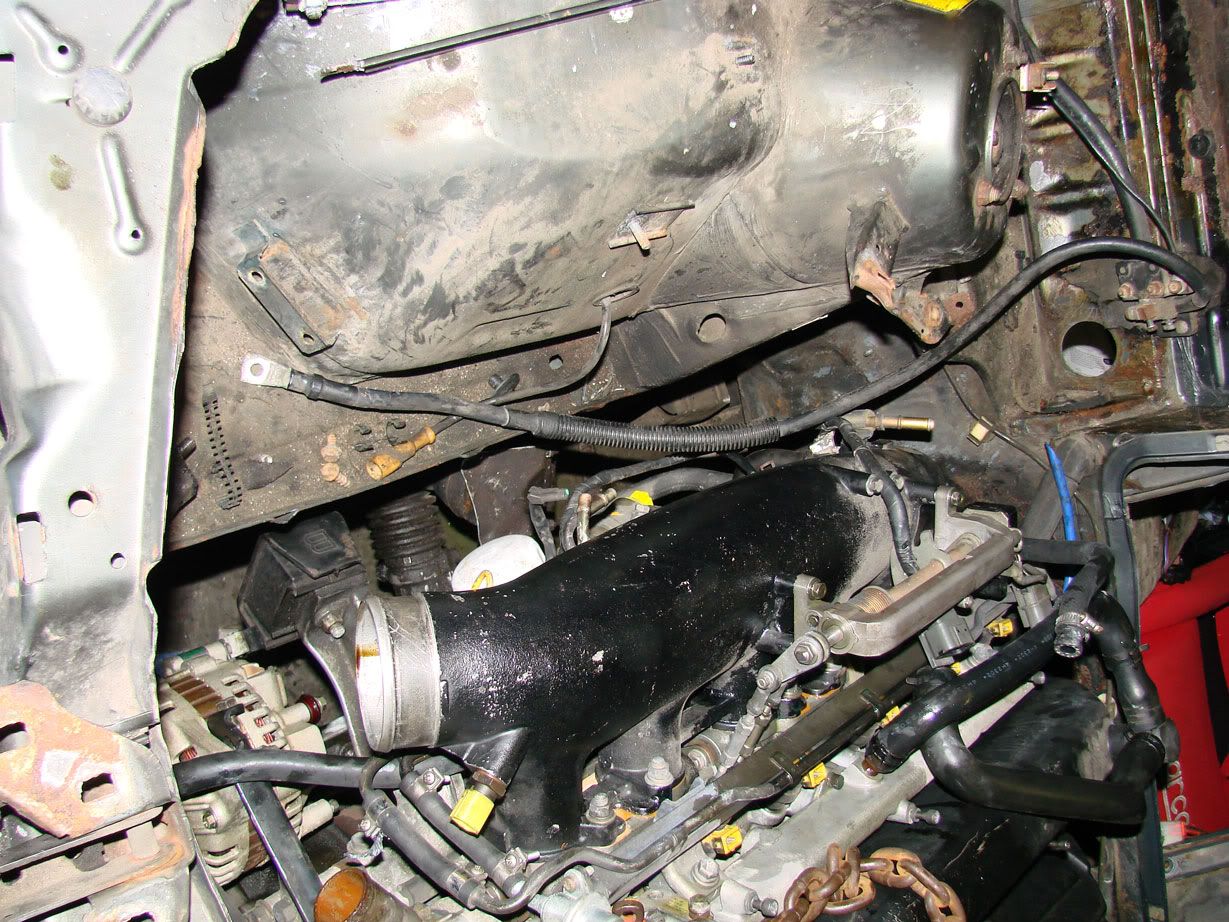
First off: the oil pan.
I used a roll form 1" NPT tap. This tap actually requires a larger hole because it actually forms the material vs cutting it. Since my holes were slightly large as it were, this worked out well. I purchased two 1" NPT socket head pipe plugs in t-356 aluminum. (the same material the pan is made from). I then coated the plugs in high temp, oil reisitant epoxy and threaded them into the holes. I tightened them with a 1/2" breaker bar. Since both items are of the same material, both will exhibit similar heat expansion.
Problem solved.
The pan with the plugs installed:
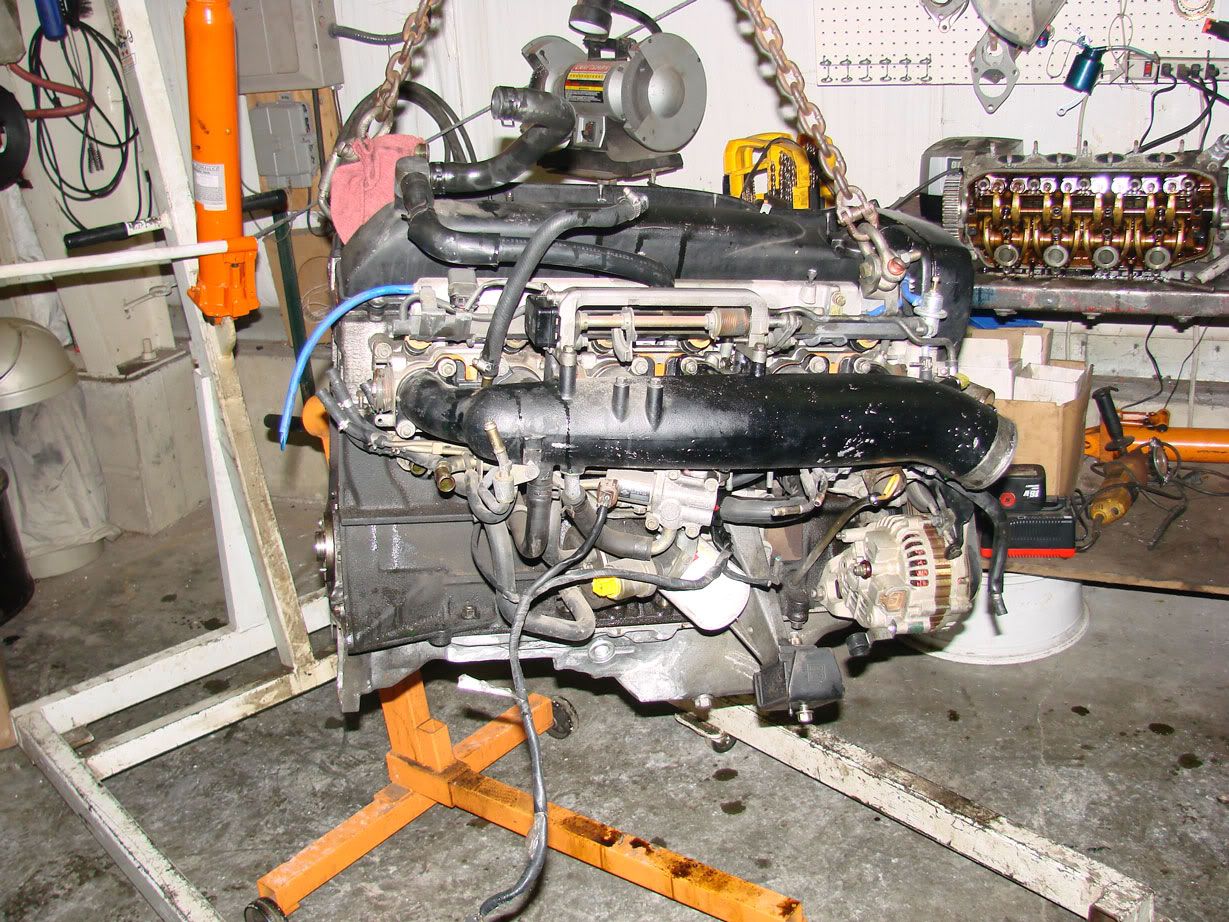
The pan on the engine:
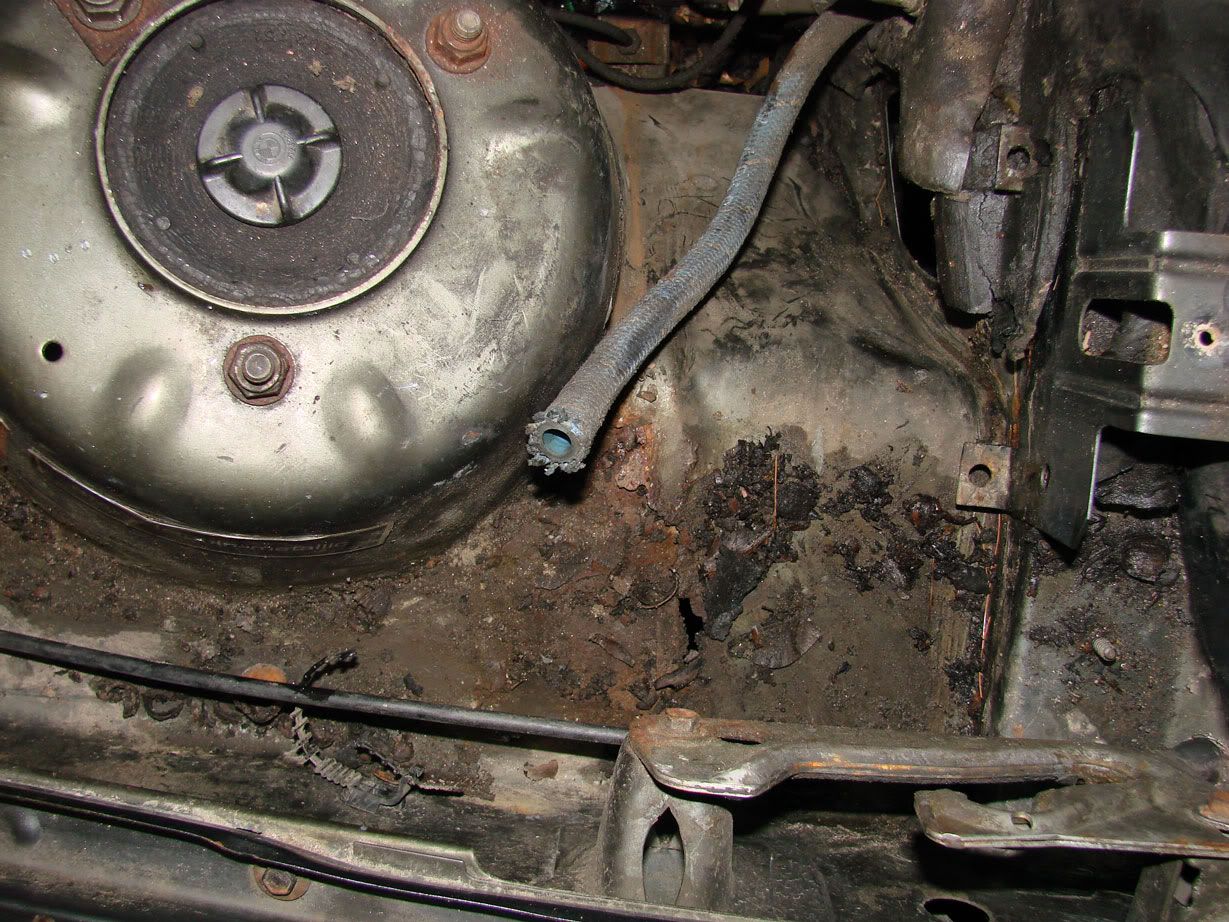
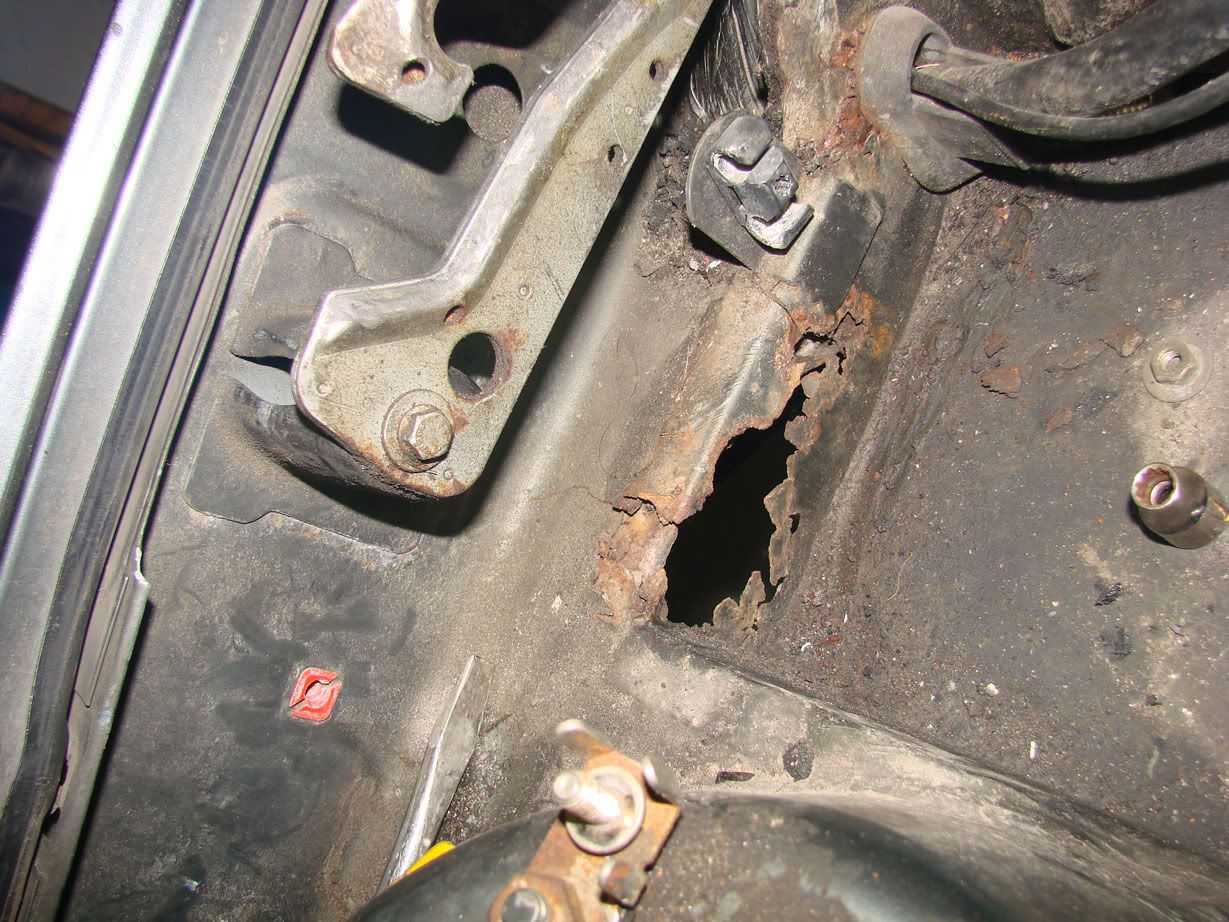
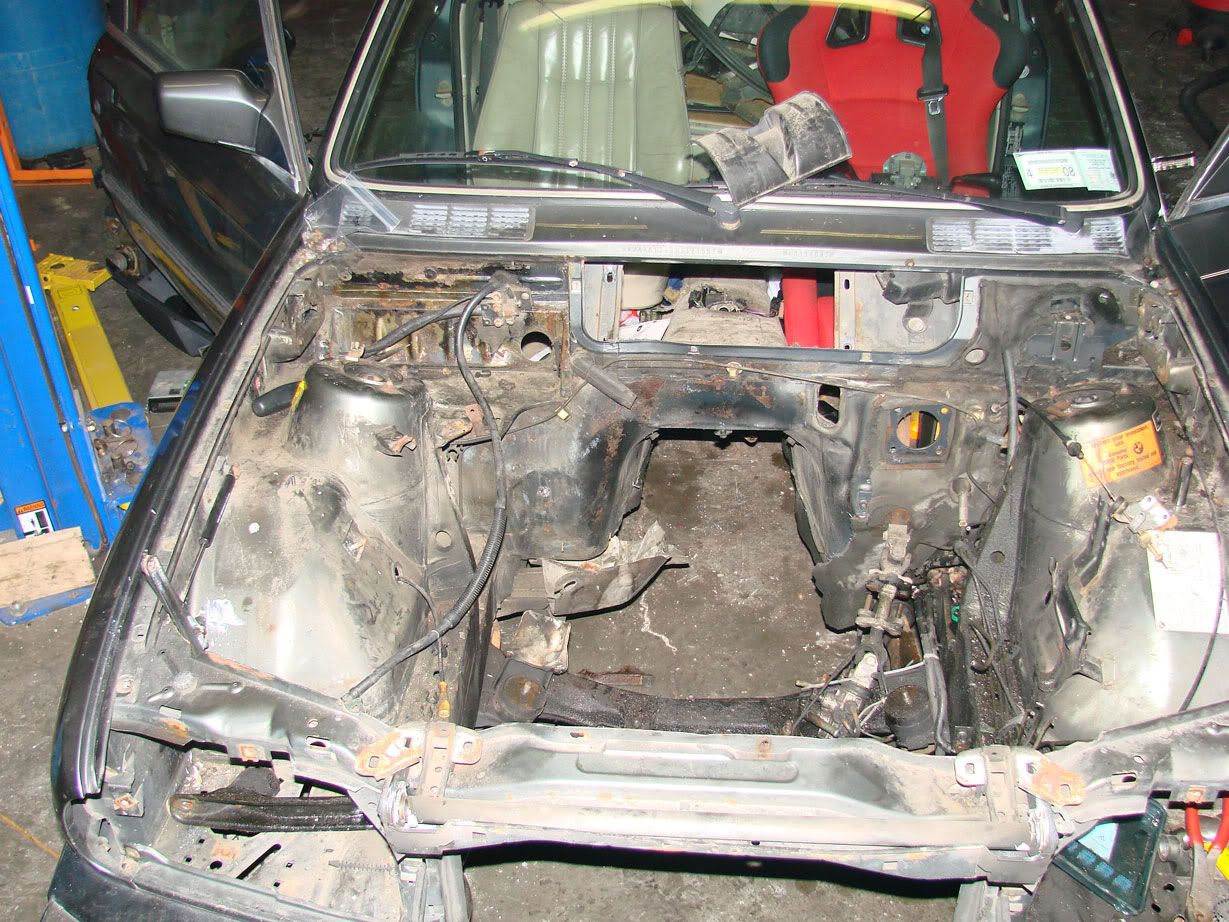
Next up, the body rot.
There appear to be four locations. They all seem like relatively easy fixes. Just need to cut out the bad parts and weld in new metal. I have acces to both metal and welders, should not be a big problem. The only portion of the rot the is structural is on the strut tower, shown here:
Here is the rust in the battery tray:
Here is the rust under the carpet:
I am not a body guy, but the rest of the car is pretty clean. Quite frankly, since no mater what shell i get i am painting, I don’t see the point in spending another 500+ dollars when i can simply fix up the minor problems with this one… A week of diy chassis work > spending $500 that can be put toward management.
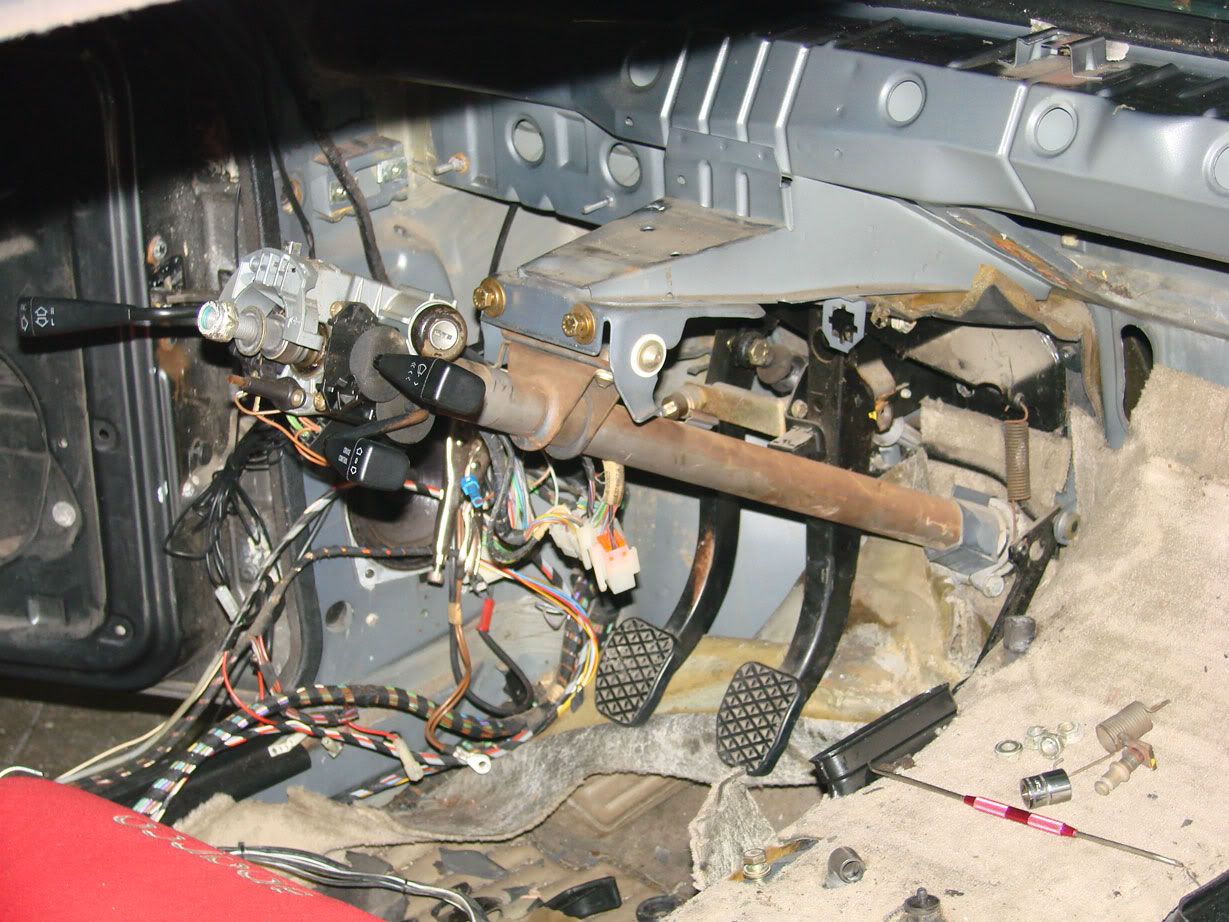
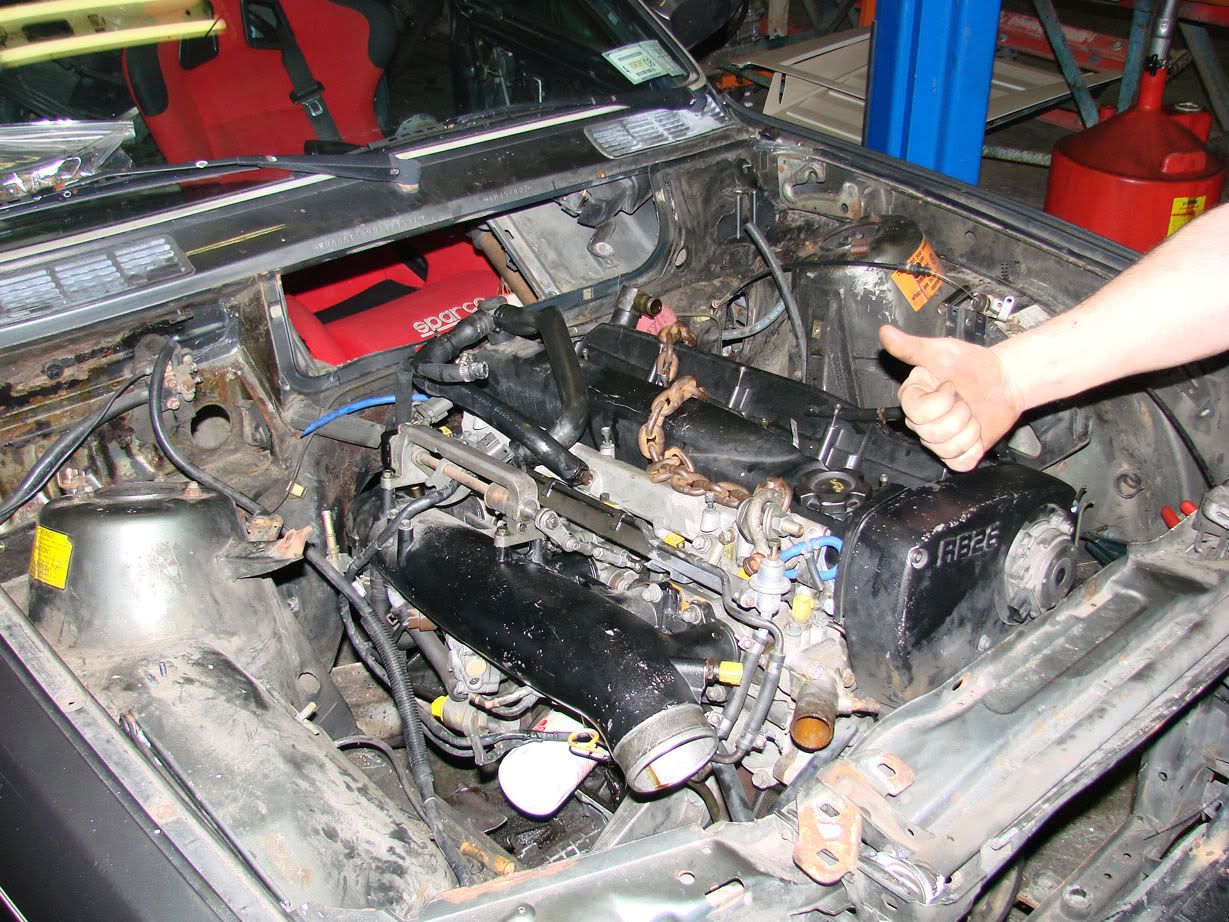
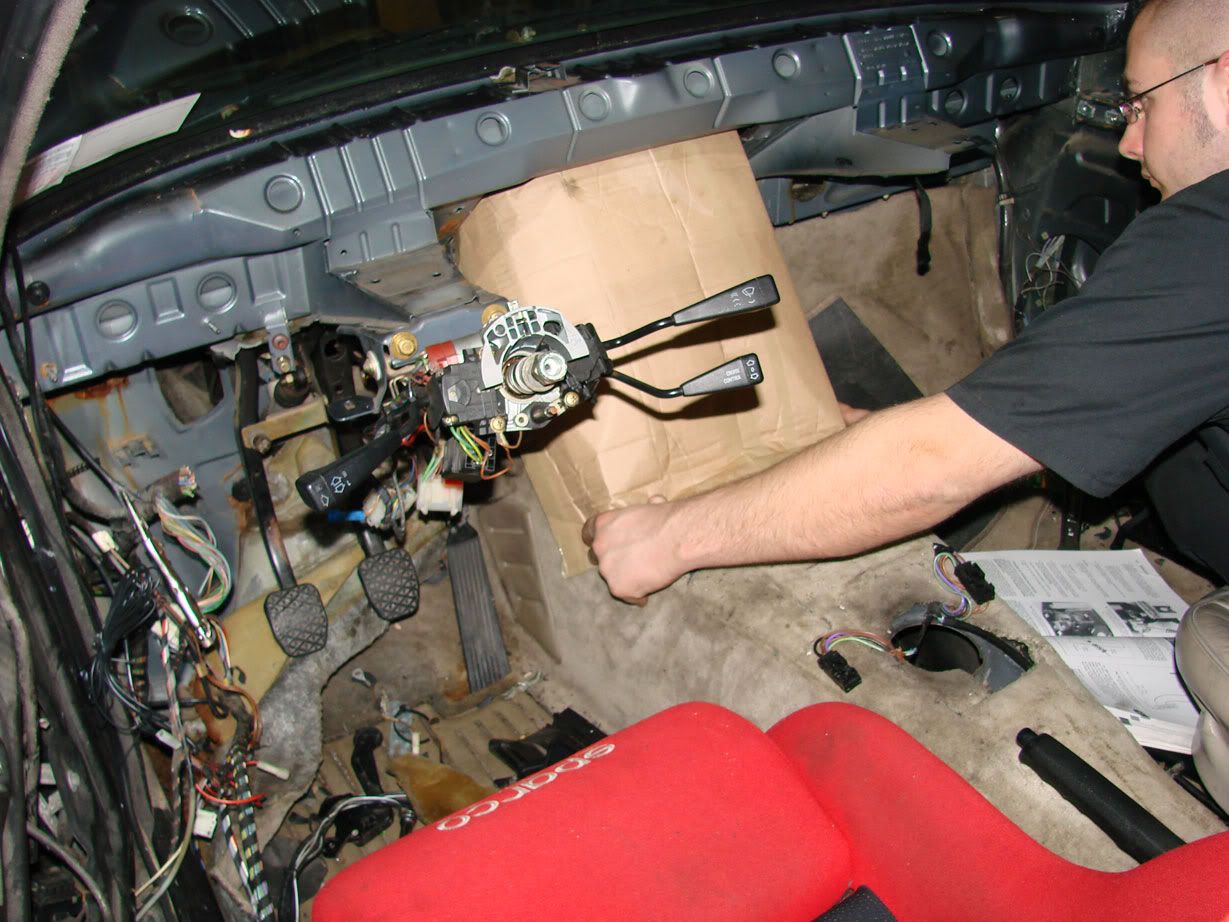
We pulled the dash out and the rest of the stuff from the enginebay. I will say this, the way this fucking car is put together is retarded. The wiring is absurd. Any Jap car i’ve worked on of the same era has always been much more organized and well-thought-out. Now i can have a better reason to hate on euros…
Looks pretty clean to me… aside from all the grease.
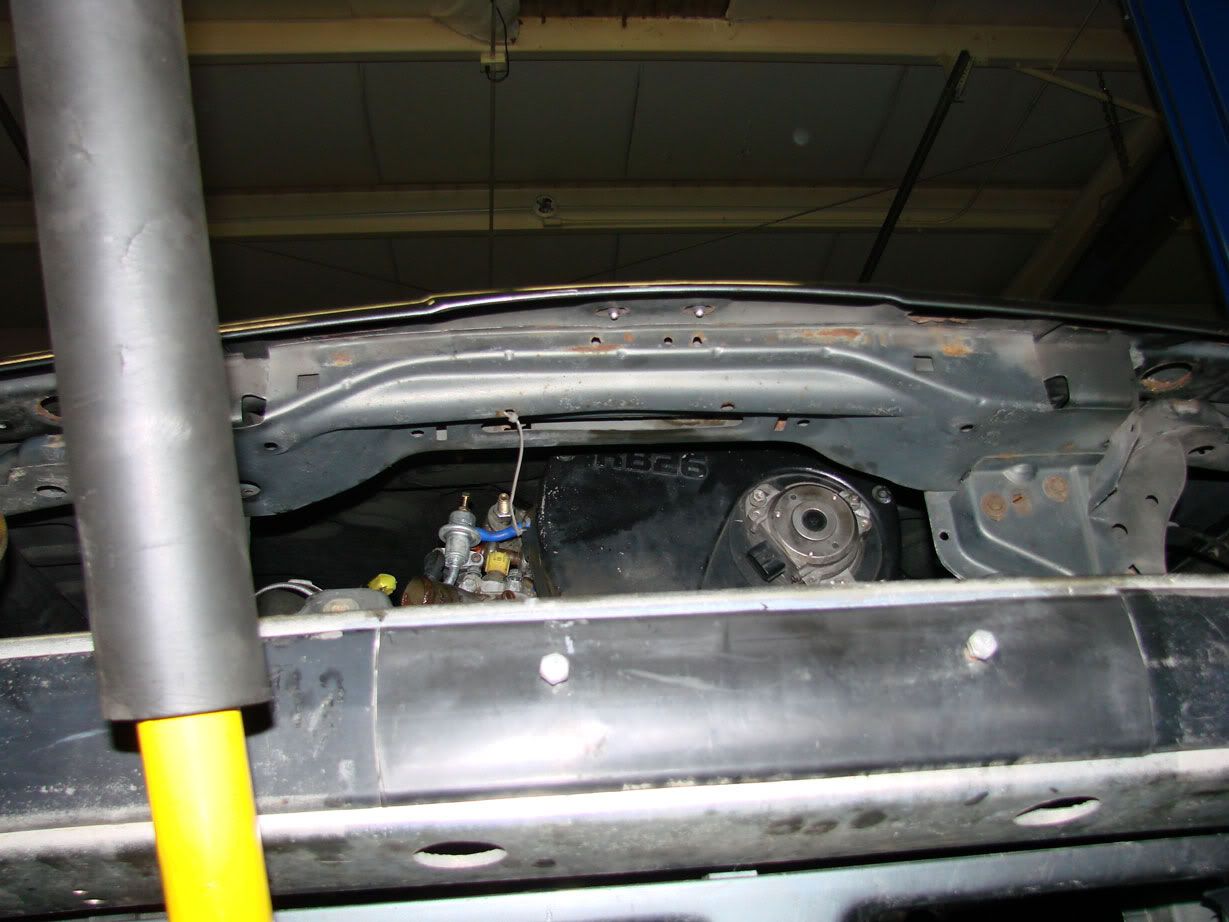
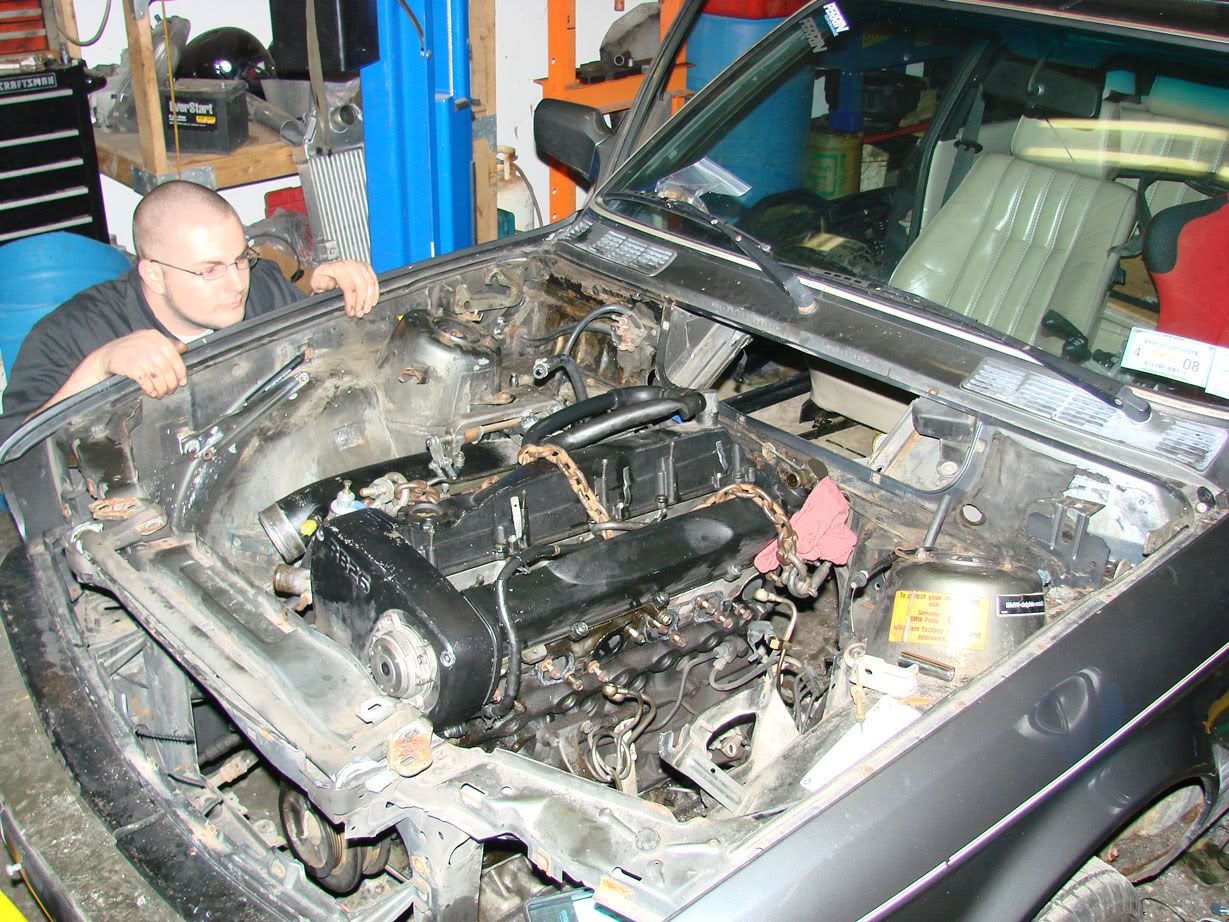
Now here are the pictures of things to come…
Don’t get your hopes up, what we’ve done here is simply set the engine on the x-member and support it with a jack (yay for strong cast oil pan). The front of the motor is at the proper height. The rear of the engine will need to come up about 1/2". The shifter sits about 1.5" back from the center of the stock hole… Close enough for me.
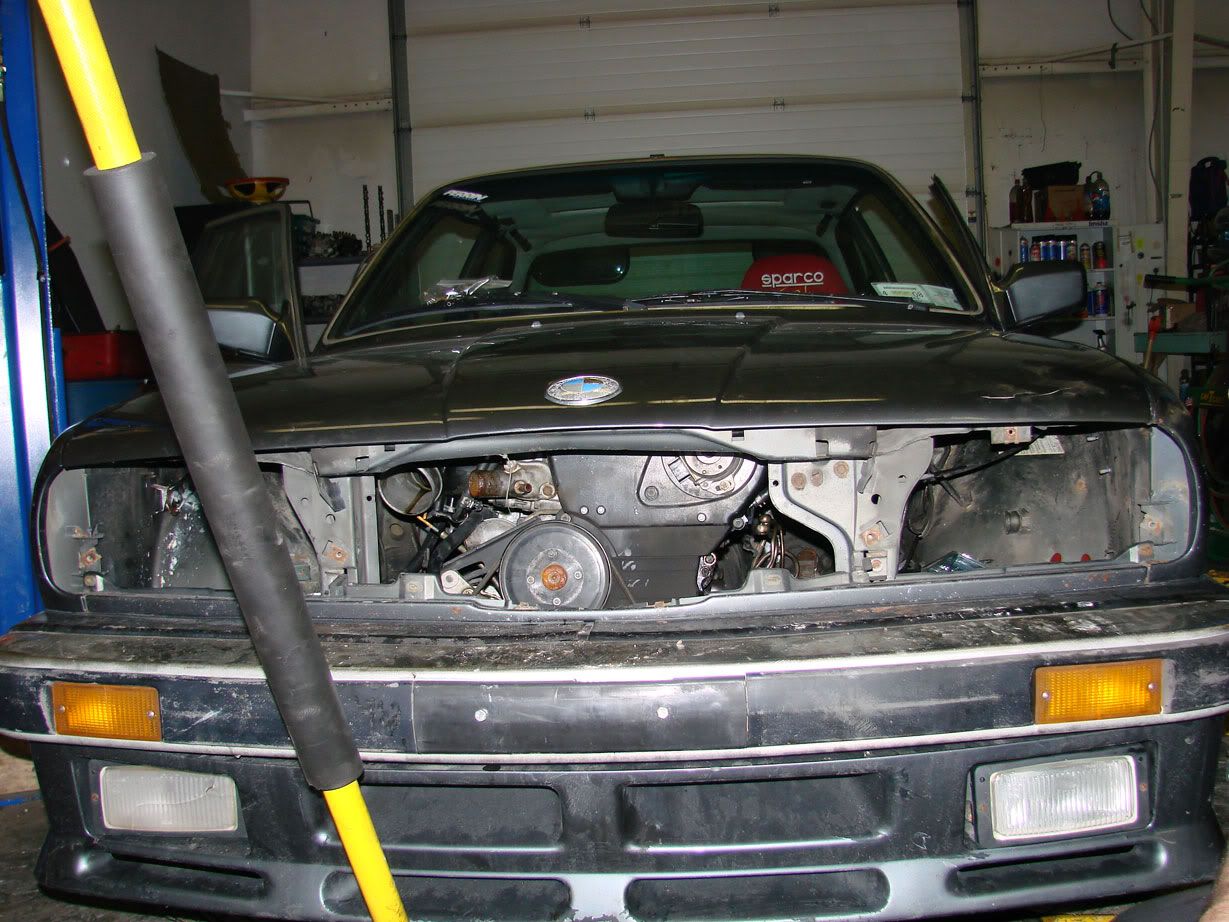
More pictures:
Hood still clears:
Don’s seal of approval:
1/2 of the brains of the operation:
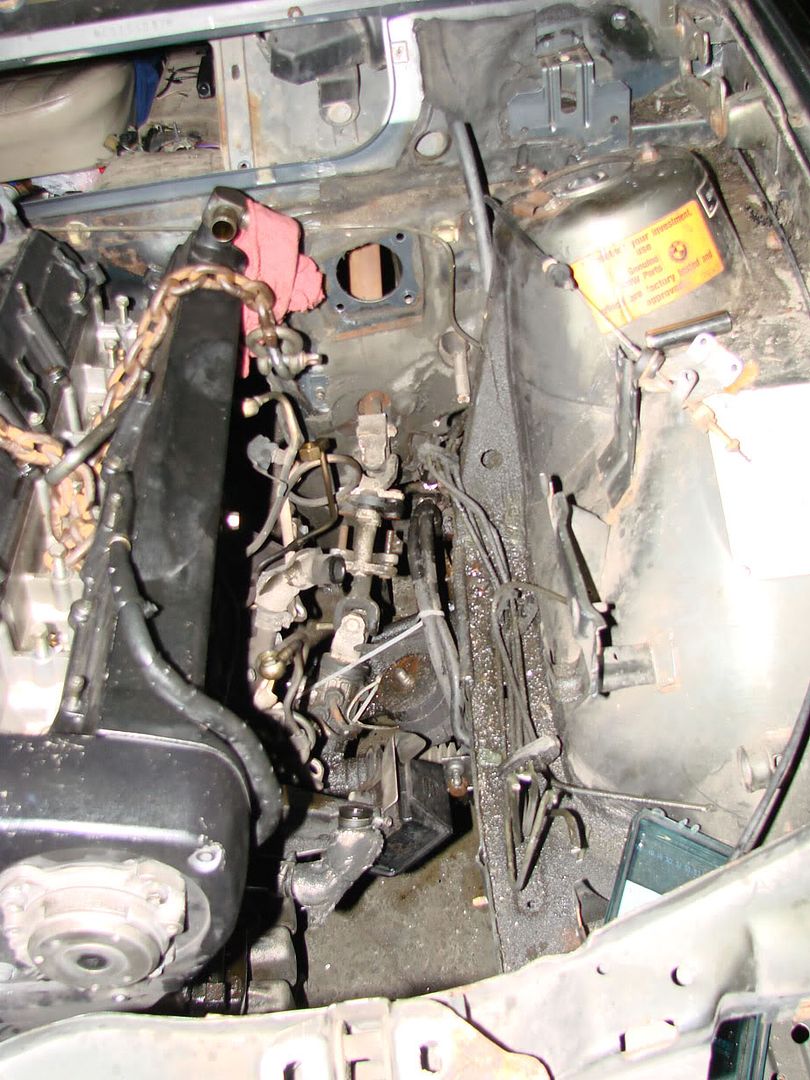
Plenty of room for the GT35R. You can see the chassis mount and the engine mount. This is very similar to how an RB mounts in a 240. Making custom mounts is going to be simple. Probably going to use solid mounts.
Christ, there’s even plenty of room over here for another one. :snky: jk. 
Well, i don’t have a picture of it, but there is no way in hell that the downpipe is going to clear the steering shaft. Also, that’s not the side of the car exhaust is meant to go down. The solution? Custom transmission tunnel/exhaust passage.
The rb26 transmission is definitely taller than the OEM unit, so the tunnel will need to be modified for that alone, well, we are also going to bring it up extra high across the firewall allowing us to route the exhaust over the transmission and down onto the right side of the car. We made a rough mockup of what this will look like with a piece of cardboard. You can imagine the downpipe on a topmount turbo going up and over the valve cover, over the transmission and out the rear of the car.
From the inside, the modified tunnel should fit behind the dash where the heating unit used to reside:
For mounting the IC, I am thinking about getting this body kit from BMPdesigns:


That’s all for now. Any questions?
:tup:
Great progress. Cant wait to see it.
And yes, 80’s german cars were put together by a bunch of drunks.
As for the kit, I’d just get the MtecII stuff and cut the center out, fits an intercooler fine.
As opposed to new German cars, which are styled by a bunch of drunks.
link to mtech body kit?
can’t find it.
 Continue with the topic