Riced out the 335's interior V. Carbon fiber

So I was watching Fast and Furious all weekend and decided that I need to add some flair to the 335’s interior.

OK seriously, I didn’t like the dark brown wood interior trim, so I glued carbon fiber cloth over it. The pictures are not all of the same pieces because not all my pictures turned out, but you get the idea.

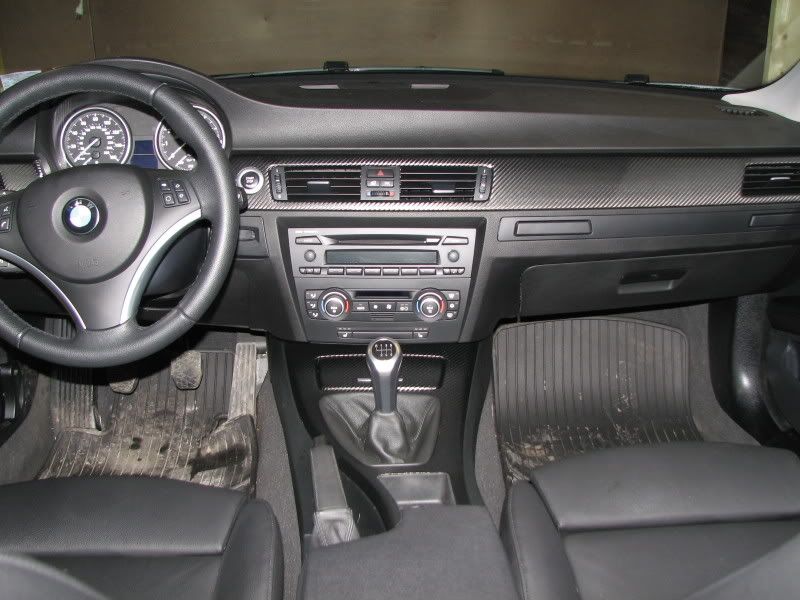
I didn’t take any pictures of my interior for the “before” picture, but I borrowed this one.
http://img.photobucket.com/albums/v79/x_iliohan/stockinterior.jpg

This is my interior trim removed from the car, cleaned and ready for the adhesive
http://img.photobucket.com/albums/v79/x_iliohan/335iinteriortrim014.jpg

Then I cut the Carbon Fiber fabric to the size I needed.
http://img.photobucket.com/albums/v79/x_iliohan/335iinteriortrim017.jpg

Here are the door inserts ready to be sprayed.
http://img.photobucket.com/albums/v79/x_iliohan/335iinteriortrim002.jpg

Then with glue (3M) on it, a few layers of it
http://img.photobucket.com/albums/v79/x_iliohan/335iinteriortrim003.jpg

Then I carefully layed the faric over the sprayed piece
http://img.photobucket.com/albums/v79/x_iliohan/335iinteriortrim020.jpg

Next I cut it to size and sprayed the bottom of the trim with the glue
http://img.photobucket.com/albums/v79/x_iliohan/335iinteriortrim004.jpg

Then wrapped around the edges to the bottom

http://img.photobucket.com/albums/v79/x_iliohan/335iinteriortrim009.jpg

Here are some pictures of the finished product.
http://img.photobucket.com/albums/v79/x_iliohan/335iinteriortrim006.jpg

http://img.photobucket.com/albums/v79/x_iliohan/335iinteriortrim012.jpg
http://img.photobucket.com/albums/v79/x_iliohan/335iinteriortrim013.jpg

http://img.photobucket.com/albums/v79/x_iliohan/335iinteriortrim022.jpg

Finally, installed in the car.

X…

ricer

regardless looks nice…

that looks awesome!!

The whole “matte CF” trend that’s starting is fucking awesome. However, are you worried about shit snagging the weave at all? I thought that they used a little bit of resin when they did it?

Here are some lotus parts in matte CF

http://www.lotustalk.com/forums/attachments/f172/85946d1216227061-new-cf-parts-horizon-cf-sills-center-console-1.jpg

http://www.lotustalk.com/forums/attachments/f172/85945d1216227061-new-cf-parts-horizon-dash-cluster-2-.jpg

hot.

:tup:

looks good Xander.

I saw that companies started selling the CF cloth on the m forums…

that is the CF “vinyl” right? not real CF?

I too always wondered how it looked compared to real CF wet resin pieces

oooh. I think the pics i posted are pure CF with some sort of “matte resin”

nice, Do you have any left over?

Looks great, yeah I hated that woodgrain in your car too

Looks a lot nicer than the wood grain. Good choice :tup:

I tried to have my bike frame done in “matte” cf… when i inquired about it, i was told they would just take the standard CF finish, and hit it up with 600 grit wet sand paper…

I saw the same technique done on some EAS interior CF parts for the bmw cars… seemed to come out find in pictures, but i didnt see it in person…

I have seen some seibon “dry” cf CSL trunks, which look damn good, but not 3k good

:tup: looks great

Well, dry and wet are not referring to the finish, typically.

I’m sure you know this, but from my understanding:
DRY CF parts means that no Material other than CF is used.

WET laid CF means that it’s a CF skin over a fiberglass (or similar) substrate.

What is the thickness of the fabric like? Did you have any issues with fitment with the added materials?

Looks great :tup:

Nice what did something like that cost?

I cant justify paying $900 for cf interior trim for the a4

I did not put any resin on there. It seems pretty durable, and I bought enough to do my car a few times over, so if I ever fuck it up, or Jeller pukes on it I can re do it. :lol:

Those inquiring about the cost, all in I was under $100 and like I said I have plenty left over.

X…

no answer to my question? Damn you

Sorry I am slow, it is fairly thin, and very durable. It was kinda a PITA to do on my car, I spent quite a while taking things apart (like the ashtray cover) and taping off the clips behind the trim, cleaning glue off my hands every 2 min. All in I spent about 10 hours on it or so. There were no real fitment issues though, however I planned out for clearances. The hardest part is wrapping the ends and making it look nice, like the ashtray cover corners.

X…