s13 SR20DET build

Okay so last Friday the 14th I received my sr20det from Dj-Infinit kindly enough he even delivered it. I am a gr12 high school student, I am rebuilding this engine at school because of resource to tools. I am not new to 240’s I owned a s13 hatch with a ka sohc and swapped a RB20det into it. Sold it and now im 240less. So back to the build, on Friday when I received the engine, I got it out of his van, and put it on a tire for the weekend. Im taking my time on this build Im in no rush. So I left it for Monday on the tire. When Monday came around and no one could stay so I had to leave so no work done Monday [FONT=Wingdings]L[/FONT]. Tuesday comes, lunch I pull the clutch and pressure plate off, put it on a stand and call it a day.
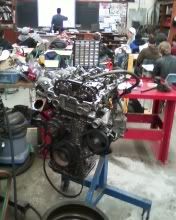
http://i925.photobucket.com/albums/ad94/mgandza/sr20.jpg
Wednesday I had my exam all I did was pull the valve cover off and start stripping it down for paint.
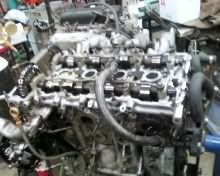
http://i925.photobucket.com/albums/ad94/mgandza/sr20head.jpg
Thursday finally some work gets done, I brought my girlfriend to help, she did basically all the work, she unbolted the front cover, the cams, took off the rockers, unbolted the oil pan, all I did was take off the head bolts, also to my excitement I found ARP head studs when I pulled off the valve cover.


When we pulled off the oil pan I was a little concerned, I found a piece of a rocker and a rocker guide. But all my rockers were in good shape and I wasn’t missing any guides, so what I suspect was someone threw a rock and replaced the head because the serial #’s don’t match up. Anyways that was about all we did on Thursday.
On Friday my girlfriend came and helped out again, we pulled the pistons, crank, and all the internals out. The cylinder walls looked to be in good shape, I might hone them and I will be installing new piston rings, when we pulled the main caps off to inspect the bearings they weren’t TOO bad for 20 yr old bearings but they looked like they were ready to let go. Also the pistons looked like they were burning oil or running very rick because they were coated in carbon deposits. Other than that the motor looked to be in good shape on Monday the 24th I will begin blueprinting the motor. Also getting the block boiled later.

---------- Post added at 02:55 PM ---------- Previous post was at 02:40 PM ----------

cylinder #1

cylinder #2

cylinder #3

cylinder #4

organization is key!


---------- Post added at 02:56 PM ---------- Previous post was at 02:55 PM ----------

thats all till monday!

nice build. … also ur gf have any friends just like her? i need a girl too rip apart motor’s for me… even better is if they clean up and fetch me a beer in the process (one can dream).
hope to see alot more progress in the following weeks! GL with it

why not reuse the studs?

maybe wrong here… but dont they stretch when you torque them down for a one time use thing?

thats what happens with stock head bolts, you can reuse them if they are under 158.2mm arp’s can be reused.

there you go. maybe im remembering it off of just the rule of never reuseing head studs. meh guess we both learned something today

yeah i thought so :stuck_out_tongue: but thanks

knew i seen this somewhere " As long as you have not exceeded the recommended torque for that
fastener, and it takes the torque and does not feel spongy, the stud
should be fine."

sweet:oj:

How much did you pay for a blown engine?

500 bucks what was blown?

okay, so today i got to the shop at 8 and started to clean the block. i went to home hardware and picked up some stainless steel wire brushes and this little pack that had 3 little ones for 4 bucks, a plastic, brass and stainless brushes, not bad :slight_smile: i also picked up some engine block de greaser, it didnt work to bad? i guess, but i ended up using brake cleaner and wire brushes for most of it. so i started off by getting all the old silicone out of the oil pan bolt holes, i used a small drill bit and compressed air witch worked great. then i used a scraper to clean the surface for the oil pan.


next was the crank case, for the cast surfaces i used the stainless steel wire brush (the small one) and for the machined surfaces like the bearings i used scott shop towels, the blue ones, with brake cleaner. i like the blue ones because the red ones leave alot of lint! badd!.

so after finishing up the bottom end i turned it over and started the outside of the block. i removed the oil filter housing and sprayed the block with this engine block de greaser, let it sit for 15 min like it said, rinsed it off and blew it wit compressed air. i didnt work to well


so i used brake cleaner witch worked great :slight_smile: like always! so i got the intake side done and then the exhaust side. the exhaust side was a little biut harder because it had more nicks and crannies.


exhaust side

rear

intake side

block deck

crank case


once everything was clean it was time to start measuring. i measured the piston to bore clearance witch was i believe, under .0025? i cant remember i dont have the specs with me but it was within spec, the crank shaft mains and rod surfaces will have to be ground, becase of scoring. and i will need oversized bearings because of this, so tomorow, i plan on ripping the head apart, going to be doing a 3 angle valve grind new springs retainers and valves, and possibly cams :smiley:

she just sat and watched today and made me do all the work :wink:

---------- Post added at 12:40 AM ---------- Previous post was at 12:13 AM ----------

oh and i also got a job at canadian tire today, as a drive clean tester :smiley:

---------- Post added at 12:43 AM ---------- Previous post was at 12:40 AM ----------

---------- Post added at 12:43 AM ---------- Previous post was at 12:43 AM ----------

more updates tomorow!

cool beans.

wondering wat was a good cleaner to get carbon off pistons?

Bro… talking about progress! honestly i thought it would have taken you some time… And sharpe_corners i dont no what was blown it was running with no rattles or anything when i had it…

brake cleaner, shoould be good . . . no ? why not get new pistons. ?

Sweet Build, take pics n video show us how you do this 3 angle valve job :smiley:

Hot tank to take off anything and everything lol…

whats a hot tank?

turbo was blown, the guy randy bought it off of had some ghetto thing’s done including having the thermostat held open with a bolt …but motor seemed to be in good shape gl with your build