This idea began after a discussion with my girlfriend’s father, Steve, late last summer. We got on the topic of what car he would like when he retired. Without skipping a beat he said he wanted a “1965 Corvette Convertible. British Racing Green with a Tan leather interior.” It was a car he could have owned when he was younger but he was talked out of it. With Christmas approaching I thought it would be nice to “build” him his dream car.
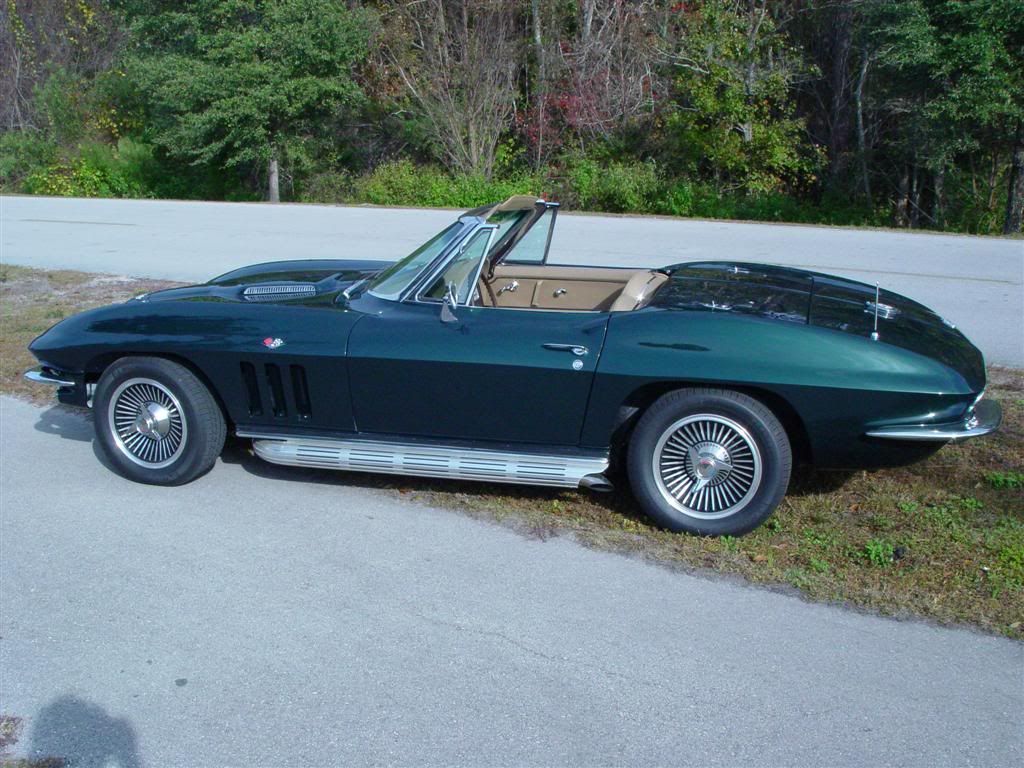
First, I did some research to find out exactly what was available on the '65 Vette. Turns out that the “British Racing Green” he mentioned was actually Glen Green and the “Tan” was called Saddle. GM produced approximately 3,782 Glen Green Corvettes in 1965 with various options. This is an example of a MINT one that is for sale for $50k.
I was more interested in the interior, more on that in a minute.
Once I knew what it needed to look like I attempt to locate a replica…this is what I found.
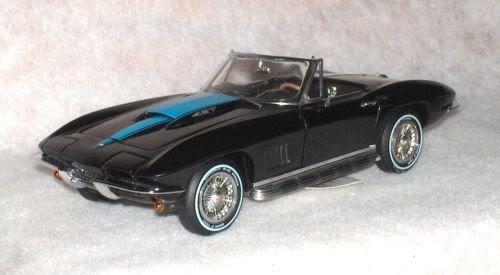
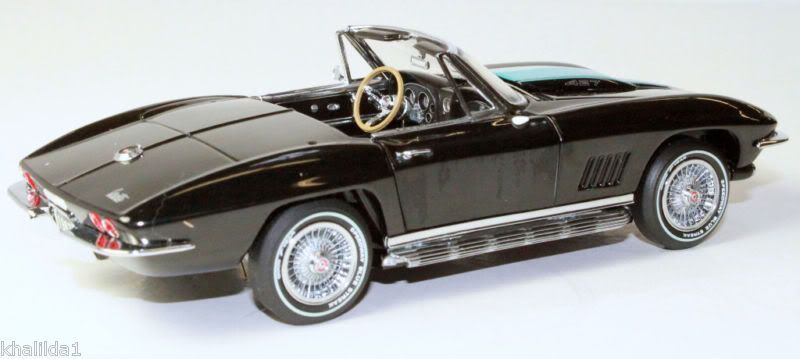
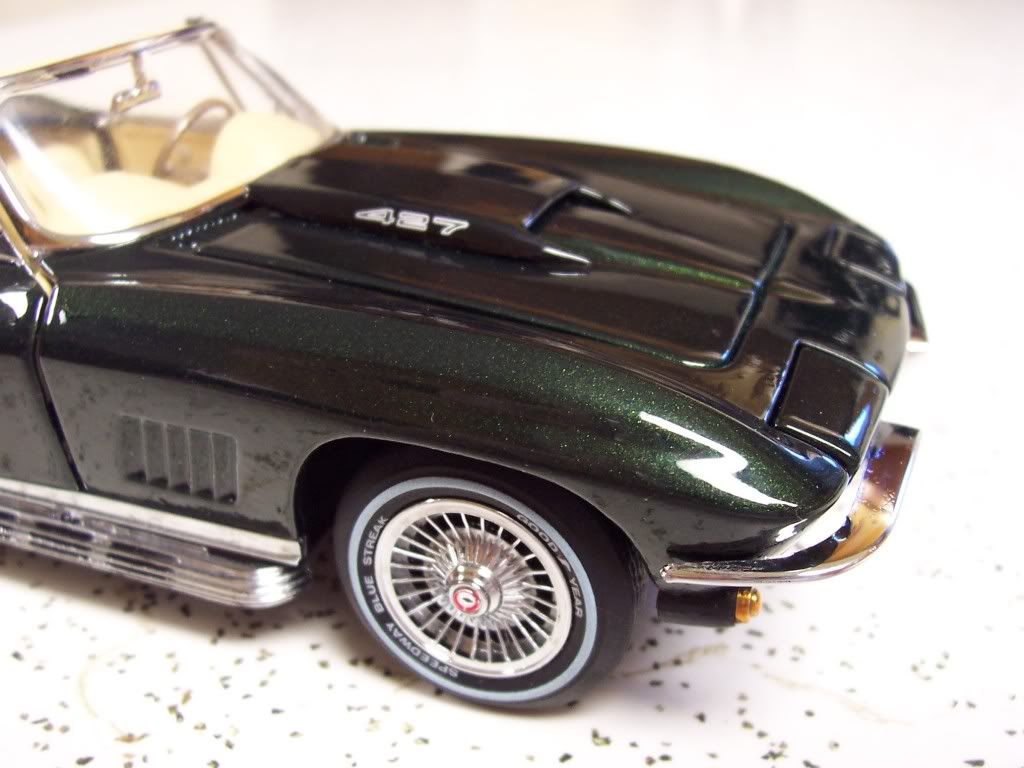
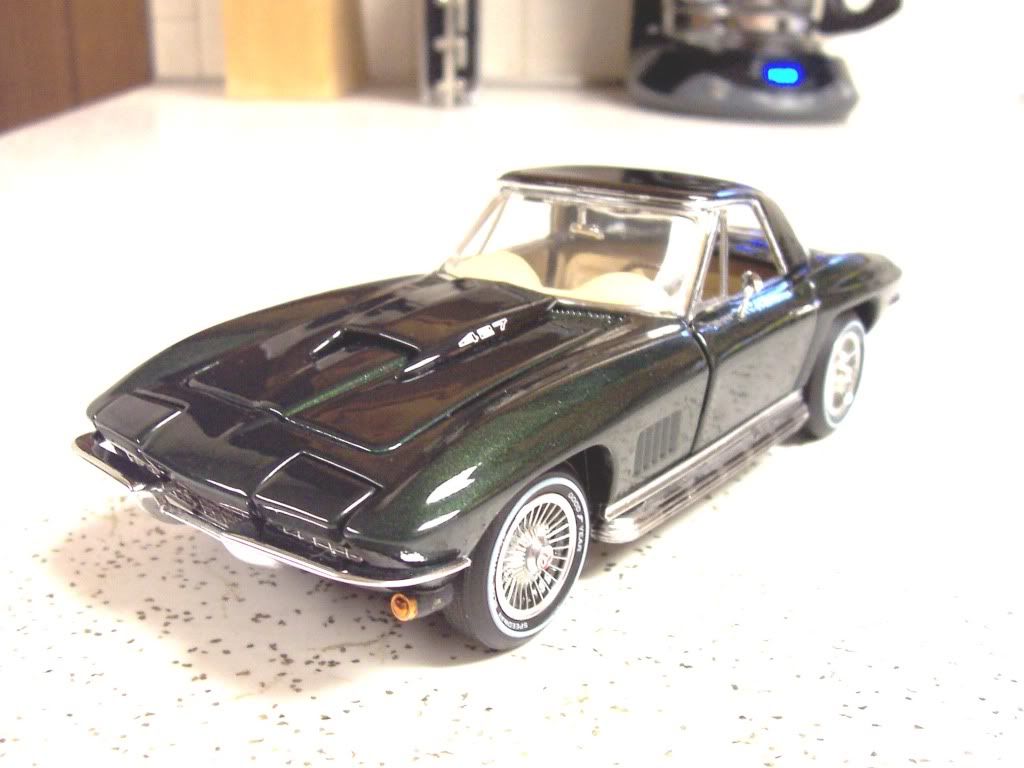
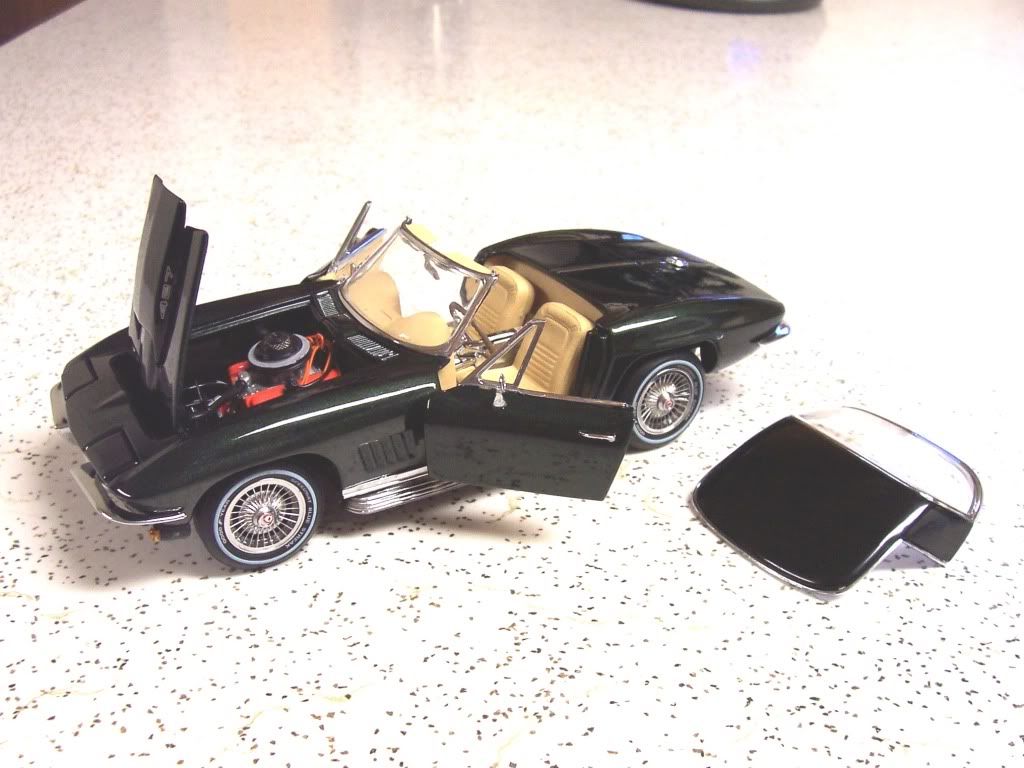
It is a Limited Edition 1:24 Die Cast from Franklin Mint. Any diehard Corvette fan will notice right away that this replica is in fact a L88 and is therefore NOT a 1965. It is in fact the 1967 L88, the first year for the 427. But, it is still a convertible C2. It is also NOT Glen Green with a Saddle interior. Seeing as how it was the closest I could get I decided to modify it just a little…
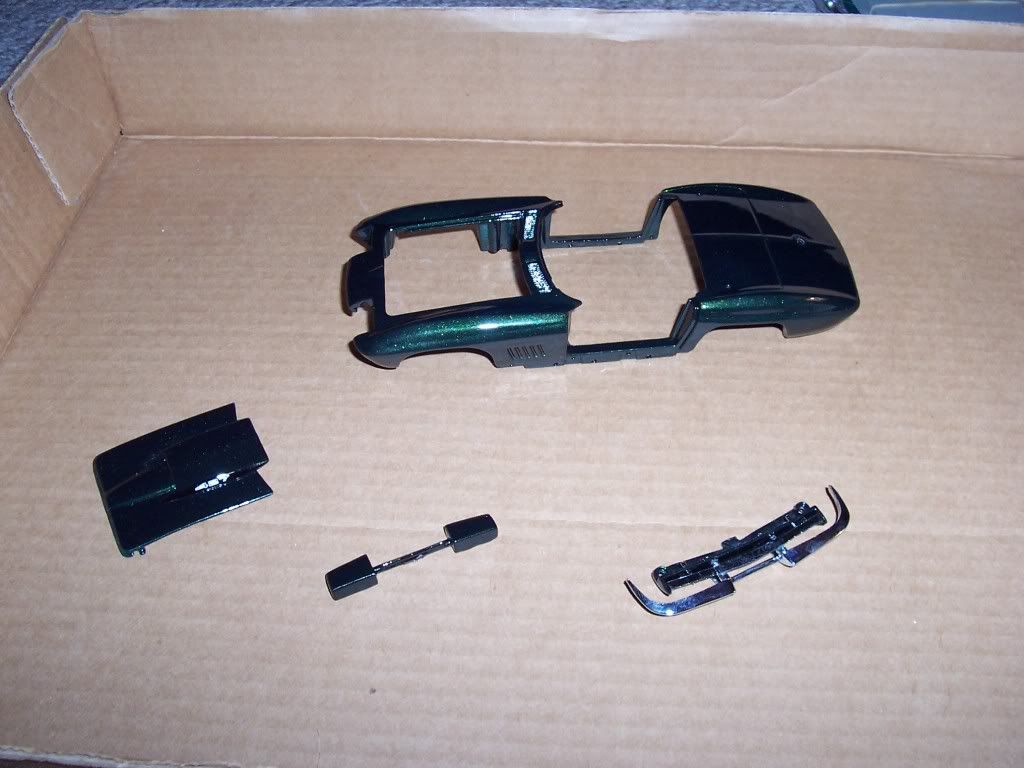
First I disassembled the chassis from the body.
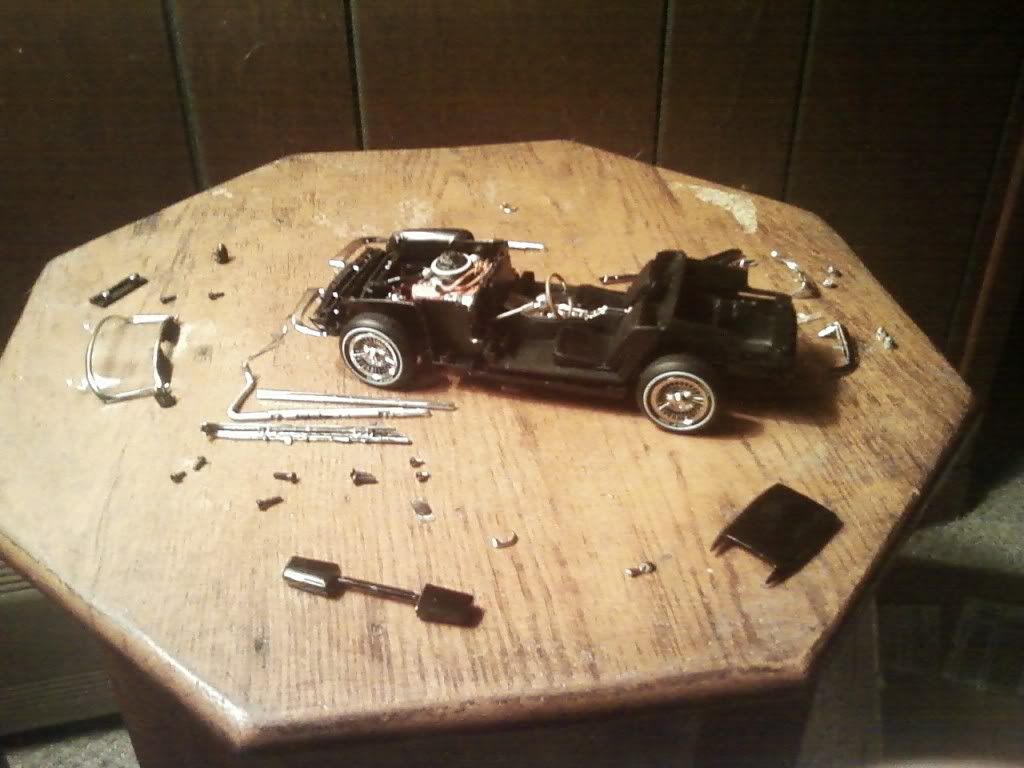
Next, I removed everything off of the body so that it could be blasted.
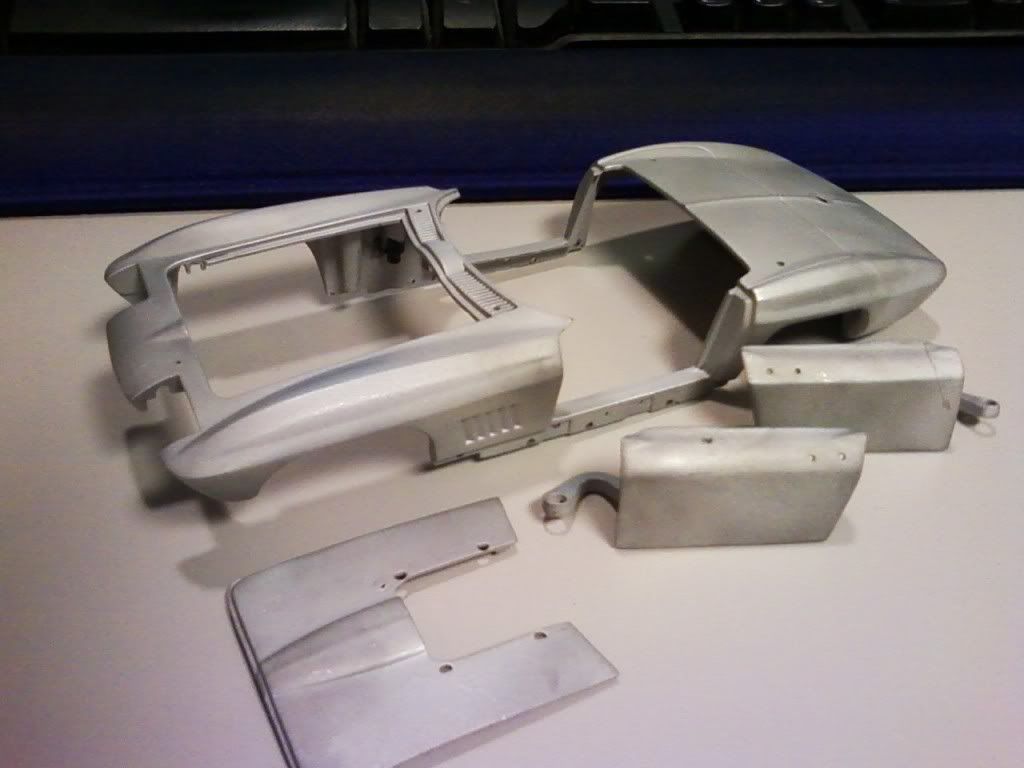
With the body cleaned up there were some minor imperfections in the die cast that needed to be addressed. But, rather than deal with filler on the die cast itself I decided to build up the paint. This was done using light coats applied at half the cure time. This allows the paint to tack up enough to build texture between each coat. Even though it orange peels like crazy it makes wet sanding much easier so you do not break through the color.
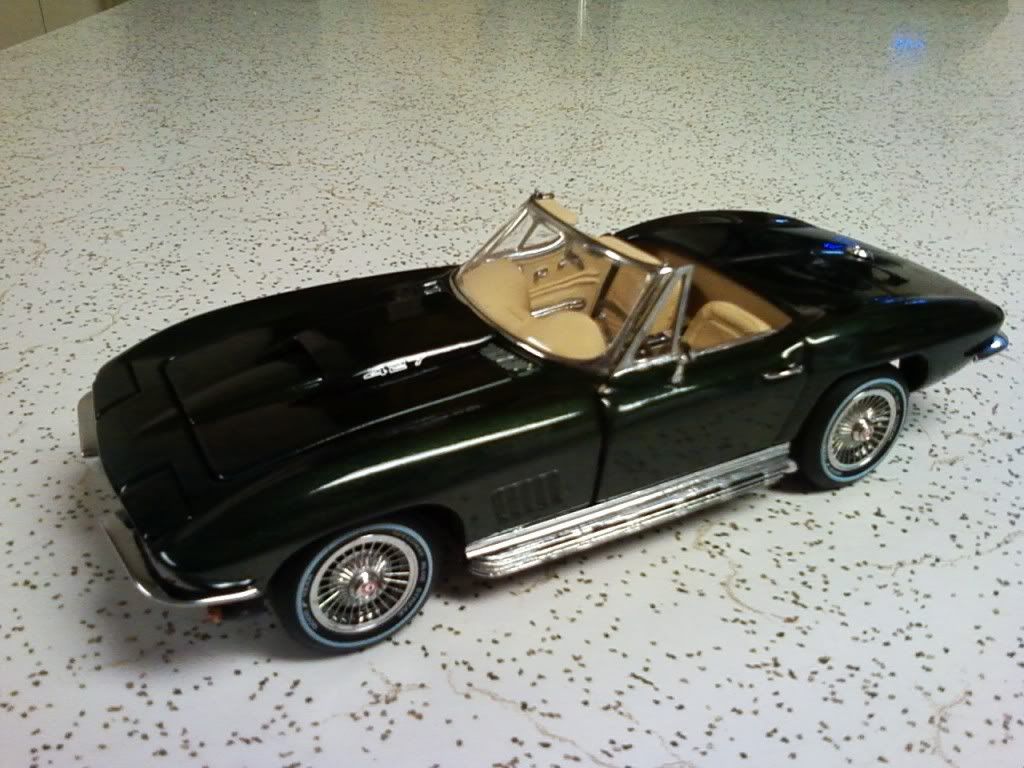
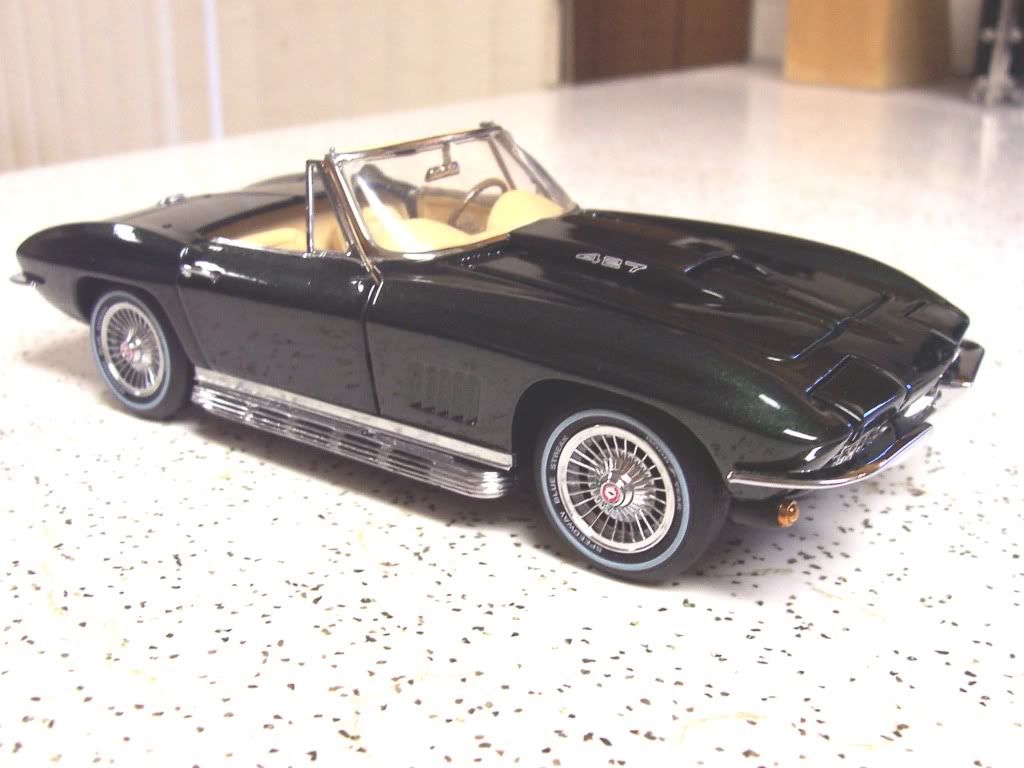
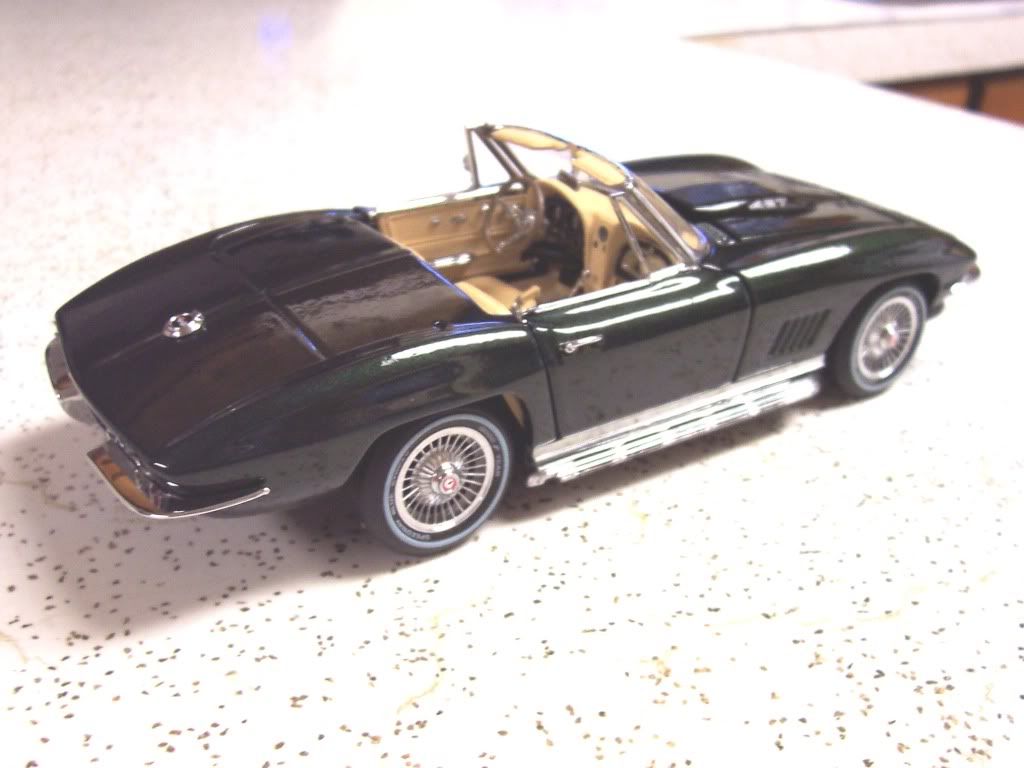
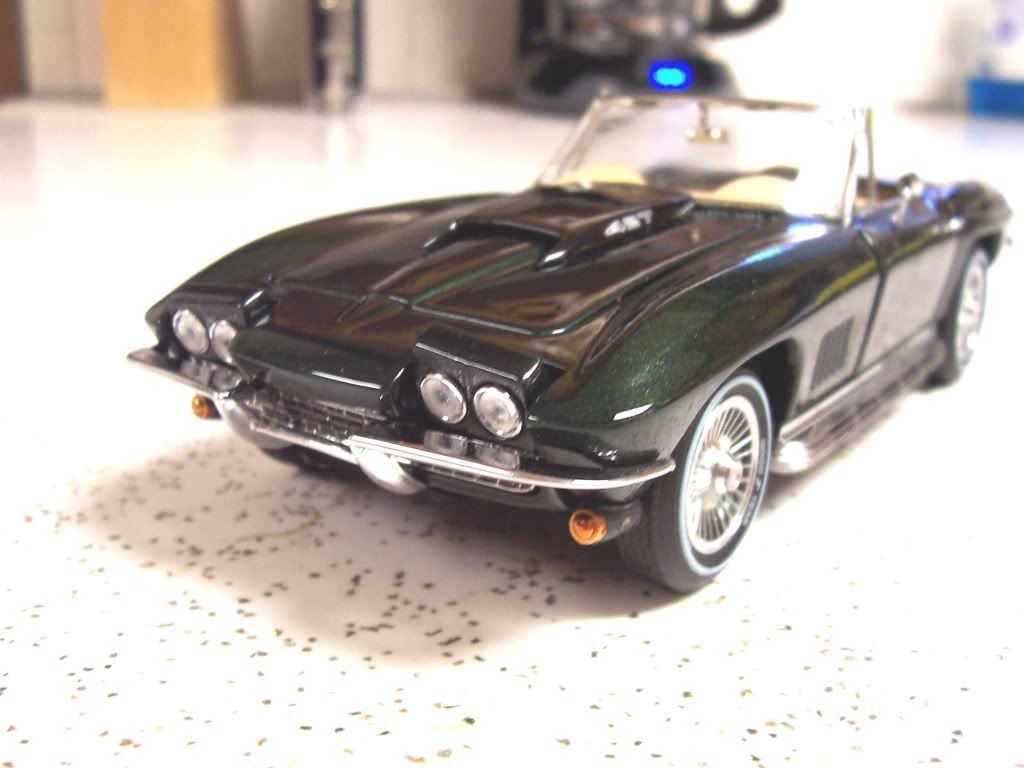
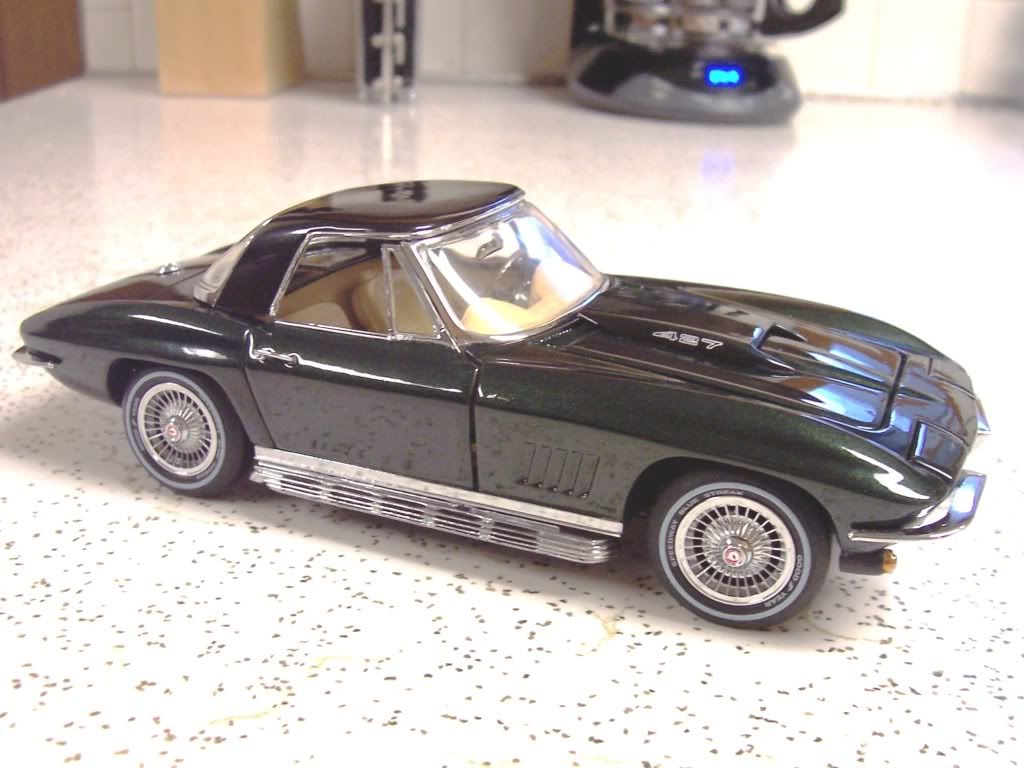
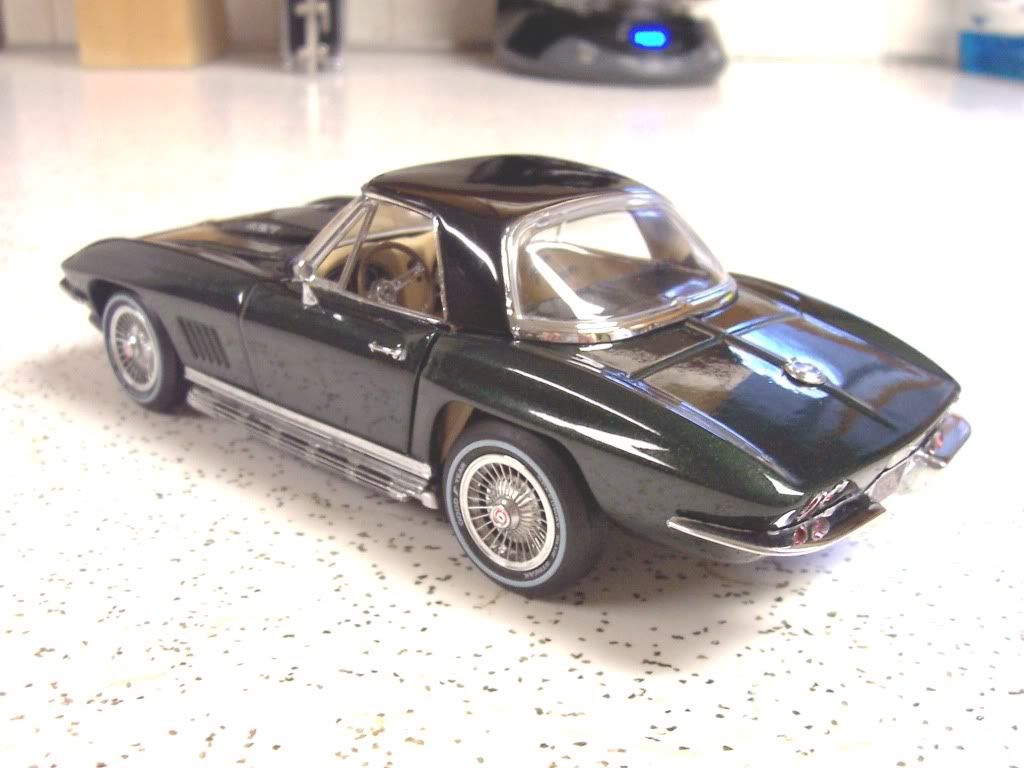
The GM color available in 1965 was Glen Green. But, after a few discrete discussions with Steve it was clear he preferred British Racing Green over the drab GM color. So, I painted it with British Green Metallic to give it that extra pop…
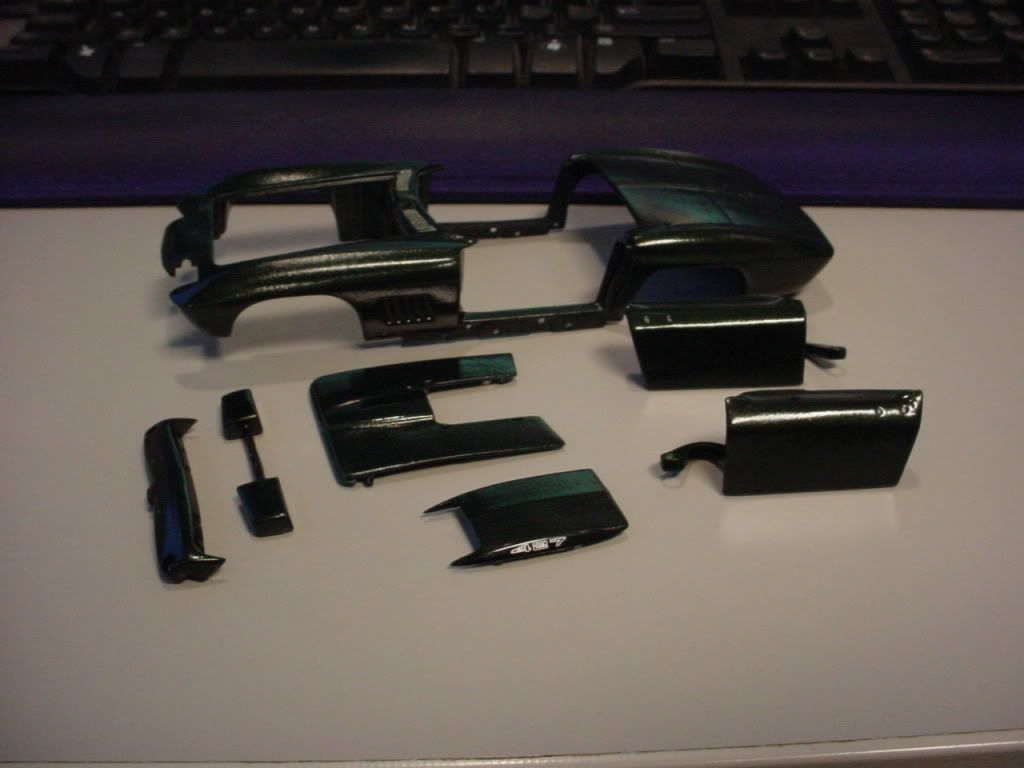
Once the paint was wet sanded the clear needed to be applied to give it that perfect finish. All told this process had two coats or primer, six coats of color, and four coats of clear (two coats applied, cured, wet sanded again, and then two finishing coats). Was it overboard? Hell yes.
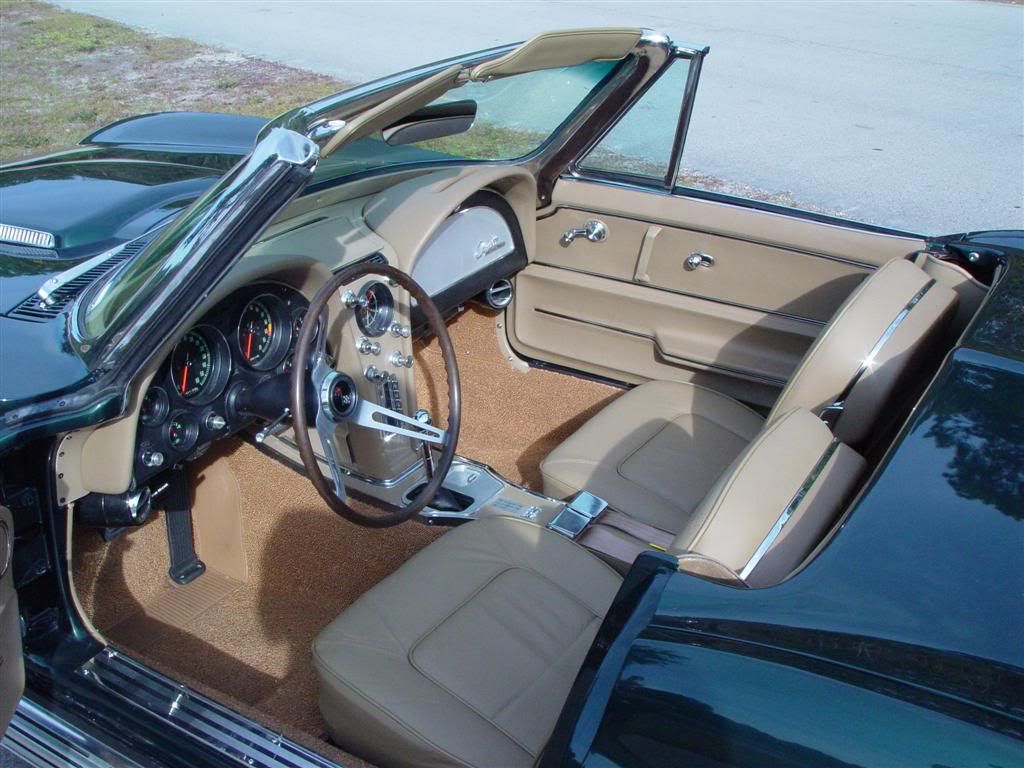
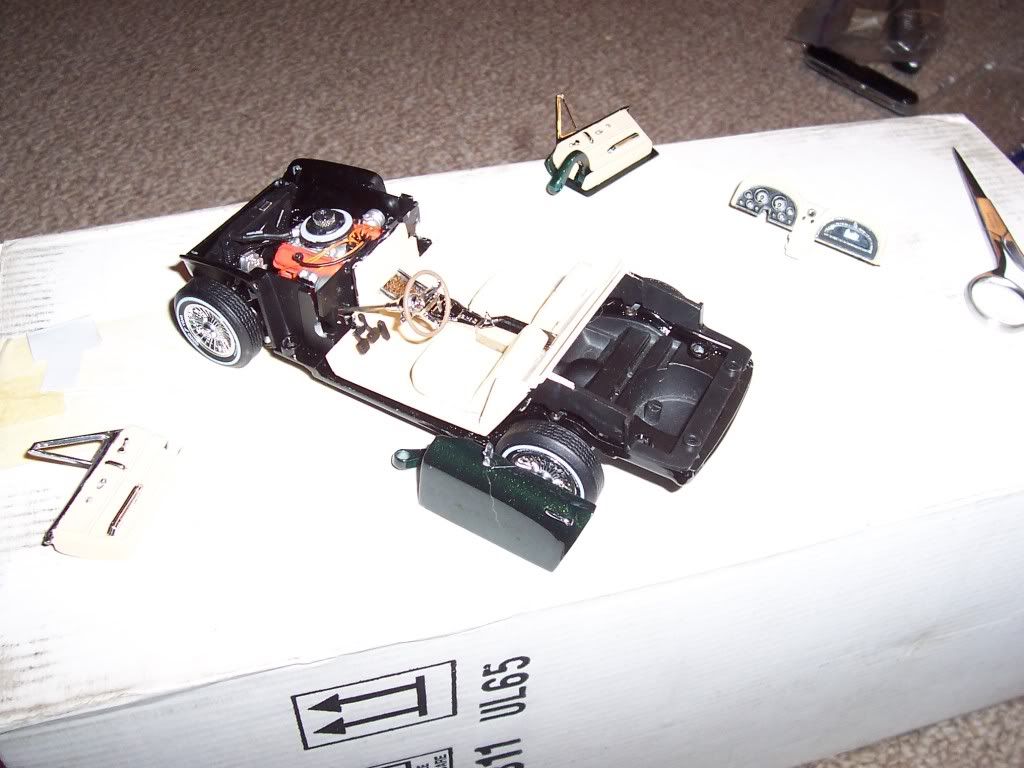
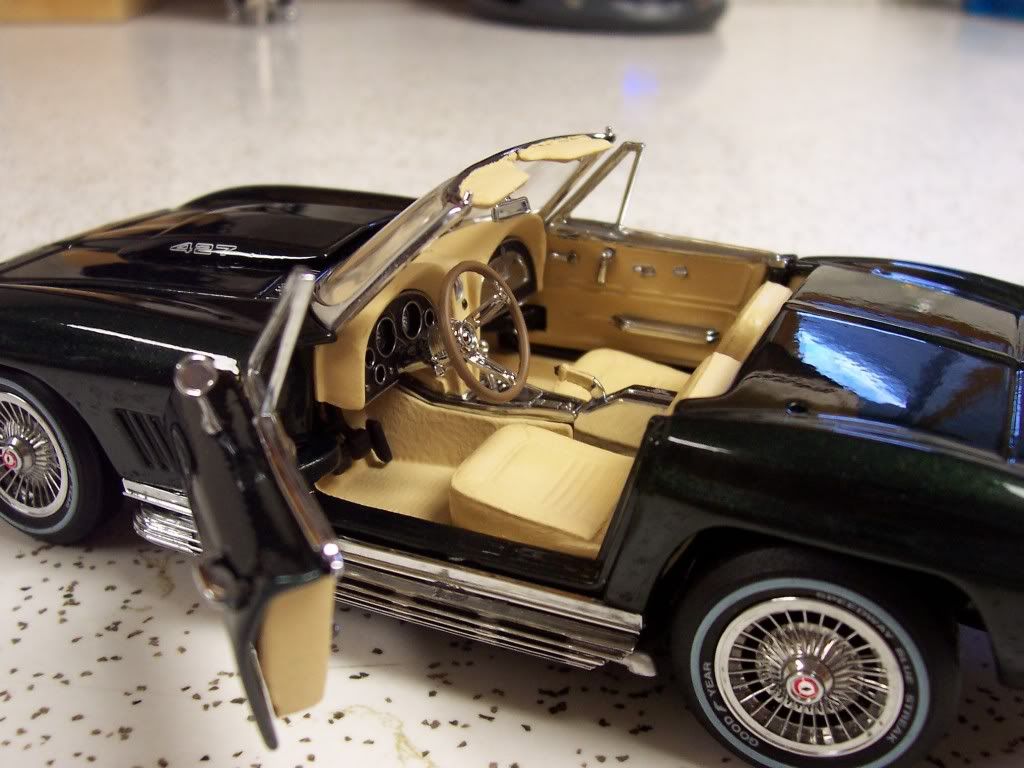
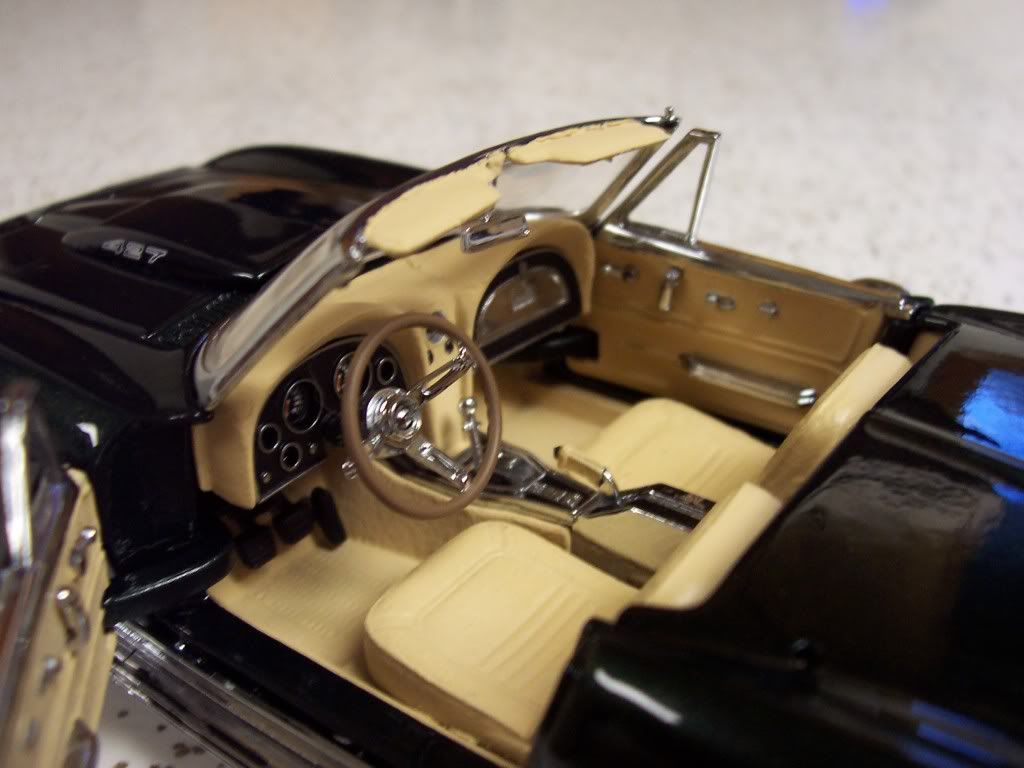
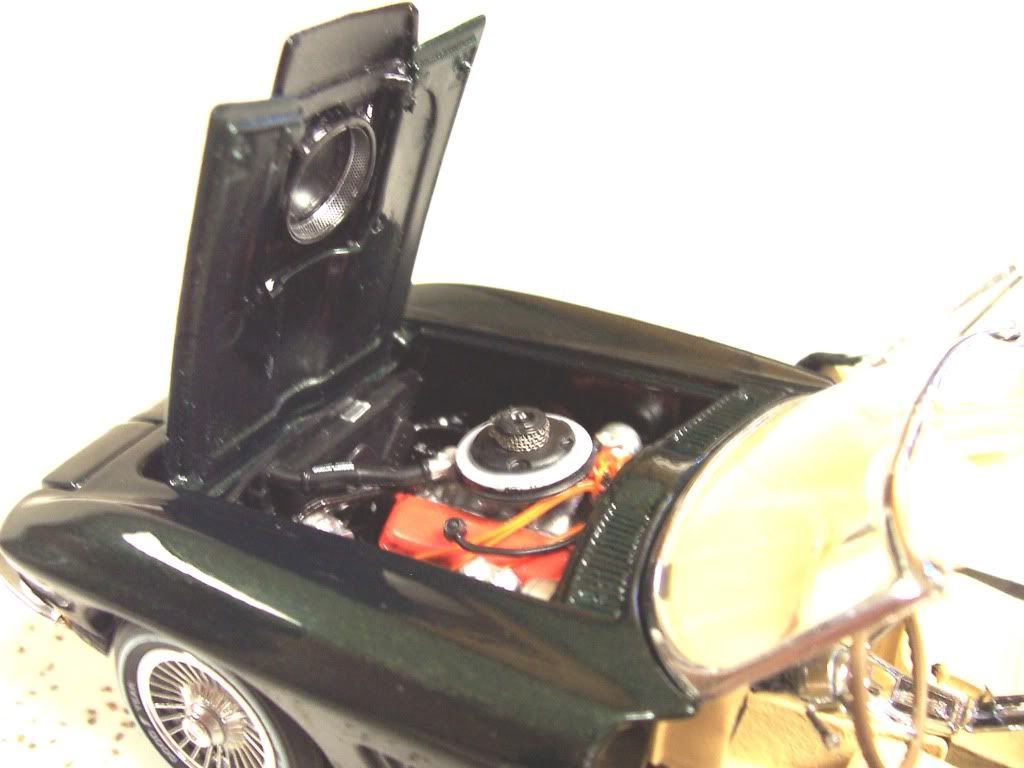
With the Body finished I turned to the interior. I wanted to mimic the OEM Saddle interior styling exactly how it was done. But, all the interior surfaces were vinyl and fabric, something that cannot be easily duplicated with just a paint selection. The solution, dry brushing. Enamel paints are great for creating textures and faux finishes. The nature of the paint allows you to work with it in endless combinations. Dry brushing is a technique I used to simulate the leather texture on the seats and door panels as well as creating a fabric texture on the transmission tunnel and floor boards. Same paint used but different application methods.
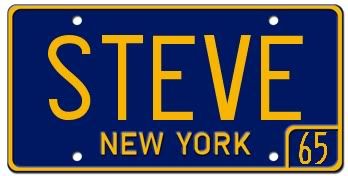
One thing I have always been a fan of is details. There are a few things I did to this to make it stand out even more than it already did. My favorite modification to this besides the color matched E-Brake Handle is the Vanity Plate. Not only does it personalize the project but I even took it a step further to match the exact plate design that was issued by NYS in 1965.
This entire project started in late October. After quite a few late nights and having to custom order the paint it proved challenging to meet the December 25th deadline. A mere two days before Christmas the project came to an end with the last piece being attached. Christmas morning came and the reaction was well worth the hours that went into it.
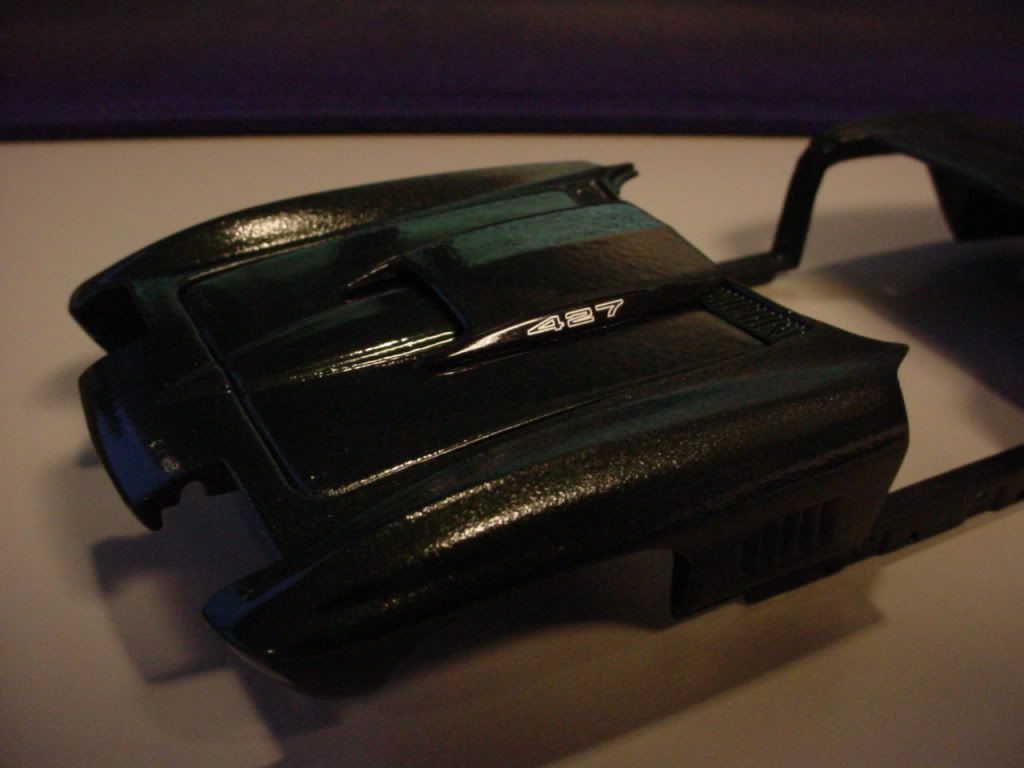
Close up of the Metallic paint:
Finished Plate:

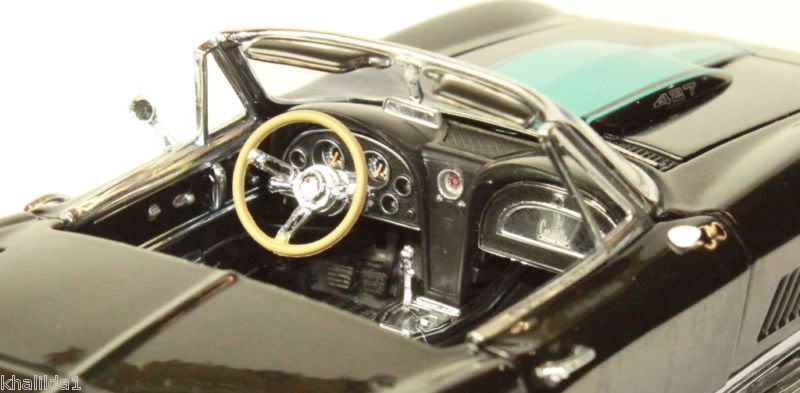
Finished Interior:
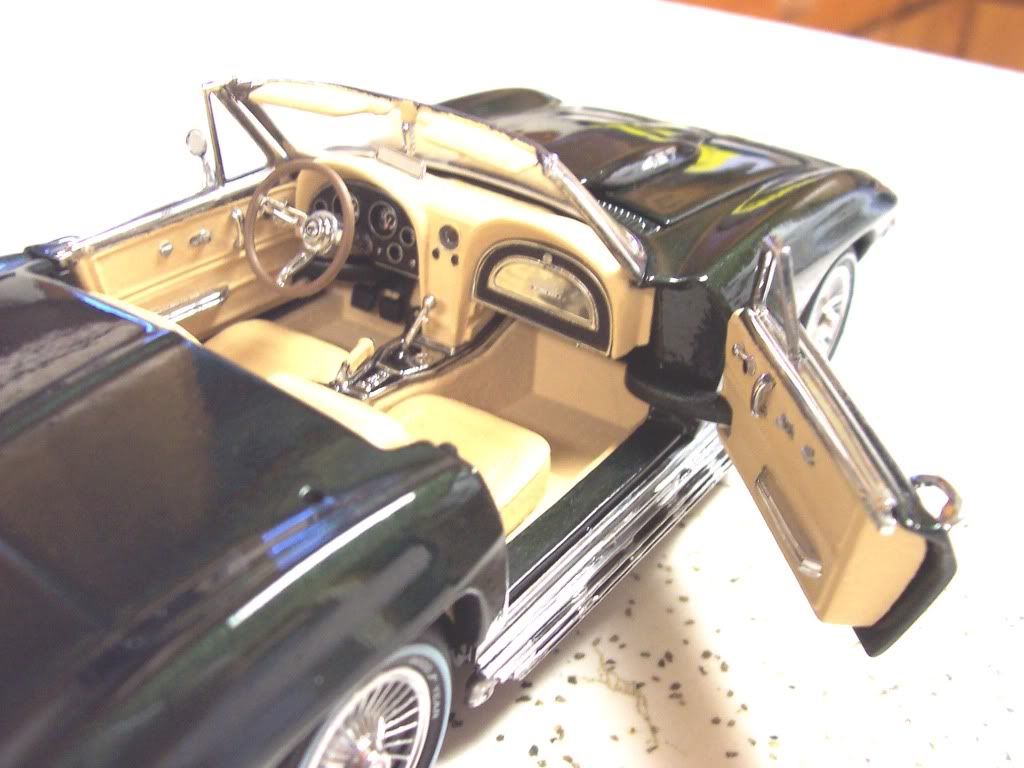
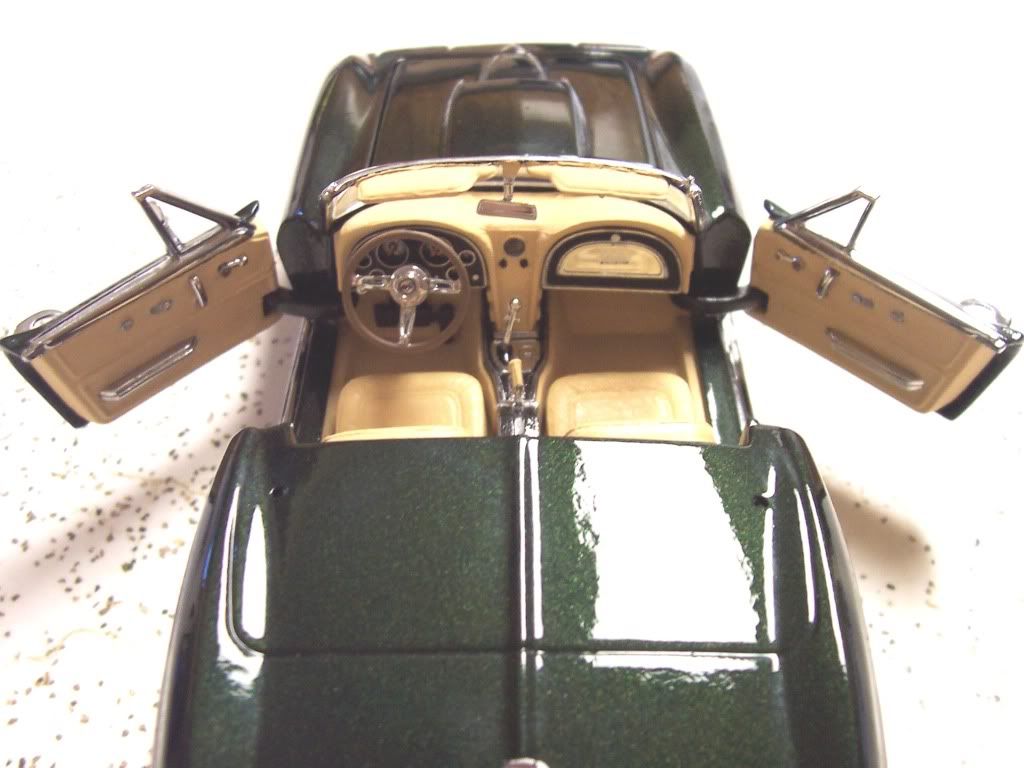
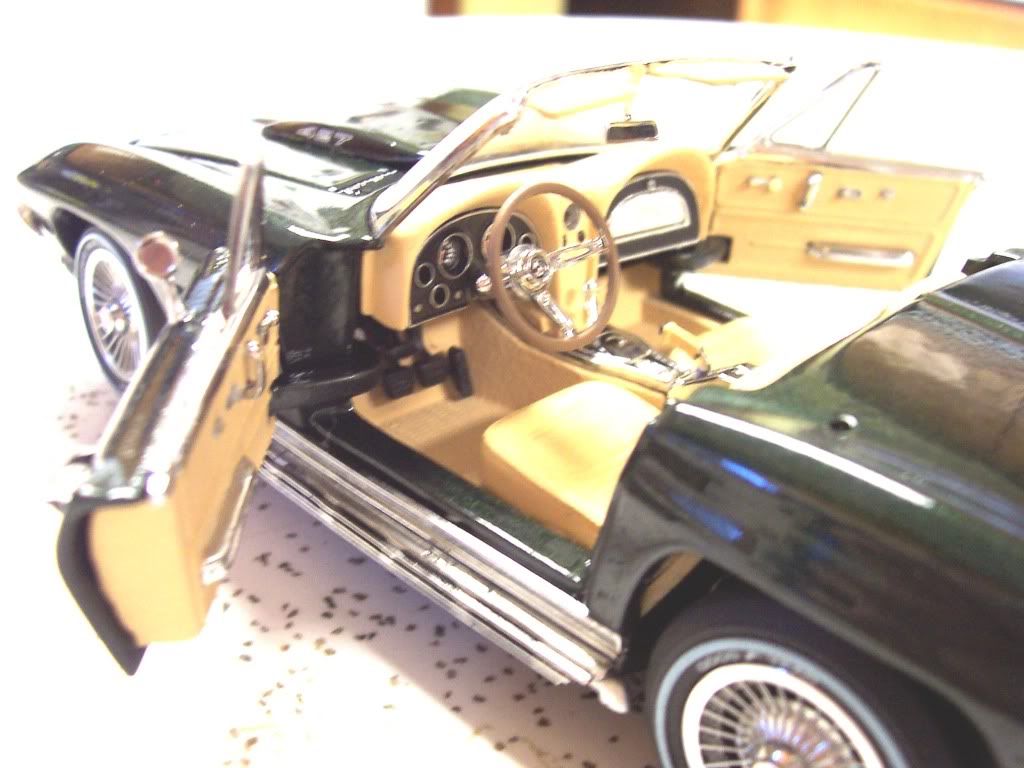
Here are better shots of the textured Tan.
Complete with hardtop. With the wheels and the accent of the scoop I decided to leave it black. I’m glad I did.
Merry Christmas Steve!!!
 LOL!
LOL!


