Stippy's 86' Trans Am

Well I bought ANOTHER car lol. I paid $300 for the 85’ Purple/Silver Trans Am I bought a few weeks ago that Josh (Hotrod) helped pick up with me, and now I bought a 89’ Maroon Notchback Trans Am for $200. Great guy (Family Friend), I had already bought the 3 in. Exhaust and the 16" Gold GTA Wheels that were on it for $150 awhile ago but now I bought the rest of the car for $200. Going Sunday to pick it up, and Ill have pics then. Itll be a parts car for both of my Trans Ams. The car is being completely stripped and being hauled away for free by the JY owner I know. In exchange he’s giving me a VIN tag and title which Im going to use for the Purple/Silver one since I dont have a title for her. It may be a salvage title (All the titles for his cars are salvage titles), but hey thats better than no title and he’s helping me out flatbedding the shell away. Once it gets to his yard we’re flipping it and taking the rearend out. Thats the only thing Eddy (The seller) wants from the car which Im ok with since he helped me out alot.

Bunch of usable parts for both of my cars. Im excited I can keep myself busy with alot of stuff now and not have to spend any money lol.

Oh and I also struck a deal with a guy on another forum for Heads & a Distributor that have 25 miles on them. 200 cc IK Aluminum Brodix Heads & a Procomp HEI Distributor for $900 Shipped! I have to wait til the money clears my paypal account, but once it does Ill send the money his way. I can see my Parts Needed List slowly getting smaller and smaller.

Tonight I removed the Rear Bumper, and removed the Crash Plastic back there too. Looked at my Crash Bar back there and its a little tweaked from that kid from school who rearended me. Kinda funny no damage to the Rear Bumper (Chipped my paint off), no damage at all to the crash plastic, but bent in my Crash Bar by about an inch. Oh well no damage to the car at all, and I can use the Crash Bar from the Notchback to replace it. I doubt Ill remove the Crash Bar from the Rear like I did in the Front. Im more worried about people on the streets hitting me from behind than I am of hitting someone or something from the front.

Next step is to rerout the brake lines and bolt in the new V8 mounts I bought. Also going to drop the Tank, paint it, and install a sending unit for a Carbd motor.

I bought a 89’ Maroon Notchback Trans Am

awesome, build the notchback!!

I have enough projects lol. Besides the front clip is already gone (Eddy sold it), he used the tranny for his 52 Coupe project and wants the Rearend too, I have the Exhaust & good Wheels, and he cut a hole in the floor to get the tranny out because ‘it was easier’ lol. Dont worry I will own a ‘Notchback’ lol, the hatch is going on my Blue Trans Am. Lighter hatch so itll be better for weight reduction, and who else can say they DD and drag race a Notchback that runs 11s? Not many if any :slight_smile:

Trust me all the parts out of the Notchback will live on. If I had a title for it believe me Id use the Purple Trans Am as a parts car, and build it, but like Ive always said Im not into numbers matching cars really so if Im using all of its parts and nothing is going to waste Im happy.

Now the collectors out there might be like WTF that was 1 out of 625, but eh whatever Im not into this hobby for the money lol.

Thats what i said! At least the parts will live on i guess.

Waiting on the tranfer from my bank account to my paypal account to be final, and then I can send the money for the Brodix Heads.

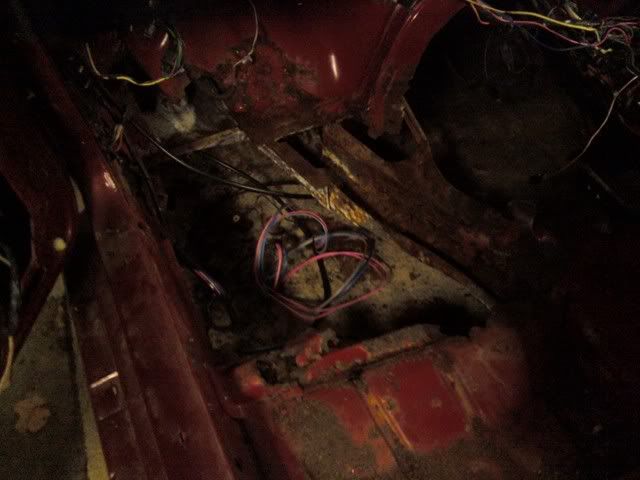
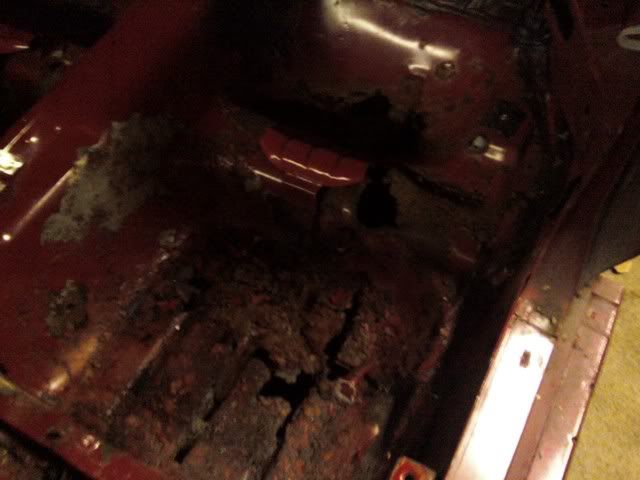
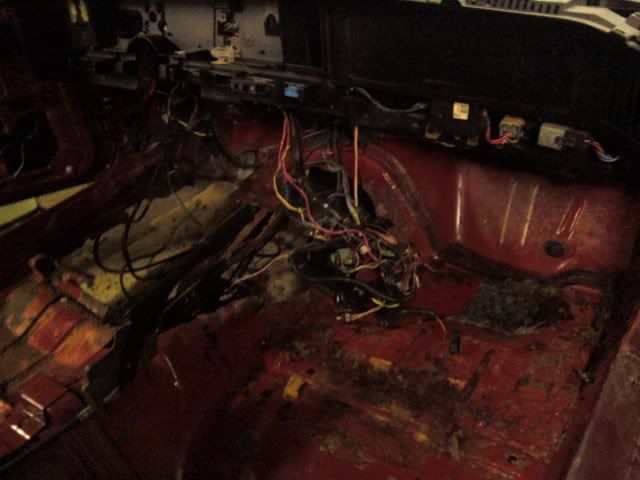
On another note I picked up the Notchback parts car I bought on Wednesday for $200. Already started tearing into it. From the outside the car looks real clean, and solid. I have the whole rear stripped except for the Hatch and the Crash Bar. I need the Crash Bar for my Blue car since mine is a little tweaked from a kid at school rearending me. Im working on the interior up front now. Just need to get the front seats out, then the carpet is ready to come out. Boy guys, Ive never seen so floorboards this bad even in cars at the junkyard. Im really glad I only intend to use parts out of it, and scrap it. It was def. worth the money for the H.O. 305 in it, and the Notchback Hatch tho.

Wait til I post up pics of the floorboards…err I mean whats left of the floorboards…

Im gonna tear into it some more tonight, and then if I take some pics Ill post some up later on tonight.

nice, brodix 200 IK’s are nice heads for the money

http://i278.photobucket.com/albums/kk104/Stippy18/cid__downsized_0215092045.jpg

http://i278.photobucket.com/albums/kk104/Stippy18/cid__0215092045a.jpg

http://i278.photobucket.com/albums/kk104/Stippy18/cid__0215092045b.jpg

http://i278.photobucket.com/albums/kk104/Stippy18/cid__0215092046a.jpg

http://i278.photobucket.com/albums/kk104/Stippy18/cid__0215092047.jpg

So who wanted me to build this car??!! Lol

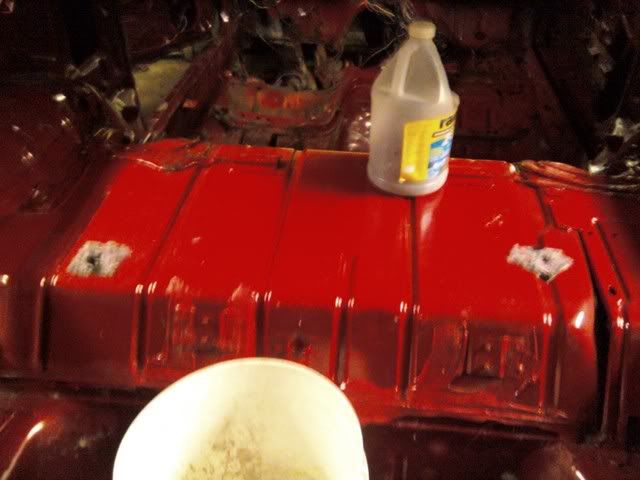
Sorry for the bad pics, I took em on my cell phone since I was in a hurry. The Washer Fluid bottle is full of Thirdgen fasteners lol. Oh, and the Dash has since been taken out too. Just have the Hatch, Doors, T-Tops, Motor, and Driver Strut Tower Plate to take off and thats it.

http://i278.photobucket.com/albums/kk104/Stippy18/cid__downsized_0215091027.jpg

This is what the Notchback Hatch looks like. Itll be going on my 86’ Trans Am, because it’s fiberglass and weighs less. Besides, its going to change the whole look of the car. Any opinions of it?

Notchback hatches are so sexy.

love the notchbacks

Haha, should look good on my 86’. I also found out on closer inspection the insert isn’t glass its plexiglass. Weighs alot less than glass, but I think that’s why it wasn’t sitting in there right. I think someone removed the original glass for one reason or another, and tried replacing it with plexiglass and either cut it not exact, or didnt adjust it right. Im going to try and adjust it, and if I cant make it work Ill make a new insert for it.

Its growing on me, I love it from some angles and others Im iffy. All about the weight reduction tho!

After the work tonight we are basically done.

Parts Tonight:

305 H.O. Motor W/ Full Harness
Inner Plastic Fenderwells
AC (Scrap Aluminum)
Passenger & Driver Doors
All Other Engine Bay Wires (Scrap Copper)
Notchback Hatch
Rear Crash Bar
T-Tops
Gas Tank
Front Sway Bar

Still Need:

Windshield
Driver Side Strut Mount Top Plate
Rearend (After its at the JY)

Not bad, tomorrow after work Im gonna spend alot of time organizing everything and getting the engine off the Cherry Picker and onto the extra stand I have. After that put all the tools away that are still laying out, and I guess start on fixing the Notchback Hatch.

You should just fix the hatch, paint it white, and give it to me. :slight_smile:

Haha. Tell you what…as soon as I see an LS1 under that hood of yours that is when Ill hand over the Hatch. :stick:

Got the 305 on the stand tonight, and cleaned up the garage and the rest of the parts. Put the 86’ back in the garage, and now Im working on the Plastics in the Hatch, and pulling up the Jute Padding in the rear of the car. Im off tomorrow so Ill be able to finish that, hide my component speakers amp in the one fender well, and see what I can get done on the Hatch.

Have to take a load of scrap to the scrap yard tomorrow too.

You’d hate it if I made you eat your words…

Little Update:

Notchback is torn down completely. Everything is off the car, except for the Windshield and Strut Tower Plate. Took about 10 hours total to strip it.

Removed the Crash Bar that was tweaked, and installed the Crash Bar off of the Notchback. I painted the Notchback’s Crash Bar after taking care of the little rust that was on it. Looks good, and itll last now. I also put the Rear Bumper back on.

Black Rear Interior Plastics are in the Blue 86’. The are a little faded, but at the moment Im not worried about it. Atleast its all black now, with the rear plastics still having carpet like I wanted. Ill have to get pics later.

Whole interior in the Purple 85’ is done. I got home from work at 9 PM on Tuesday, and didnt go inside til around 2 AM when I finished. I pulled all of the old, rank, stained plastics and carpet. I started with the rear and put my old rear plastics from the 86’ in with the black carpet from the Notchback. Moved onto the front and pulled up the carpet and plastics. Replaced the carpet and plastics from out of the Notchback, and my old Grey/Black seats out of my 86’. Ill get pics later. The only interior the car needs now is a Headliner and Dash Pad.

Also, I received my Aluminum Brodix Heads & Pro Comp HEI Distributor on Tuesday. They are so freakin light compared to the old cast heads that were on the engine when I bought it.

As of yesterday (Dad & I were off) we pulled the 305 out of the Purple 85’, and set it on an old tire. Swapped everything over we needed (Sensors, Vaccum Lines, etc) to the H.O. 305, and began to set it in. On this car Im not worried about looks right now, so I didnt clean up the engine bay or paint the engine. We are just trying to get it running and on the road first.

We are going to keep wiring everything up, and hopefully be ready to try and crank it tonight or tomorrow. We are using the H.O.'s Wiring Harness & ECM, instead of the original Wiring Harness that is butcher’d and its ECM. I still have to tear down the old 305 to bear block to scrap it. Im probably going to keep the Heads and thats it.

I also forgot to add that while I was swapping out the rear interior plastics I decided to gut the car of the interior to pull up all of the jute padding. All in all I think I removed 15-20 Pounds. All of the interior is back in tho, and doesn’t look any different.

I also removed the old V6 Motor mounts, and we started to install the V8 ones I bought. We are going to try our best to install them without dropping the A Arms like your supposed to do.

I love how this was a 400 sbc swap into the 1 car, but now its a 2 car build :slight_smile: Just like my builds, they always snowball into more and more of a project

Trying not to mess with the Purple 85’ too much. Ive got enought done on it for now, trying to keep all my focus on the Blue 86’ til its back on the road. :burnout:

Havent updated this in a long time. Ive done alot, so Ill just post up an update of my parts list for this build.

Interior

[LEFT]140 MPH Cluster
B&M Megashifter
Battery Relocation Kit


Exterior

2 1/2" Harwood Cowl Induction Hood

235/60/15 BF Goodrich Radial TA’s (Front)
295/50/15 BF Goodrich Radial TA’s (Rear)
Nightshaded Tail Lights
Notchback Hatch (Soon)


Engine Compartment

400 SBC

A/C Delete Heater Box
ARP Bolts
Brodix IK 200cc Aluminum Heads
Champion Aluminum Radiator
Comp Cams 1.6 Full Roller Rockers
Comp Cams 7.750 Pushrods
Comp Cams .540/.540 Flat Tappet Cam
Comp Cams Hydraulic Lifter Set
Dual Electric Fans (2800 cfm)
Edelbrock 14" Chrome Air Cleaner
Edelbrock Chrome High Rise Valve Covers
Edelbrock Fuel Pump
Edelbrock Performer RPM Intake
Fel-Pro Gaskets
Moroso Oil Pan, Pickup, & Pump
Moroso Oil Filter
NGK Platinum Spark Plugs
OEM Starter
Orbital Gel Battery
Power Master 140 amp Alternator
Pro Comp HEI Distributor
Proform Aluminum Water Pump
Proform Gear Drive
Royal Purple Break-In Oil (7 Qts)
Speed Demon 750cfm Carb
Summit Chrome Oil Dipstick
Summit 8.5mm Ignition Wires


Suspension

UMI Performance Lower Control Arms

UMI Performance Panhard Bar
UMI Performance Subrame Connectors
UMI Performance TH400 Crossmember
UMI Performance Torque Arm
UMI Performance WonderBar


Tranny

Art Carr 2800 Stall Speed Converter

B&M Flexplate
Electric Speedo Converter
Rebuilt TH400 w/ Shift Kit
Spohn TH400 Chrome Moly Driveshaft
TCI Racing Transmission Fluid (12 Qts)


[/LEFT]
Ill post up a few pics. I have repainted the engine bay flat black, because I wasnt happy with the silver I painted it. I also had my Heads drilled for the Steam Holes at Broughers in Pleasant Hills, and got back my Nightshaded Tail Lights from a buddy that was doing them for me.

EDIT: Also painted the Hood to match the car, and painted the Notchback Hatch & Wing too. Need to have a piece of glass cut for the Hatch before I can use it tho.

http://i278.photobucket.com/albums/kk104/Stippy18/cid__0423090619-1.jpg
Picture was taken on my cell phone before school. Morning dew is on the car lol.

http://i278.photobucket.com/albums/kk104/Stippy18/cid__downsized_0424092207-2.jpg
Engine as of now.

http://i278.photobucket.com/albums/kk104/Stippy18/cid__0503091615-1.jpg
Paint looks grey, but in person its a true flat black. Looks better than the Silver I had painted it before IMO.

:bigthumb:

I got the Champion Rad & Dual Electric Fans in the mail yesterday.

Today we closed up the air tubes on the Headers, and stretched them on. Also sat the engine in today, and got the motor mounts tightened up.

So far a problem we are seeing is the fuel pump inlet/outlet, well one of them is right next to the motor mount clamp that bolts to the block. There is no way you could get a fitting on there, so we notched out the mount a slight bit, but we are going to see if we are able to swivel the base of the fuel pump a few degrees. Not sure if its possible, but if not I may have to buy a different fuel pump. Other than that, a small block looks REAL good in place of the V6 that was in their last fall. :slight_smile:

Gonna worry about the fuel pump later, but right now I went out and purchased a few Grade 8 bolts to use for Bellhousing bolts since I dont have any. Gonna try and get the tranny up in, crossmember back in, and driveshaft bolted in tonight.

Most mechanical pumps can be rotated to fit.

Its the Edelbrock High Volume one, so hopefully it rotates. We were hoping it does, but were too busy to take a look at it to see if it would.

After tonight we have done:

Welded air tubes shut
Headers stretched onto block
4 Qts Royal Purple Break-In oil added (3 left)
B&M flywheel swapped on
Motor sat and bolted down
Art Carr Torque Converter put in TH400
Tranny put up in place and bolted to engine
Speedo Converter bolted onto tranny
Tranny mount installed
Crossmember reinstalled
Torque Arm bolted back in
Spohn Driveshaft bolted in
Champion Rad sat in place

Im going to need a different starter because my OEM isnt going to work with this flexplate. Also need to run fuel lines, rad hoses, go through all the wiring of what I need/dont need and hook everything up, and a few more misc things.