you m*******er. Insane!
1 Like
Hey, Re: the motor, looks super healthy! Love that you can still see crosshatching. wild.
Are you saying that essentially you’ll be forced to go +1 on this, as OE bore pistons seem hard to source?
I finally found the Wiseco piston list and figured out that they make a +0, +0.5 and +1.0mm versions of their 9:1CR piston (previous I thought they didnt offer a +0). So it will just depend on what the engine guy tells me will work.
There is a little scoring adjacent to the crosshatching, which I would expect, but it may still be round enough that he can just do a re-hone. We shall see.
Dan
1 Like
As always, amazing work. More info on your diy lizard skin?
I found the idea here: alternative to Lizard Skin | Hot Rod Forum
Maybe that will help. Its literally just microballoons and latex paint.
Dan
Lots of progress this weekend.
With the drivers door stripped and ready it was time for the pass door. Id love to have a talk with whoever kicked the damn door 100x getting out and with whoever painted this thing.

Door track modified and holes / seam welded up.

Metal finished

Found two big dings in the middle of this door.

Stud puller to the rescue. While I wasnt able to get them out totally, I got it much closer.


Stripped (pic taken before I pulled the dings)

Hung and baking in the booth. Had it near 80 metal temps in there in about an hour


Epoxy


And topped with 2k.


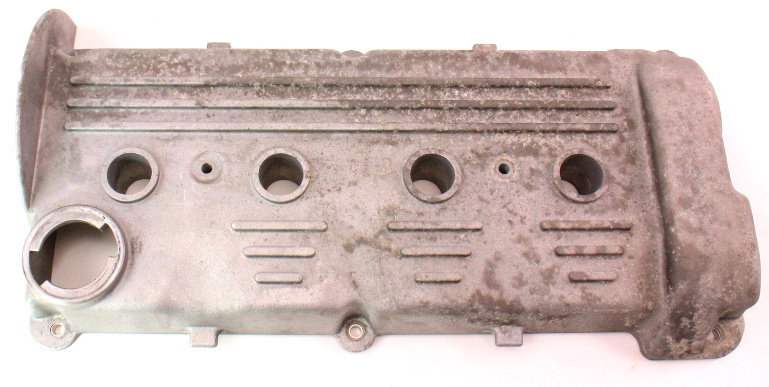
Also did the same to the valve cover.

Up next body work on the shell begins.
Dan
2 Likes
This whole thing makes me jealous and envious… I wish I had the tools/knowledge to do all of this to my Camaro I’ve had in storage. Incredible job!
Thanks! Its quite the project, hopefully the end result is good.
Started body work on the chassis.
Pass side marker light area is 98% done. Unsure what, if anything, I need to do with the couple slightly low spots on the top part of the quarter panel that showed themselves in front of the gas filler hole.

And one coat on the drivers side marker area. Unearthed a small ding I need to address as well as a few low spots like the pass side.

Finally started sanding out the valve cover while mud dried, which is a real treat, but I think will look good when its done.

Dan
2 Likes
Finished sanding out the valve cover. It should be good enough.

Tackled the low area behind the pass door. Finally got to use my Ingersoll board sander - which works so good.

Just had to do a little hand blocking after to get it nice nice in just one coat.

And with that I think the pass side is good enough that any left over low spots can be handled after the Slicksand.

Finally I finished up the repair on the drivers quarter / marker light area. I think it turned out really well and I used WAY less filler compared to the previous repair.

Probably one more night should finish up the last of the drivers side mud and then I can mask (again) and spray the Slicksand.
Dan
2 Likes
Stripped down the block and head this weekend.
Was pleased to see the condition of the crank, someone took care of this.


Pulling 16 valves and seals was a “hoot”

Will be dropping everything off at the machine shop next week.
Dan
1 Like
A week of filler and sanding later, finally finished that up.


Then it was time to do some 2k seam sealer. Always a hoot to mask, tool, and sand.


And what spray job wouldnt be complete without more masking.

With all that done, locked everything in with two coats of epoxy.


Laid out pretty nice! And for having sanded in the booth and just doing a quick blow out, there was almost no trash. Hopefully that carries over to when I paint and clear this thing.

The next morning I did a quick scuff and then two coats of poly primer (Slicksand)


Just a reminder of what I started with on this panel.


Finally with the cam cover sanded out I put a coat of epoxy on it. Its not perfect in spots, but I think its good enough.

For those not familiar there was once the filler cap here

Dan
1 Like
So you’ve relocated the filler to where?
To no where. Im going to make a funnel that I can connect to the -10 breather fitting there on the side ![]()
EDIT: This is an example of the OE cover.
Dan
Gotcha! It’ll look clean but how long will it take to fill 
Does it matter? It cant take longer than a couple mins a quart. Def faster than a DSG service fill from the top.
Dan
It doesn’t, I’m just impatient, lol.
I was recently looking up the oil extraction time for my truck and it can take an hour+ with a compressor. I almost bought a hand pump to do it myself but damn that’s a lot of pumping.
Woof yea. Thats a bit much.
DSG fill takes maybe a few mins a quart, 5 maybe? Idk. I pour one in and do something else until I forget and then start over on the next quart.
Dan
This build started in 2007. I don’t think he’s the kind of guy that will be too upset over a couple extra minutes per quart of oil added. 
2 Likes
the things we do for vanity 