a while back i was trying to find these in convertible and couldn’t really come up with any. were they made?
I do too…I’m trying to come up with a way to maybe get rid of the chrome trim inside and give that more of a naked steel look.
Do it up!
They made 'em…but they’re pretty hard to find nowadays.
Okay, just spitballing here: If we removed the plating, we could get it back down to the factory metal. Is it steel or a pot metal? Magnetic? Possibly burnish the finish? Plate with nickel? Coat with a semigloss powdercoat, or, low gloss clear?
Some real hotroddin’ up in heah :tup:

:tup:
Tom, I’m not sure what material the factory used…I’ve been looking to see if I can find another bezel to mess around with.
Since last post I had ran into some clearance issues with random things like transmission level dipstick, a steering line on the rack, a few senors had to be moved around…etc. Pretty simple remedies, no pics though.
Next, I moved onto the wire harness. In it’s dirty, stock glory…

Marked the plugs I wasn’t going to be using; wiper motor, washer fluid, smog pump, egr, etc…then stripped the loom and removed the wires as far back as I could to minimize the bulk of the harness.

A few hours later, some tape, and new loom. Nothing fancy, but looks a lot cleaner than before. Still have some more left to do like mount the computer and fuse box under the hood…

Nice progress Mike. Very Cool project.
Last time i put a late model sbc into a 55 i had bought a kit (transdapt i think) that came with a whole crossmember(that was welded between the rails) with engine mounts to change the front back mounts to side. The kit your using looks much different. does an lt1 have provisions for front/rear mounts?
awesome build :tup:
I’ll have to take a look next time I’m laying under the car…I can’t remember off hand.
Thanks:) It’s been fun but a bit frustrating at the same time. I’d love to do a bunch of custom metal fabrication, but the lack of tools, experience, and desire to pour a ton of money into the car hinders that. As long as the old man likes it in the end is all that matters I guess.
Wow, it’s been a while since I’ve updated the thread…
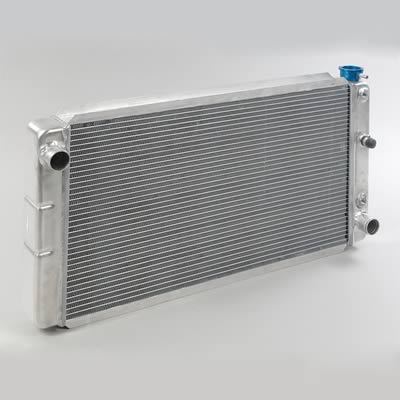
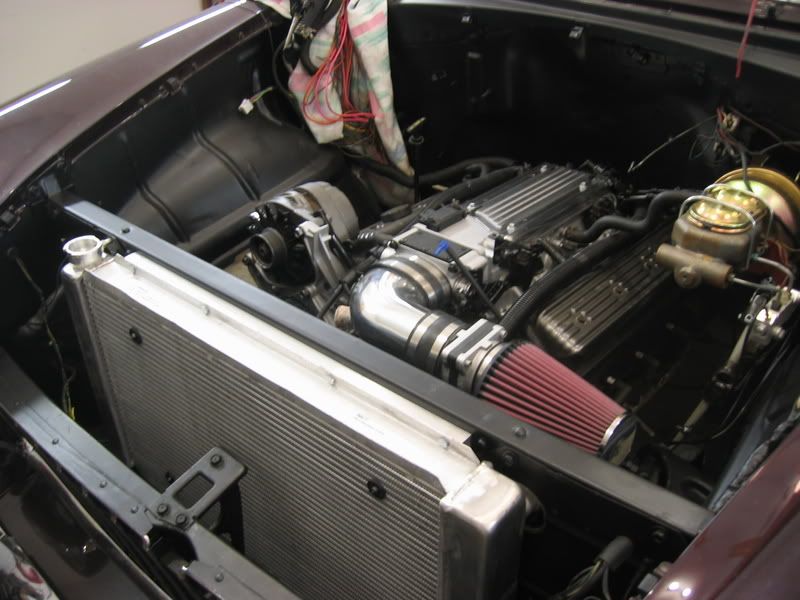
Since last post I’ve made progress here and there. I had to modify a pressure hose from a '94 Camaro in order to fit into the Caprice pump. Basically, a section of about 4" of tubing was removed and a new end put on. Once that was taken care of the next item of business was the radiator and fan set-up. I went with this radiator from Summit for $260:
Next item of business was the radiator and fan set-up. I went with this radiator from Summit for $260:
http://store.summitracing.com/partdetail.asp?autofilter=1&part=SUM%2D380473&N=700+115&autoview=sku
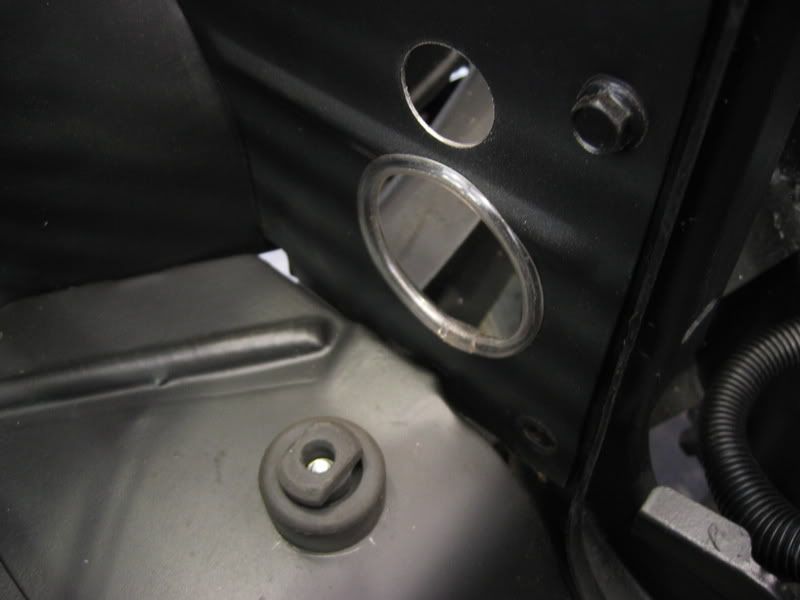
I had to poke some holes near the core support for the hoses to come through, also note the rubber foot for the radiator to rest on:
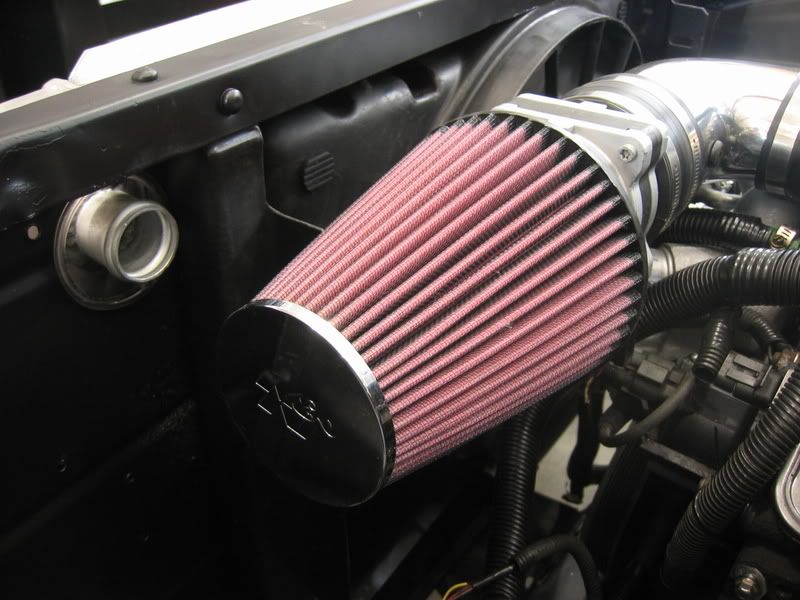
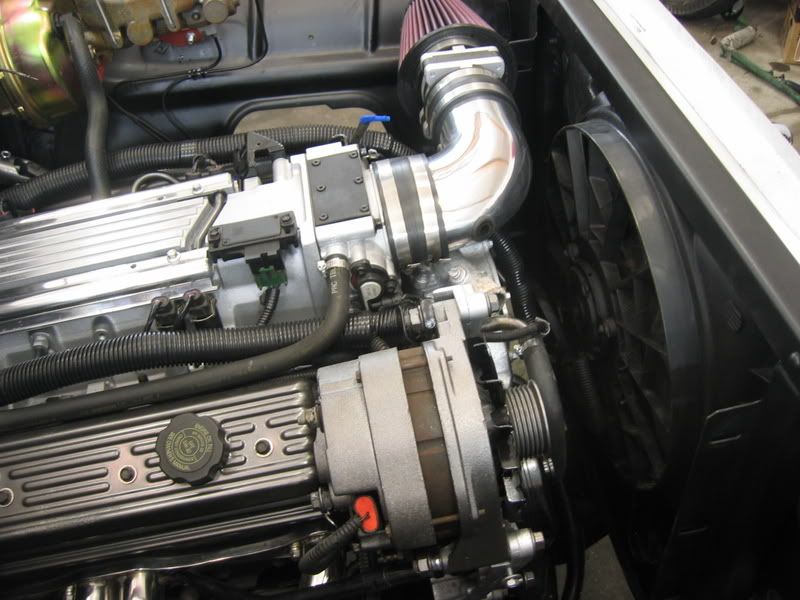
Here is a shot of the upper radiator area, along with the new intake elbow and K&N filter. Also, note how snuggly the Taurus SHO electric fan and shroud fit.
I also polished the fuel rails…wasn’t digging the black and thought with the intake elbow and exhaust pieces that polishing up the fuel injection was a little icing on the cake.
Here’s a shot showing the radiator secured in place along the core support.
I’ll have some more pics tonight hopefully since these pics are a few weeks old now.
<3
Love it. Polishing was the right move, good balance in there now.
Awesome project. I really like this build.
:tup:
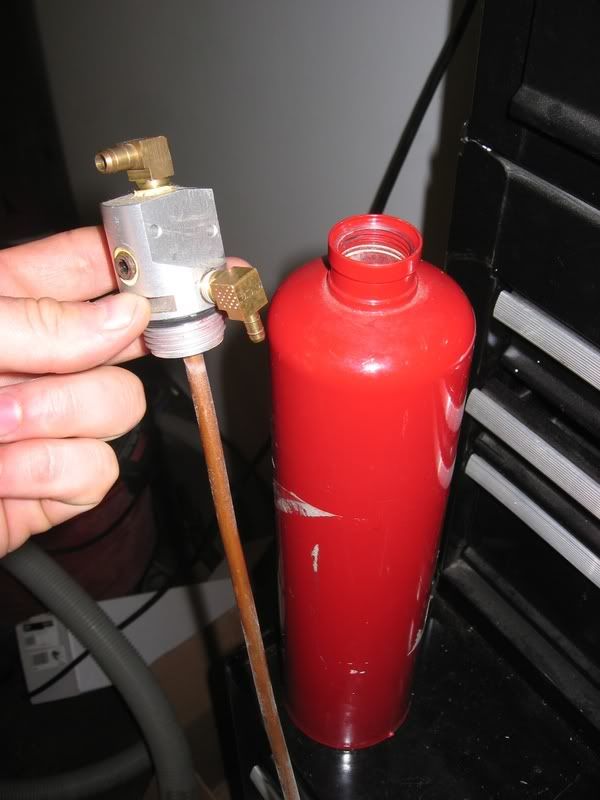
Needed an overflow tank for the radiator…this was a fire extinguisher in its former life:)

Gutted, with some tubing…I can’t take credit for this as it was done by a friend’s father.
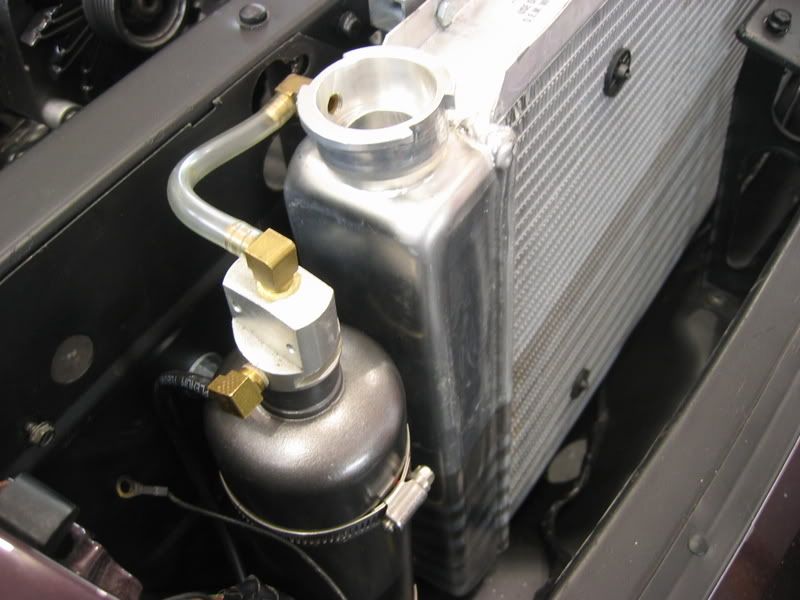
Painted, and installed.
Since the AC was deleted I needed a pulley to go in place of so I can run the stock belt. Began with a foamcore template, and some scrap aluminum. The pulley is an idler pulley that was used on the stock tensioner, and the cylindrical piece was turned on a lathe to match the dimensions from the bracket of the tensioner.

Some clearcoat paint on the aluminum and charcoal on the bolts.

Installed…I’m wondering if there will be a problem with the pulley not being ribbed for the belt and wanting to walk a bit???

Todays update: Engine runs:)
Still have a lot of buttoning up to do, but the wiring is all sorted out and she fired right up! No pics of the latest as most of the work I’ve been up to has been fairly boring and slightly insignificant to post up.
Soooooo… any pics yet?
I’m wondering how come u guys went with an LT1 over an LS1 if ur gonna be upgrading to Fuel Inj anyway? More expensive?
I have several pics…just have to upload them. My usb port at home is fubar, so I have to upload them at work…just have been too busy to do so:(
$700 for a drivable Caprice was the initial motivator. The 4L60E had been rebuilt recently so that helped too. The Caprice was owned by a friend so I knew the history of the car. I had wanted to go LS1, but the cost was too much for the build. My parents are building a cabin at the moment so getting funding has been tight as it is. In the end, the car is being put together for my old man, and all he is looking for is a comfortable cruiser that has EFI, overdrive, and a little more power than what he had before. I know the LS1 is a great engine, but the LT1 can more than do the job as well.
Gotcha. Looks like fun…post pix when u swap in the C6 Z06 crate 
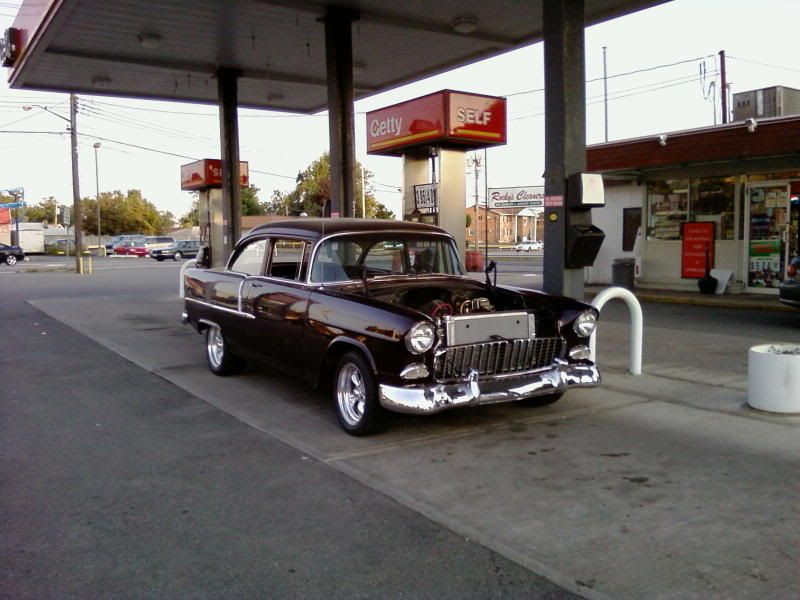
Long past where I thought I’d be at this point of the summer…but it drives!!! Took it a mile down the road to the gas station. Needs an alignment pretty badly as I could smell the front tires getting punished from too much toe out. I was quite easy on the gas and probably didn’t go over 30mph, but it felt pretty damn good!
So cool to see this man
Congrats :tup: