I’ve watched a ton of videos online since before I even welded at all but this video has a little trick at the 8:20min mark that may be good for lining up my panels on the next area once I’m done with my current panel.
I’m not worried too much about how my patches turned out I think they’re not bad, it seems like unless you’re like a super amazing tig welder master body guy that people always need a little glazing puddy.
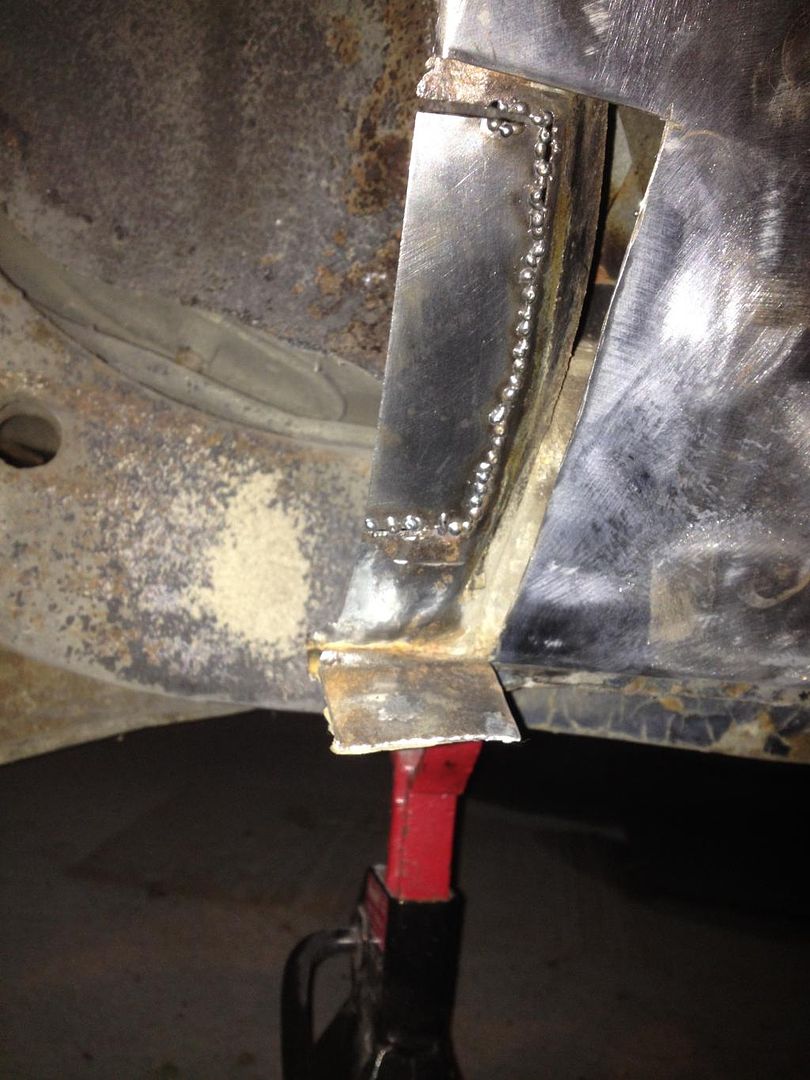
I’m done welding on that door, I’m going to grind it down to bare metal and epoxy prime it then use some glazing puddy/filler to straighten it out.
i put a straight edge to it and the vertical weld filled a gap and even tho I stitch welded it, it still shrunk in and without asscess from the back to beat it back up, it’s just going to need some filler to straighten it out, shouldn’t be too bad tho
Sorry I didn’t respond. I don’t really do any bodywork and the finishing would be all you. But I can weld pretty well at this point and would have no issue welding in a patch that is already fitted.
Thanks, well I am having a lot of fun doing it, I think it would of turned out better if I had better access to the back of the panel. But I also plan to run about 20psi(not sure if it goes by psi or another measurement) of gas because I had it at like 14 during this initial weld. Also going to increase voltage by 1 click hoping it will lay the weld down/flatter.
It’s a process for sure, and I’m trying to not warp the panel with heat, one more door and then the quarter areas which will probably be harder but I plan to have fun!
Grinding down the inside of the door to bare metal because the paint was pealing a little and has a little bit of surface rust. I’m not doing the entire inside because that paint is still good and you won’t be able to see it with the door panel on anyways. I just want to protect it from rusting, going to be using epoxy primer.
Also hung a new light, costs me $29.99 for the light fixture which doesn’t come with bulbs and then another $9 for the T8 bulbs but its bright which is great. I’ll probably buy a few more once its time to paint. I was hoping for it to be a bit cheaper then $40 a fixture.
also with the help of my friend I hung my unit heater. It’s 75,000 BTUs lol it’s more than my house furnace (small house). But if I paint it in the winter I will be happy it’s oversized. Just need to make the roof penetration, pipe gas line to it and run electricity.
I’m not sure if I’m a dick for saying this, but hopefully you know not to run the heater while painting…the cloud of overspray/fumes from the chemicals in paint are HIGHLY combustible and the heater can easily ignite it all and blow up your garage. I would highly recommend getting a commercial grade exhaust fan in there as well, you can heat the space BEFORE actually spraying, then once done spraying turn on the fan to evacuate the fumes for a good 20-30mins, then turn the furnace back on to heat the garage a couple hours to get the paint cured. Also, if you want to retain the heat in there you should use 4x8 sheets of that foil-covered insulation board that’s like $15 a sheet from home depot on the ceiling…this will also keep dust and such from finding it’s way from the roof/rafters into your paintjob…if not going to insulate at least staple painters drop cloth clear plastic across the ceiling. wetting the floor also does wonders for keeping dust down and also prevents the paint from coloring the shop floor as it dries while still on top of the water and you can sweep it away once dry.
Thanks for the info, safety is important, I do know about that though from research. So the plan is to heat the garage and then turn it off and then paint. I do need to get some exhaust fans. I plan to put them under my garage door/ close garage door on top(probably a few box fans), and then put an air filter on my screen door to allow inlet air. I plan to vacuum the shit out of every inch of the garage, wet the floor and probably put up some type of barrier but I’m far from that just yet.
The passenger side is done with rust repair, but I need to weld a little on the bottom front door patch I welded in because once I went to test fit the door it was too low, so I had to grind it up, and burned through. All patches are made by hand, some of the pictures of the progress are missing, like when forming the patches or intial shaping of the patches.
I hand made all the patches!!! Should look good with a skim coat of filler.
It seems to be finishing out halfway decent, but I think you need to turn up the heat just a bit…your welds are basically sitting on top of the metal instead of penetrating into it. you’re just BARELY too cold because obviously the bottom of the tacks are catching but you could get a much flatter weld and have less grinding to do.
I didn’t even realize you replied lol, I wonder if It’s because when I was welding the metal was as cold as the garage(winter). Yeah I had a lot of grinding but I finished all the welding, didn’t filler work, and was able to epoxy prime the doors today.
As you can see not much room, I accidently caused a run in the top left corner but I’ll sand it out later.
The panels being cold really shouldn’t affect anything. You just have to play with your wire speed and current until you find the sweet spot. You’re weld pool is not wetting out and thats why you are having a harder time grinding. If you have the heat at the proper setting, along with timing on your part you can end up with a much smoother weld. Which typically means you have less to grind and a stronger weld.
Finding that sweet spot is tough, especially on parts that may be a bit dirty. Any contamination will really wreak havoc on your welding, so before you start to dial your settings in make sure the front and the back of the panel are clean of any dirt, or paint. Looks like you are getting the hang of it though!
Regarding the welds in the quoted picture, i was blowing through with the welder set on 1 for voltage, i needed back most of those welds with a copper spoon to not blow through, maybe since the welder was a 115v budget welder or i sucked. Either way all the welds have been done for awhile and the car has been stripped down to metal and epoxied and high build.
I also just bought a new gun because i was worried my devilbiss startingline guns wouldnt be quality enough to spray candy red.