That throw away set up was sweet, a little messy but oh well lol. The car looks so much better in person now, it’s uniform looking :tup:
:word:
Probably not a lot. 5 cans of that stuff maybe weigh 3lbs?
Minimally 4,000,000lbs. I am eating a chicken finger sub…how much weight did that add!
Real answer maybe 3lbs A few lbs is obv worth it to me as I am not building any type of race car. Weight(although im not just going to add for no reason) is nothing I am going to shy away from for the sake of having a cleaner and nicer build. I would do this same mod again…even if it were 100lbs. K maybe not haha 
Just talked to LZ and he was wondering about weight for sound deadening purposes. In my limited research about that weight really isn’t the best at stopping sound but building a barrier of cells kind of the same way insulation works? Anyone with some sweet info feel free to post it.
With the pearl gray subframes, wheels, calipers, black wheel wells and car I think it will all flow great.


:tup:
What prep work was needed for the undercoating?
Also, who is doing your powdercoating?
I am not sure what you could have gotten away with so I am sure i did way more work then I needed to. So I cleaned it as if it were to be painted which as you know means scrubbing every lil sq in of the car over and over and using manyyyyyy exchange buckets for the water in doing so I was using simple green for the earlier stages and a few abrasive brushes then to more traditional soap and mitt to just water. Once it was clean enough to rub your face all over I used med duty scotch-brite paint scuffing pads like these and went over everything really well
http://www.sears.com/shc/s/p_10153_12605_SPM222405337P?sid=IDx20101019x00001a&ci_src=14110944&ci_sku=SPM222405337
Then one least wash until I was getting clear again in the dirty bucket.
Paint!
I would say I put in maybe 4-5 days total into the job.
very nice!
Dan
Your build was one of the inspiring build I have gone through that made me appreciate building a car and going through as many “details” as possible and making it really yours.
So thanks a bunch!
:tup: I’m liking the gold and black.
Me too. There will be a bunch of dark in there too breaking it up as well. Wheel, calipers, strut and wheel well all being dark i think will give it a great balance. We will know soon.
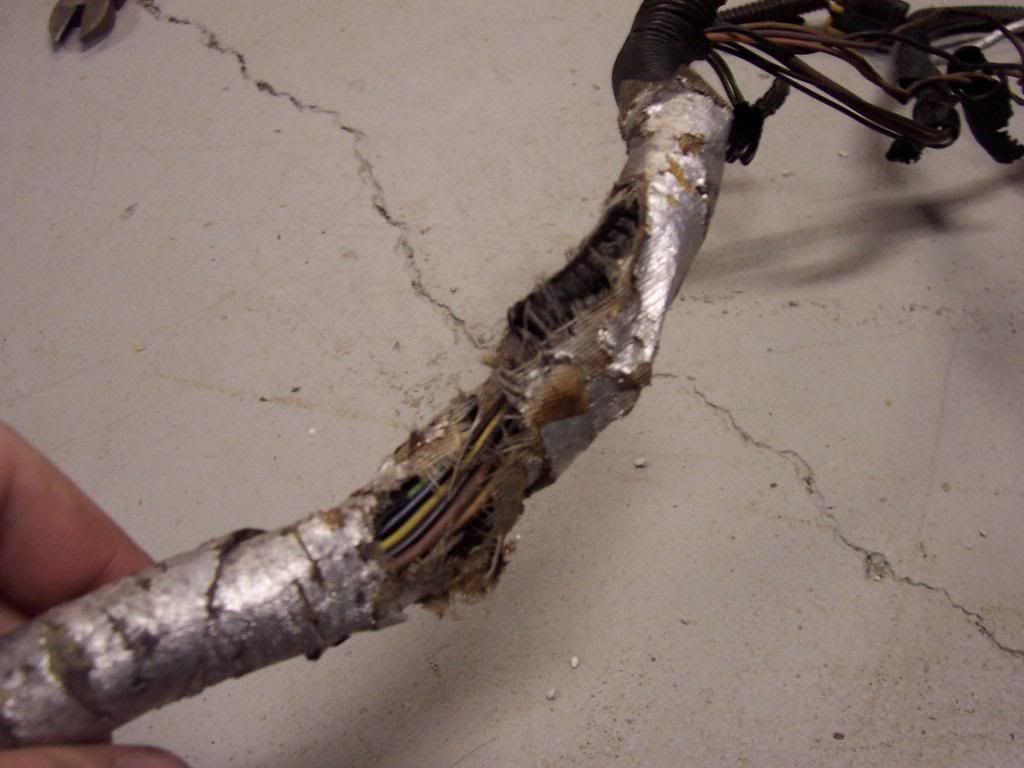
Here is the progress as it stands on the LS1 engine harness.
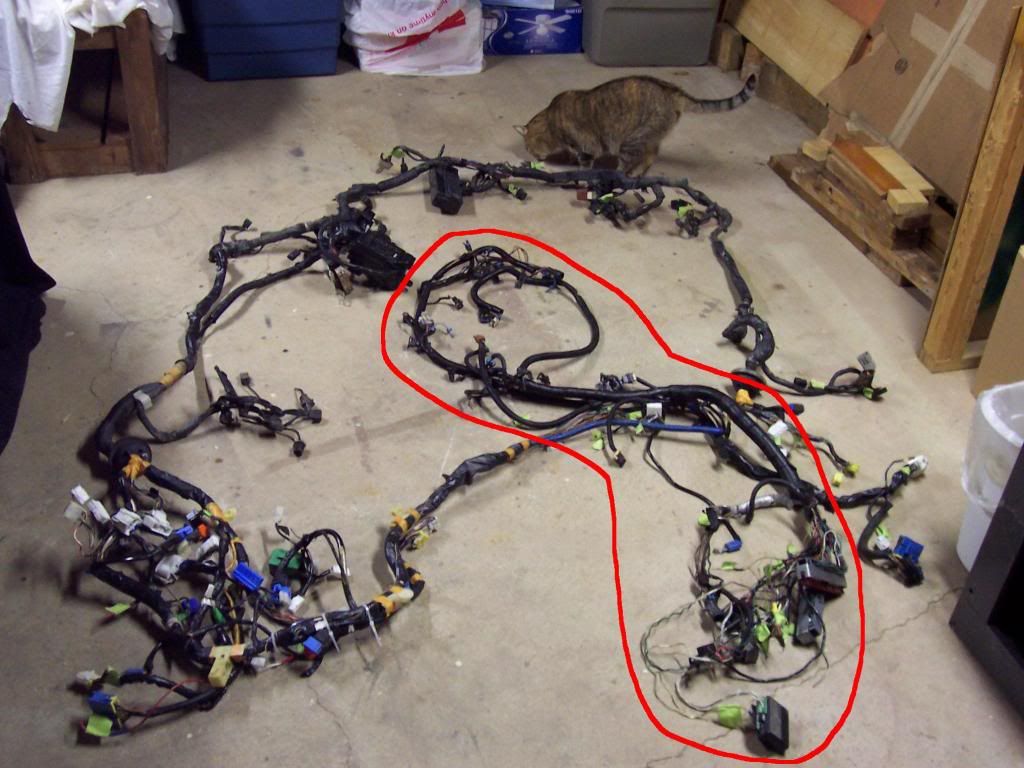
Drew and I knew of some issues when we pulled it out of the car…but, I uncovered more.
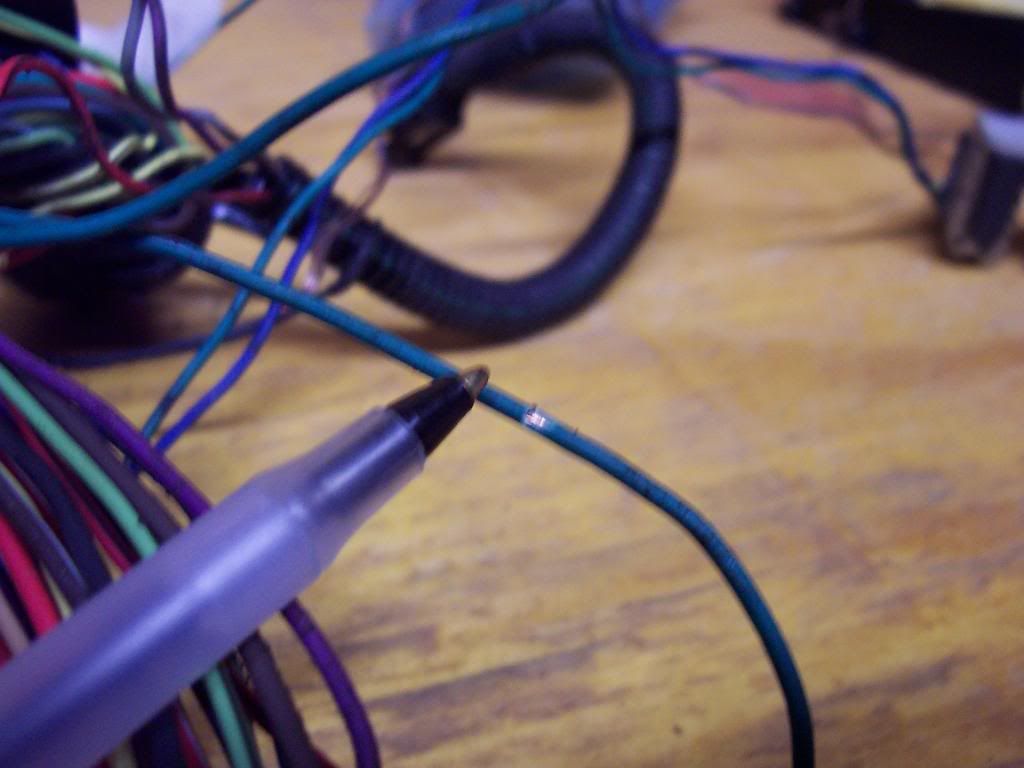
Exposed wires:
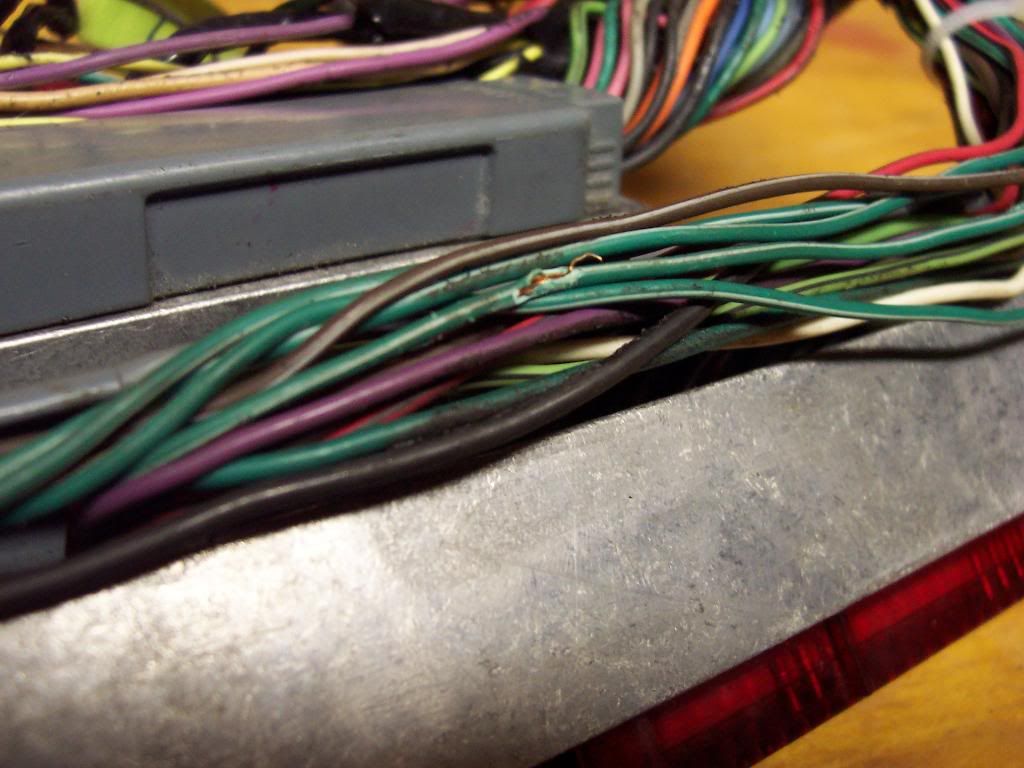
Good thing this does not power anything high voltage, oh wait:

Just to point out…holes this small can lead to a completely torched car.
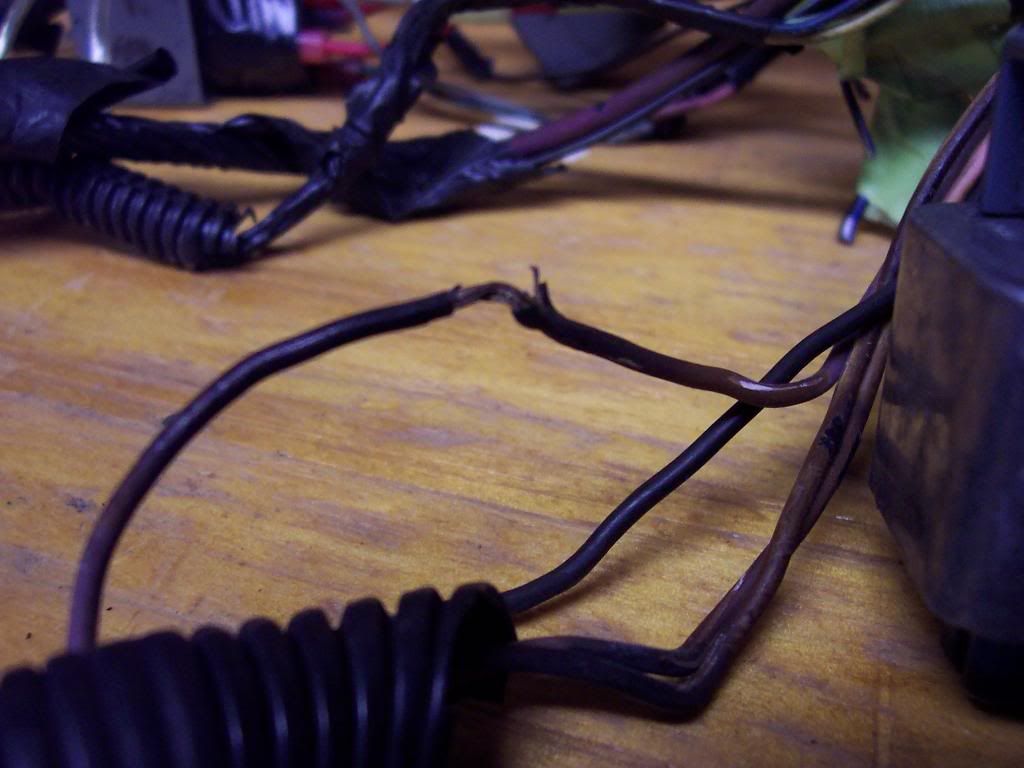
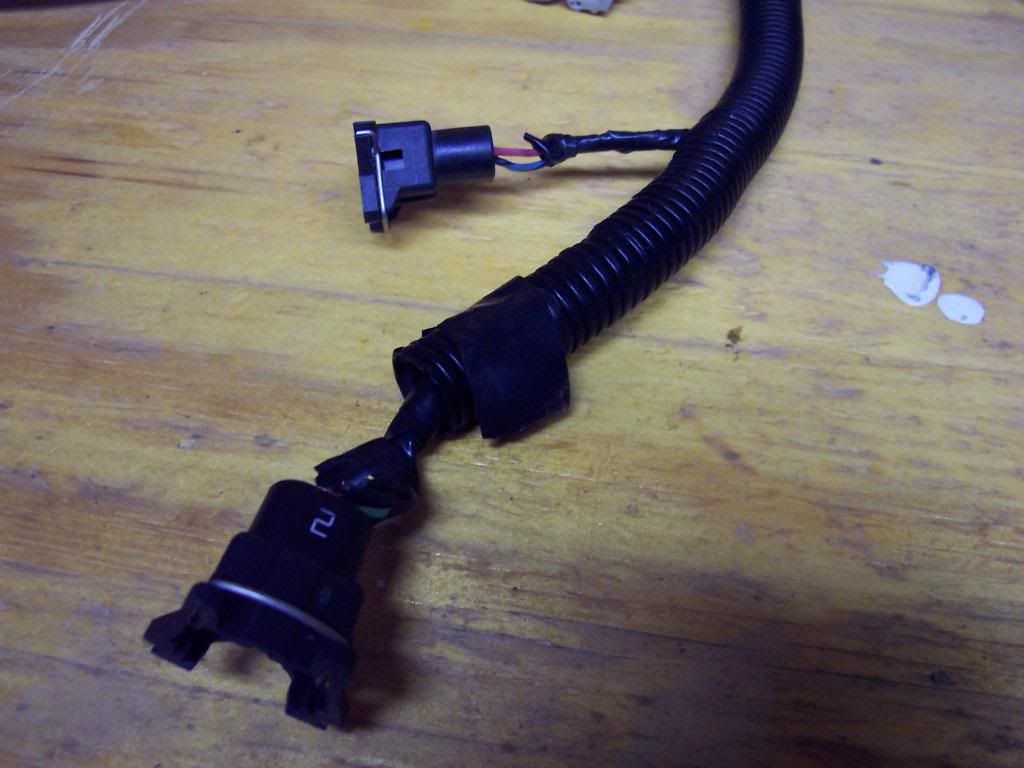
Broken wires suck the most because half the time you can’t find what they went to very easily:

Melted wires:
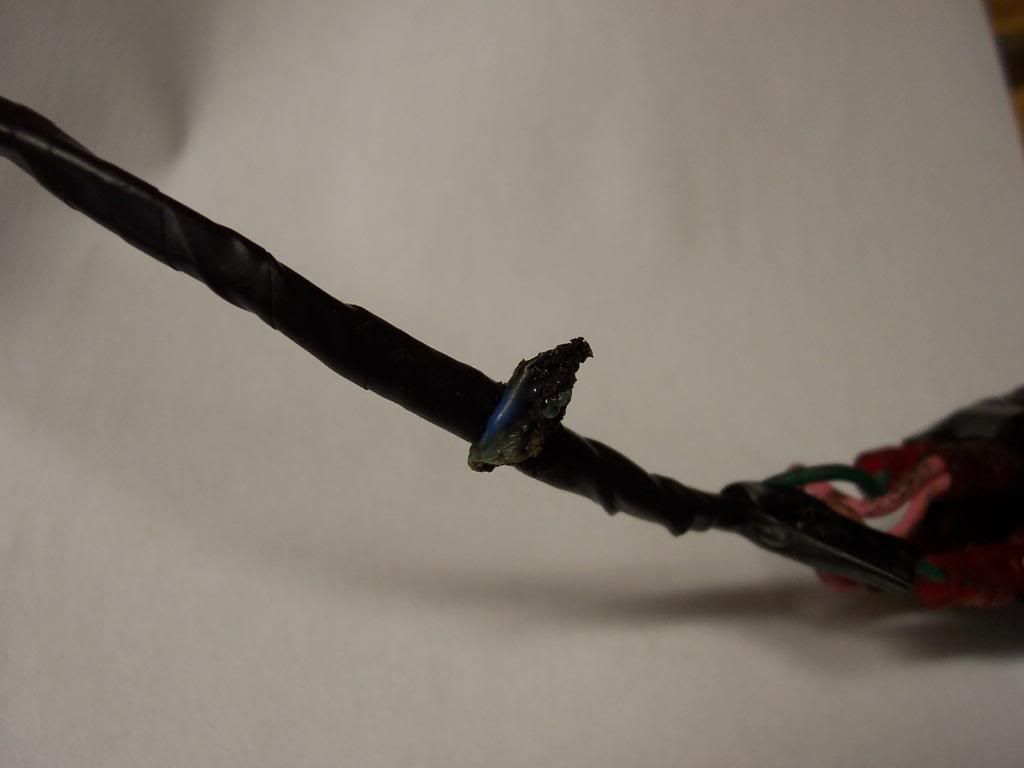

Umm, WTF…?!..This was all the same wire traced back to the main loom:
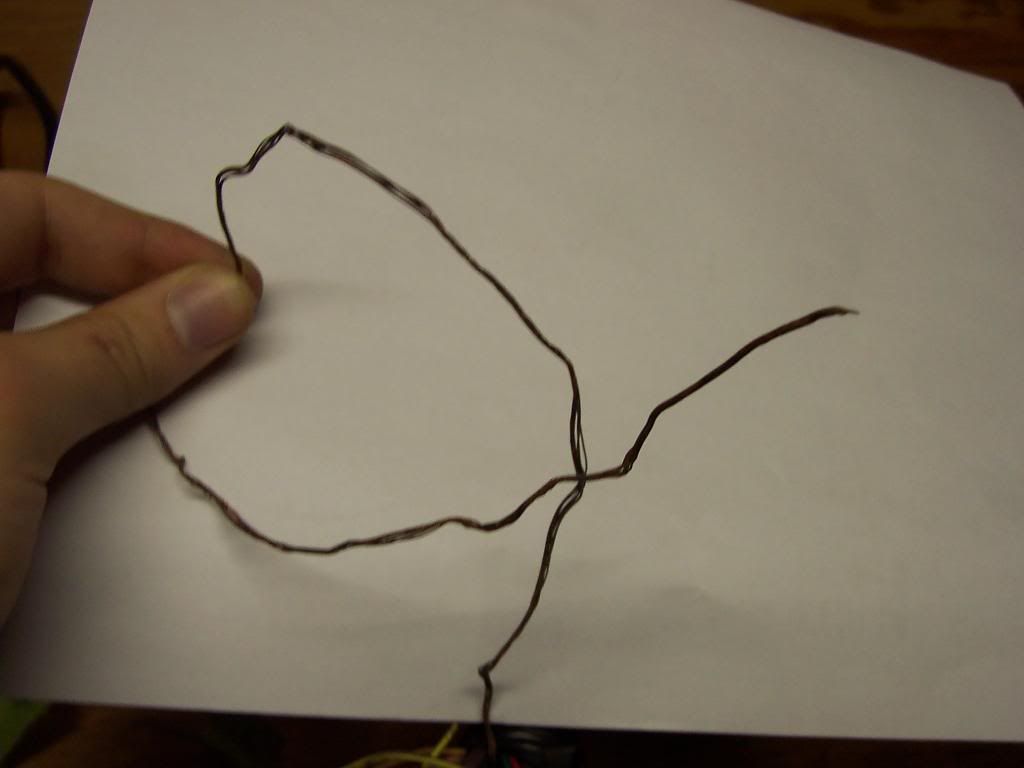
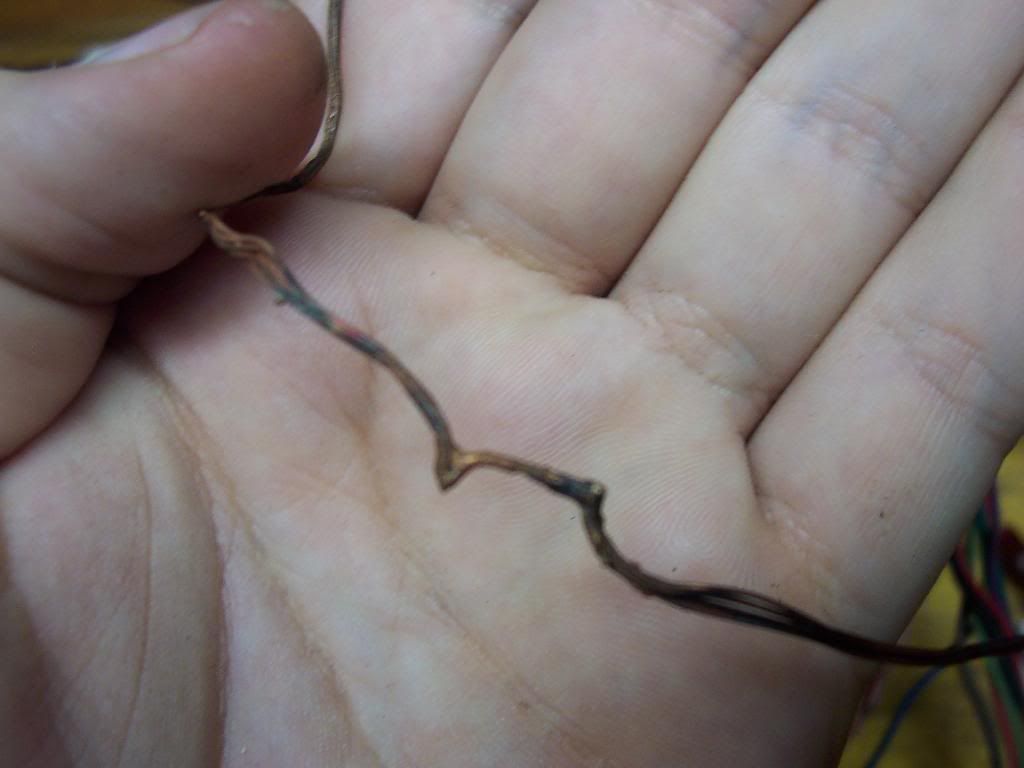


When I pulled out all the dead wire I had over 2 feet of singed, melted goodness:

Cool, hidden treasures:


MOAR hidden garbage:

I’ll let the pictures do the talking:
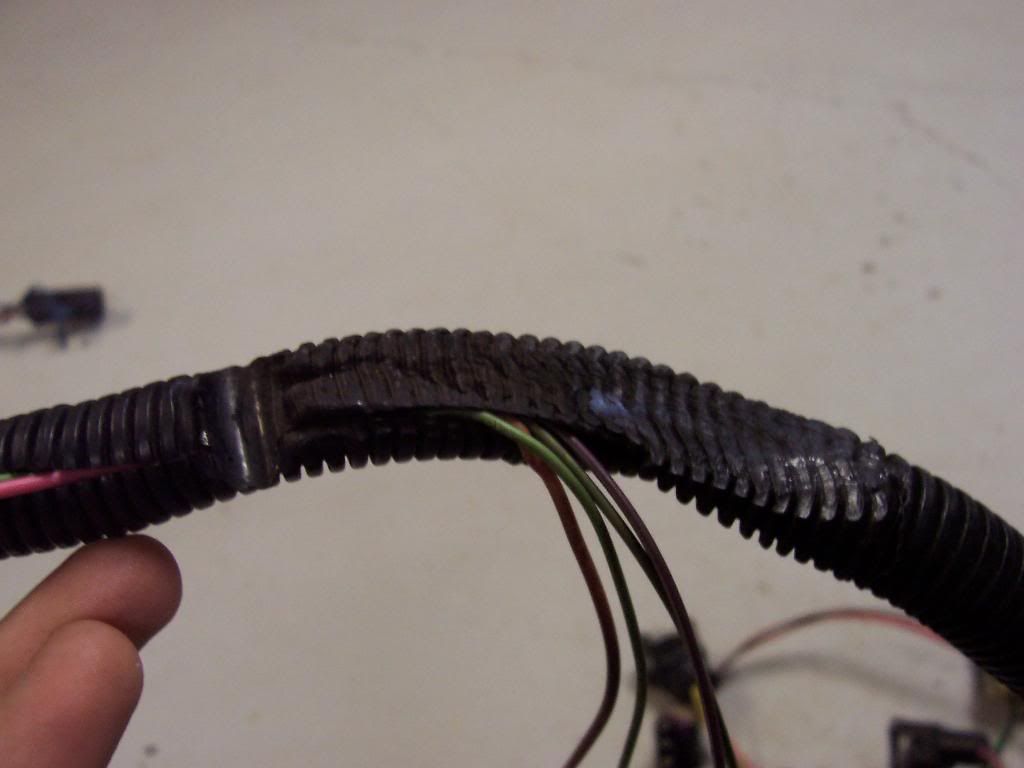

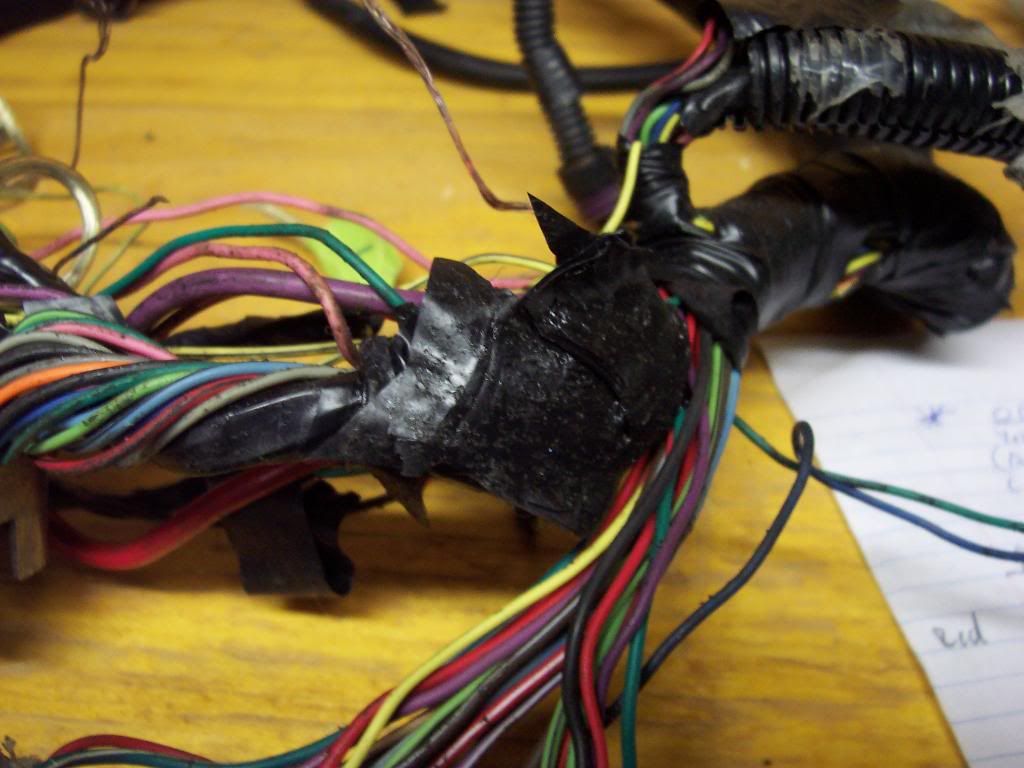
Other “problems” just involved horrid loom and massive amounts of electrical tape:
Now that all the issues have been identified I can begin fixing this debacle. The plan is to re-wire and re-loom the entire harness. Some connectors are being lengthened while others are being relocated. I spent the better part of the weekend replacing all the bad wiring. Right now I am about 18 hours into this harness on just stripping loom/tape, cleaning, inspecting and repairing.
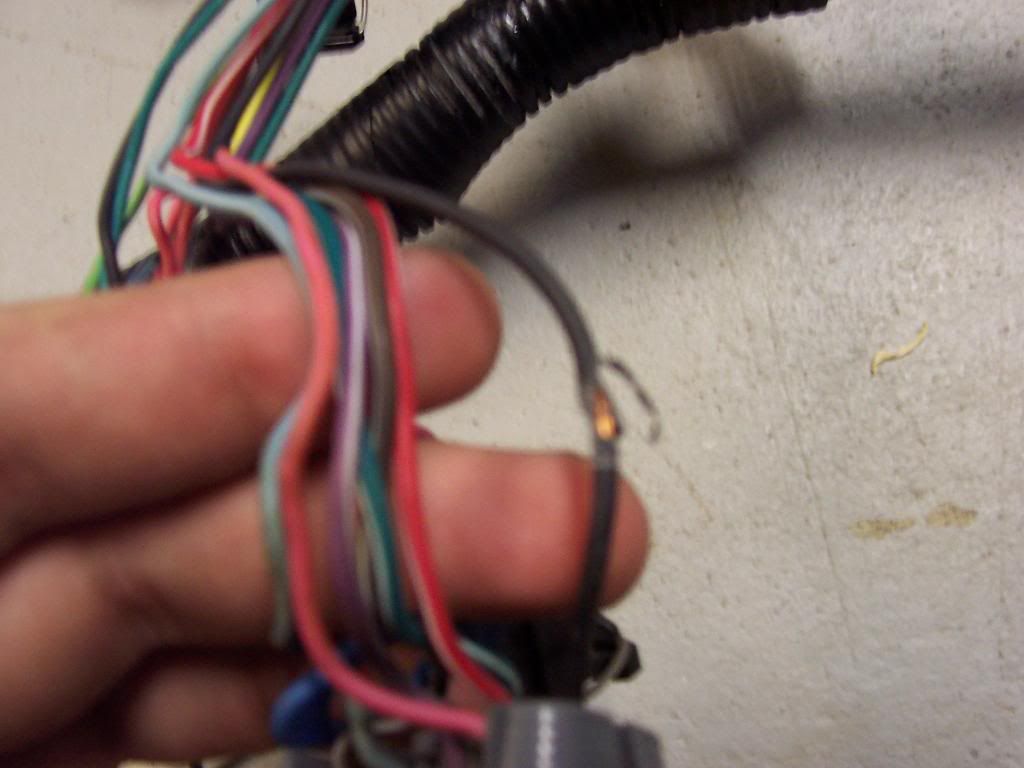
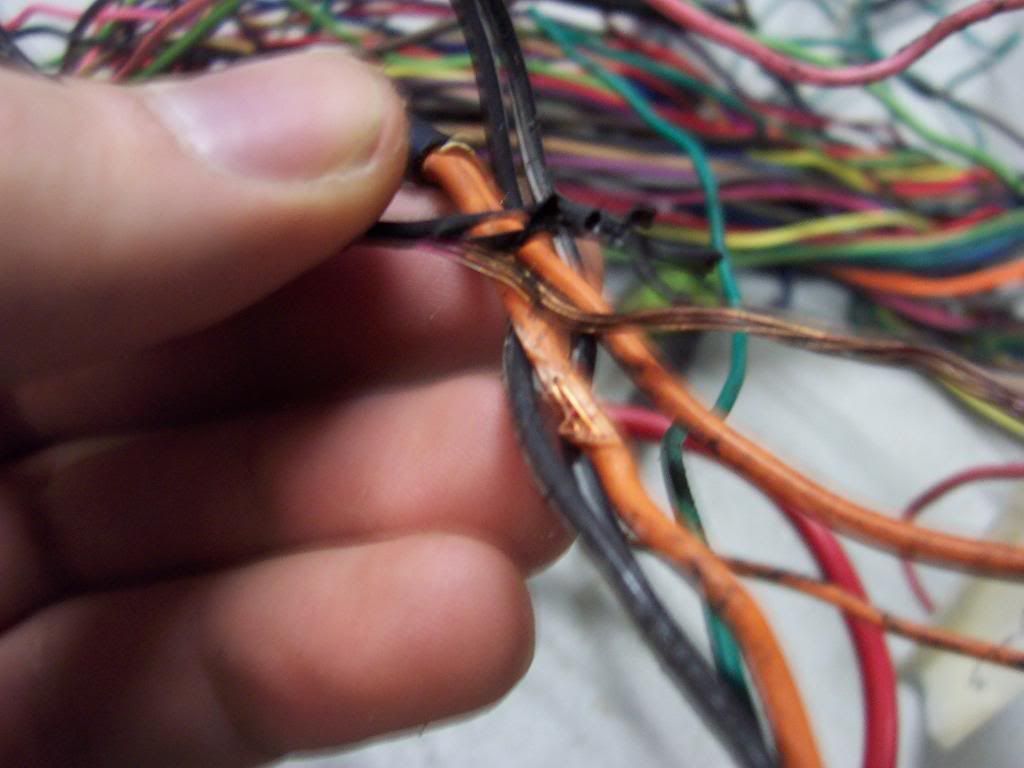
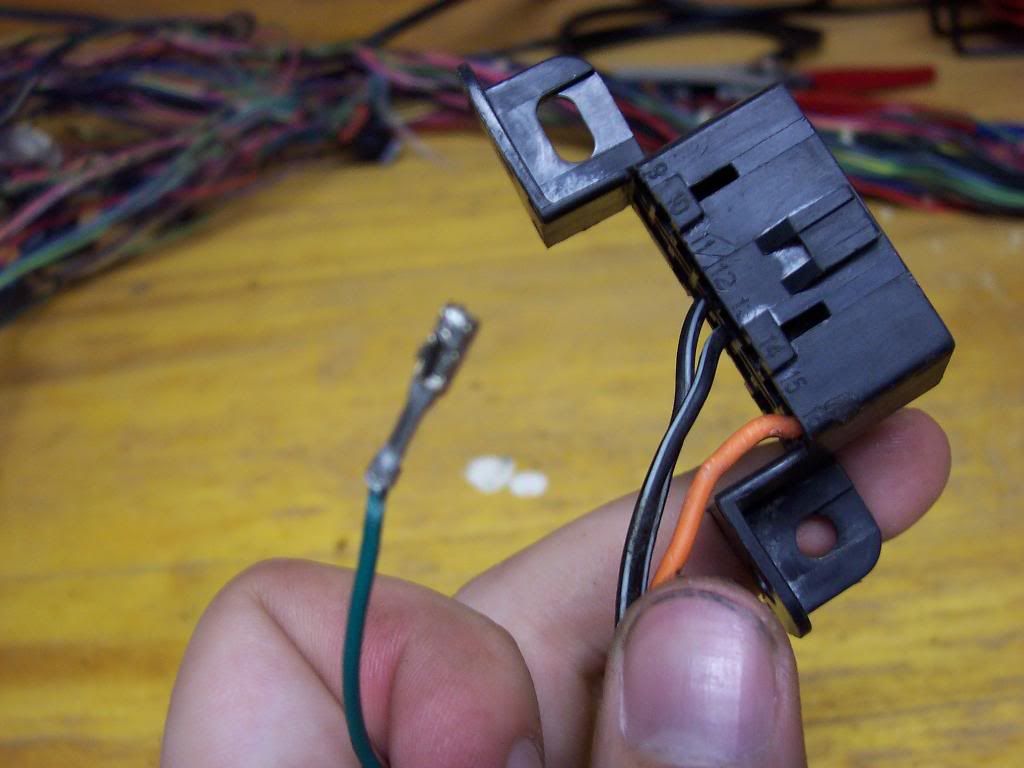
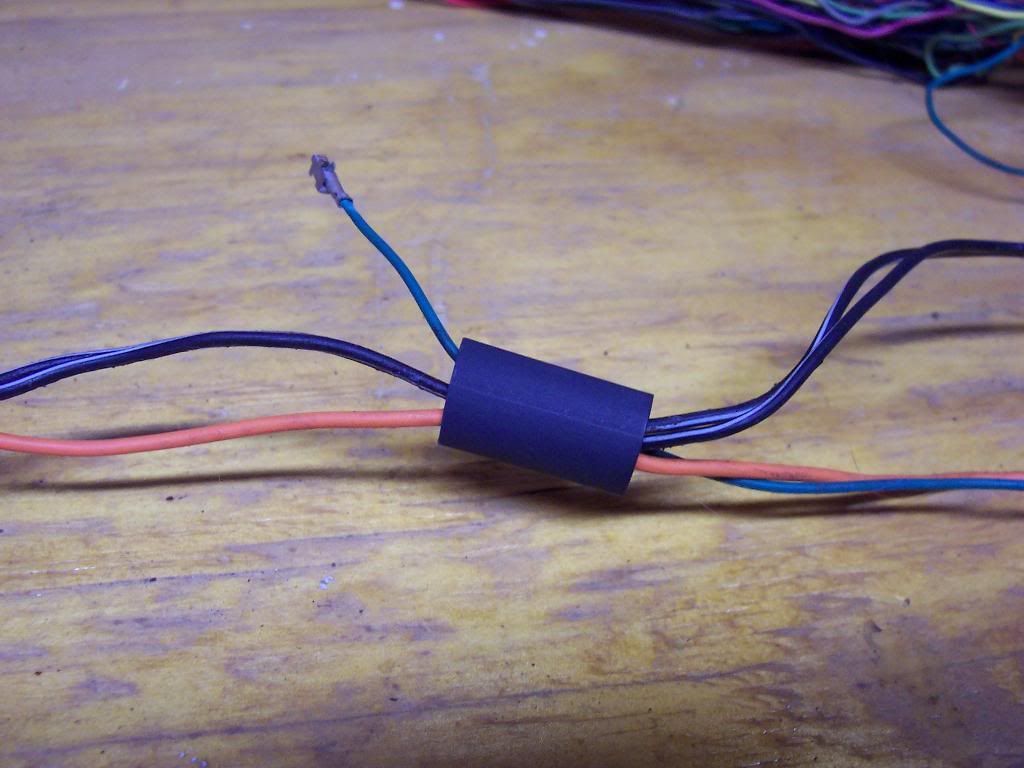
Here you can see the melted black/white wire and the exposed orange wire:
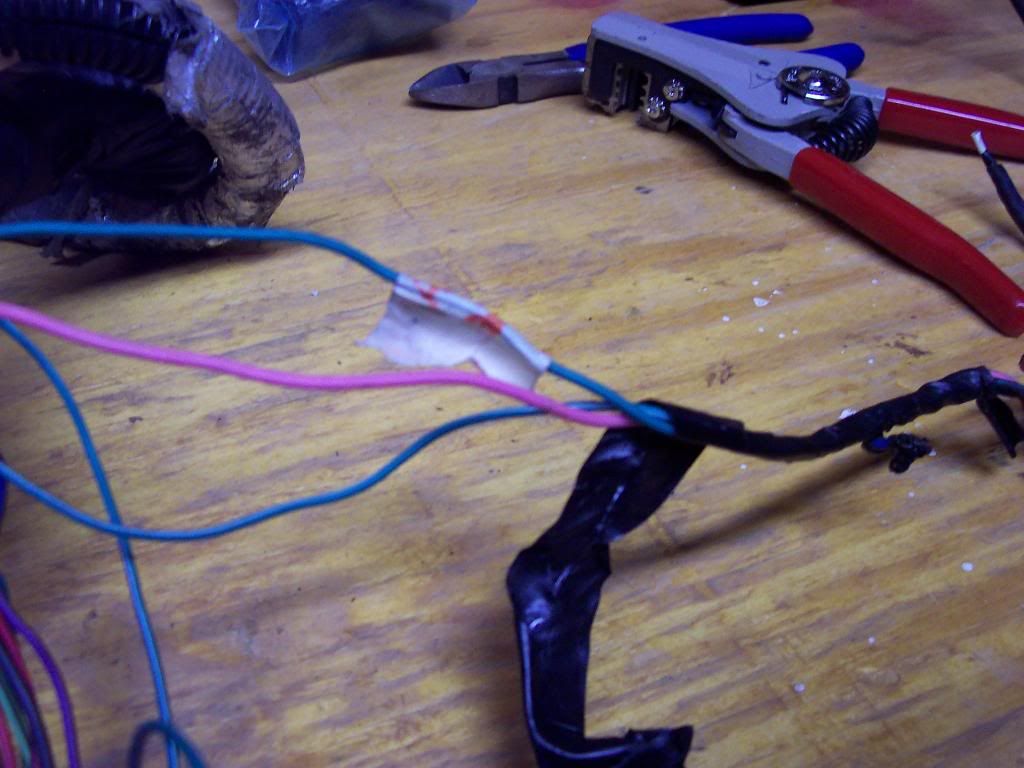
Due to re-looming the wire each end will be finished. Therefore, I need to get tubing on the wire I want to cover. For the wires that are not cut/damaged already simply remove the pins. Pins can be removed, usually. No need to cut wires.
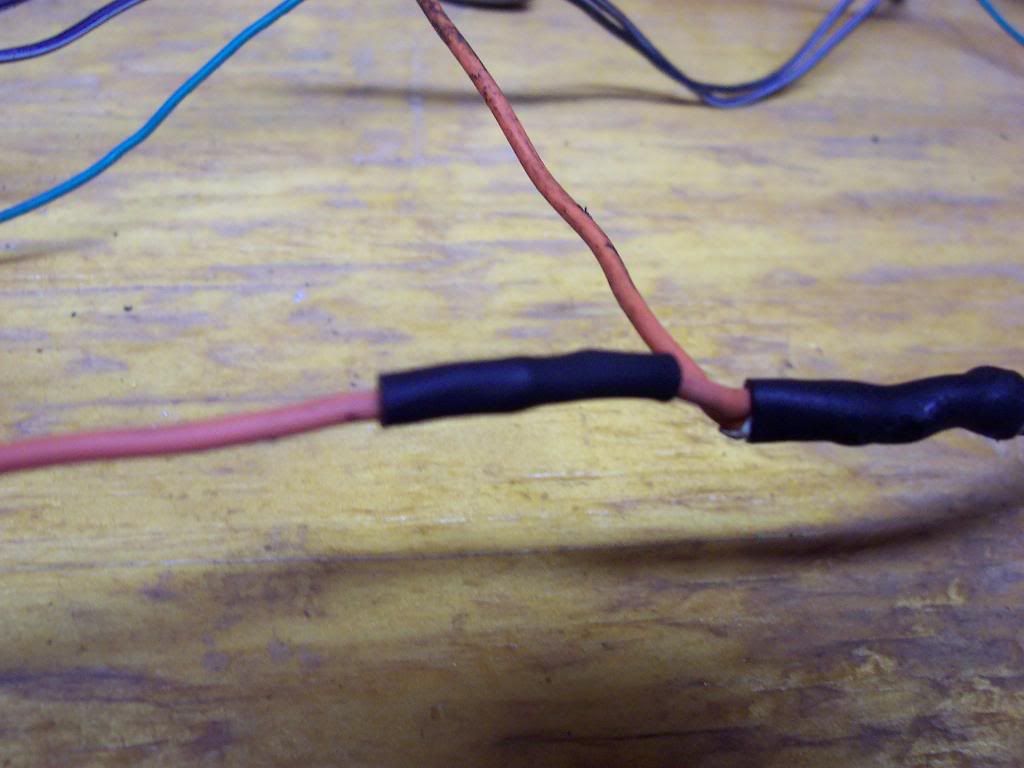
Slide main tubing on to cover the wire bundle that will get loomed:
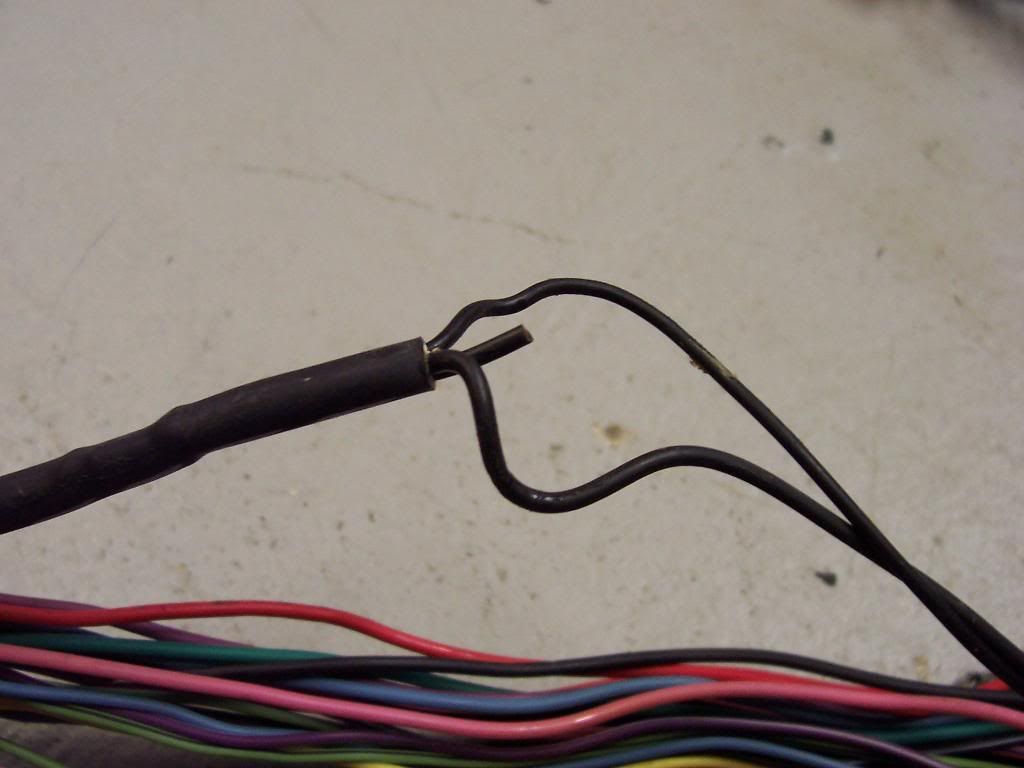
Cut exposed area of wire. Don’t forget that every connection needs insulation so be sure to slide a piece of tubing on before you solder it. Then, re-strip for clean copper and wrap the wire. This is where I get the most questions/debate. Do me a favor, hook your index fingers together and pull. Yeah, STONGEST. FUCKING. CONNECTION.

Then slide the tubing over the connection and shrink.
Most of this is “wash, rinse, and repeat.” I got stuck on a few wire lengths and locations. A quick trip to Drew’s garage got me back on track. More to come…
wow, that harness was in rough shape…good to see it getting cleaned up :tup:
Wow, and I thought my wiring was bad…
aww, shucks.
That wiring harnes… wow. Thats all I have to say. What a fn disaster.
Dan
Luke is the fucking man when it come to this shit, among many other things. His help/dedication/work to helping me reassmble my MR2 has been absolutely priceless…we’ve gone through every single wire/plug/connection/etc. on my car a million times over (granted it was all pretty good in the first place, no offense Drew, haha), and am 100% confident it is better than when it came from the factory…
Luke, when you go through a harness like this, and are perhaps removing wires from systems no longer used, do you ever source new hardware? When I put the LT1 in the '55 I removed a lot or wiring but used all the stock plugs…never really thought to have gone with anything new but it sure would have made for a cleaner look.
Drew, do you have a pic of this disposable applicator for the 3M undercoat? Last I used the 3M stuff was right out of the nozzle on the aerosol bottle…which got plugged up often:(
All types of ill shit. :tup:
Thanks for that Joe. I used to get a lot of criticism, not on here by any means, for the level of detail on mine/friends/soon to be friends projects. I see no other way than to go that extra step. Your MR2 will become exactly what your goal is set out. Same with Drew’s FD. I try to deliver every time. I never give back crap. If I fuck up. I fix it.
That is one of the smartest questions I have ever heard related to this stuff. A HUGE oversight by most people. Honestly, anything that is questionable gets replaced. Look for scortch marks, corrosion, bent pins, charred wire insulation, and just wear. You can bring back the luster on a lot of this stuff. ABS is a great material and will stand up to some pretty harsh conditions. A little mineral spirits and a scrub brush is making this harness like-new.
Thankfully this harness, while the wiring is kind of roughed up, all the connectors and pins are near perfect. Because the connections on the LS1 motor are not in any bad spots to cause issues most problems are just wiring. Heat, vibration, poor strain relief, and just plain human error when this harness was first built are the causes of 99% of these problems. The problems you see above are also non-Drew related factors.
The botched relay connections are being replaced with these: http://www.parts-express.com/pe/showdetl.cfm?Partnumber=330-075
Plus, I am adding a 15 pin connector to make all the connections from the LS1 harness to the Mazda OEM Main harness. This will allow Drew to remove the whole Harness again next year ![]()
Just because a few of you must not remember since well this thread is a million pages but this wiring harness was not done by me. That is what your get when you hand over actual hard earned cash to hinson super cars. I would never do something like that.
Nice seeing ya last night Luke. Looking good man.
Holy fuck that’s a hinson harnes? I remember you mentioning that some of their stuff was shit, but god damn.