My sponsored 78 shovelhead build thread

Nah, maybe just for the dyno.

So I’ve been doing some thinking about caliper leverage. Since I have a weird combination of caliper and master cylinder, I needed to do some math. This is pretty vague math and there are a lot of assumptions I am making but I will compare my results to what I think it SHOULD be and go from there. The master cylinder I got is a pull-type master and pretty hard to come by, so I’m stuck with this sort of aggressive bore size (17.3 mm)

KNOWN:
I haven’t weighed my bike but I suspect it weighs 350 lbs. I add another 160 or so, plus fluids, so 525 lbs is my GUESS.
I hate doing anyforce calculations in Imperial units so:

M=525lb = 238kg

A little internet searching yields a rough coefficient of friction of .40 for average brake pads, so:

Mu = u = .40

Picked a stopping distance for a Honda police motorcycle because it was a roughly similar weight:
60-0 mph in 140 ft or

Vf= 27m/s
Xb= 46m

Caliper piston size: .027m x 2 & .03m X 2 (Total area: .0026m^2)

Master cylinder size: .017m = .67in (.364 in^2)

First we can calculate the negative acceleration:
Vf^2-Vi^2=2ax

A=vf^2/(2x)=7.9 m/s^2

Next find force
F=ma = 1890N

Using a torque balance find force at rear caliper:
R tire: 26.3/2=13.2in=.34m
R Rotor = 11.75/2=5.9in=.15m (minus half piston diameter = .135m

So tangential force at the caliper = 1890N*.34/.15 = 4284N

Using friction:
F=Ff/u=4284/.40=10710N

Now I’m going to convert to pressure (and imperial units because they’re familiar to me)
P = F/A = 10710/.0026 = 41.11E6 Pa = 600 psi

Using a master cylinder area to convert to linear force at master I get 220lbs,
Now I can set up my linkage according to how hard I want to press down to achieve this.

For 20 lbs of pedal pressure I need a roughly 10:1 mechanical advantage.

If I was using a ½” bore cylinder I could reduce that to about 5:1 (which is about what I would expect), but the whole reason I am using a pull type master is for good placement, and in order to get good placement, I need to make linkage, so I’ll simply tailor the linkage to my specs.

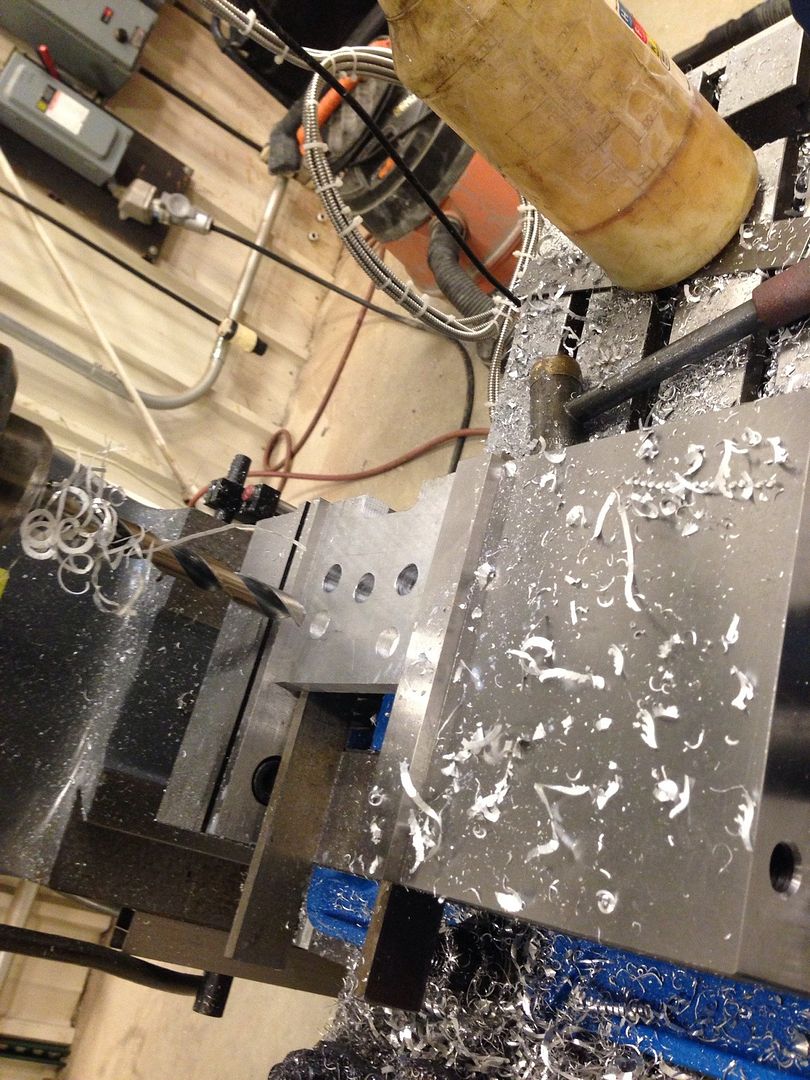
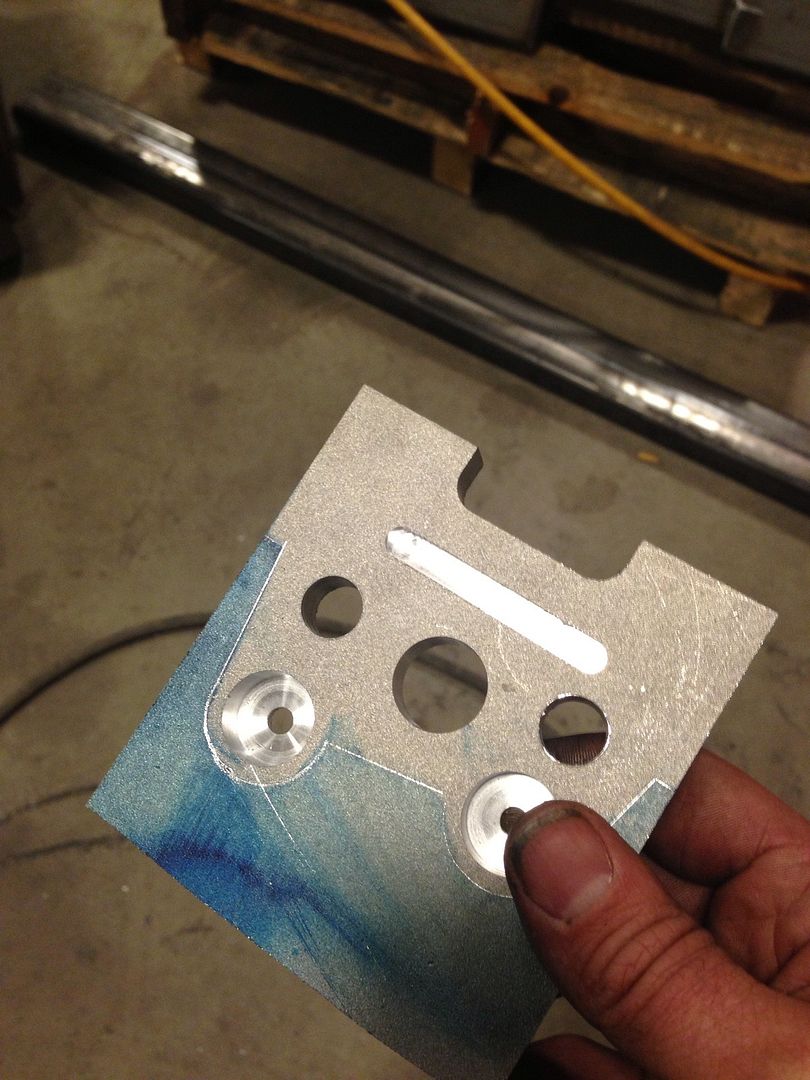
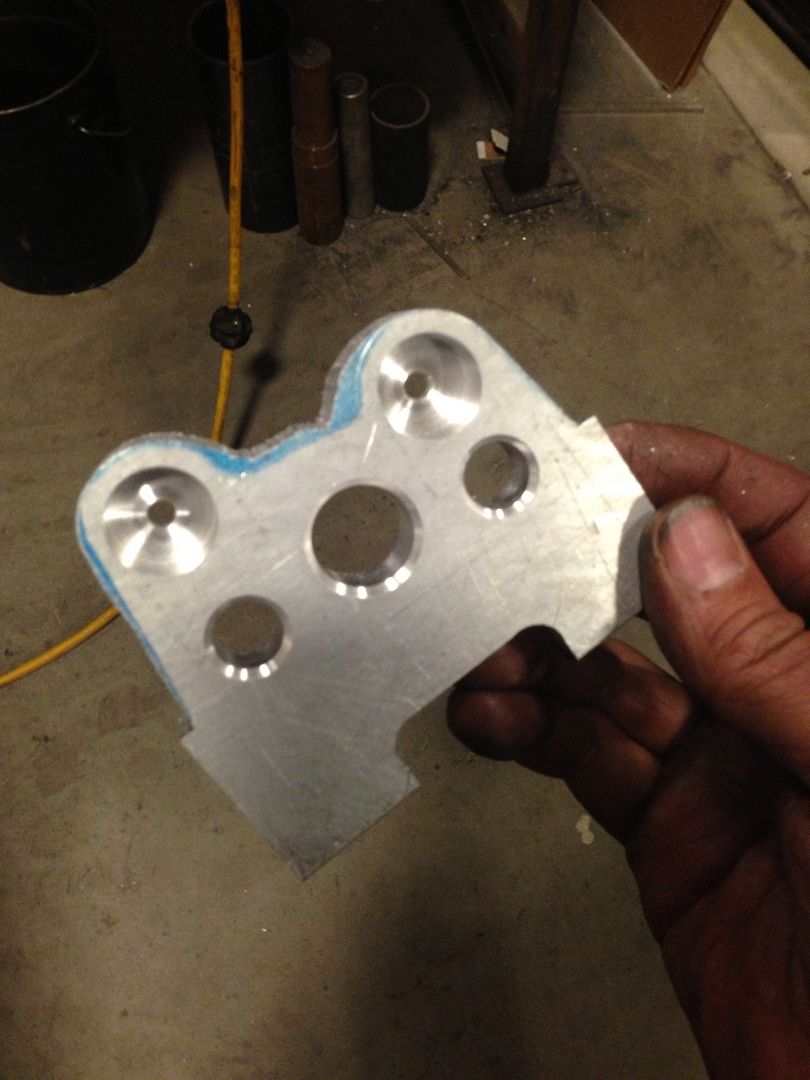
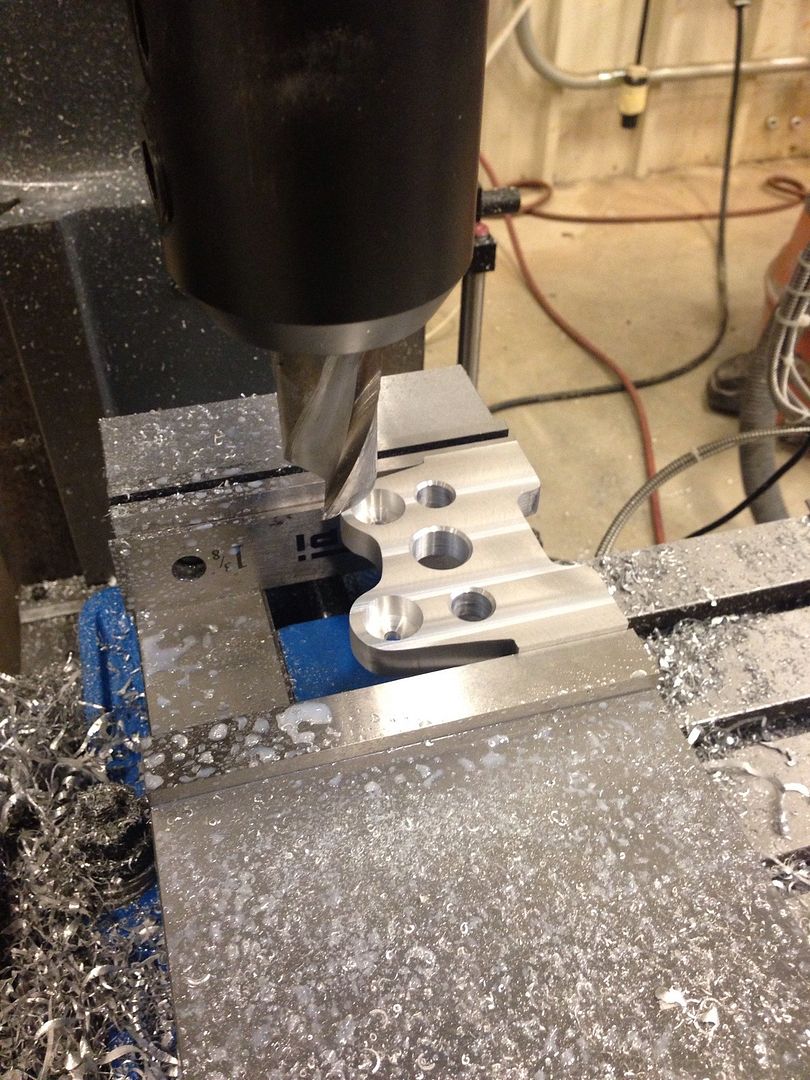
Oh, also, here’s a shot of the completed clutch system. Everything here (with the exception of the footpeg) was made by hand from scratch. No CNCs were used, just semi-basic tools.

(let me know if that pic doesn’t load)

loving this thread, keep up the great work

are you staying on track time line wise?

Overwhelmingly impressive. :tup:

It kinda makes me want to PM a moderator and have my ‘garage’ build thread deleted, lol. Truly impressive stuff.

Will trying to get that much stopping power out of just the rear tire result in it just locking up?

Possibly, but the lockup point is going to be the same regardless of what the brakes linkage is doing. I may need to adjust the ratios a bit, but it seems in line with my Honda. I have one of these calipers w a .5 MC on a 6:1 lever arm and it’s pretty good, so i think 10:1 with the larger master will be good.

FYI: I have a brake pressure gauge if you want to borrow it for testing. It threads into the bleeder port. But Im sure you could come up with something at work.

Dan

Sweet truck. :slight_smile:

Looks like it’s mostly just me in this thread anymore. Oh well.

Since I am waiting on brake parts I decided to make some rubber-mounted oil cooler brackets. A few people have made snarky comments to me about not really being a true DIYer because I have access to tools that “do it for you”… Well, I hardly agree… with the exception of the parts that I waterjet, almost everything is still very labor intensive. These oil cooler brackets took almost 7 hours to design, conceptualize, and fabricate.

Here’s how it shakes out, you don’t just put it in the machine and press a button.

At this point I’ve already rough cut the plate to size, then milled the edges flat. I’ve also side milled the feature on the side and the pilots for the “decorative” holes. I am now in the process of drilling the holes for the counterbores for the isolators, which will each require 3 tool changes and several “to-depth” features.

Now I’ve added the decorative groove on the side of the part and finished the counterbores. I’ve also forgotten to chamfer the decorative holes and will have to put it back in the mill to do that. I then cut out a pattern from my cad drawing and lay it on to the part and mark it with blueing dye. Then I use a scribe to accurately mark the shape of my part.

Then I cut it out on the band saw, and use a wide belt sander to flatten, smooth and round the edges. This part is very time consuming to do well. I also put the part back in the mill to add the chamfers. At tyhis point I’m about to finish the part with a hand held belt sander called a dynafile (which is one of the best tools EVER) with three grits of belts, working my way down to 200 grit or so, then using a final polishing belt. Doing this stuff freehand requires a lot of patience and a steady head.

Now that the edges are smoothed and cut I put the part back in the mill and run a facer over both sides, taking off .005 each pass until it cleans up. The final step will be to stand the art on it’s end and add the 4 threaded mounting holes.

And here’s the final parts, 7 hours later.

Looks good. What oil cooler did you decide on?

I got a setrab/jagg one and a holley/earles one and I actually prefer the fit and finish of the holley one better. A little searching seemed to indicate they were of similar performance, though the pressure drop in the holley one may be a little higher.

Not a do it yourselfer? Who said that, the Amish?

Someone the other day on chopcult said “anyone can do what you’re doing because you just throw a ton of money at everything”

---------- Post added at 10:30 AM ---------- Previous post was at 10:13 AM ----------

RE: the cooler, qhatever kind it is, the benefits are going to be reduced because the only (good looking) place to put it is between the cylinder and exhaust manifold. LOL.

No, I’m watching it…I’m just in awe with every update and my only contribution would be of the :tup: variety. I don’t know shit about motos, just that this build is awesome.

I’m doing the stand back and shut the fuck up while someone works. I check it daily.

This was actually a copy/paste from chopcult, i meant it there, not here, people are engaging here. Over there it’s a ghost town because they’re too busy dry humping eachother over bolt-together cookie-cutter chopper builds, which is depressing because I had high hopes for that forum initially.

Looks very good man. Keep on keeping on

Yeah, I agree. Are you really surprised though? You’re giving people too much credit to step out of their comfort zone or have an open mind.

I just read every page on your build there, not sure why but I did. I didnt see any bad comments at all, did they erase them or something? I can understand people hating on your build, shit I hate it too because Im not making it myself, lol. Its awesome.

This build is awesome! I need to find a engineering job so I can have access to a machine shop again