Project: SteeZee - 1973 Datsun 240Z LQ9 V8 Build

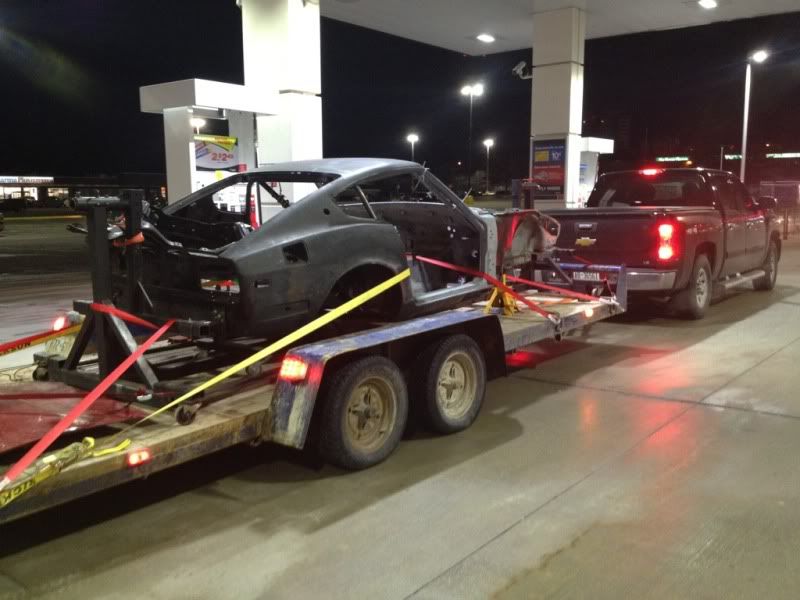
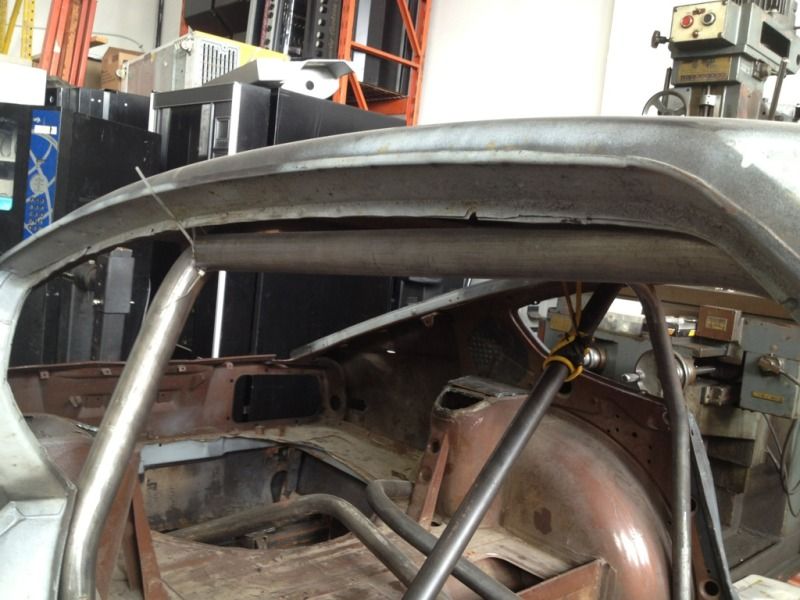
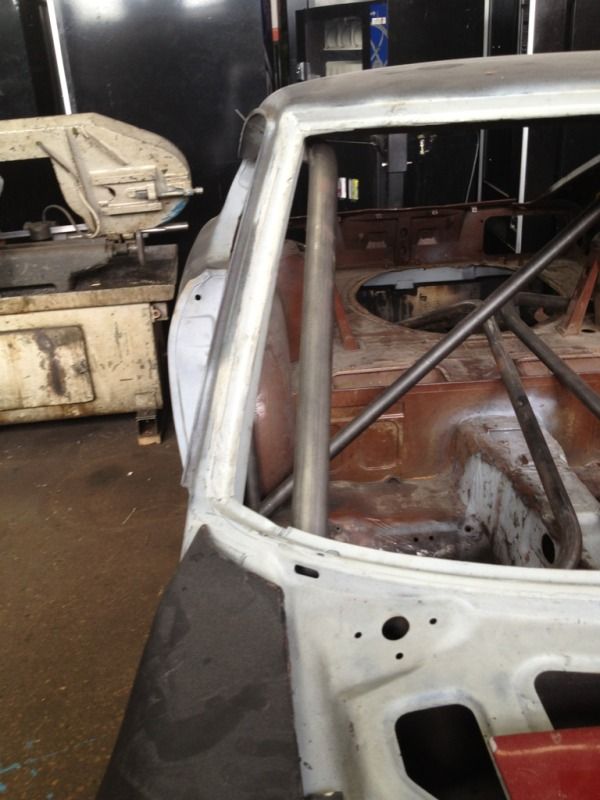
My Datsun has been at the fabricators since Oct 27th, 2011. Now being Nov 10th, 2012, I’ve gotten mildly bored. Graduated Robotics and Automation in August and have been working full time since, so have some extra budget for the car :smiley:

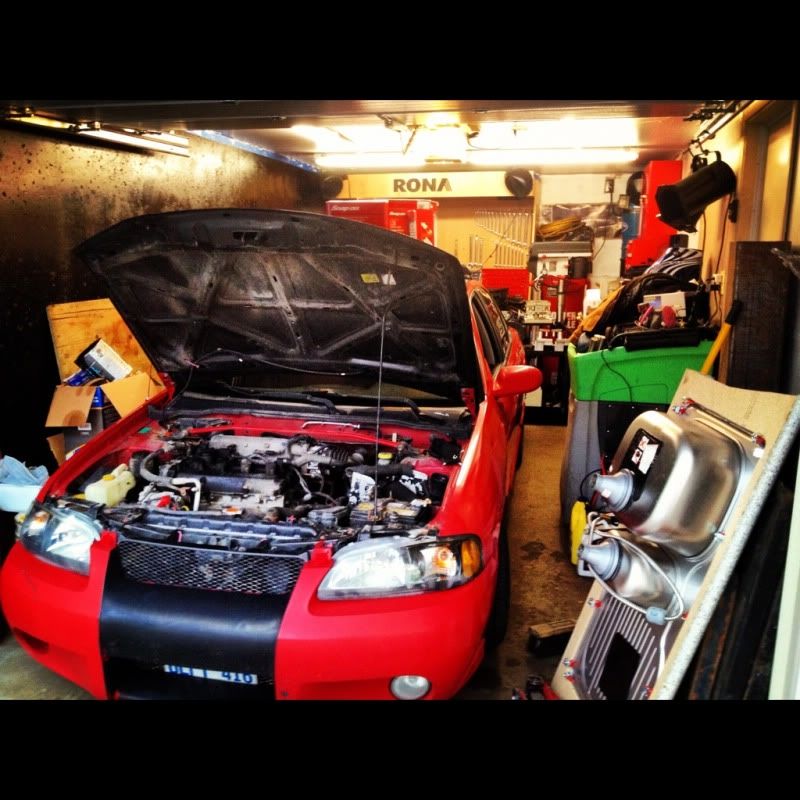
This was my garage at old home (just got a new house last week), tight quarters is understatement of the week. 10’x20’x82"…

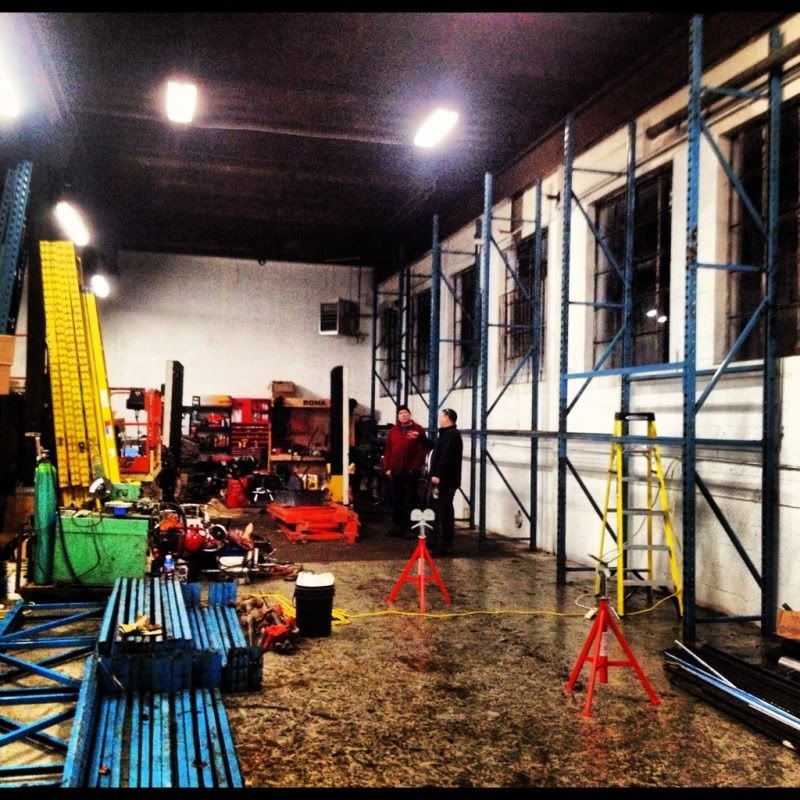
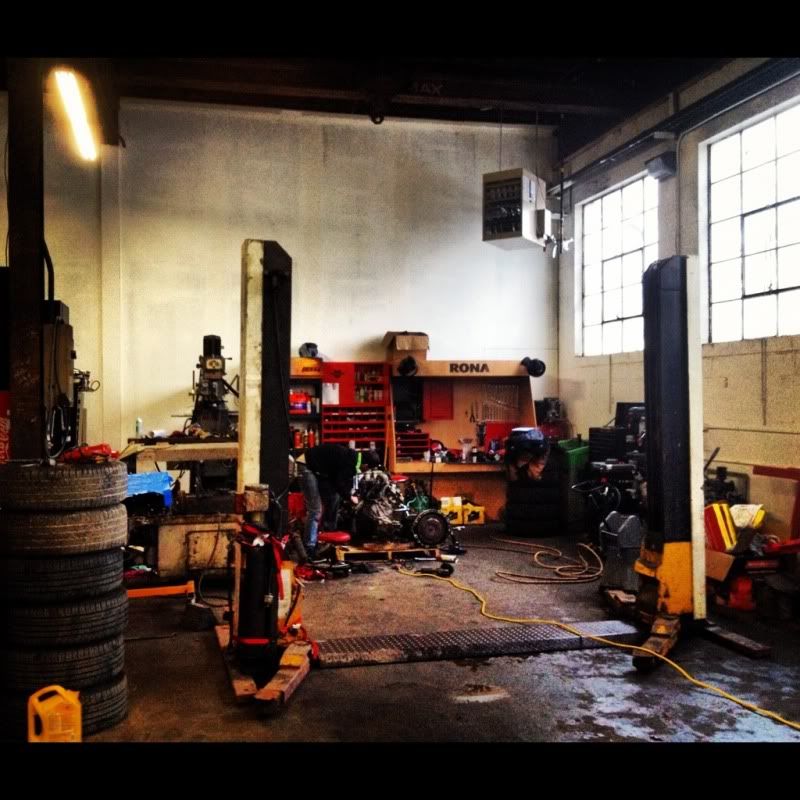
Got in on a shop here in Kitchener - 3200 sq ft for a hell of a deal

From the front:

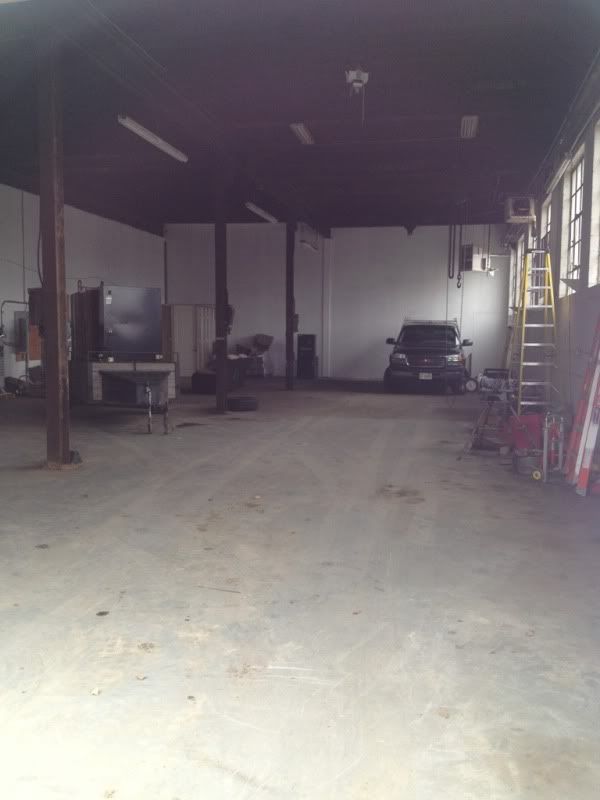
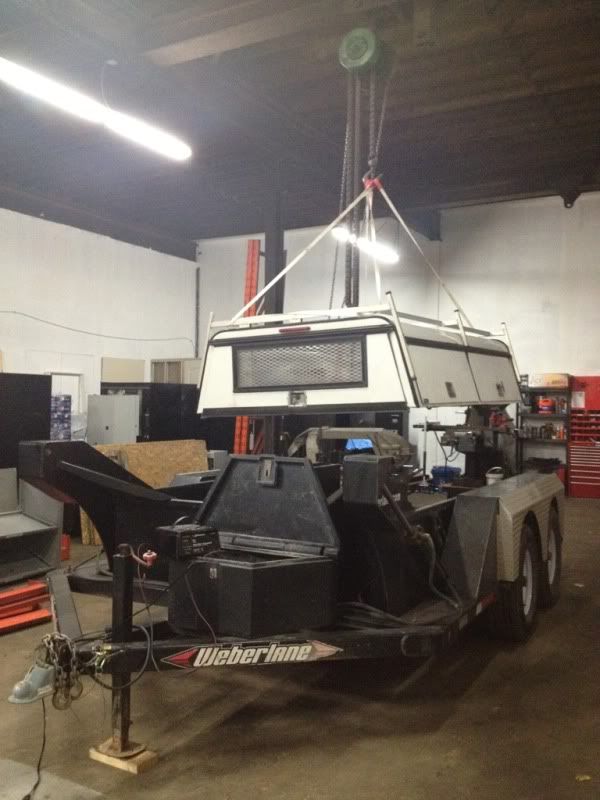
From the back: note the 10 ton gantry crane that runs the length of the shop.

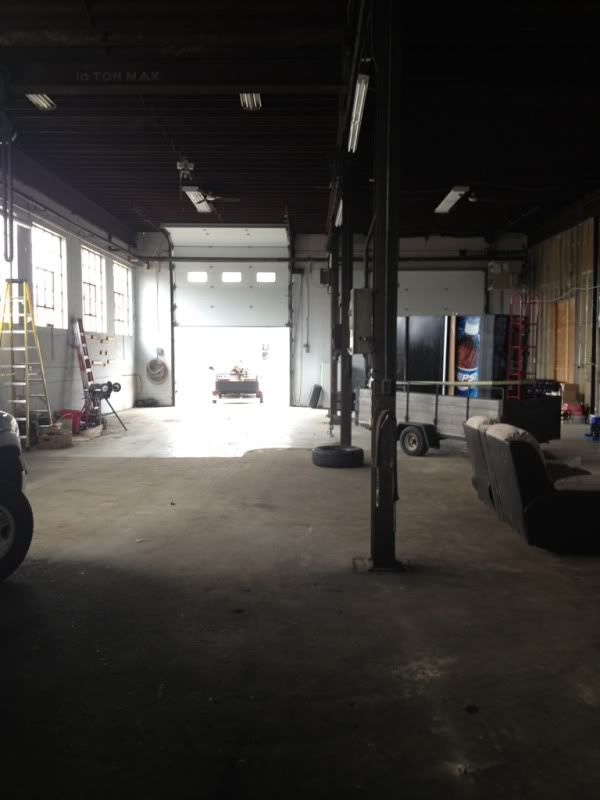
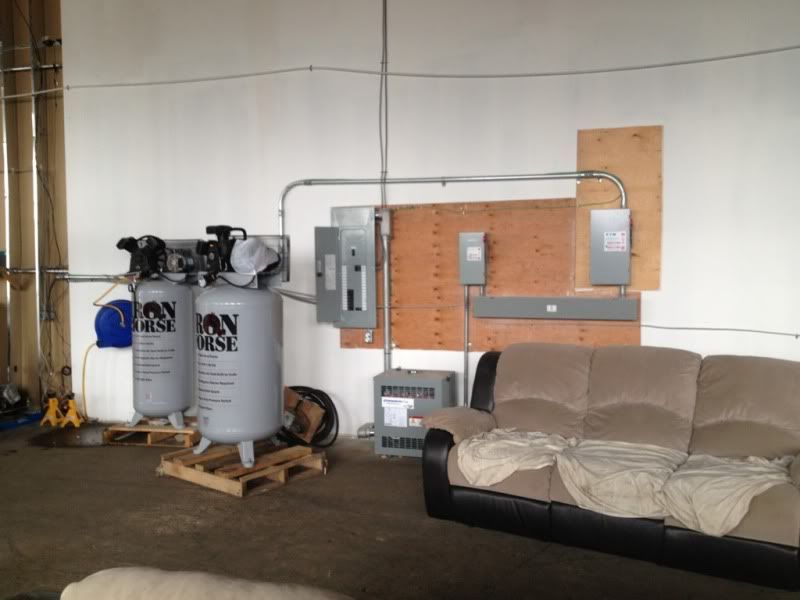
We’re set for air, have piping to all corners of the shop buried in the concrete. 100 amp 600 3 phase as well, with transformed down to 220/110.

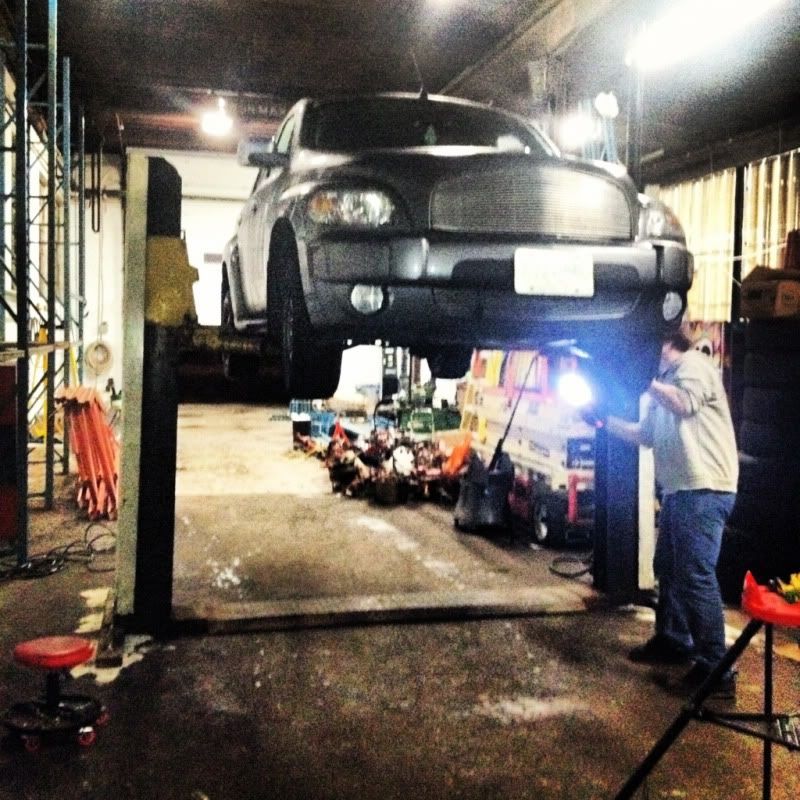
Set up my stuff in the back right.


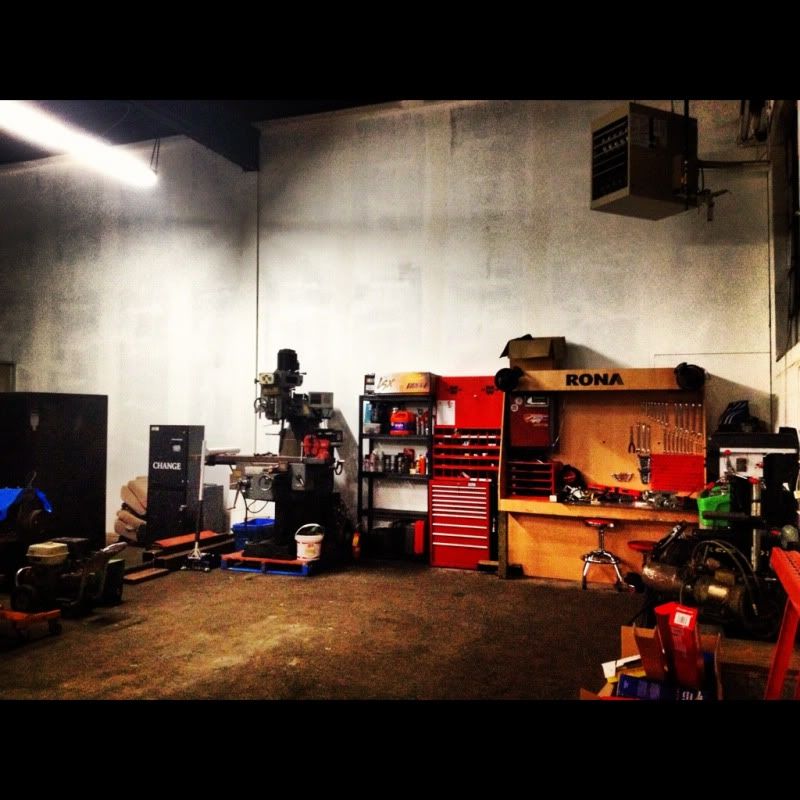
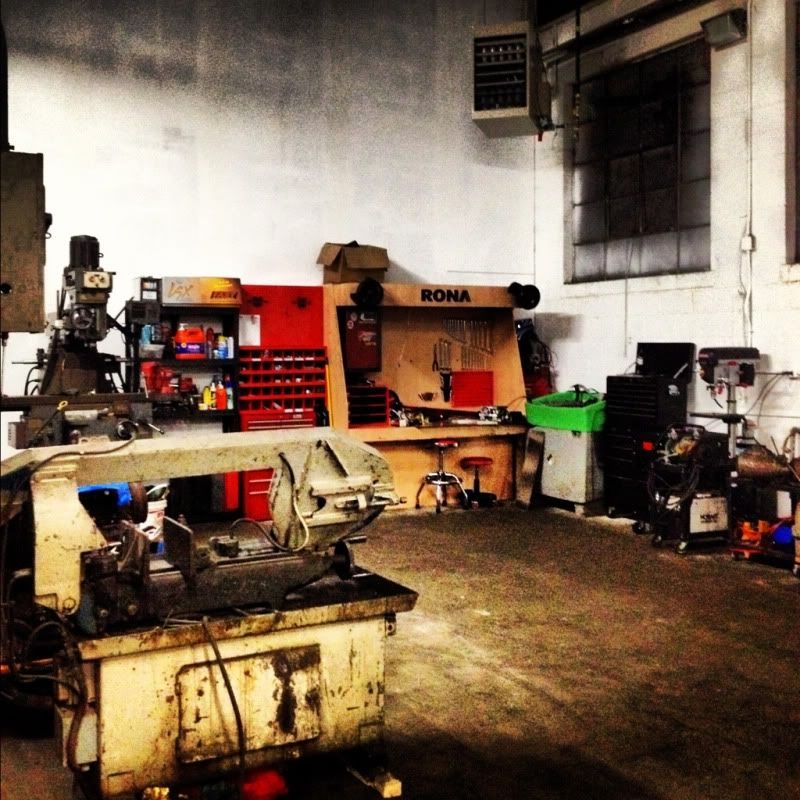
Picked up a Meba horizontal bandsaw 600v, 12" round cut cap.

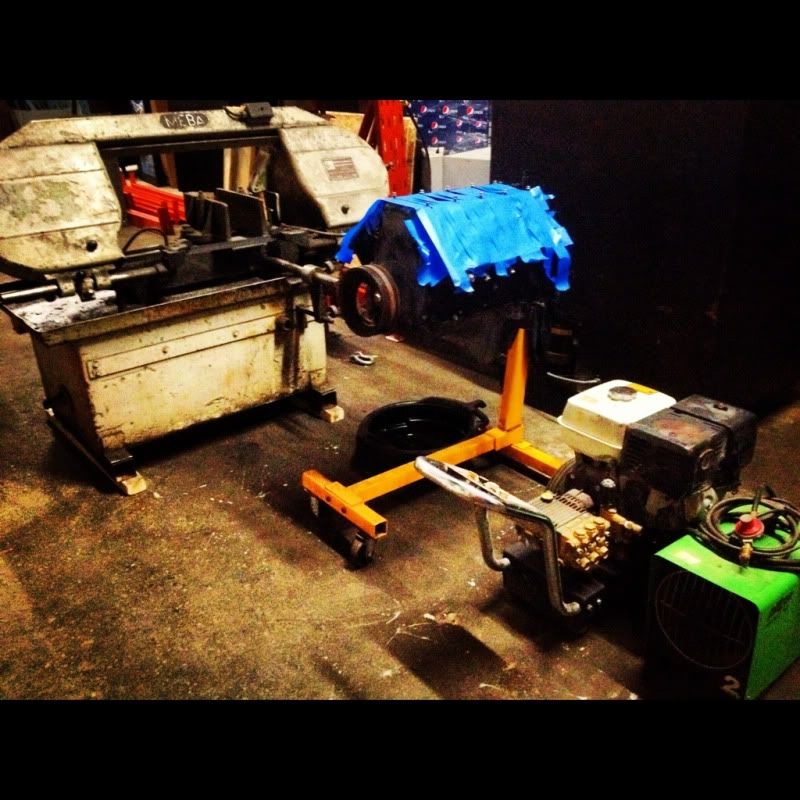
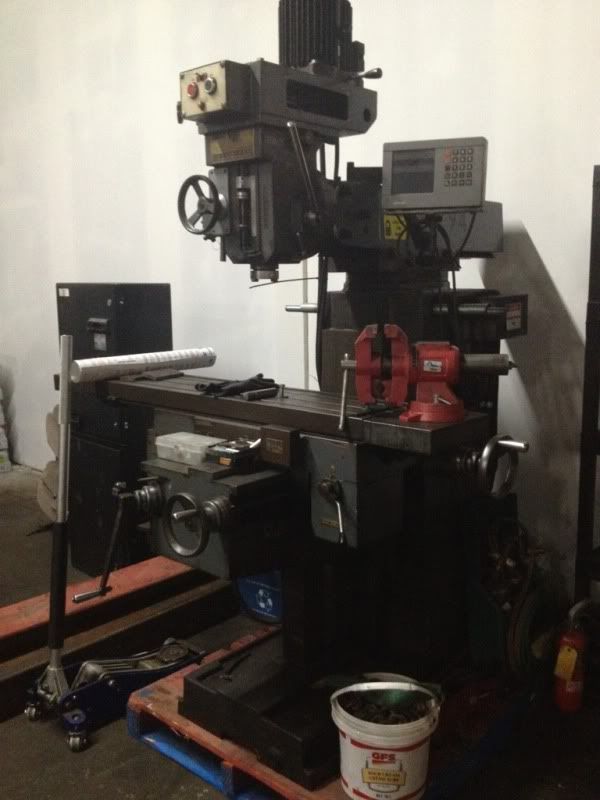
Netted a (free) Tos Kurim Finesa FNK25 6-axis turret mill with Heidenham XY NC readout from work.

Also have a shop trailer now - 6’x12’ 14,000lb Hydraulic Drop deck (sits flat on the ground when lowered)

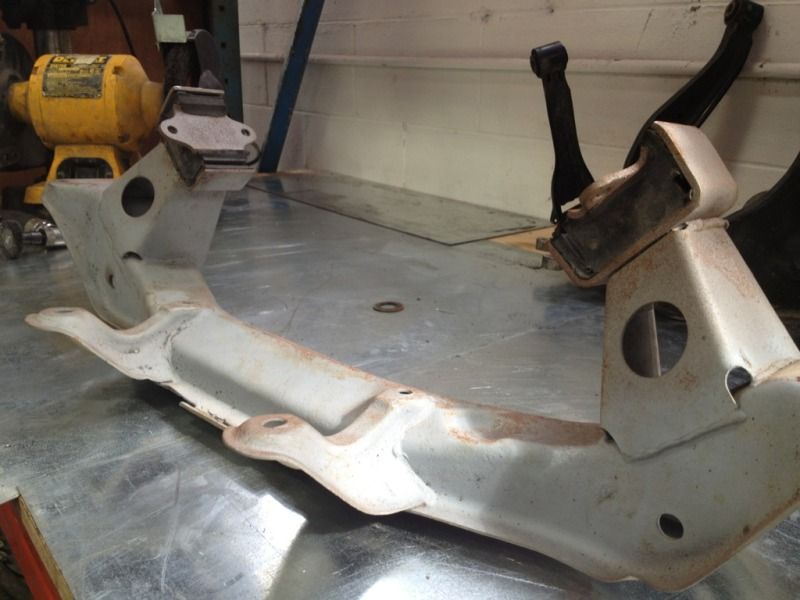
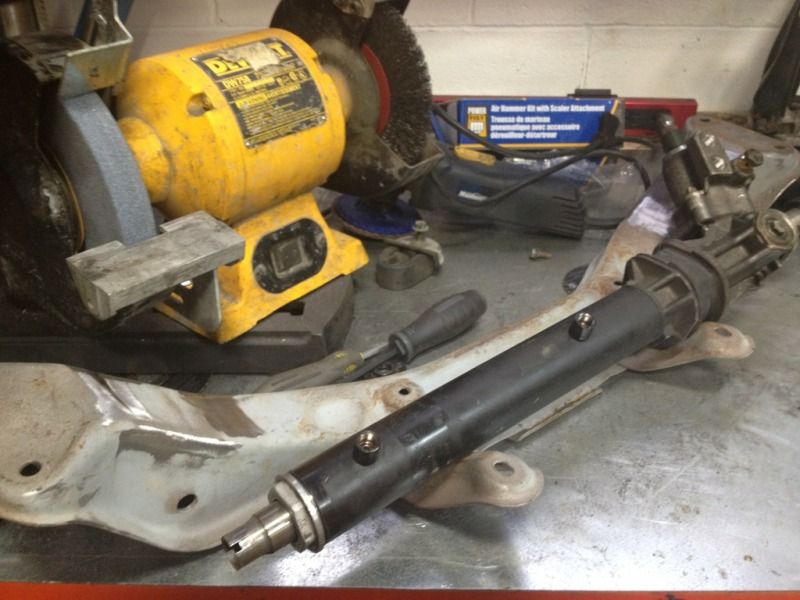
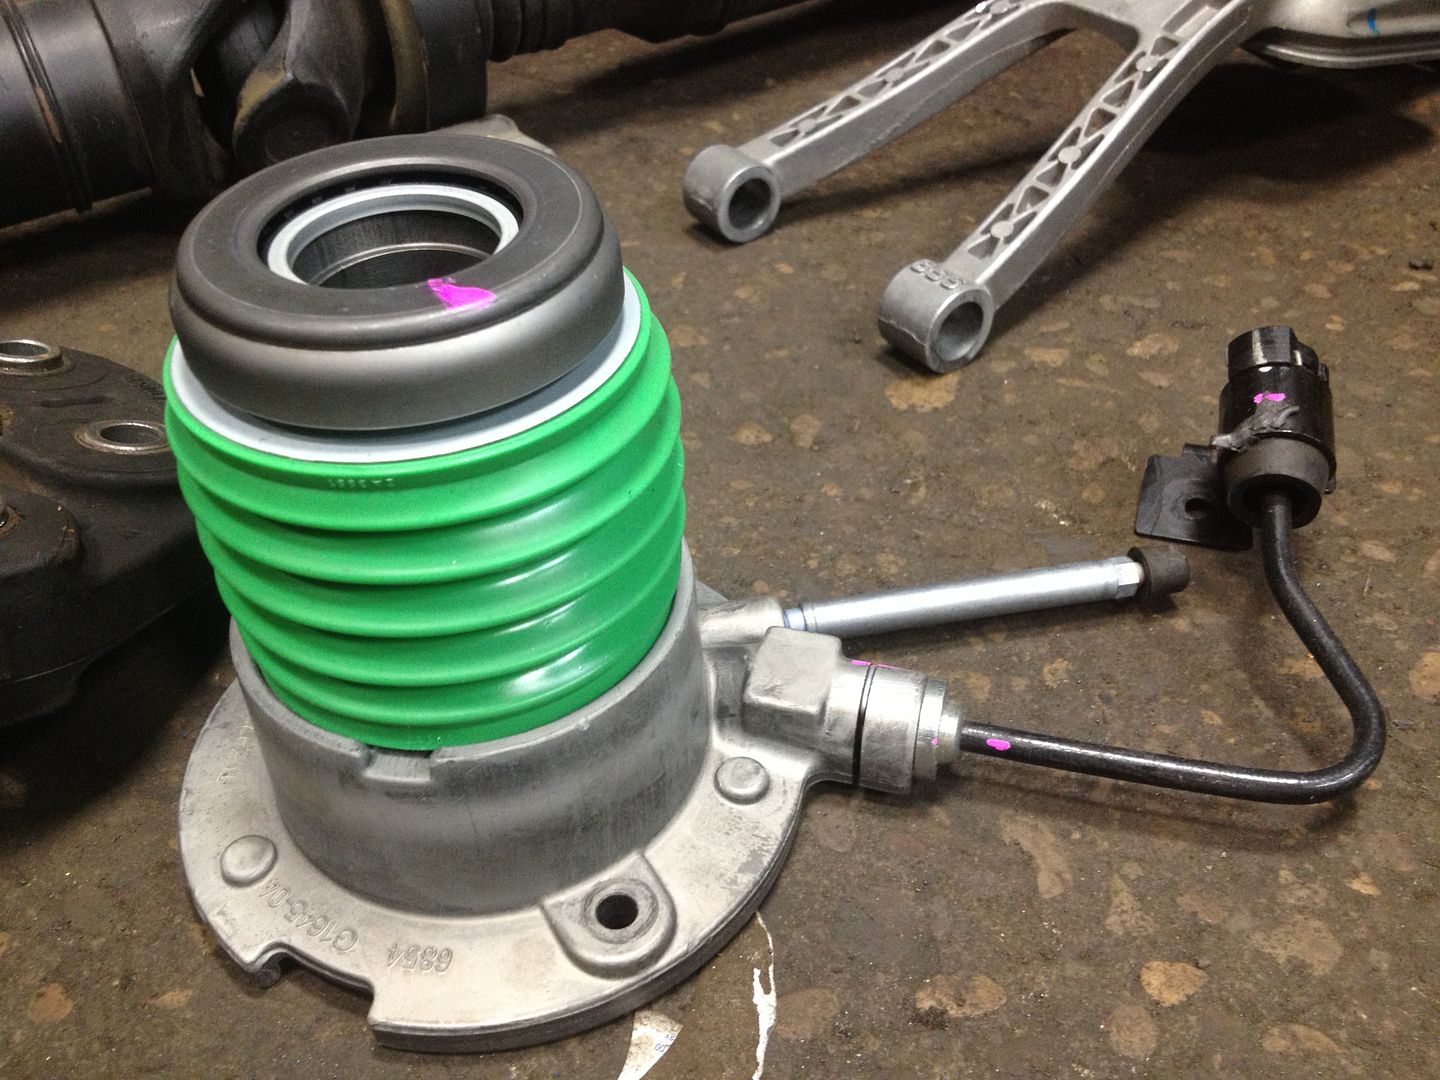
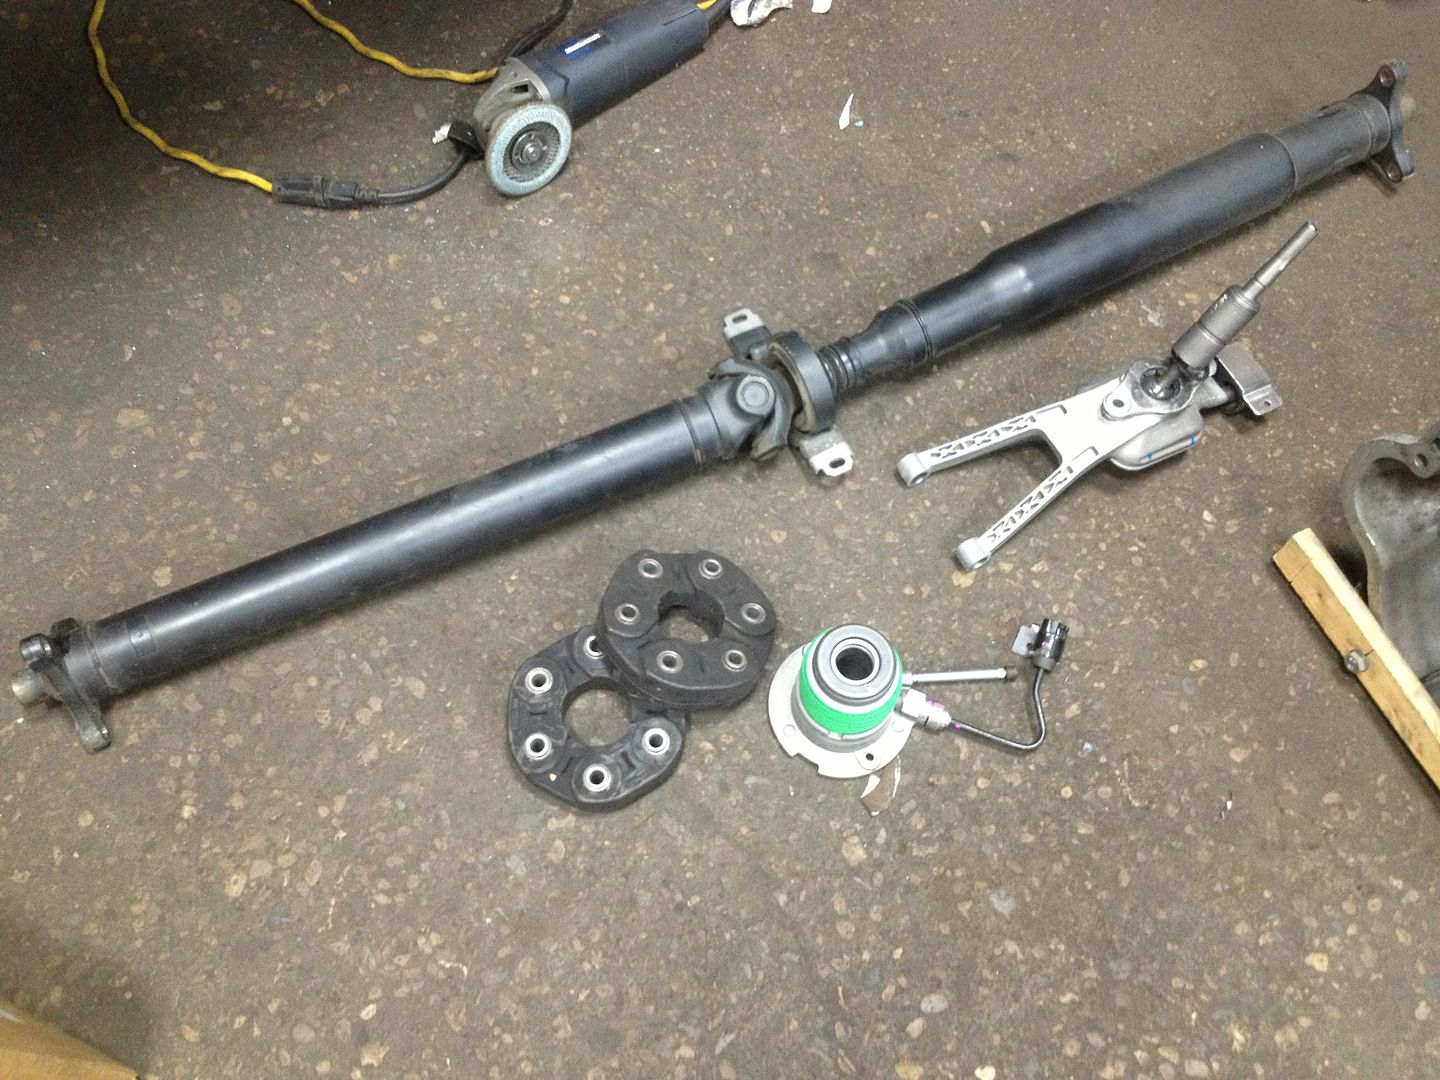
I’ll have some updates with parts I’ve collected soon!

Just subscribing. Looks good :slight_smile:

so jealous of your shop setup!!!

Shop is slowly coming together…

Addition of the day (just for Braden lol)

I was told my Datsun would be coming home tomorrow. But have no confirmation in last month so we’ll see how it goes…

^ Awesome… so jelly

So any news bro :frowning: I got your text btw!

Check this for inspiration :slight_smile:

Ah that Z is titties man…

Sorry for a disappointing update but:

shop organization is taking shape :smiley: this is stage 1 of racking. Had to take down about 60’ of heavy ass 4" sched 80 in order to get the rack into a decent place.

Hoist is anchored down and running now

Next is the fab table and finishing some more racking

not much happening to the shop or Datsun other than Brendan’s VH45 S14, so here’s one of the new shop mascot, Diesel.

Found yet another use for the 10 ton gantry crane :smiley:

that dog is so cute

442 days since my car has left me, but it’s home now…

Cage is not done, main hoop, diagonal and A-pillars are cut but not welded.

I’m not worried, I actually have the shop and capabilities to do everything myself now so it’s all good. Big things to come soon! Just happy to have my car back…

Epic f’n disappointment in… anyways, waste of our time and money… tuned in as usual on your project bro… keep the thread alive…

Had a couple hrs today to put towards the Z… Time is extremely hard to find these days haha just have to be persistent.

This is the cage that was done by the fabricator. I am scrapping every part of it that was done - about 40’ of DOM scrapped unless I can salvage some short pieces out of them.

Main hoop has ~3" between it and the roofline.

The door bar stuck below the roofline.

The A-Pillar was fairly tight…

Took the S30 front subframe and nipped off the factory motor mounts…

Picked up a R33 GTR RHD steering rack. RHD because when you flip the rack over, I need it to work in that direction with the S14 knuckles flipped right to left (steering rack in front of subframe instead of factory).

Then I took the R34 GTR rear subframe and burnt out the factory bushings, sawz-all to the top flange and air hammer to push the sleeves out.

Mocked a SPL V1 Solid Subframe Bushing into the bore.

Tomorrow night’s plan is to brace the subframe, ditch the diff bushings, find a bushing for the R33 steering rack and send out subframe(s) to JP @ Strip tech for powdercoating.

Nice build so far looks promising!

Thanks Stainless!

Got a couple more hrs in today. This is yet another time-saving gift I was given when the car came back:


All four corners were the same shape. Pretty good gap for welding…

Cleaned up the surfaces.

Took some expensive artist tracing card stock…

Spray painted from inside the tower and trimmed the outline.

Overlayed onto some scrap 1/4" that I preformed into the curve.

Trimmed, fitted, cursed, drank a beer and tacked.

Missed a couple steps here but this is after a lot of finishing touches - Turned out not too bad for my first time doing metal work.

Welded top and underside, root pass ground down and another cap for cosmetics.

Finish the rears tomorrow night! The big welder is too much to do finishing/smoothing welds so once all 4 corners are done I’m gonna bust out the 110v and clean everything up!

Found this pic hiding in my photobucket -

That’s the piece after I worked that filler strip in. Couple pin holes that I’ll fill with the 110v welder later.

R33 GTR rack fits nicely on S30 subframe:

Cleaned up cowl area down to bare metal and sprayed it with temporary paint.

Got drivers side rear camber plate 90% done, it and the passenger will be done this week sometime :smiley:

Finally found some time to work on Z (truck needed yet another motor :().

Got all 4 corners done for camber plates.

Started on the boxes for the main hoop:


Not nearly finished as the R34 subframe has to mount to these somehow.

Spent a bit of today time on this:


FWIW, little while ago I received a hydraulic power pack, a hydraulic ram (6" bore, 2" rod, 4" stroke), 8’ of 1.25" stainless rod, 8’ of 1" threaded rod, 1/4" wall 6x6x10, 40 feet of 1/4"x2x6, 8 feet of 6" c channel and some other bits… FREE! :smiley: so I am turning them all into a hydraulic shop press. I haven’t done the math on it yet but I estimate the ram to be roughly 50 ton. I’m making attachments so I can use it as a brake, shear, mounting a JD Squared model 3 vertically on the back (baller tube bender), hydraulic hose crimper (ends came on the ram for this), as well as a general shop press (bearings, bushings, dimple die’s etc…)…

Pretty stoked to get going on the car and press now that the truck is all wrapped up.

Got some work done on the press today. Would’ve been a lot farther if metal supply stores were fricken open on Sundays…

1.5HP motor to the hydraulic pump, should put out more than enough. Motor is held to the press via a plate with 4 holes with bolts welded and their heads cut off flush, then the plate welded to frame.


The gauge was fubar’d so I picked up a digital readout gauge that has a programmable pressure setpoint. This means I can hold the handle full tilt and it will automatically shut off the pump (or divert) back to tank if I set it up as a pressure relief.

Last few weekends I’ve had to help buddies move n crap but I got to put some time in today.

First I took some 2.5" square and cut it to size w/ angled ends for access to weld inside (and it looks better), drilled 1 1/4" holes where mounts are, made a “sleeve” out of a pipe nipple with 3/4" ID and welded it inside and out.

http://i243.photobucket.com/albums/ff286/Aaj2k5/835D0803-3ACC-4F89-A6EA-405E5456B85B-362-000000DBE0ACAEF3.jpg
http://i243.photobucket.com/albums/ff286/Aaj2k5/AB969747-7CD3-4B68-AE8E-D194A2C873DB-362-000000DC1C69A28D.jpg

Then I clearanced where the subframe contacted the inner wheel well

http://i243.photobucket.com/albums/ff286/Aaj2k5/5006348D-ADDC-455D-A437-5F365B6A0388-362-000000DC40EA7255.jpg

Then I clearanced where the front diff mount contacted the tub (with a BFH)

http://i243.photobucket.com/albums/ff286/Aaj2k5/C1A54CDB-36E9-4B56-B97C-69D22A0F3C2A-362-000000DC487F8C0C.jpg

Measured 10 times at 12 places and tacked the subframe lol an extra hour in this step will save many hours in future alignment and vibration issues… Note the sleeve in the tube

http://i243.photobucket.com/albums/ff286/Aaj2k5/3403DB0D-7212-45D5-B3C7-0FC31A24D908-362-000000DC52FC3750.jpg
http://i243.photobucket.com/albums/ff286/Aaj2k5/FCA9224F-E618-4D22-9D0D-38B56E1AD3A3-362-000000DC5AE7E6EE.jpg

Arms on, knuckles and hubs on, they are within 1/4" of centred in the wheel well side to side.

http://i243.photobucket.com/albums/ff286/Aaj2k5/AC9565CE-C31D-44C0-8DD2-9272DBF0942D-362-000000DC686C496C.jpg

Picked up some S14 coil overs from Brendan - the fronts fit well even though my camber plate template is for a HSD/Stance rather than JIC.

http://i243.photobucket.com/albums/ff286/Aaj2k5/1D11606D-AEFC-4DCC-AB10-D218CACEBB45-362-000000DC6DF23298.jpg

My front suspension setup is going to be reverse of what I originally wanted. The traction arms and sway bar have to point to the rear of the car to allow for a front steering rack setup. This is not set in stone as I have to see if the motor will fit with steering rack the other direction.

http://i243.photobucket.com/albums/ff286/Aaj2k5/519FAB60-FD99-45CE-801D-1F74A593B34B-362-000000DC746BA230.jpg

And some more CAD for whoever is into that kind if thing, this is the basic layout of the underside of the Z. Motor is to size, and T56 is to size

http://i243.photobucket.com/albums/ff286/Aaj2k5/9950BD3A-7A75-4E12-8109-D8046F72D314-362-000000DC7B900F90.jpg

Great job Aaron. Keep it up!

wow pretty good looking cars and XJ but damn jealous of the goat. D;

Old crapiness:
http://i243.photobucket.com/albums/ff286/Aaj2k5/FFE9907B-842F-45B2-B51E-F0DB200A1CC1-791-0000008A8F1C961B.jpg

Side by side (LQ9 pan vs LS1/LS6 Z06 “Batwing” pan):
http://i243.photobucket.com/albums/ff286/Aaj2k5/7541BE52-68FF-4ACC-BE8E-FC129D8A3AD1-791-0000008AA223DE8C.jpg

New hotness:
http://i243.photobucket.com/albums/ff286/Aaj2k5/B49AD9CA-EC8C-4497-8C16-F27CAAFC3CB2-791-0000008AAB0DBD51.jpg

Holds same capacity (6.5 qts) but much better baffling design and the obvious 4" of extra clearance doesn’t hurt either haha and this one was a “new take-off” and is mint shape :smiley:

Soo, I took a month of weekends off to try and have a life outside of work… But I’m back at it again - had full day on er today.

Took the LQ9 Truck manifold and tossed in storage:
http://i243.photobucket.com/albums/ff286/Aaj2k5/0B776ED1-F246-4F4C-BE0F-4A53ED105F38-7027-00000A5AFCC7E978.jpg

Took the NTO LS2 manifold and tossed in on the motor:
http://i243.photobucket.com/albums/ff286/Aaj2k5/BB20793D-5C02-4160-8659-359E6884BCDA-7027-00000A5B0B731377.jpg

If you squint from 30 feet it resembles a car:
http://i243.photobucket.com/albums/ff286/Aaj2k5/E236DD77-EF84-40AB-BB65-A94494BB13F1-7027-00000A5AE0A5911C.jpg

How both sides looked after all the cancer was cut out:

http://i243.photobucket.com/albums/ff286/Aaj2k5/F9290DDD-BC15-4879-9B0E-D93D0156B500-7027-00000A5B1C481997.jpg

Cut off the traction arm mount, the gusseting to the footwell. This leaves a gap along the length of the from rail. Also note the new panels in footwell, formed to the curve in the new floors and all panel intersections fairly nice. (I now have newfound respect for tin-whackers haha)

http://i243.photobucket.com/albums/ff286/Aaj2k5/38BB6CAC-5D69-4D1F-8463-2611DFC56823-7027-00000A5B2985CBE5.jpg

Test fit my new rails - bent up 14ga CRS into (Inside Dimensions) 2.25" along top, 2.5" along side and 3" along bottom, 42" long. These are oversized length ways so I can trim down to fit minty.

http://i243.photobucket.com/albums/ff286/Aaj2k5/1AF7D132-7571-4DD8-9153-BDEEBE4DCBAB-7027-00000A5B47BEFC89.jpg

Welded in patch panel out of 18 ga CRS - 2.5" wide roughly 15" long with an extra 1" angled as flange support up the footwell.
http://i243.photobucket.com/albums/ff286/Aaj2k5/AB827D7F-D06F-4B7D-9527-166F96C0DE04-7027-00000A5B5CC4B82F.jpg

Boxing patch fits fairly flush.

http://i243.photobucket.com/albums/ff286/Aaj2k5/EBCA764B-8355-46D3-89C2-DECA4C3AD509-7027-00000A5B62DE3121.jpg

Frame rail fits even flusher.

http://i243.photobucket.com/albums/ff286/Aaj2k5/307A243D-A0ED-41DA-9A08-4B907CBDE75A-7027-00000A5B768D7F13.jpg

First pass of welding it in. I forgot to take a pic after the cap pass and cleaned up.

http://i243.photobucket.com/albums/ff286/Aaj2k5/4F2C2D4C-52C0-4FDB-A822-48A023C2DF78-7027-00000A5B841544D2.jpg

Cleaned up the wheel well and painted everything to keep the bare metal from rusting up.

http://i243.photobucket.com/albums/ff286/Aaj2k5/19B5D03B-584E-4CA4-B756-E20FC57937FB-7027-00000A5B921DC942.jpg

Nice, flat and straight. And I feel 10,000,001 times better about bolting 450 horse to this frame rail as opposed to the stock.

http://i243.photobucket.com/albums/ff286/Aaj2k5/D116B8FD-2F68-4F40-9790-70A3B4453A8D-7027-00000A5BA38885F0.jpg
http://i243.photobucket.com/albums/ff286/Aaj2k5/B01EC64C-AED1-43CC-B0CE-F798745212FD-7027-00000A5BD2D4A3CF.jpg

That’s all for today peeps, I’ll hopefully have the passenger side matching this next weekend now that I’ve figured out how its done haha. This is actually a much bigger step in the build than it may seem. After this is done, I can tie in mid frame rails front to rear, cage mounts, motor mounts, tranny mounts etc etc.

This ladies and gents is a TR6060 6 speed from a ~2012 Chevy Camaro. Thanks to a man named Joe, it now resides in my shop staring the LQ9 down. Also joining it is a bnib GM TR6060 concentric slave cylinder and a Camaro driveshaft, flex couplings and the shifter. TR6060 is fairly factory exception of carbon synchro’s.