VW Cabriolet Project for the wifey

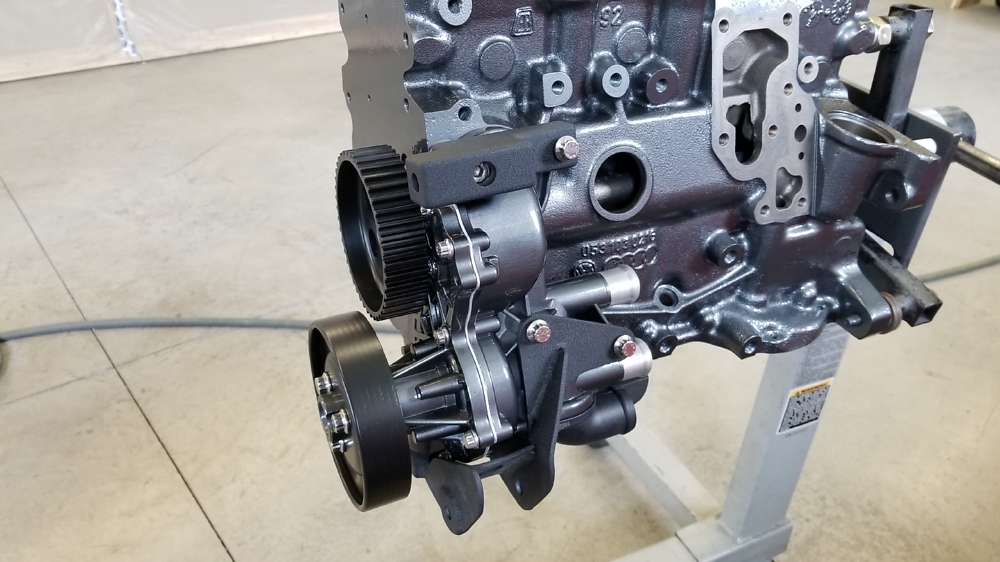
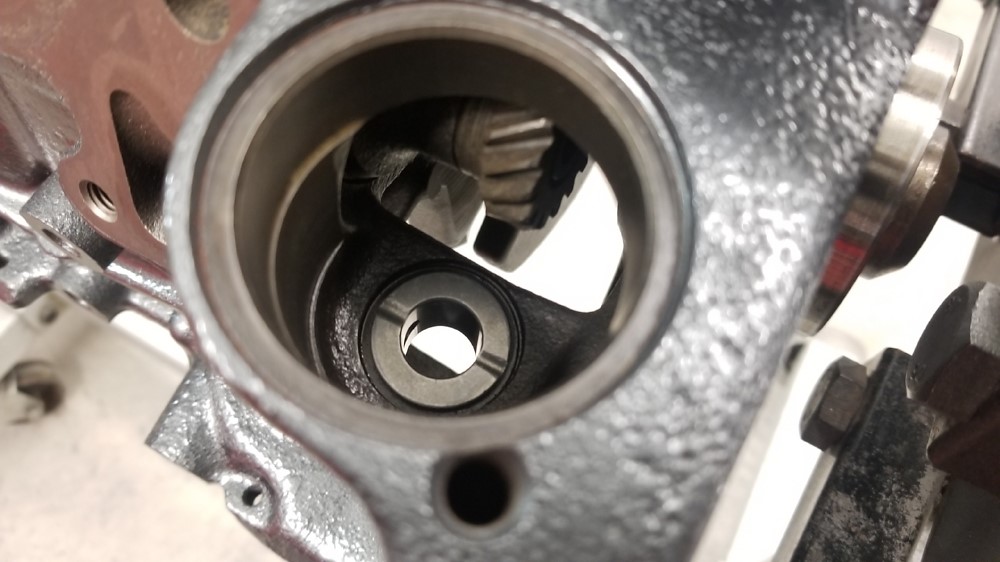
Machined a couple of simple slugs to pound the intermediate shaft bearings in with, and got the shaft in with ARP bolts and a new seal. Used a lenght of 3/8 rod to get to the inner one.

Oil squirters back in.

Glyco bearings with separate thrust plates.

Checked all the main clearances the old fashioned way with plastigage

Crank in awaiting a final check of the thrust clearance.

The Wiseco wrist pins were a bit tight for the Eagle rods, so I ran them out to McQuillens on lunch, they should be ready monday.

I also somehow forgot to order rod bearings. They are due wed latest.

Slow but sure its coming together

Dan

2 Likes

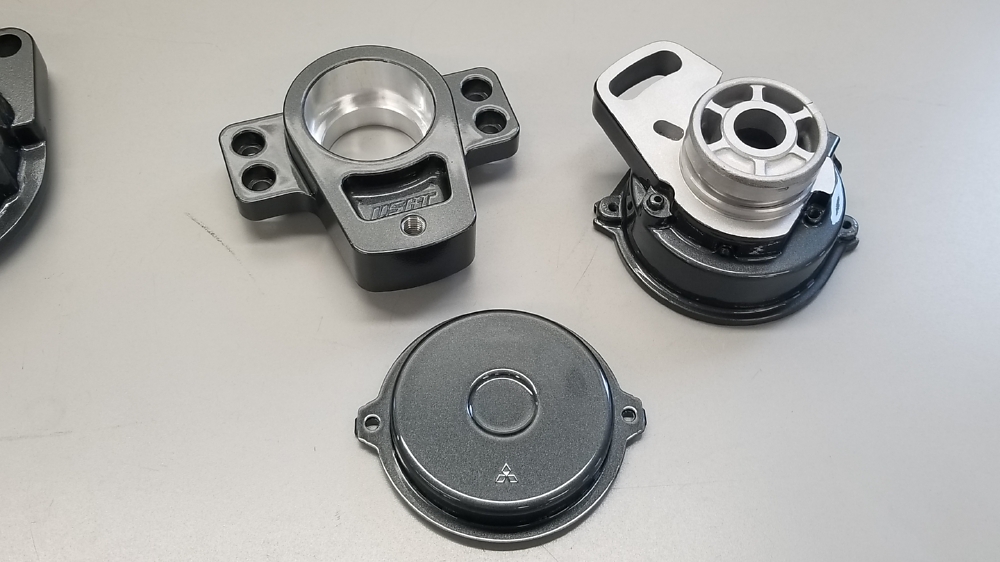
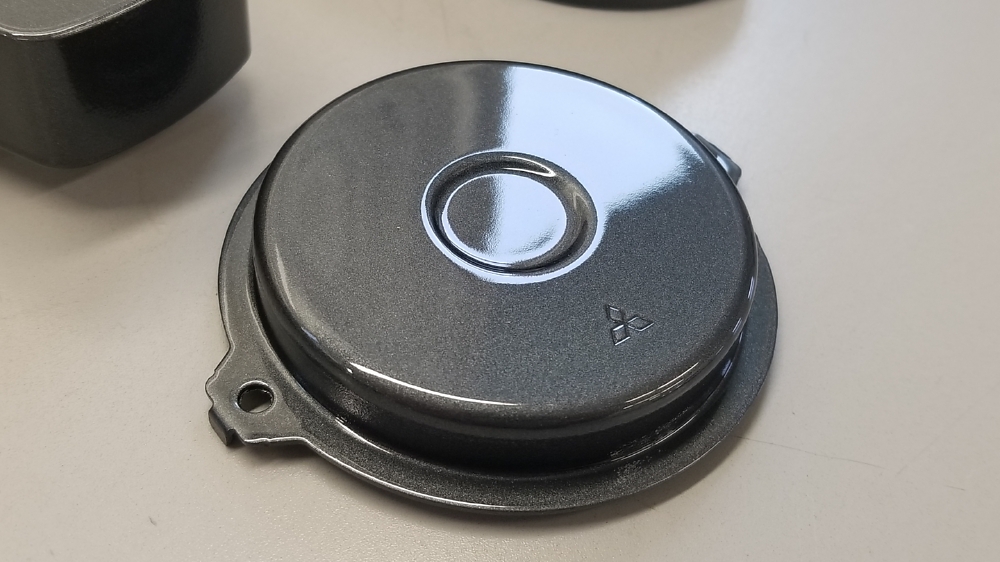
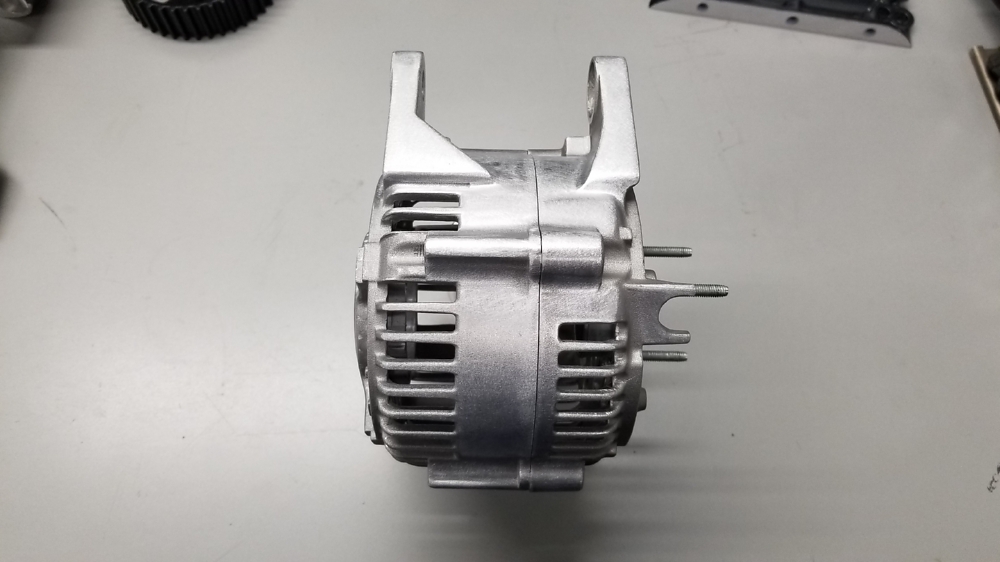
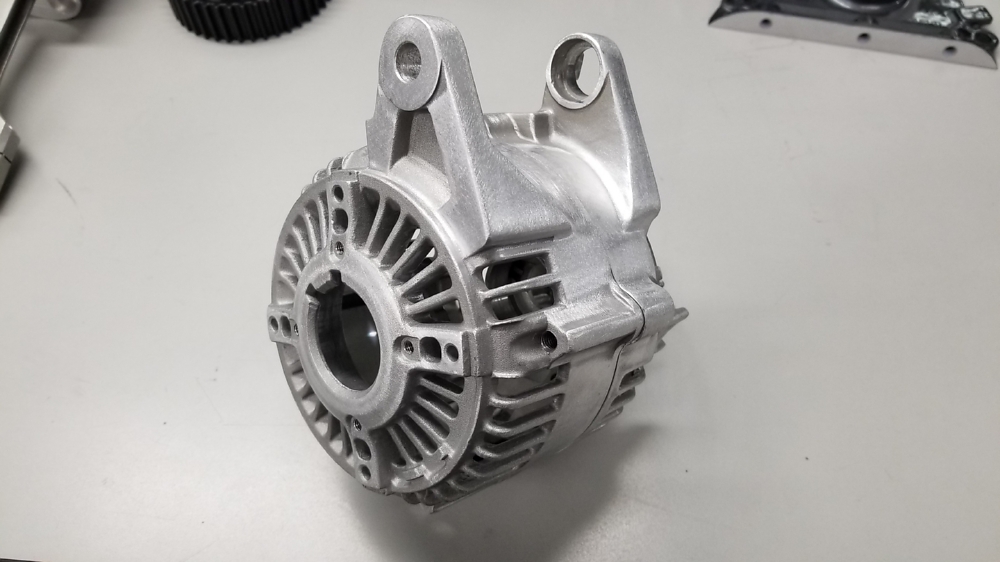
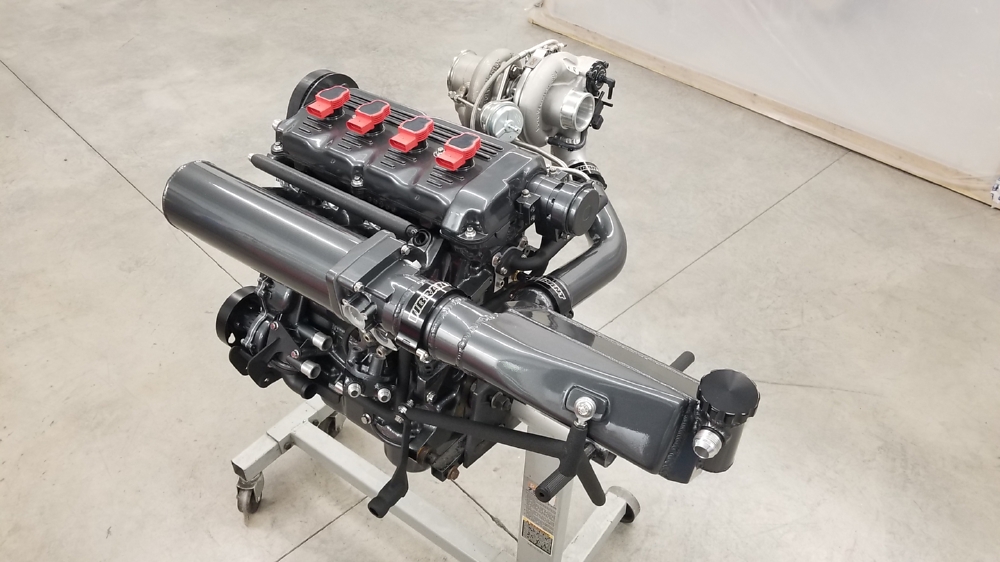
Finally painted all the small bits for the motor this weekend.

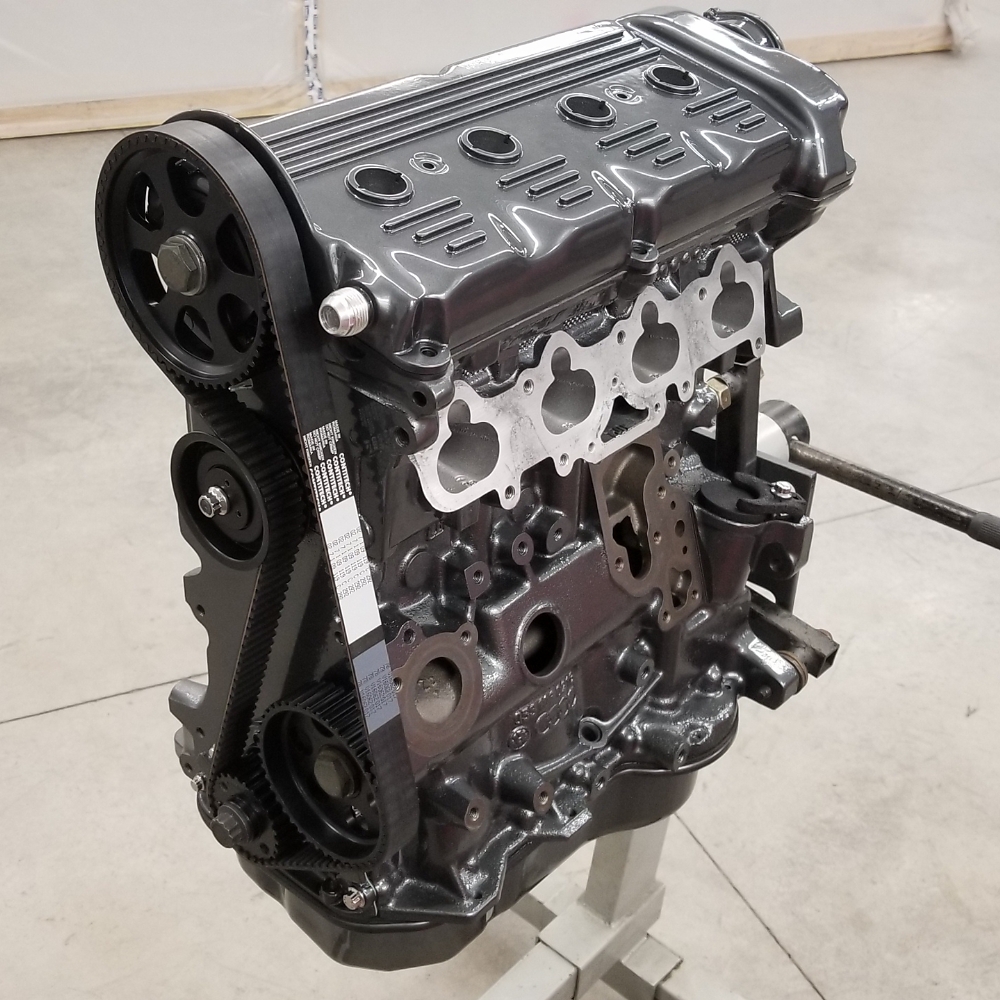
Ill skip the part where I spray the epoxy etc and just get to the eye candy. Im still amazed at how nicely this SPI clear lays down. All these are right off the gun. I did get a couple small runs but I blame it trying to get coverage on all the little features. They shouldnt be too bad to do a quick sand a buff on.

This and the CPS cover turned out just SO good.

Yes I painted the billet CNC cam sensor adapter …

Dan

1 Like

A vw with DSM parts, this will surely explode. :slight_smile:

Looks great.

haha, we shall see. It was my best option for a good cam/ crank trigger option.

Had to test fit the wp and alternator brackets

Reassembled the cam angle sensor - had to make a new seal for the connector and a new o-ring for the cover.

All together

And installed. Loving the look of this setup. Also installed a couple of water jacket plugs, the CLT sensor and the heater core water feed tube

Back to motor assembly.

Turned a slug to drive in the oil pump shaft bushing.

And assembled the pistons / rods. McQuillens honed the wrist pin ends for $8/ea

C clips are a hoot.

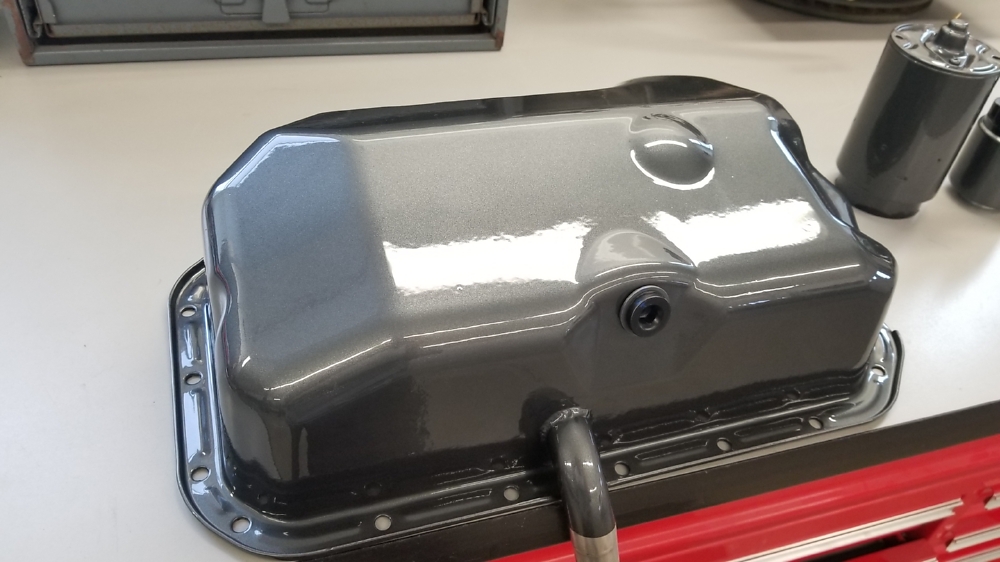
Checked the oil pump clearances and installed the new oil baffle for the factory windage tray and a new oring for the pickup. So thats ready for install.

Dan

1 Like

Also pulled the alternator apart and smoothed out the mold lines, rough edges, and filed the flash off every single hole in prep for paint.

Dan

2 Likes

^ This is just a ridiculous level of detail. I feel like no matter what I work on or how detailed I get this thread is always going to be in the back of my head going, “you’re still a fucking slacker compared to that VW build on NYSpeed”.

2 Likes

I have issues. Dont feel bad.

EDIT: I also stabbed myself at least 2x with the tip of the round needle file. Good times.

You can’t even drive this thing when you get done. Park it in the living room as a work of art. Also, what is going on with the Cavy? please tell me you’re driving the mess out it.

I fixed a few of the issues late last summer with it, drove it a couple times. It needs a re-tune, and maybe a different turbo, I currently hate the response. If it ever stops raining I need to get that taken care of, but I do plan to drive it this year.

Dan

2 Likes

Epic progress last night.

Checked crank thrust - right in spec.

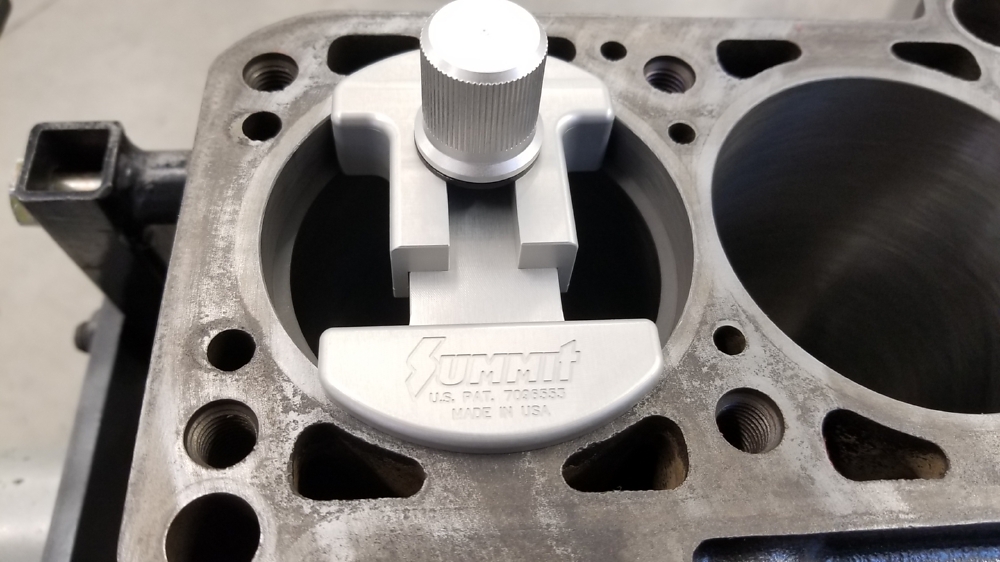
Picked up the tools to do the ring fitting / install myself - pliers, ring filer, ring squaring tool (this thing worked amazing and was way easier than flipping a piston over on every hole a bunch of times), and the bore specific wiseco ring compressor (also worked amazing vs the adjustable strap type).

Squaring tool in action

All of the oil rings and 2nd compression rings were already at spec, so I didnt need to mess with them at all which was nice.

The top rings were a bit under, I had to file each about 0.002"

And installed

This thing made the install effortless.

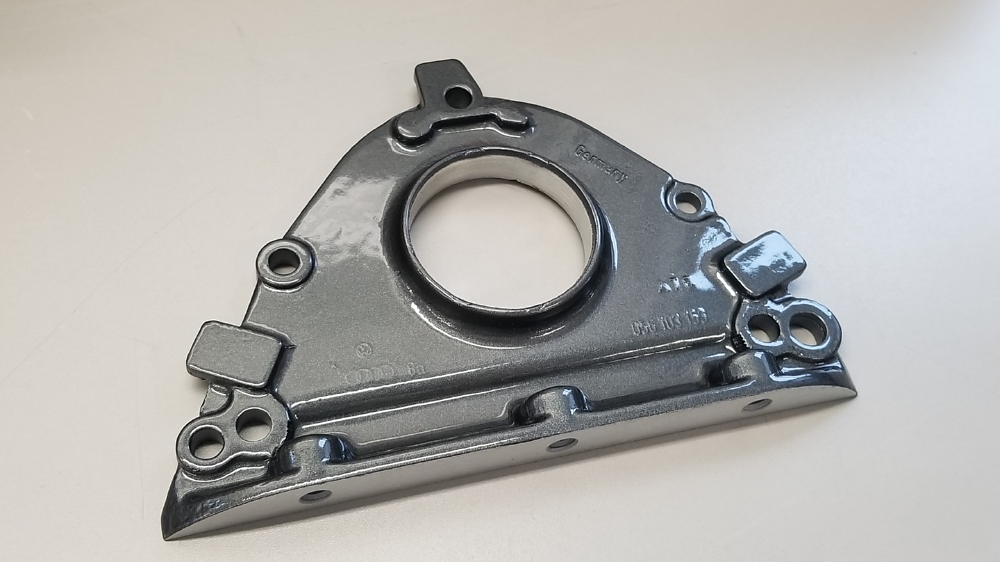
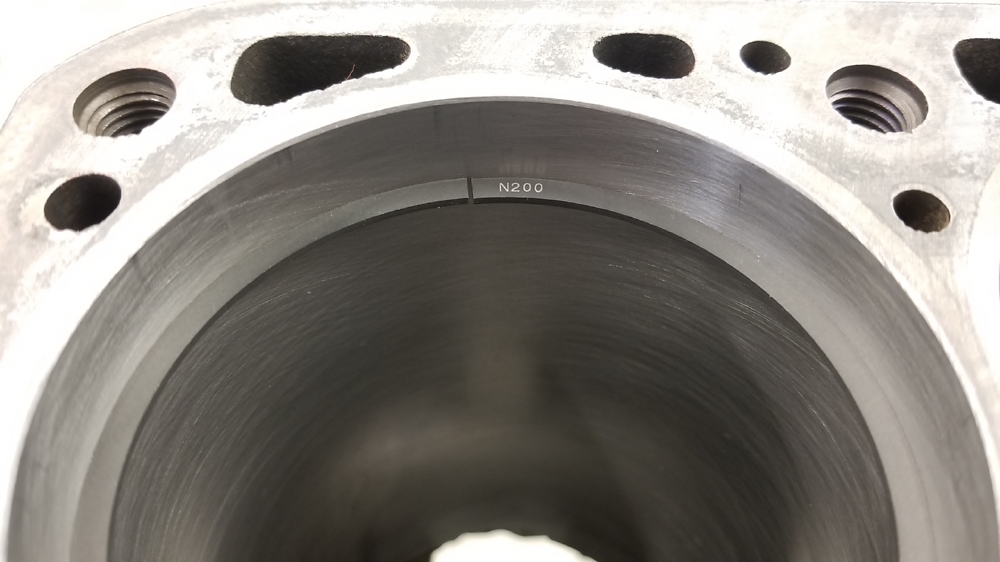
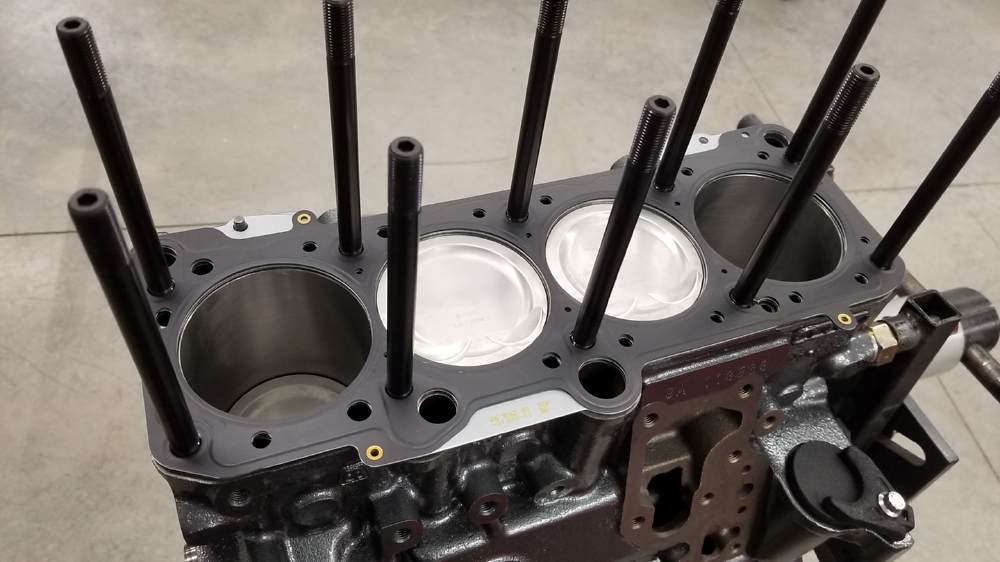
Then I figured why not crack on. Got the ARP head studs in and the MK3 MLS gasket in place. For my VW friends the gasket is p/n 037103383N which is for the MK3 2.0. The one alignment pin either has to be removed or the hole in the gasket drilled. I opted to drill it. I simply taped the layers down so nothing could get between them - unitbit made quick work of it without any burrs.

Then bolted the head down, installed the timing belt etc.

Finally got the oil pump, pickup baffle and OE windage tray .

Im going to assemble the whole thing on the stand just to be sure I didnt forget something stupid and then its time to crack the trans open.

Dan

2 Likes

Incredible work.

I recall you saying you’d be ‘offloading’ the engine build, which really only meant offloading the machine work. I’m sure you’d have it no other way. Keep it going, I love this thread.

I was going to have the whole thing done, but my machine shop doesnt really like to assemble, so I was going to have my tuner help me - since he does a lot of assembly also, but our schedules never lined up so I said F it and just tackled it myself.

Hopefully I didnt miss anything dumb. lol

Dan

The attention to detail here is unreal…amazing work, Dan…

1 Like

Picked up the rest of the coils and got them all modified. I did have to sacrifice one in order to get the process right but whatever.

Remove the rubber boot

Sand the end rib off and trim the tabs down a little for a perfect fit in the modified valve cover.

Trim the boot to length and reinstall

siqq

Then I thought Id mock up everything so I could make sure everything fits, adjust any bolt lengths etc. Also why not look at it again assembled.

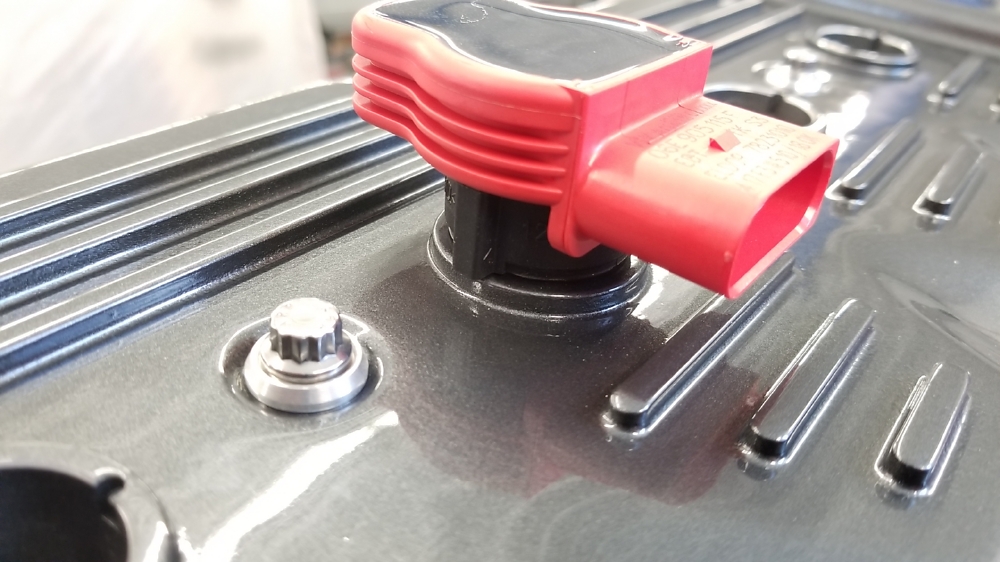
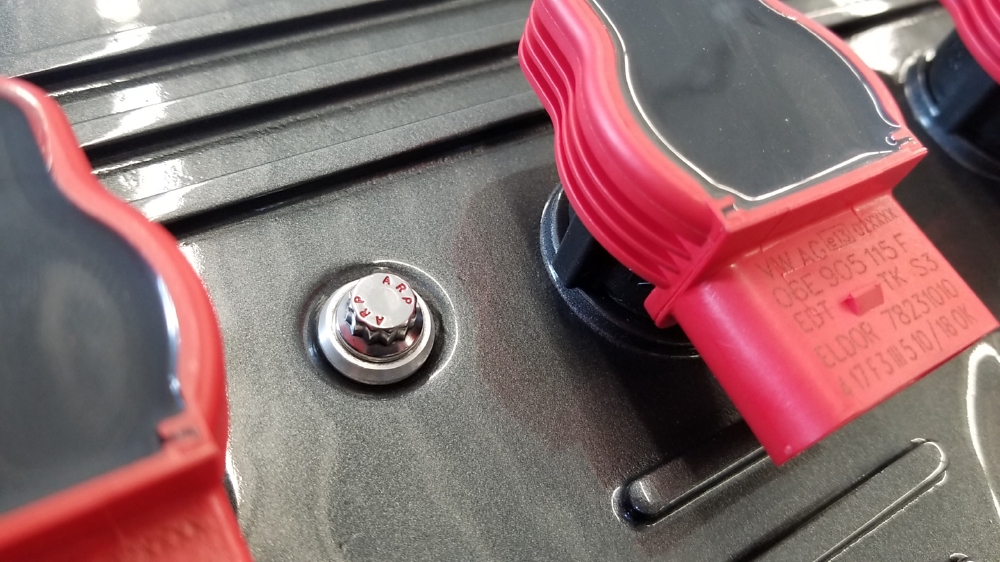
Decided that it needed a little something, why not try filling the ARP on all the bolts in red. Wasnt too hard and adds a little something that likely no one will notice.

Much better

Then it was time to get the TB back together. I HATED the oe plastic pulley, plus it wasnt exactly in the correct orientation.

Cut this crap off

Turn down the end of the shaft to be just shorter than a custom billet pulley and drill / tap a #8 hole.

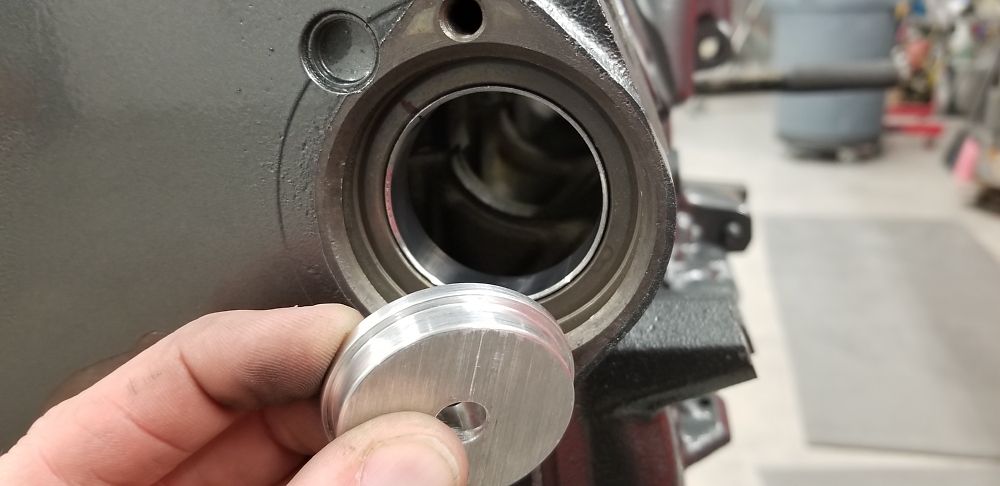
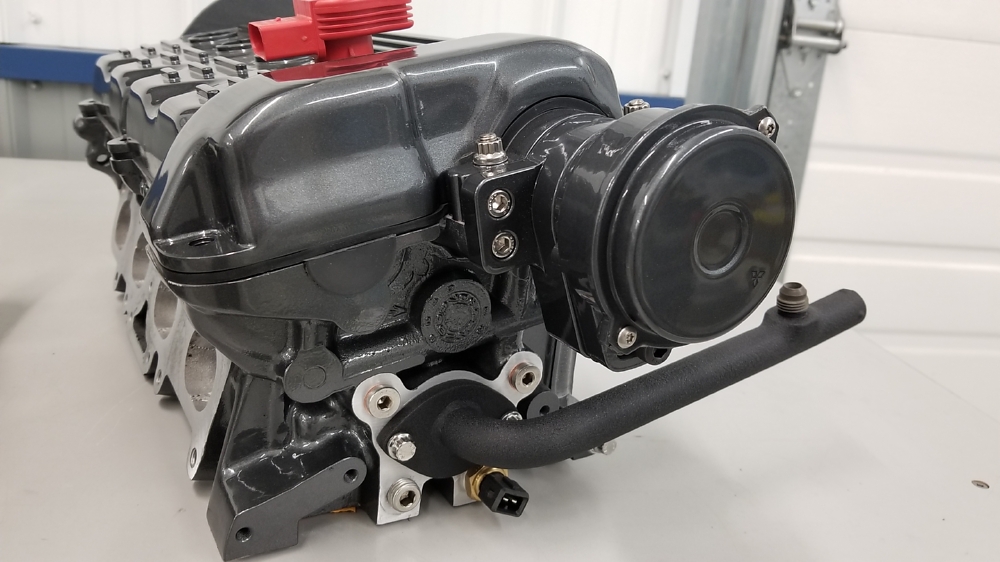
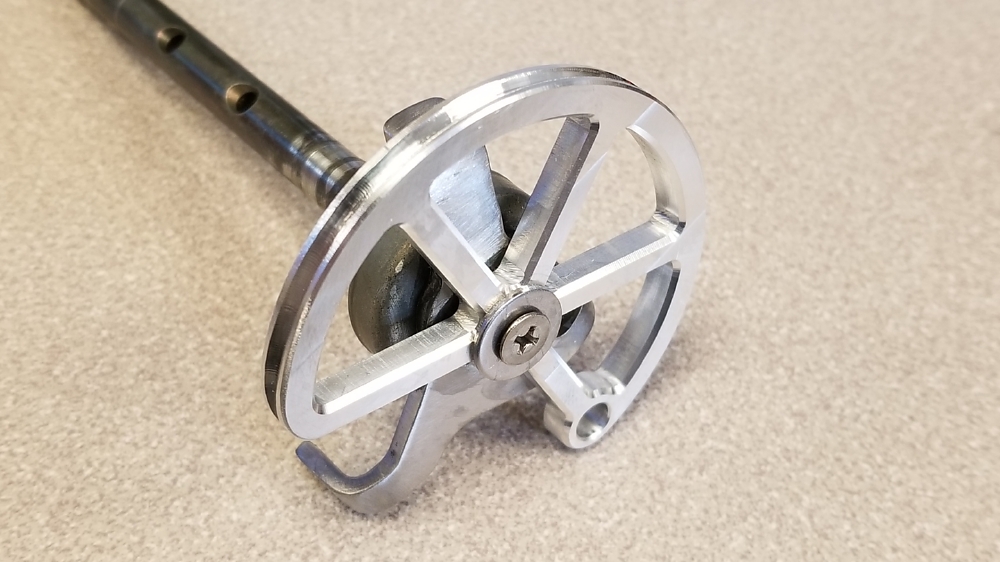
A guy I work with has a smallish CNC at home. We designed a pulley and he cut it out for me one night last week. This may only be Rev 1 as Im not 100% on the cable routing yet, but at least I have something to test fit. He can knock me out a final version once im ready easy peasy.

Then got the TB reassembled with one new shaft bearing, a new IAC, and new ss hardware. Yes, I need a different screw for the TB pulley.

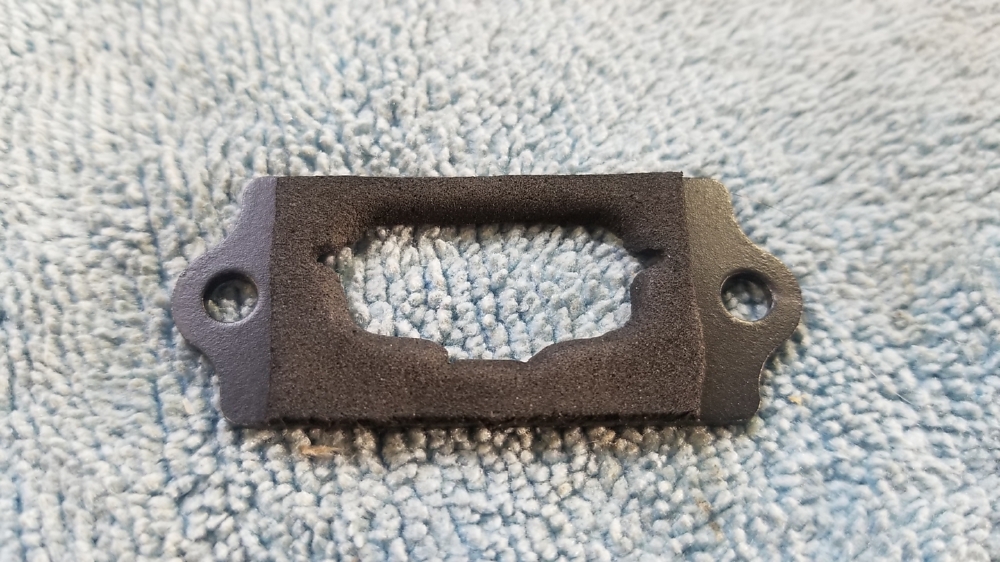
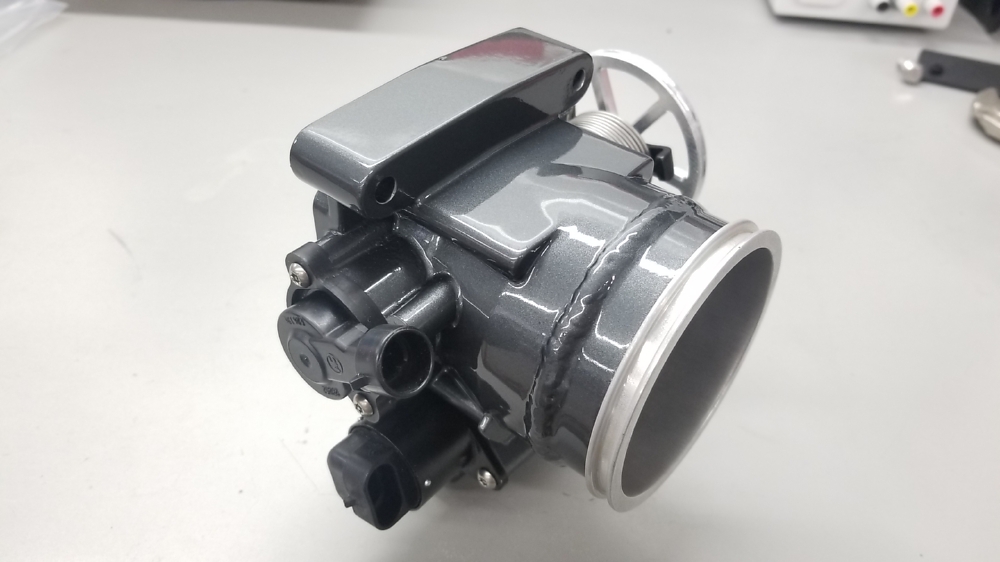
SS inserts installed in the intake (the TB is counter bored in back to accommodate them - they came with a loctite on them that I didnt want to disturb trying to shorten them)

TB in place - complete with painted ARP hardware.

Then it was time to prep this guy for paint.

So just a few more things to do and the motor should be about ready and I can get to back to the transmission.

Dan

1 Like

The red lettering…love the attention to detail. Just when you think this project has raised the bar as high as it can go, you take it up another notch.

Or am i just adding a day to the completion date? lol

1 Like

Just adding days, months you know…

1 Like

Got a couple of the coolant hoses and the water pump / alt mounts installed. Im using the gates power grip heat shrink hose clamps.

Now the motor is more or less together, I wrapped it up and tucked it into the corner and moved on to the trans.

Got it torn down in prep for the Wavetrac differential install.

Dan

1 Like

Those gears are pretty dirty. I expect to see them polished or powder coated with some cool little highlights before they’re put back in the trans case to never be seen again. :wink:

1 Like