i love it!!!
Decided to extend the drivers rear brake hard line vs using a longer flex line.

Added some shaft collars to the exhaust hangers. I had cut off the stops b/c they were rusty underneath. This was the cleanest solution to keep things in place
Of course I had to swap the bolts out for stainless


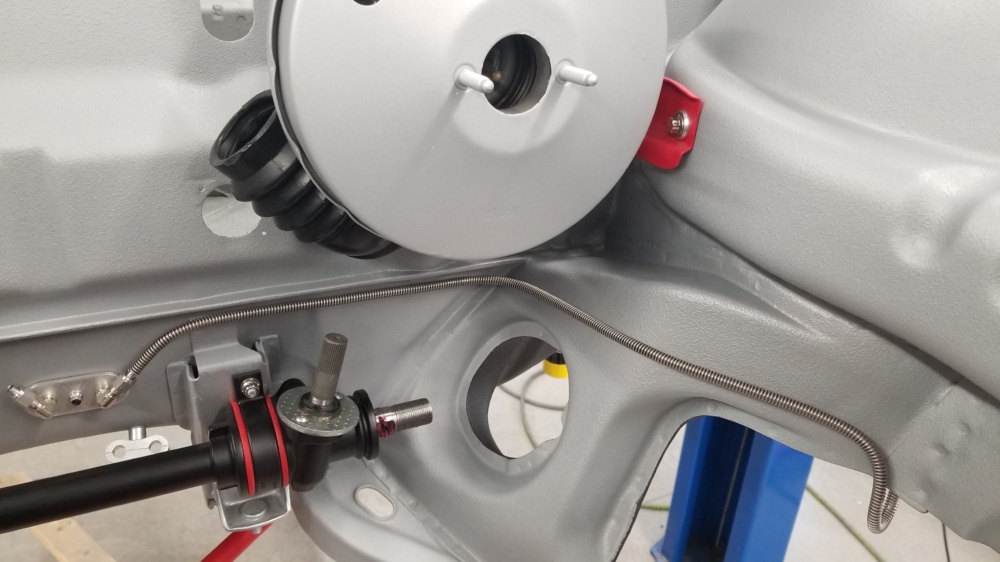
For fun I set a control arm / knuckle / brake in place.

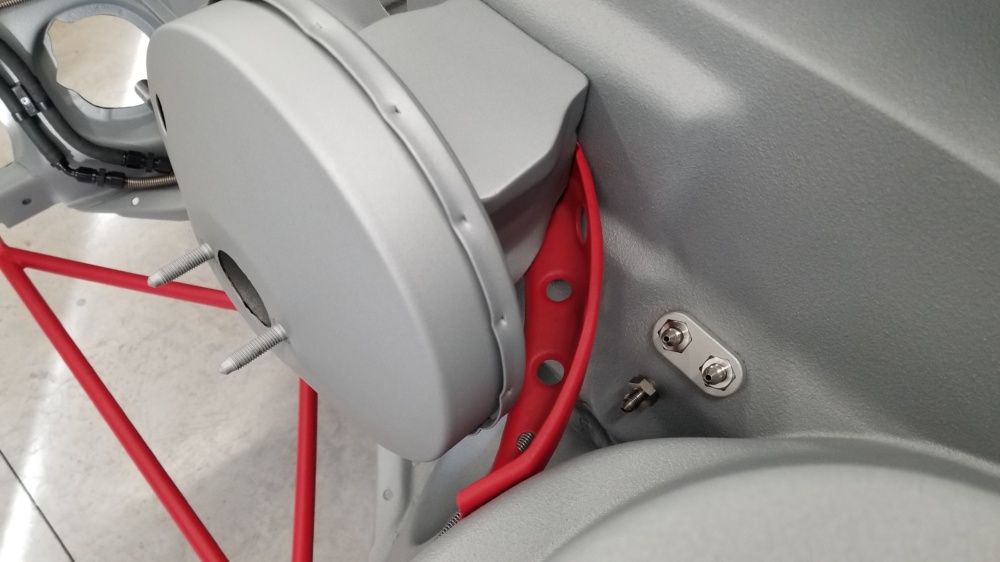
And then decided I wanted to re-route the front hard brake lines around the firewall vs through the frame rail as originally planned. because reasons.
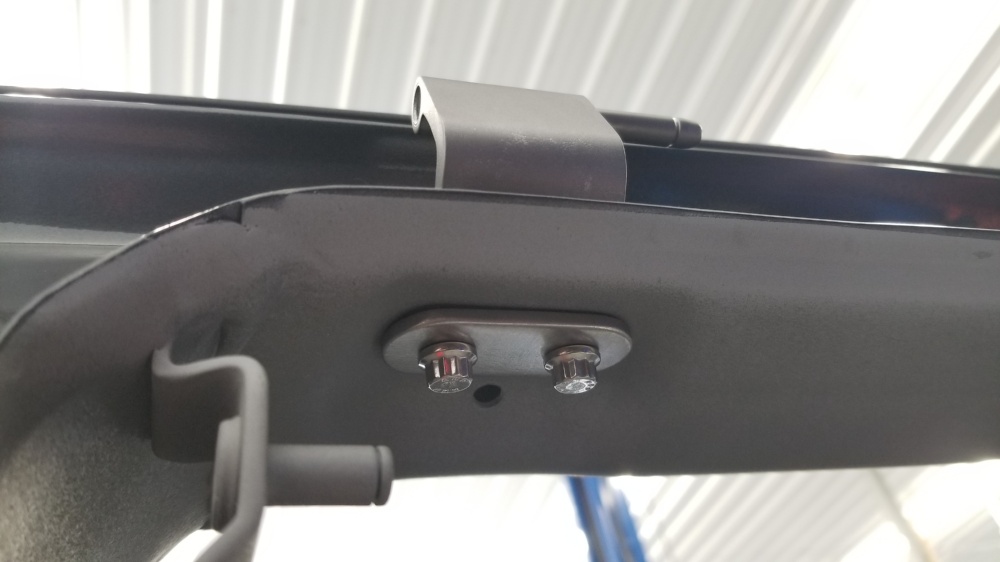
Utilized the hole in the firewall that I didnt shave for the one to pass through. Added another hole for the pass side and a nutsert to mount a little ss plate I cut out.


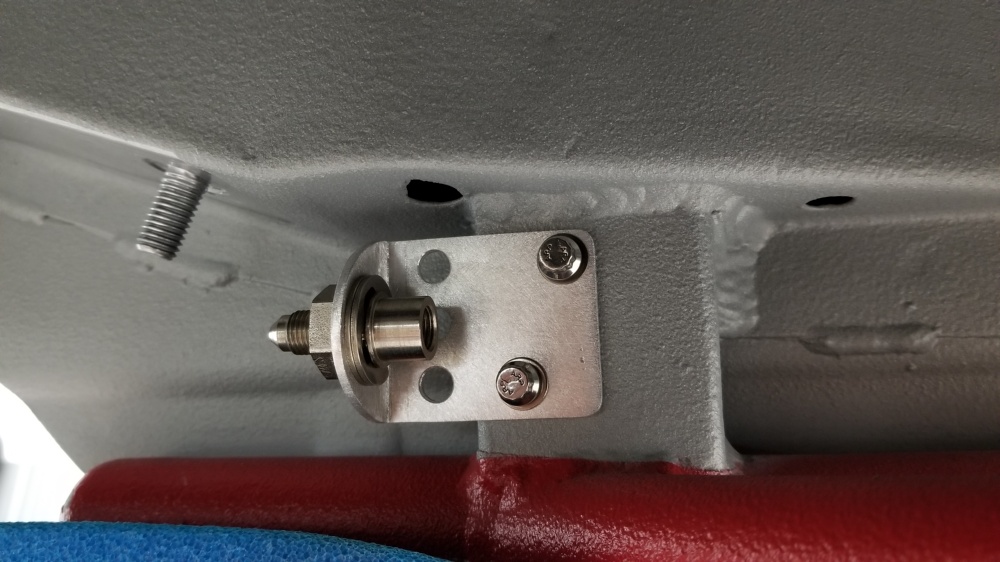
Had to space out the one fuel line mount 3/8" for clearance. Worked well.

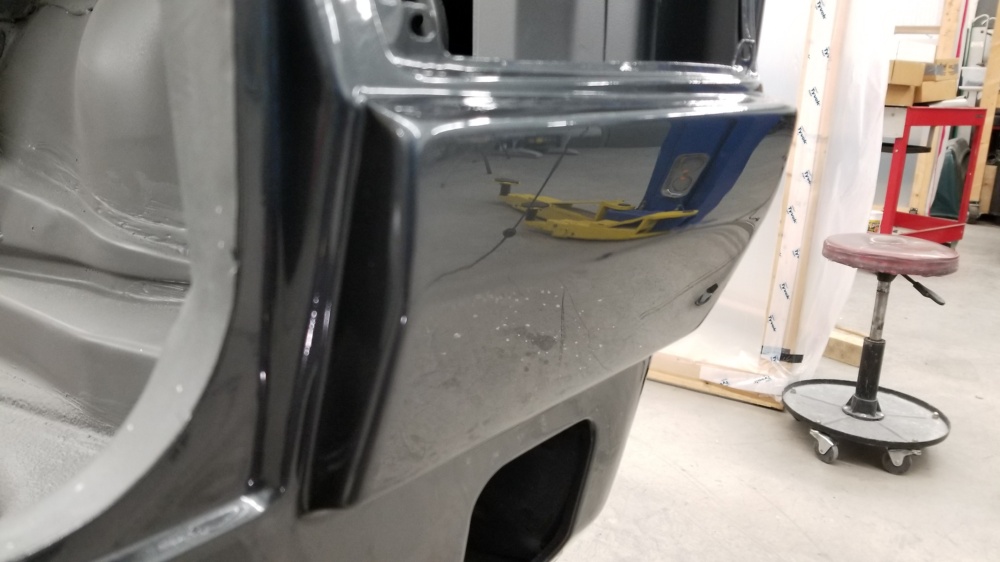
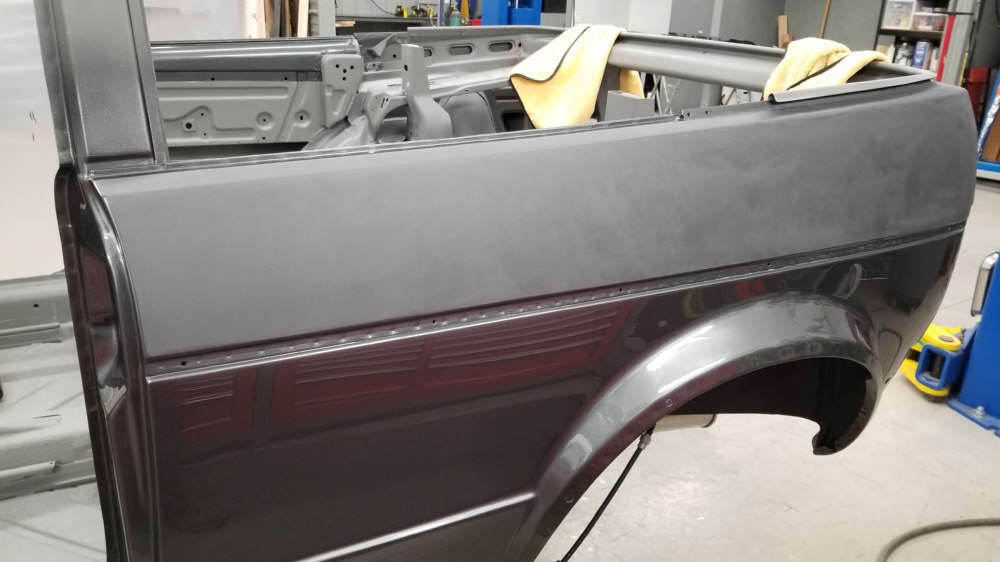
With that done it was back to painting. Decided to tackle the hood and trunk.
Final blocking.


Seam sealed
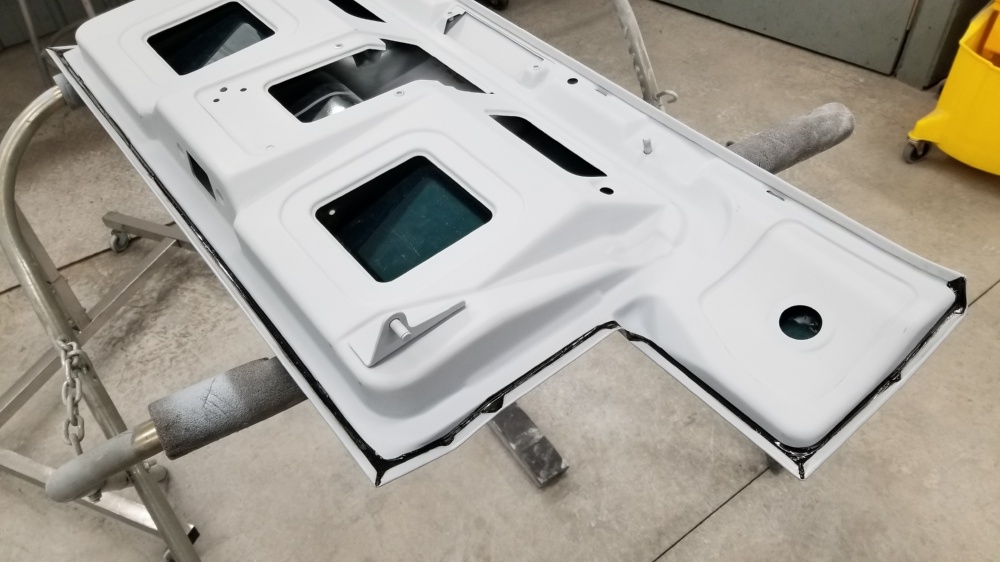
Picked up a new spray gun.

Hood in sealer

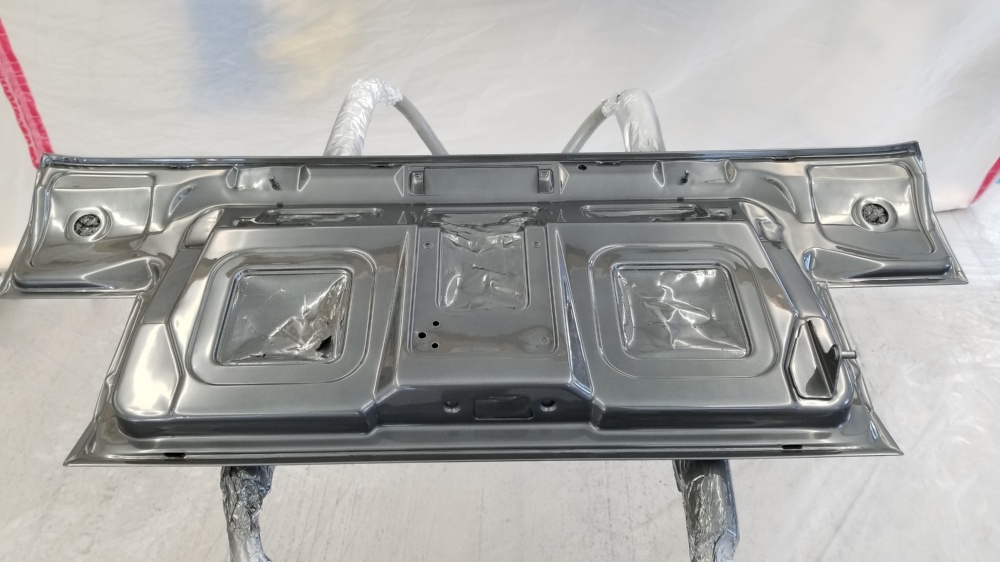
Inside of trunk painted. clear right off the gun.


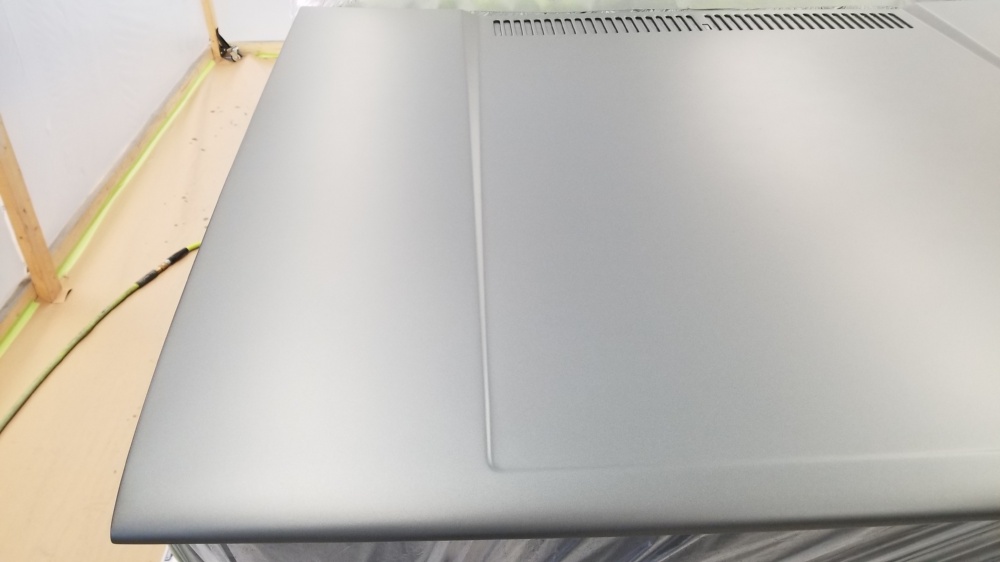
I wasnt happy with the hood. It had more tiger stripes than I found acceptable so I didnt clear it. Its now color sanded and ready for another coat. My paint buddy is going to stop down soon to give me a lesson on how to not F it up again. haha.

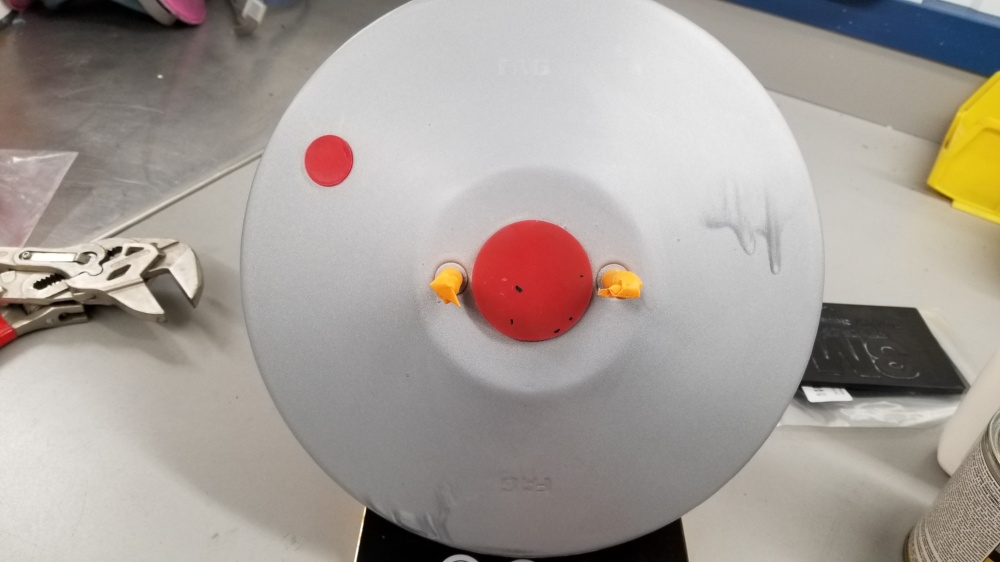
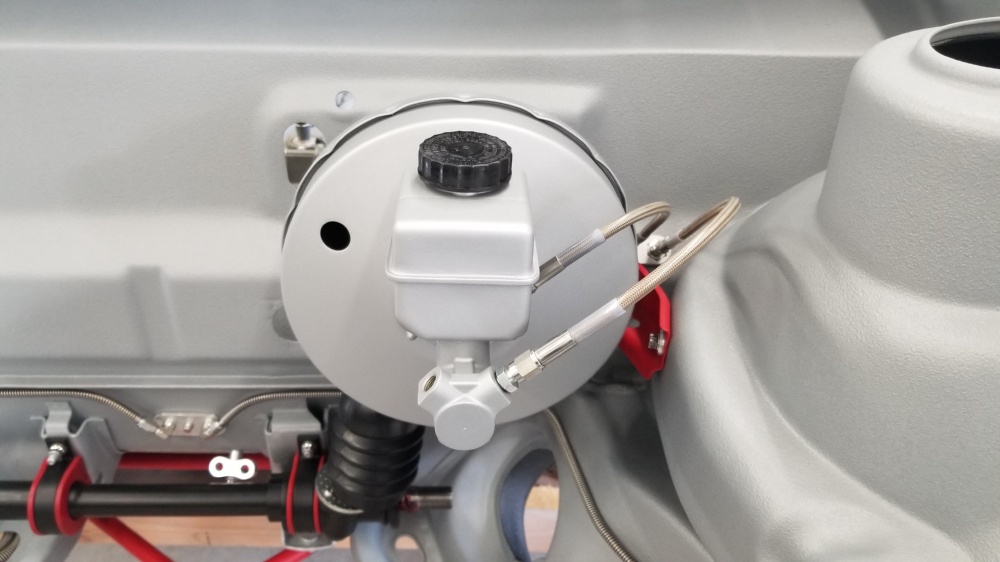
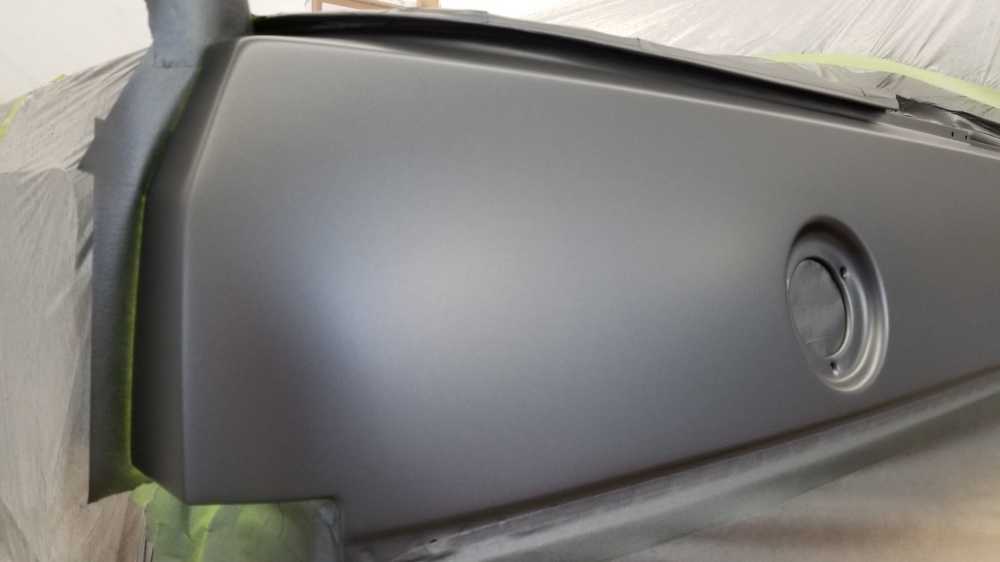
Finally sanded out the huge runs in the brake booster and gave it a fresh coat of matte silver single stage.

Dan
3 Likes
umm wtf it’s winter time where are the updates. BUMP!
1 Like
this time of year is probably the hardest to get anything done. I do have some updates - ill try to catch up later today
Dan
1 Like
Ive been chipping away the last month just have been lacking motivation to make an update.
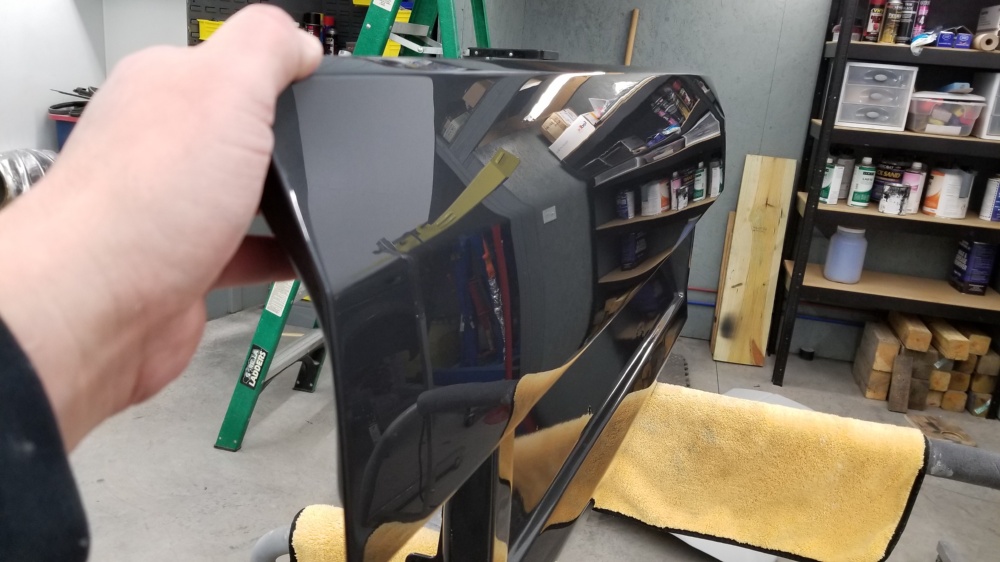
Got the outside of the trunk lid painted, and sanded / buffed. It still needs a little work but its hard to buff it on a stand. Once its mounted Ill do the final passes.
Off the gun


Sanded / buffed


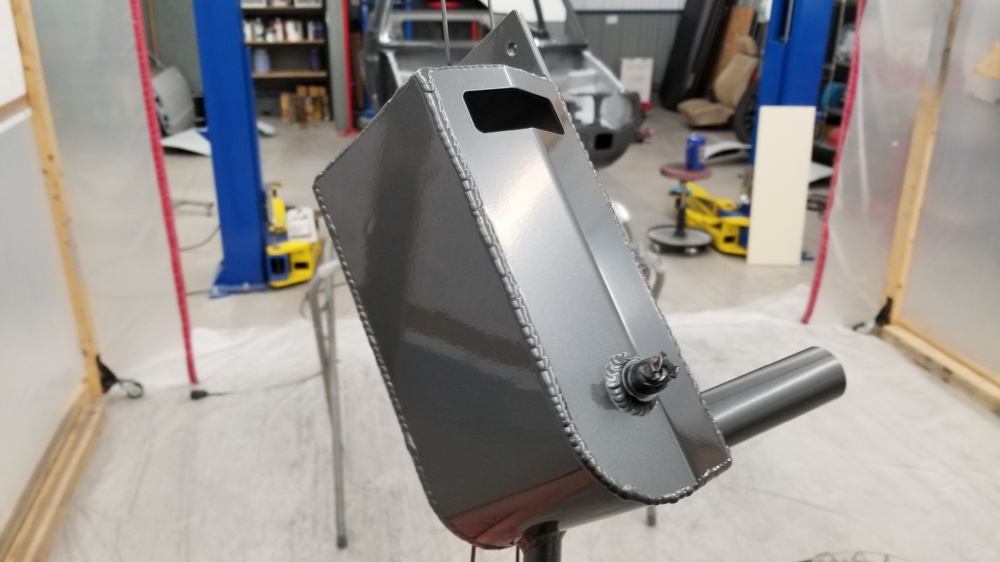
Also painted and assembled the catch can. Used a little anaerobic to hold the oring in place during assembly. It worked ok enough.


Then switched gears and started prepping some random parts for nickel plating.
Rear trunk striker

Blasted and deburred

Trunk hinges smoothed, rounded, and deburred


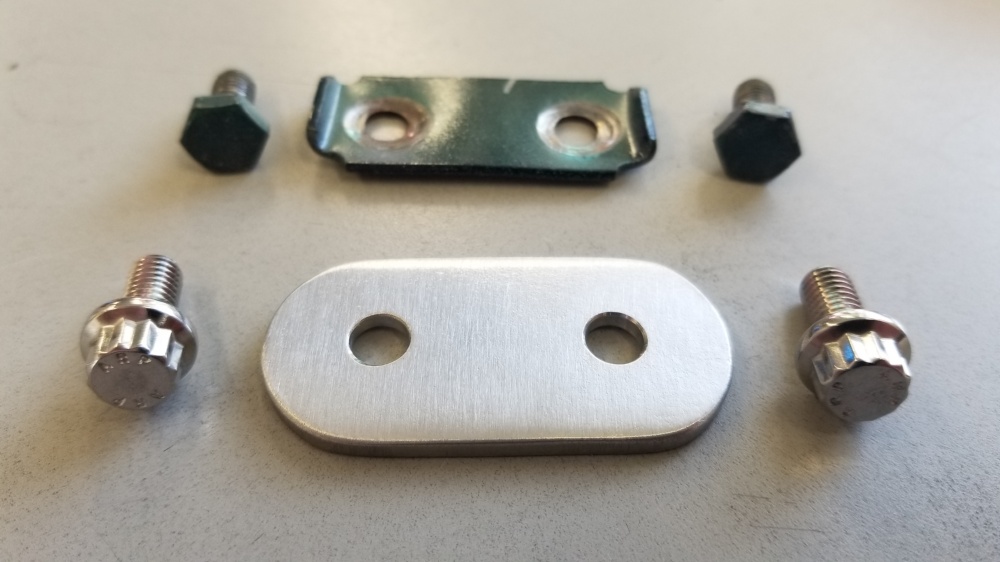
The backing plates for the trunk hinges were crap so I made some new ss ones up. and of course ARP 12pt hardware

Then it was back to the steering and brakes
Cleaned up and painted the steering shaft. The locking nuts cleaned up nicely, just swapped out the bolts for 12pt ARP I happened to have.

And after some bs with the column shaft being collapsed some, got it installed.


Next redid the two front brake lines to mate up with the relocated firewall bulkhead. Made a SS block off plate for the area of the floor I had to open for access.
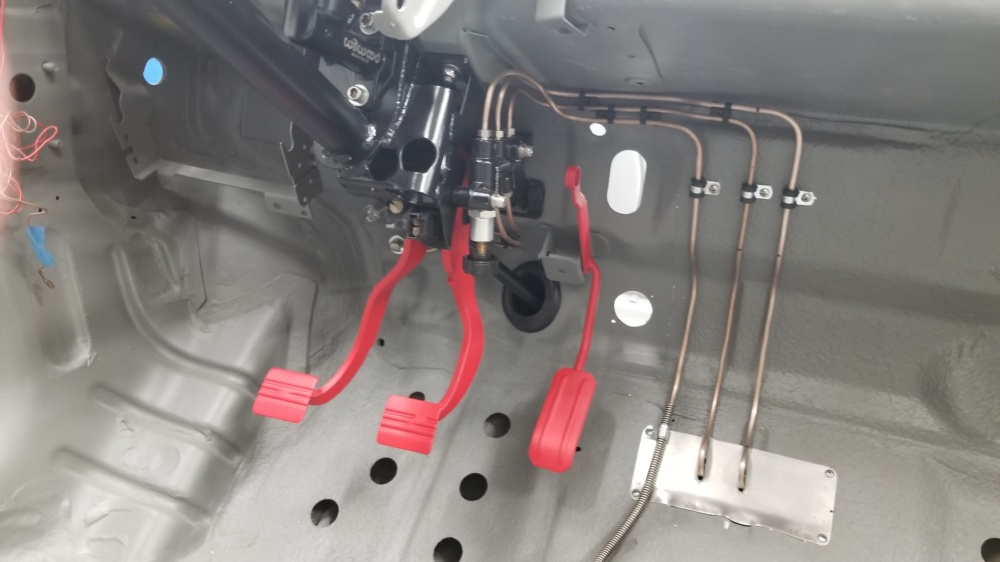
And got the front hard lines mounted to the chassis. Instead of the big U clips I used some 0.010" ss spacers and ss E clips to secure them.


Added a couple of P clips to the hard lines - which more or less wraps up the brakes, other than flex lines.

Installed the repainted booster, master cylinder and flex lines to the firewall,

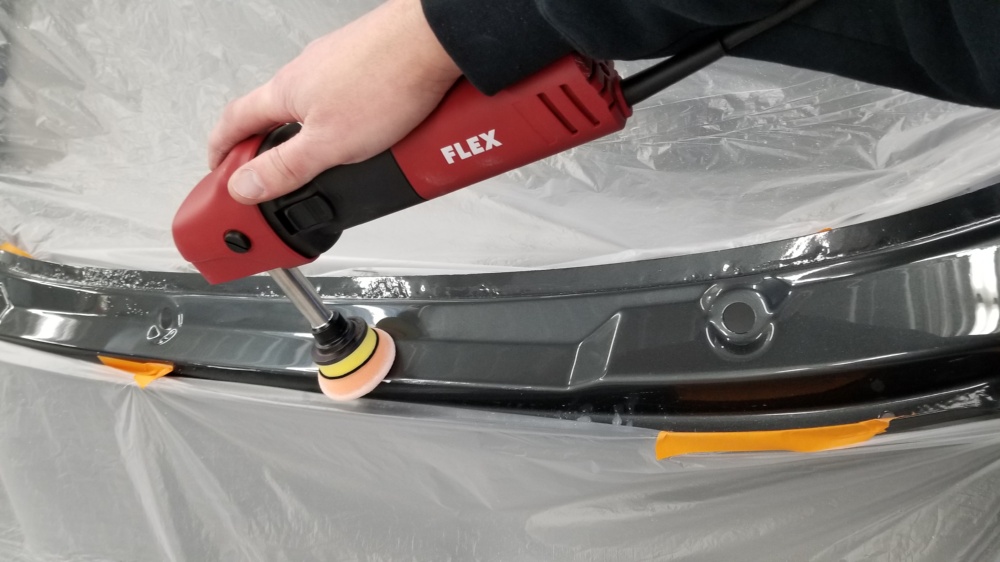
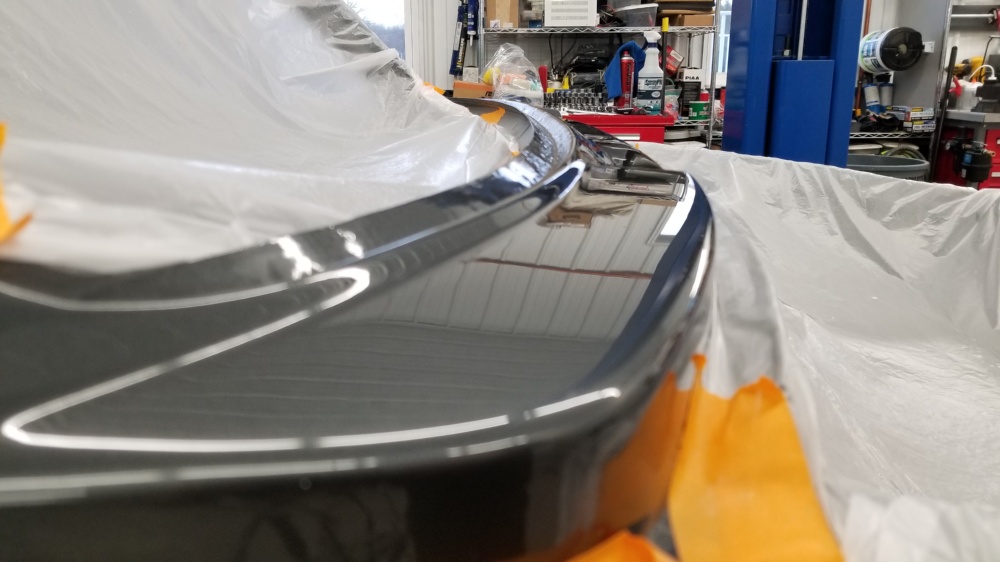
Then back to paint. Sanded and buffed the wiper cowl area. The mini Flex rotary was the MVP of this job.


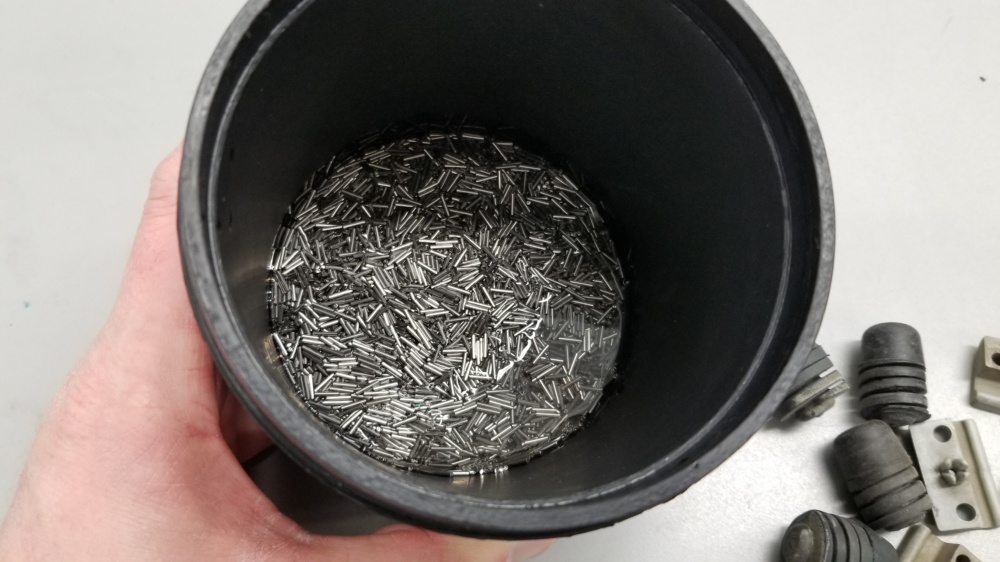
Finally decided to see if I could clean up some of the factory rubber body plugs and clips in my old brass tumbler.
They turned out amazing. I didnt snap a before pic of the plugs, but as you could imagine they were covered in dirt, sand, undercoating etc.

I use some small ss pins in the tumbler with hot water and a drop of dish soap, letting them go an hour or two.

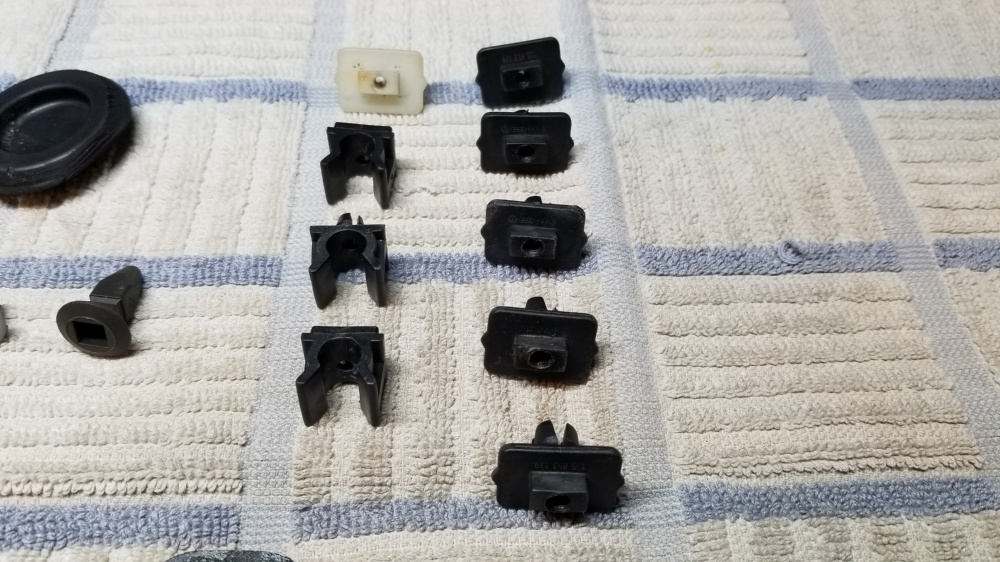
It didnt quite get all the primer overspray off the plastic, but whatever, youll never see them.

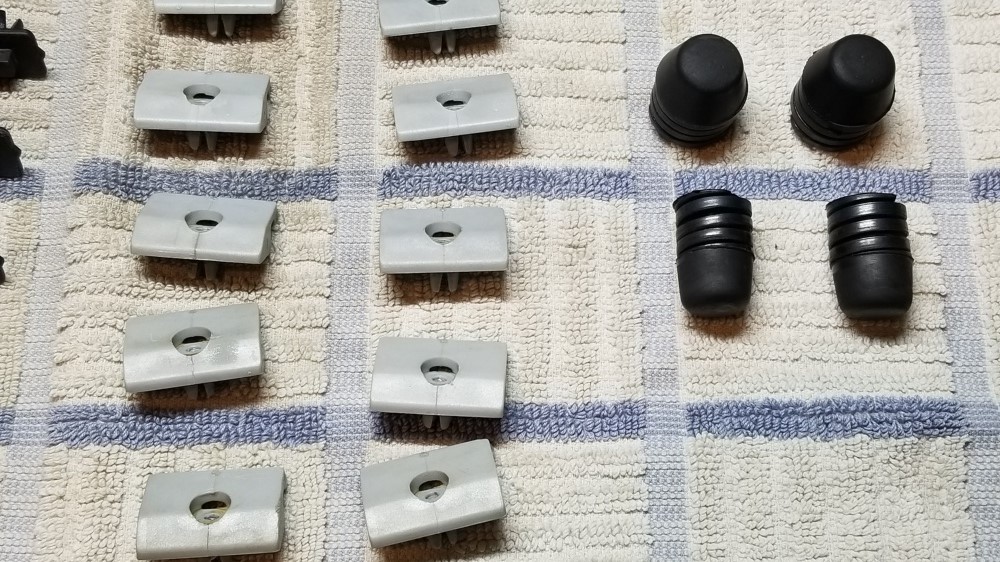
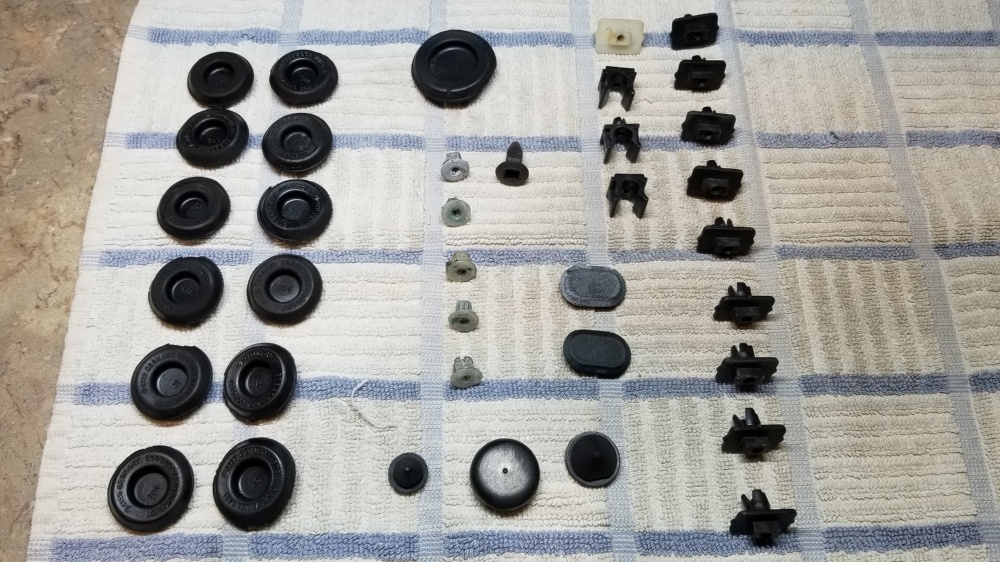
Its hard to believe these arent brand new.

And now we’re back up to date.
Dan
2 Likes
Im super behind on updates. I guess I got tired of uploading pics and making posts.
Ill try to catch up over the next week or so - for posterity’s sake.
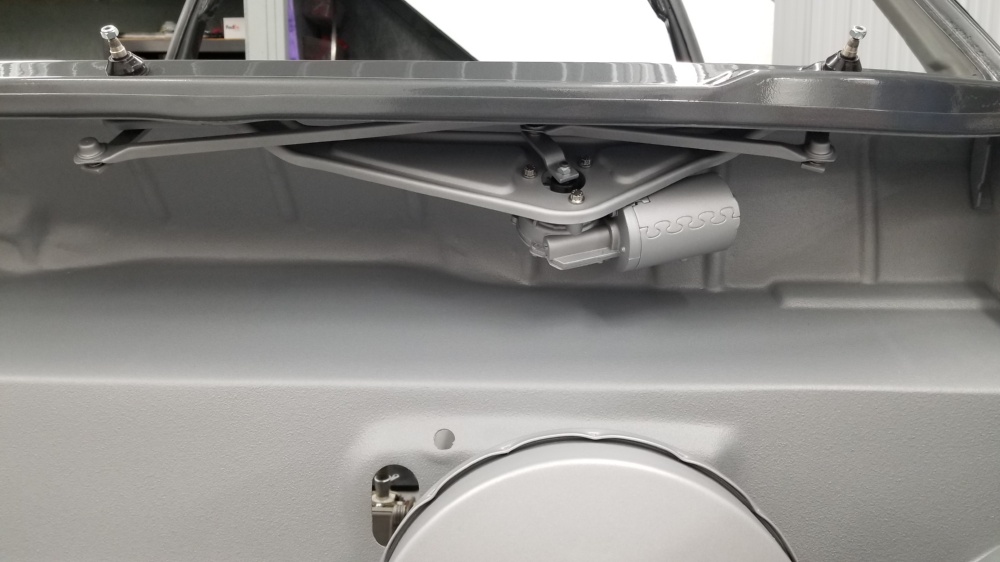
Installed the wiper motor assy.
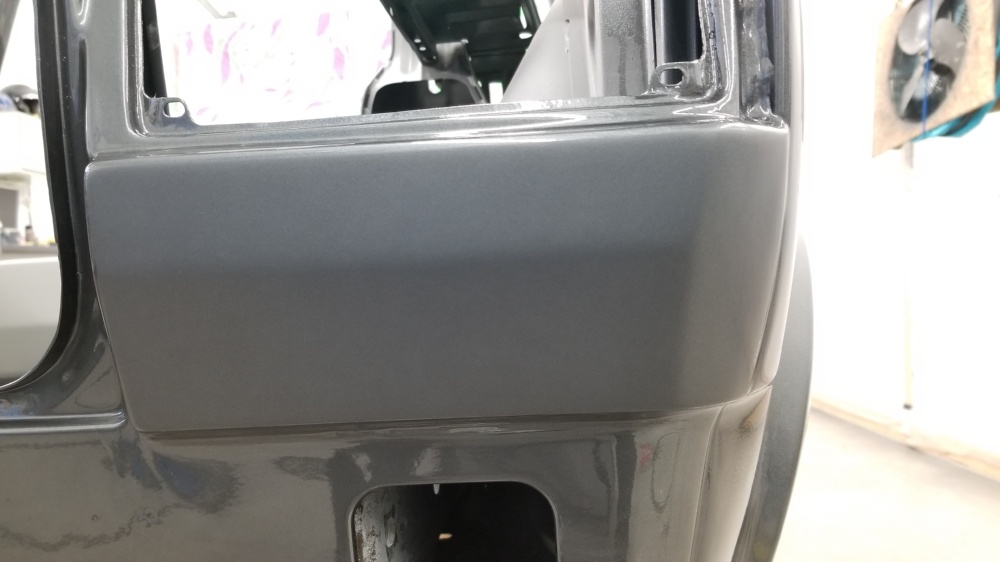
Sanded and buffed the inner B pillars and rear window sill area


And the core support, mainly just a quick buff.


And then the windshield fram in prep for windshield install.


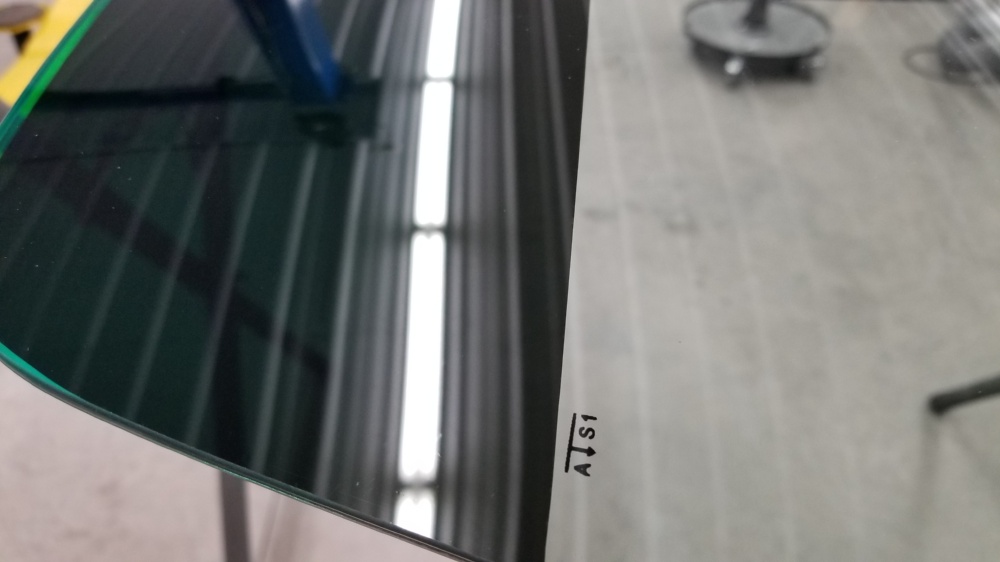
Sourced a new press in windshield FW00332 locally and a good german seal


The green tint was just awful, so I did a nice 8% strip on top. Its cut curved to matcht the windshield.

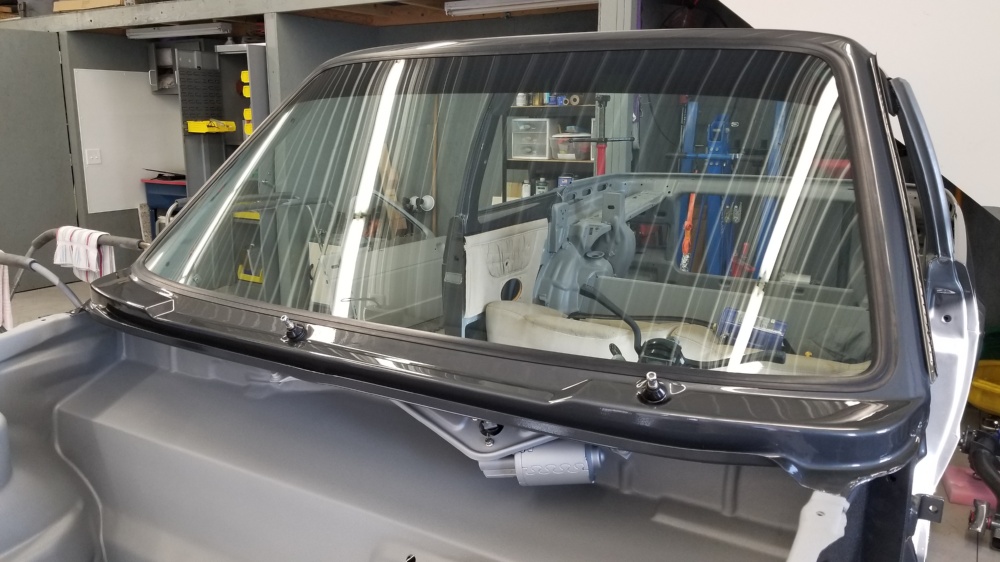
Upon attempting to install it I figured out that the lip was too wide for a press in. I suspect they changed the width of this
late 91 or 92 to have more glue area because of airbags.

So I set off to trim 1/4" almsot out of the lip - always a fun surprise after paint. It took about an hour with an airsaw.


And then the windshield fit perfect.


Next I spent some time sanding and buffing the door jambs and the area under the rear tail lights.


Then it was time to deal with the paint on the rear quarters and the hood. The tiger striping was just not cutting it on both
sides, and the pass side had a small clear sand through.
So back in the booth it went.

Blocked with 800
Masked


Color
And cleared
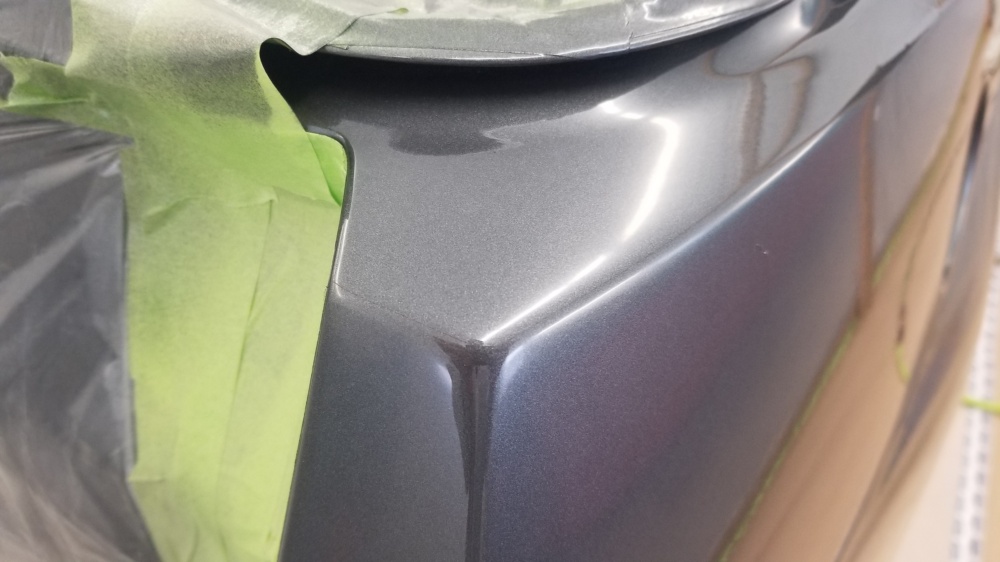

This color looks so different depending on the light

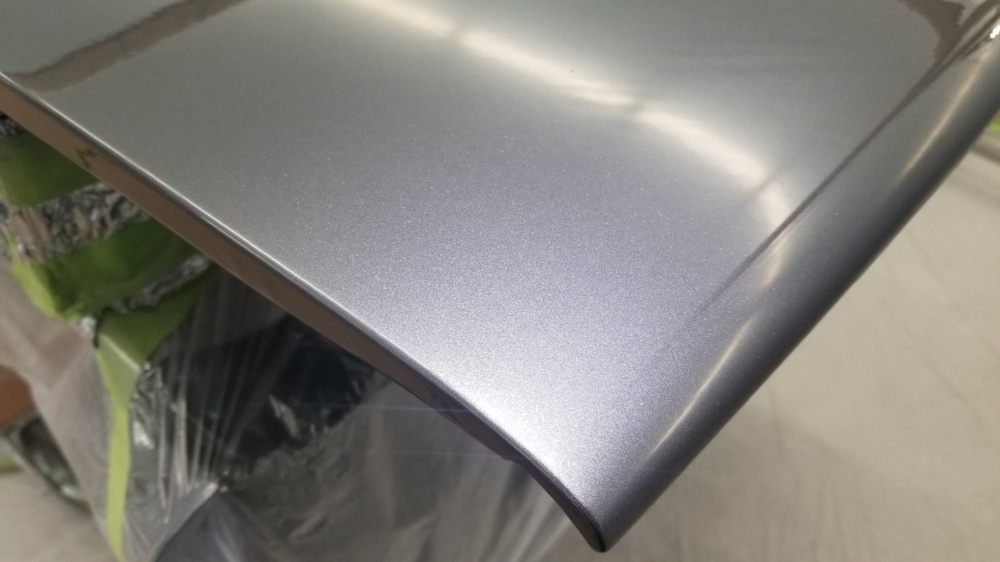
With that the chassis is finally painted and ready for assembly!

Dan
1 Like
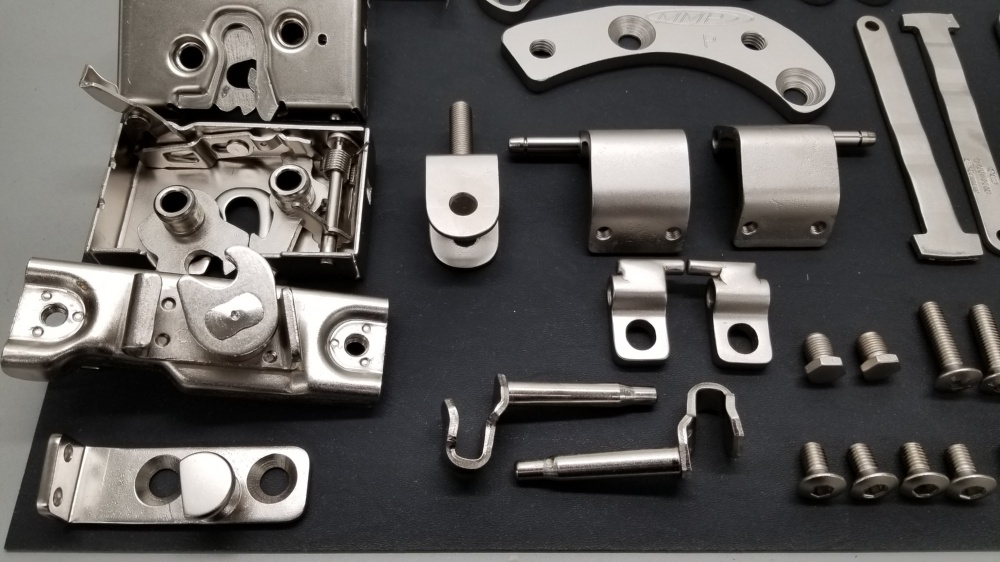
Had a coupld batches of parts electroless nickel plated. Most were bead blasted first where possible for a matte finish.
I absolutely love the finish and it was very affordable. Was around $100 for everything.


Plastic bits of the door latches reinstalled
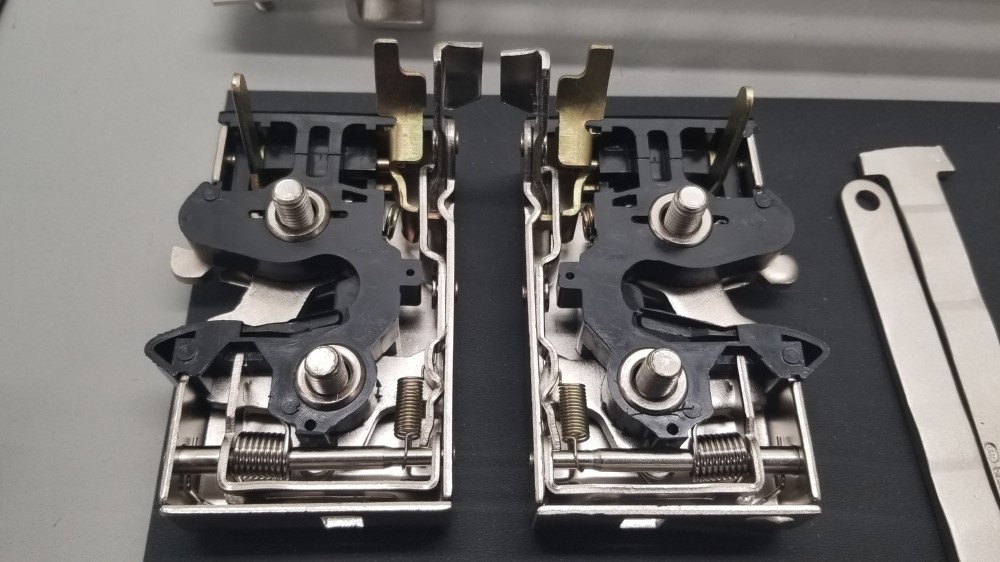
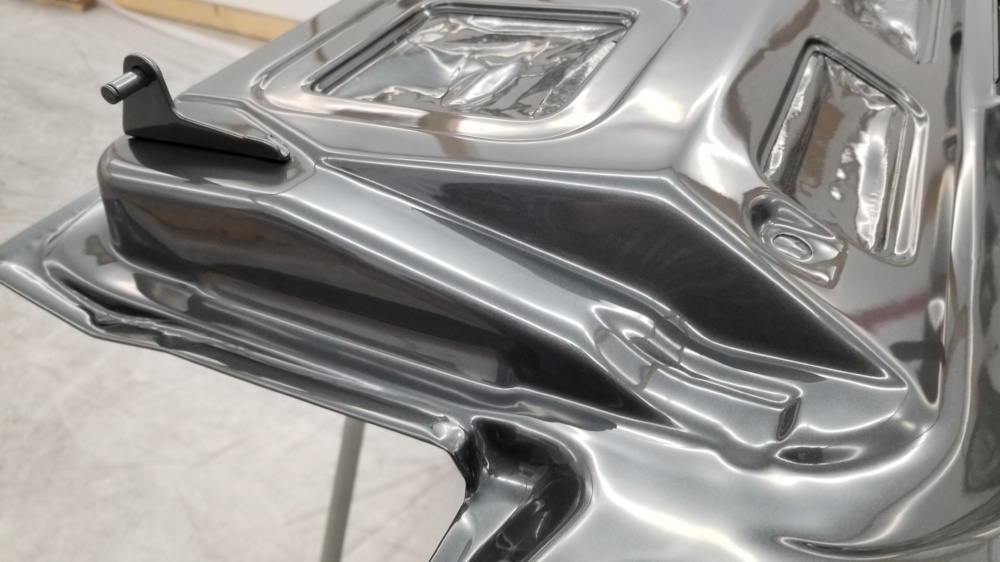
Hood latch assembled. I did black out the release lever so it would blend in to the black grille.


Installed


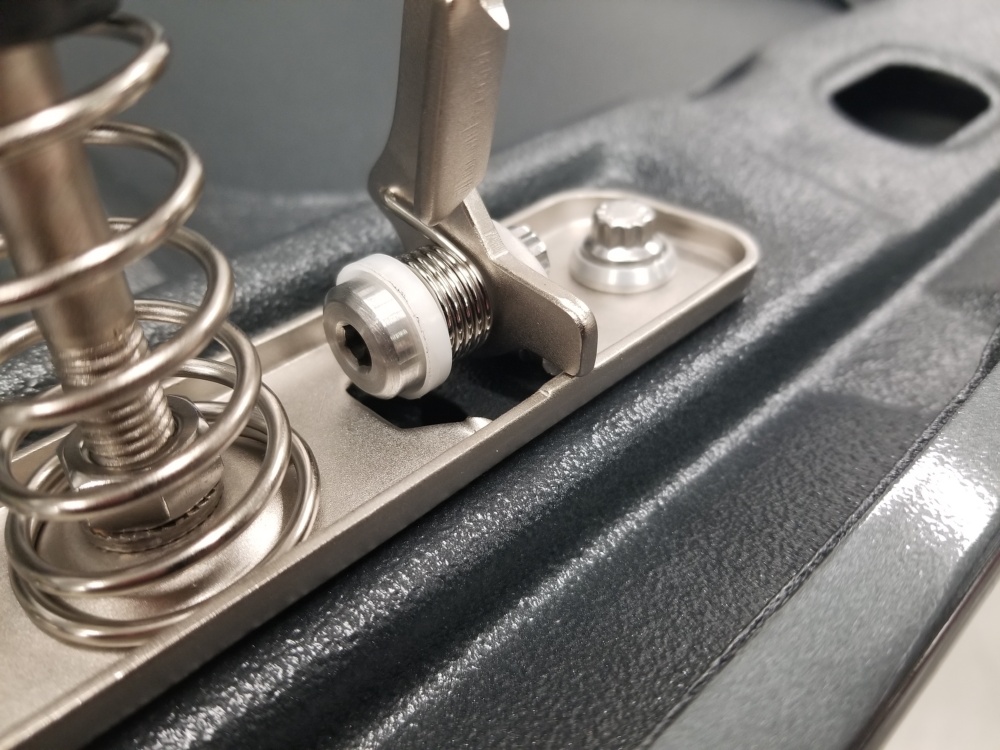
Hood catch assembled and installed. I turned a new spring retainer out of black abs figuring the white one would be dirty the first time the hood closed. Also replaced the riveted pivot point with a female shoulder bolt and mating 12pt ARP.


Trunk latch and actuator installed.


The rest of the plated parts will be sprinkled throughout the rest of the chassis assembly.
Dan
1 Like
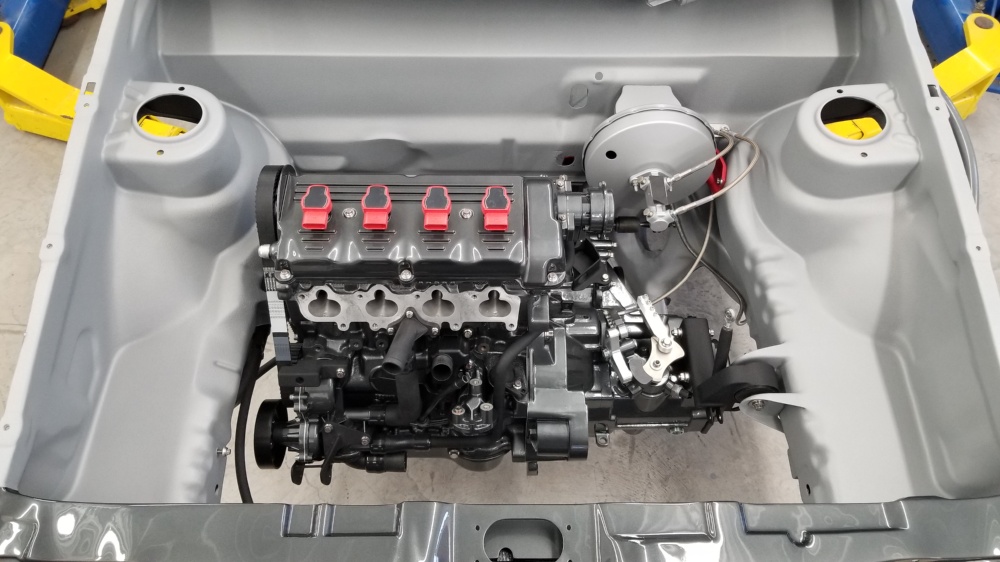
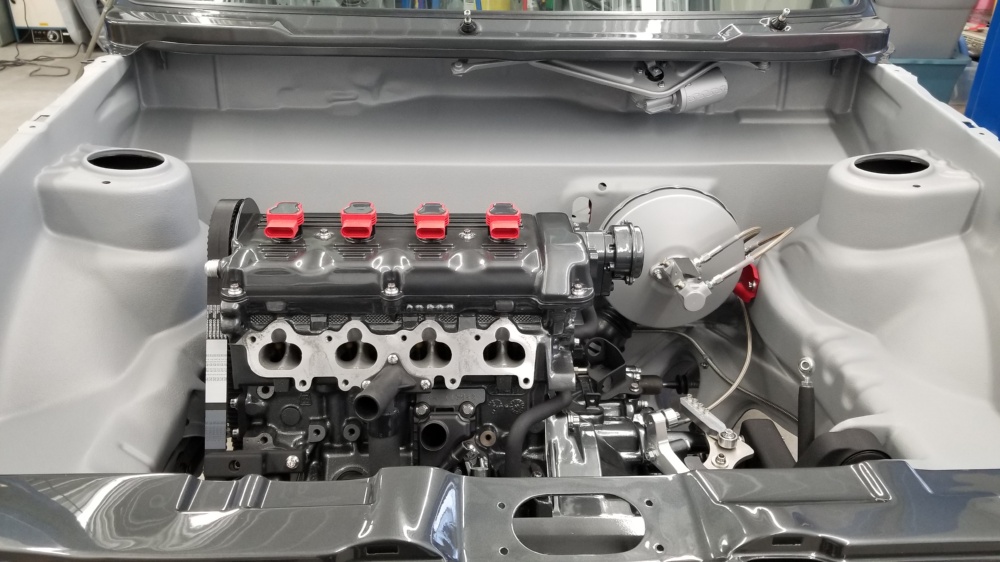
Installed the motor and trans.
It was quite simple using the jig I made previously. Just lower the car over it and bolt it in place.
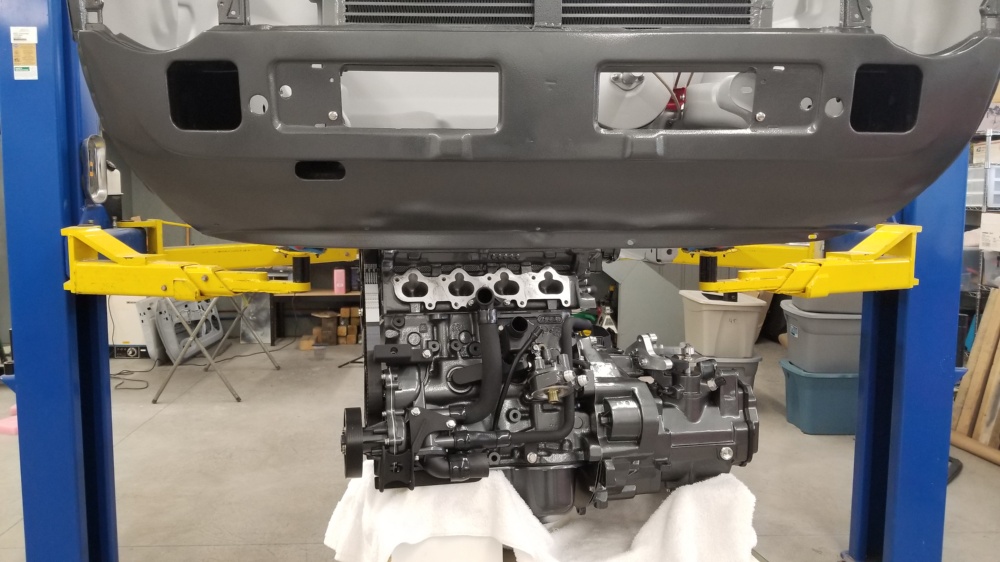


And thats it for this week. More to come.
Dan
4 Likes
This thing is a work of art.
4 Likes
Every time I look at updates in this thread I become envious. I would love to do this with my Camaro that’s been in storage for nearly a decade but I definitely don’t have all of the skill/tools/facilities to do so.
1 Like
Yup. I know this build. Talked to him a couple times, interesting dude.
Dan
I can’t believe he’d spend that kind of time/money then turn around and sell it for a massive loss.
Yea, I didnt realize he sold it. Dude clearly has more money than he knows what to do with.
Assembled the surge tank that I made using the Integrated Engineering DIY mounting plate.
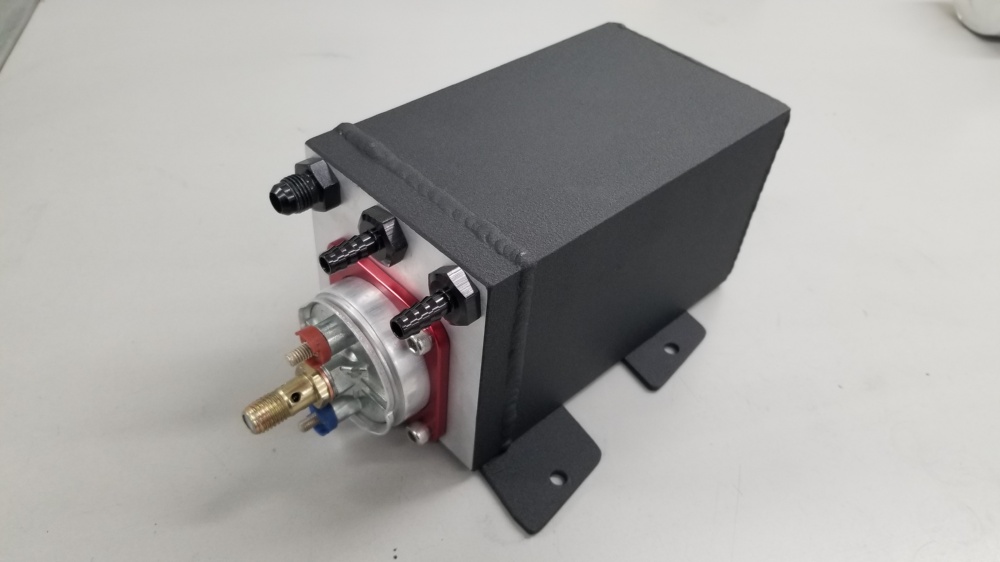
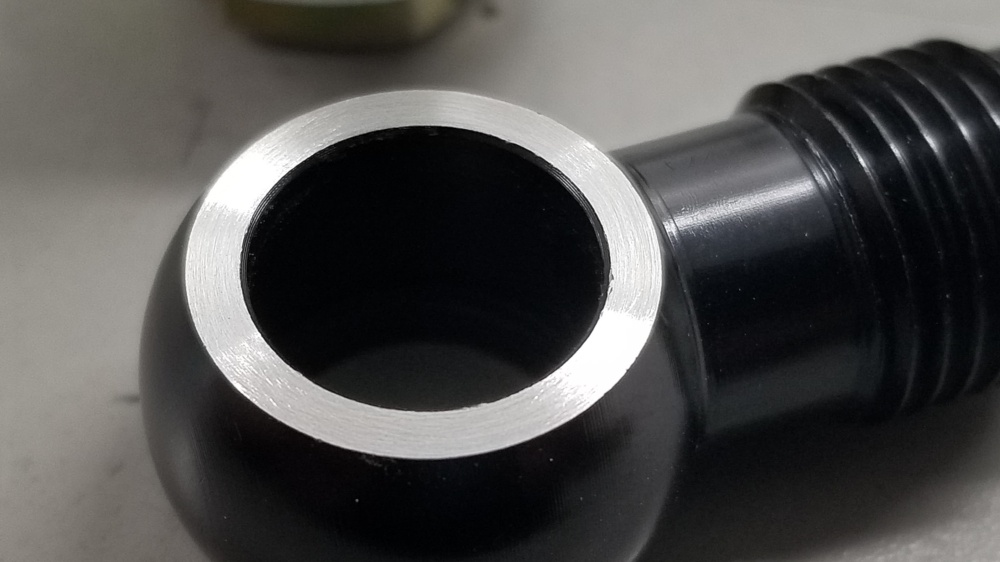
Im trying to eliminate leaks so I “decked” the fuel pump outlet banjo.

And I will be using SECO seals on most of the joints, especially those that are hard to access once assembled.

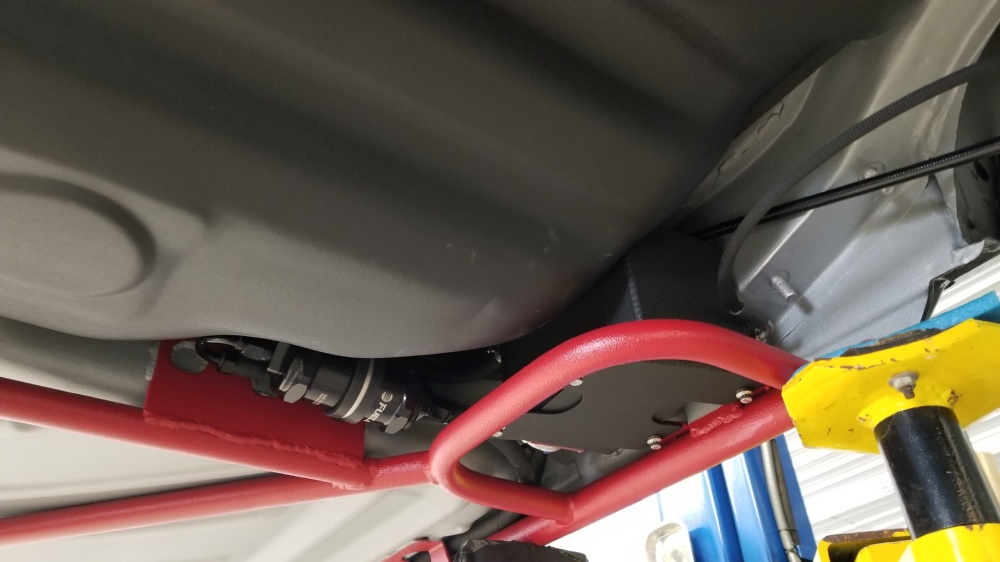
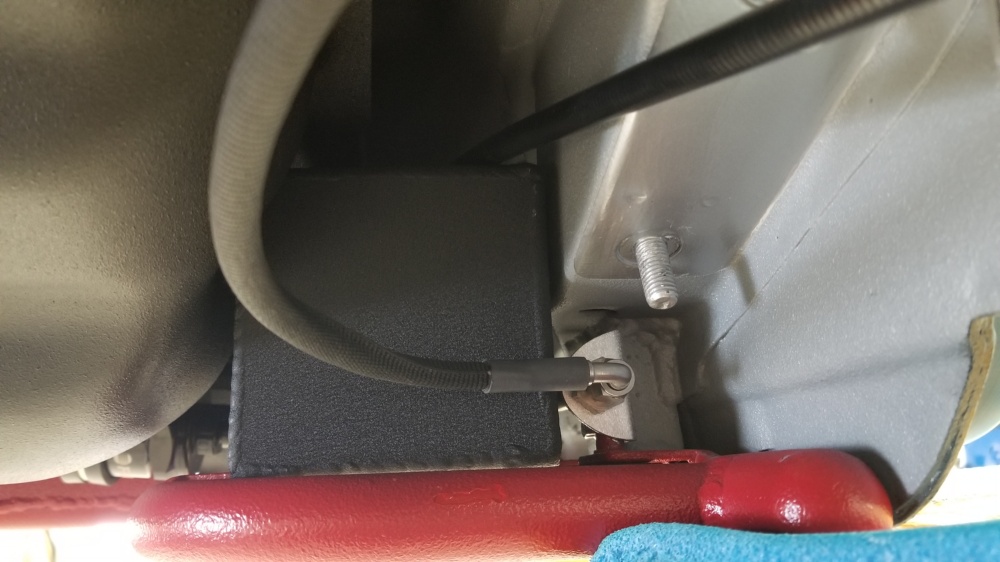
Hoses connected. The two smaller to to the factory tank.

And installed along with the fuel filter


Then it was time for the rear suspension and brakes.
Again, SECO seals.

For the rear flex brake lines I was unable to source DOT ones that fit correctly so I opted for pre-assembled lines which I
installed abrasion resistant heat shrink over, and then sealed the ends with adhesive lined shrink.These feed through the beam so
I wanted to be sure they would be protected.


Beam mounted with ARP hardware, and brake lines fed through beam. And ebrake cables routed.
Swaybar is Autotech 10-525-1028GK


Stub axle spacers. These were made from an aluminum disc sourced from McMaster p/n 1610T28

Next in order to use the ARP wheel studs the rotors needed to be modified.


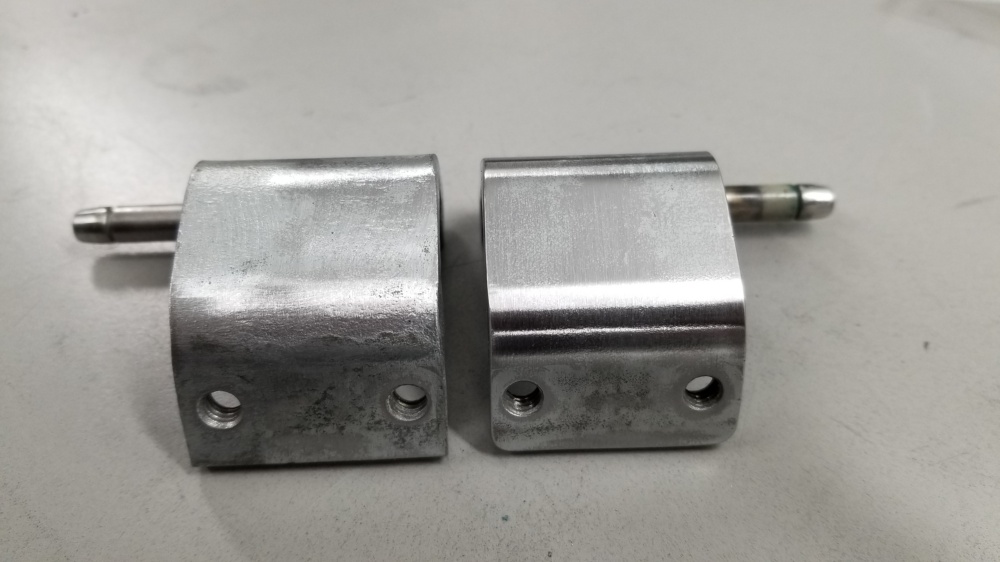
Powder coated hangers with electroless nickel plated slide pins.
Torque adapater made torquing some of the bolts possible. Ive found these pretty handy in general when using 12pt hardware. Be
sure to use them at 90 degrees so you dont have to adjust the torque value.
A few specs on the rear brakes:
Scirocco stub axles
MK4 aluminum calipers
Stoptech rotors p/n 127.33022R/L
Stoptech street pads p/n 308.03400
Rear caliper springs p/ns 7H0615295A 7H0615296
Ebrake cable clipcs p/n 1H0609747
Ebrake cables - 1800mm - p/n 191609721A
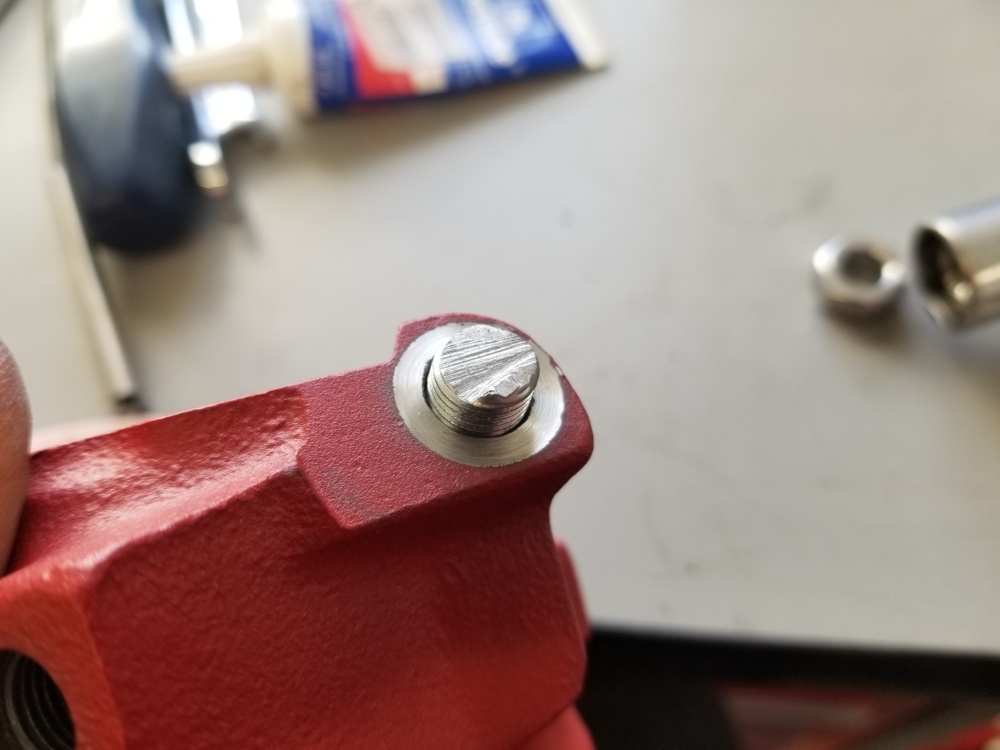
Before moutning the calipers I needed to remove some powder coating for the banjo washers. I came up with this little tool made out of random parts. It worked really well.


The banjo had to be slightly modified to fit in the recess of the caliper. So I had them nickel plated after. The banjo bolts are stainless as well as the bleed screws.

And before everyones loses their shit. I realize the bleeders are on the bottom and will need to flip the caliper to bleed them. Yes, it is possible to flip them so relax everyone.


And that pretty much wraps up the rear suspension and brakes. On to the front !
Dan
3 Likes
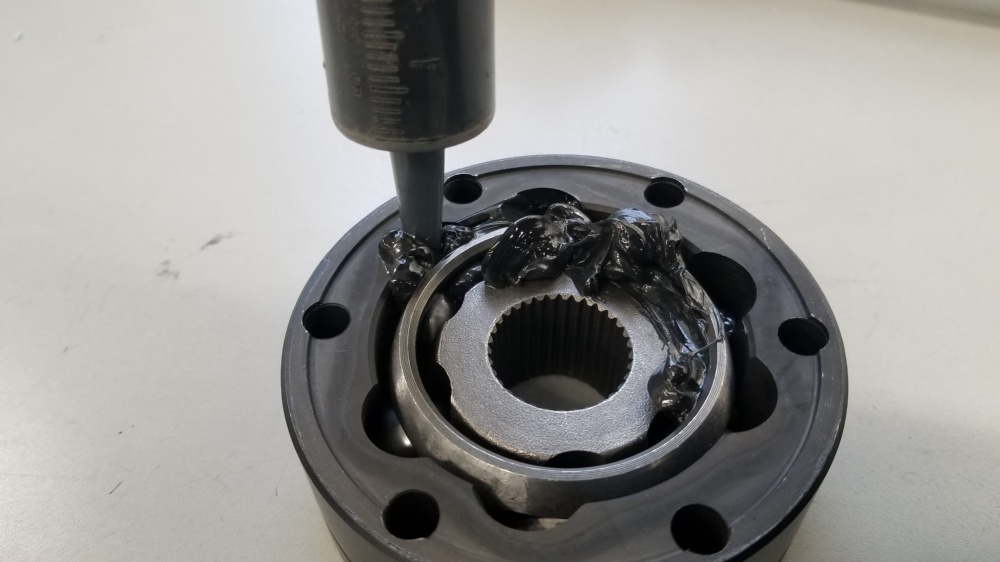
Up next was rebuilding the axles. The outer joints were in good shape, so I decided to simply reuse them and just replace the
boots. The inners however were in bad shape so I sourced some new GKN joints and boots.
Also sanded, bead blasted, primed and painted the shafts and joints. Also sourced stainless clamps and new C clips
Im skipping a bunch of steps here because I think everyone knows what a super old diry axle looks like.
Everything prepped and ready for assembly.

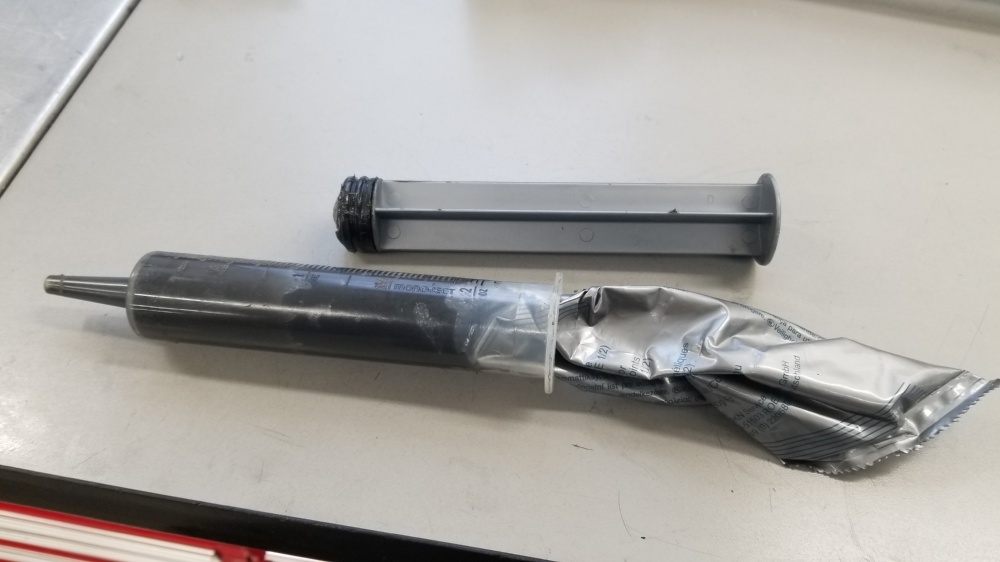
I came up with a way to help pack the joints with grease. It worked pretty well.
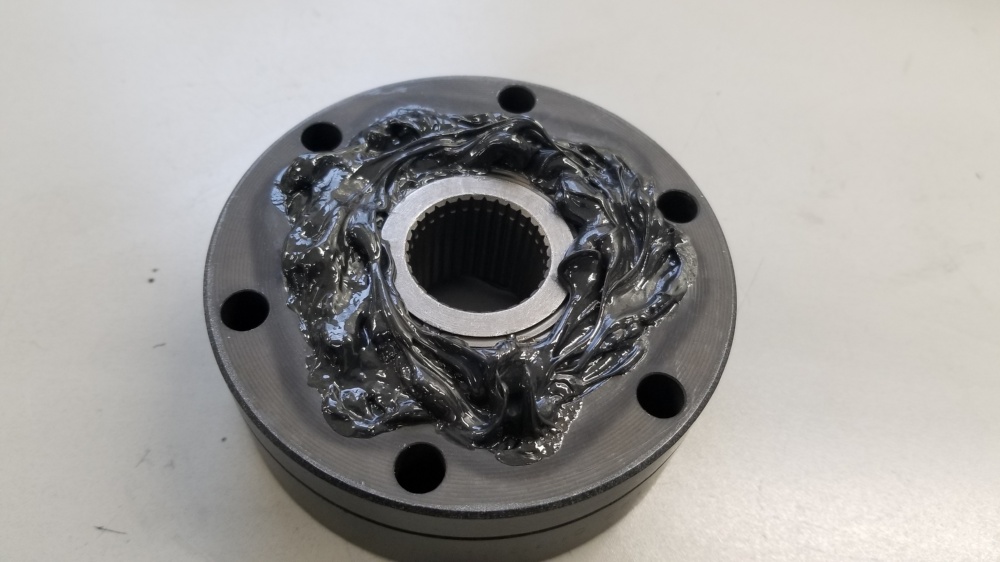
Another thing I did was measure the OD of the inner joint C clip before installing the joint to ensure it was fully seated.

After pressing it on I was able to verify the same measurement, ensuring full engagement.

Assembled.


Installed with new OEM hardware that was nicked plated.

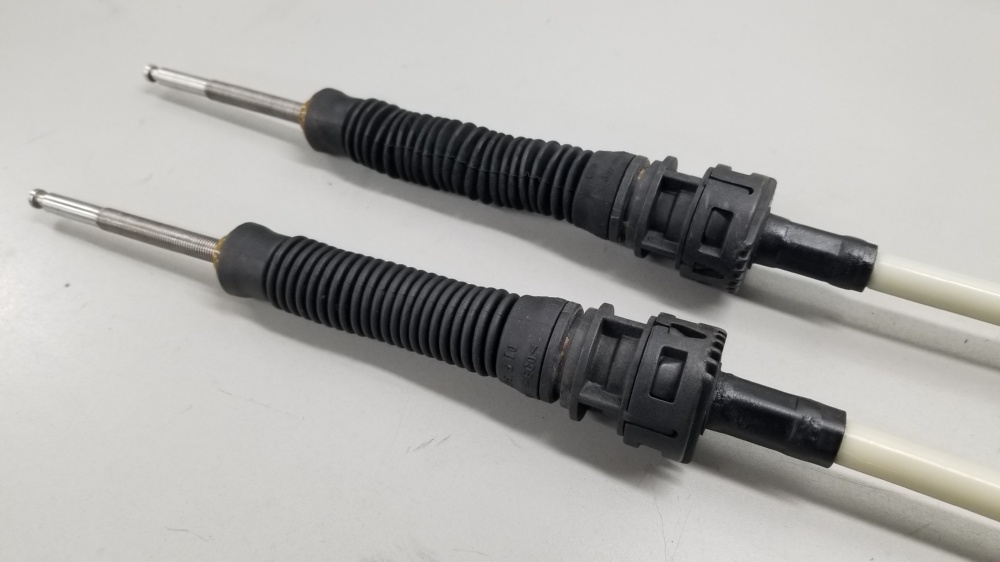
Next, it was the shifter’s turn.
The cables I sourced were in good working order, just dirty. So I cleaned up the boots with a little APC and a brush. And painted
the metal collars.


The modified 02J shifter box in place.

Cables routed to the Diesel Geek shifter.
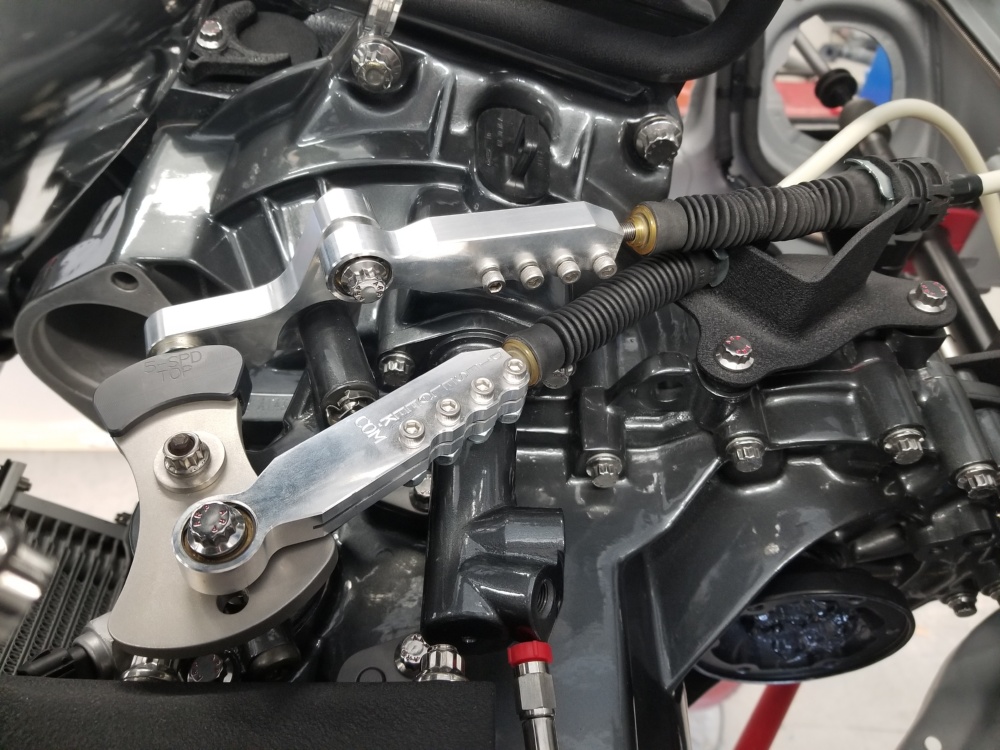


And the clutch slave cylinder line with stainless banjo and bleeder fittings installed.


Dan
4 Likes
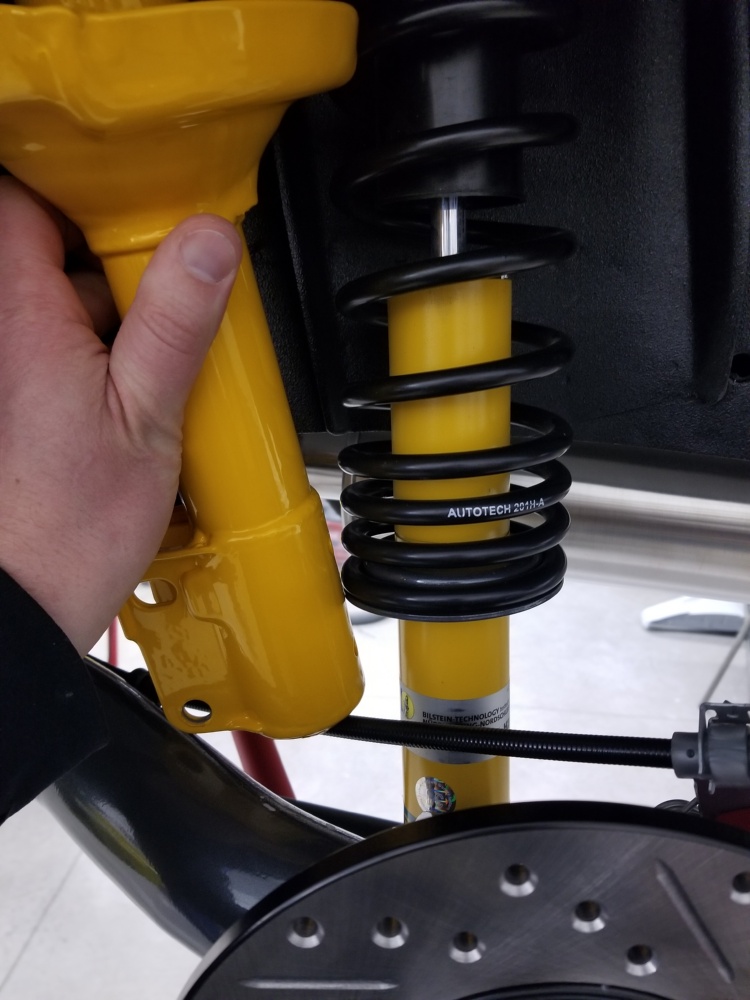
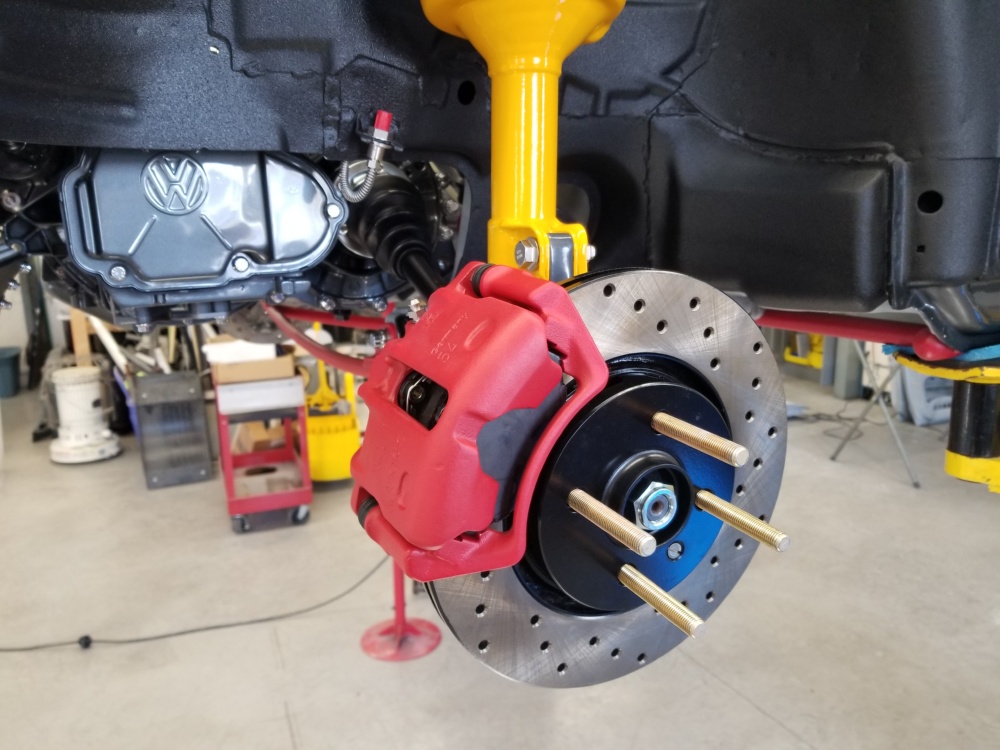
Front suspension and brakes time.
Stock front swaybar
Stitch welded control arms
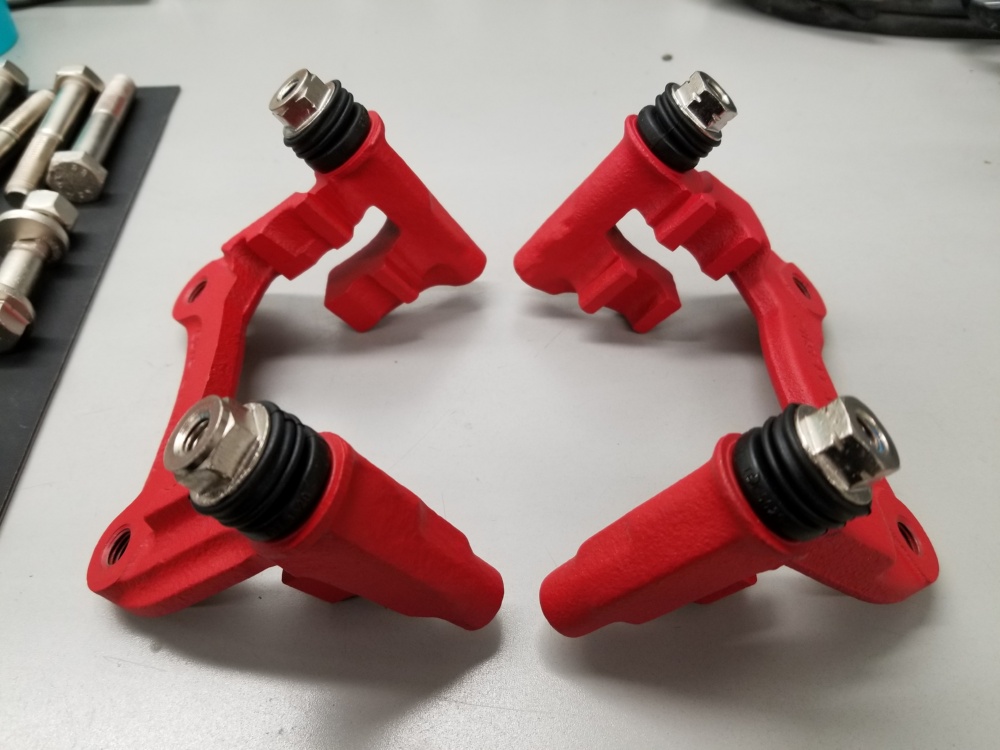
MMP Corrado G60 11" big brake brackets - nickel plated
Powder coated calipers (Lucas 54) and hangers
Stainless banjo hardware and bleeders - still need hoses
Stoptech rotors and pads
Bilstein strut inserts F4-P30-0137-H1
Autotech lowering springs
I made the lower brace - its documented way back here somewhere
All mounting hardware is stainless ARP with stainless nordlock washers with the exception of the strut cam bolts which were nickel plated.
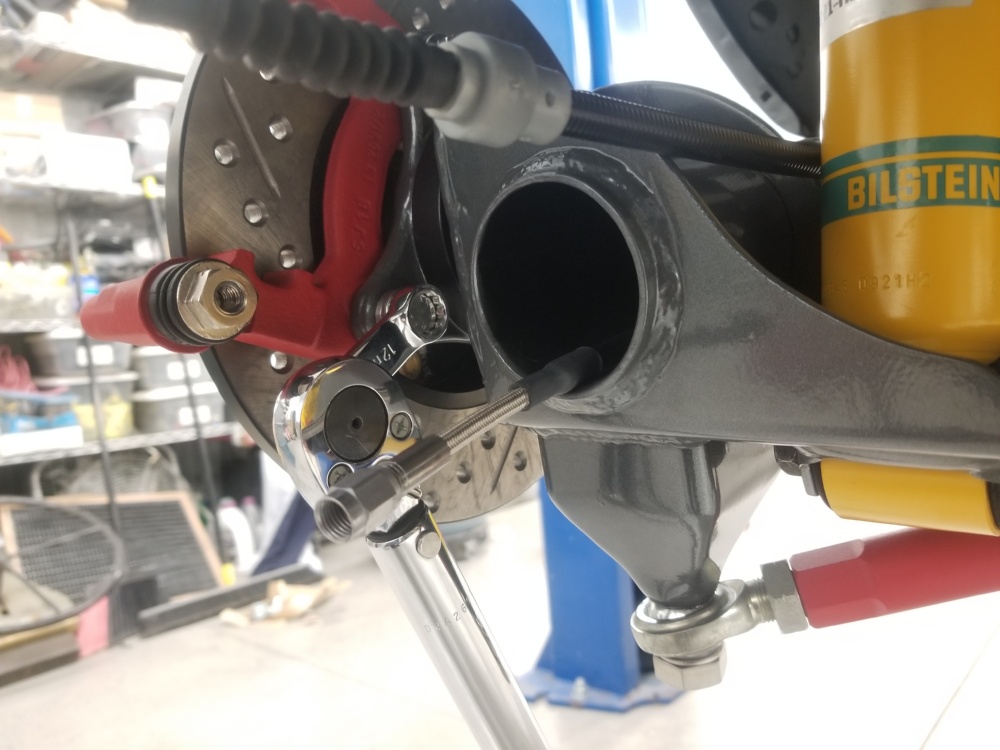
Arms and swaybar etc in place

The strut tubes were somehow in bad shape so I decided to have them re-powder coated. Figured why not remove the hose tabs while Im at it. I have something else planned for them

The color is a decent match to the Bilstein yellow, just too glossy, but whatever.
Had to remove the powder from the knuckle for a better fit. Just put some black paint over it.

Of course ARP wheel studs pn 100-7713. I went longer thinking i would run a spacer, but now IM not sure, we shall see.
MMP brackets and hardware nickel plated.

ARP everything.

Caliper brackets with new nickel plated hardware.

Again the calipers needed powder removed for the banjo fittings. This time I drilled out a M12 nut to fit over a piece of threded rod and simply applied the paper to it and spun with the drill. This was not possible on the rear due to the recess in the caliper.

Worked well
And all assembled with pads etc. Just need to measure for the front hoses and get them on order.

Stainless banjo adapter and bleeer.


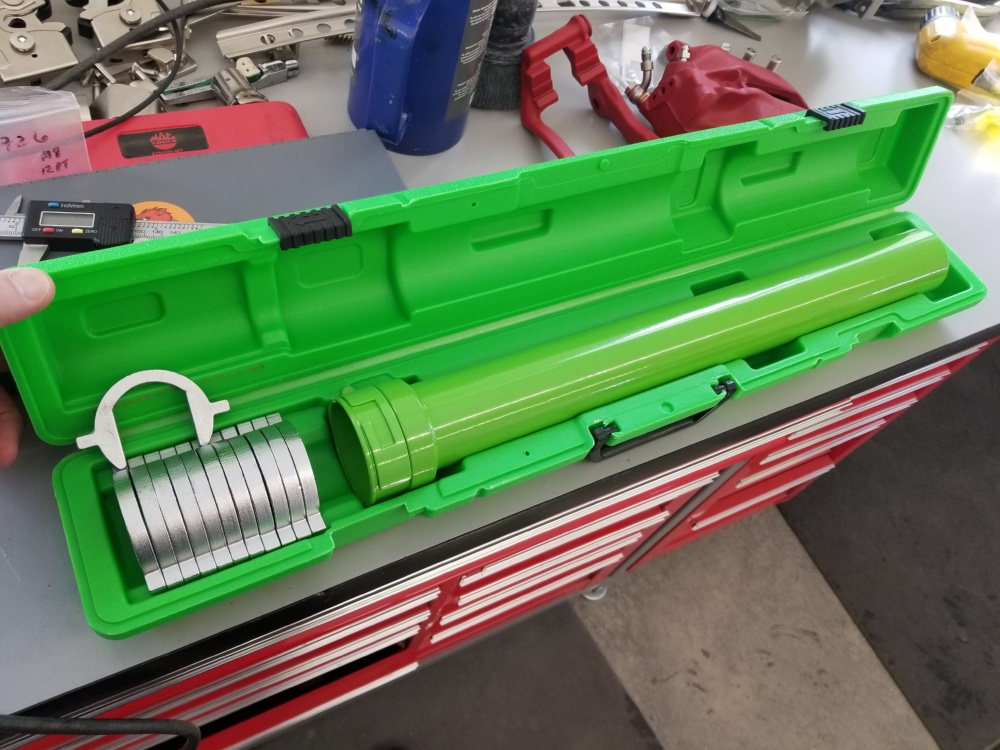
Last bit was the tie rods and boots.
Picked up one of these tie rod tools finally.


New boots and ss clamps of course.

Dan
3 Likes
And now for motor / engine bay assembly.
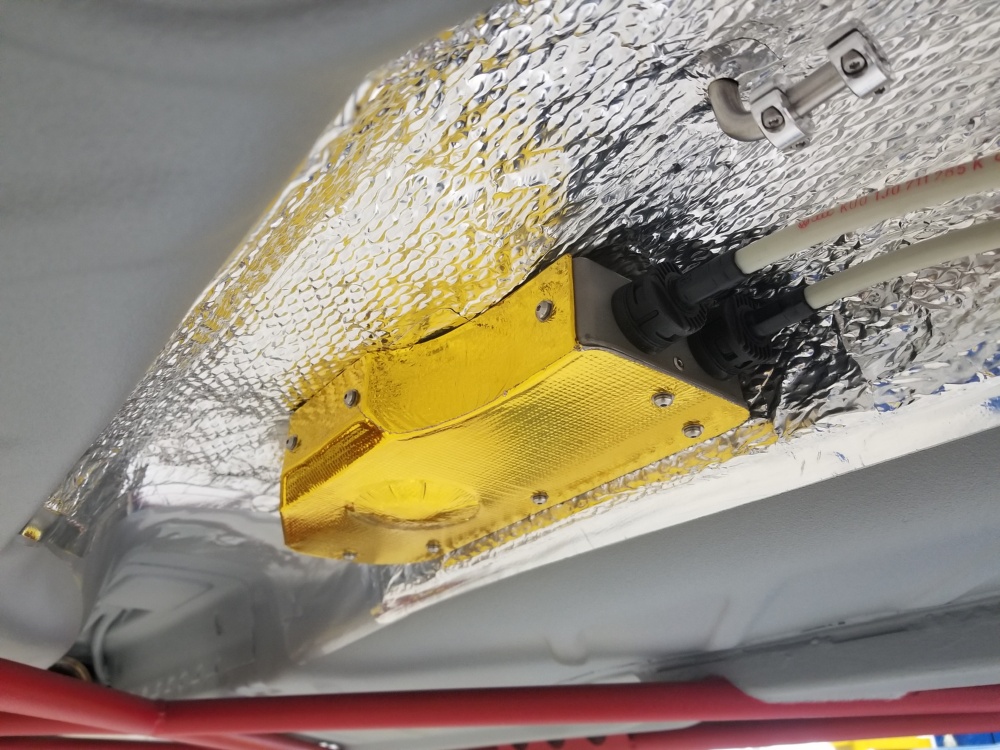
First I wanted to make a heat shield for the fuel lines as they downpipe runs right next to them.
Used some clear plastic to trace out the basic shape.

Transferred to steel

Cut out and then tipped the edges on my HF bead roller.


Then spend a bunch of time shrinking and stretchin the edges, plus a ton of hand hammering to get the shape just right. And
finally d/a sanded smooth.

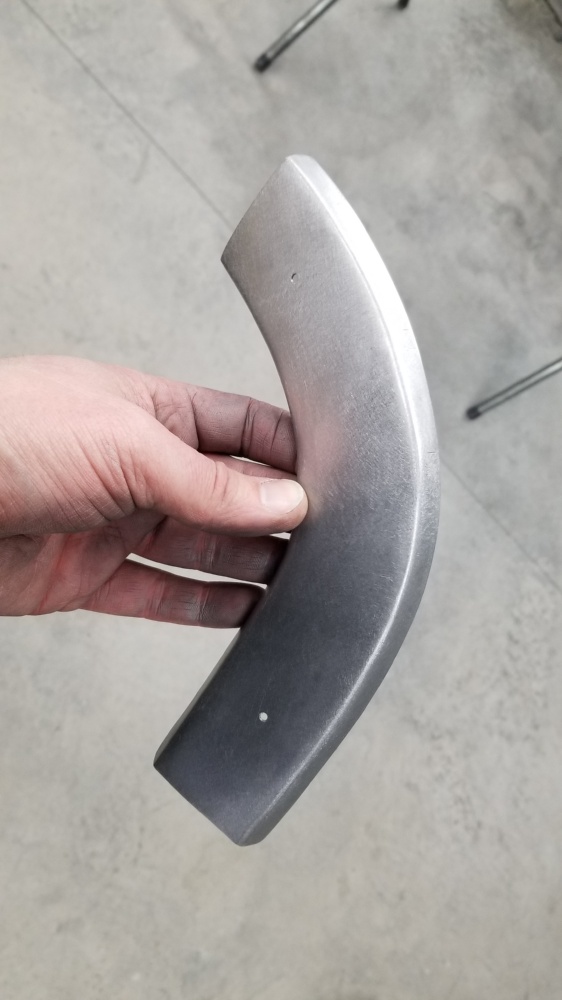
Perfect shape
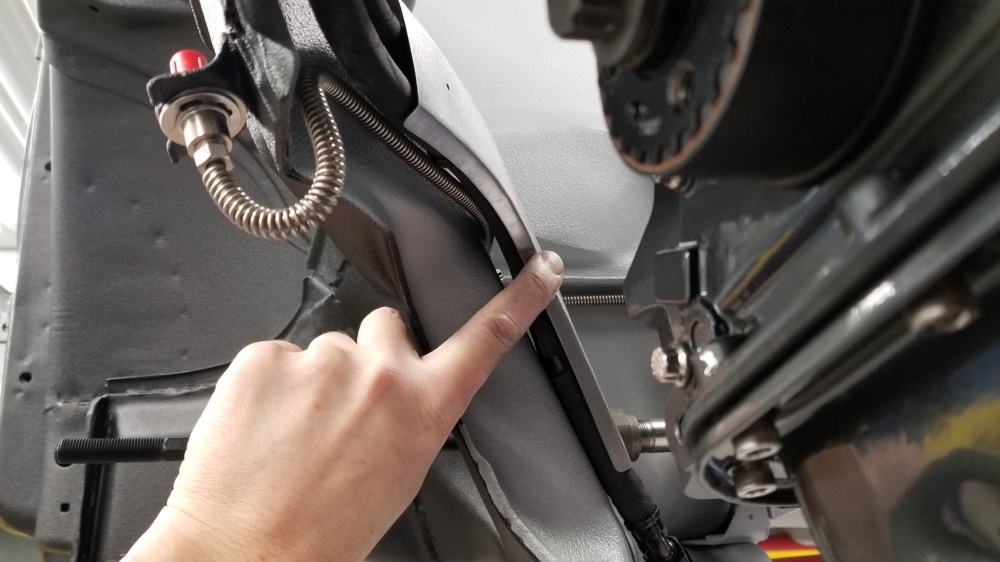
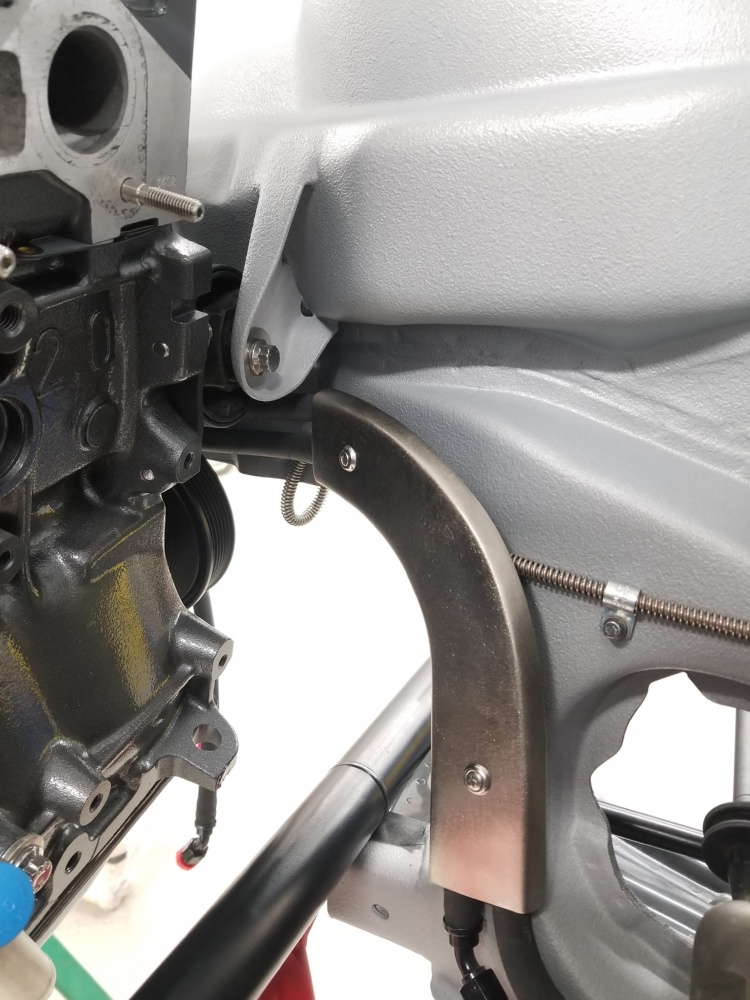
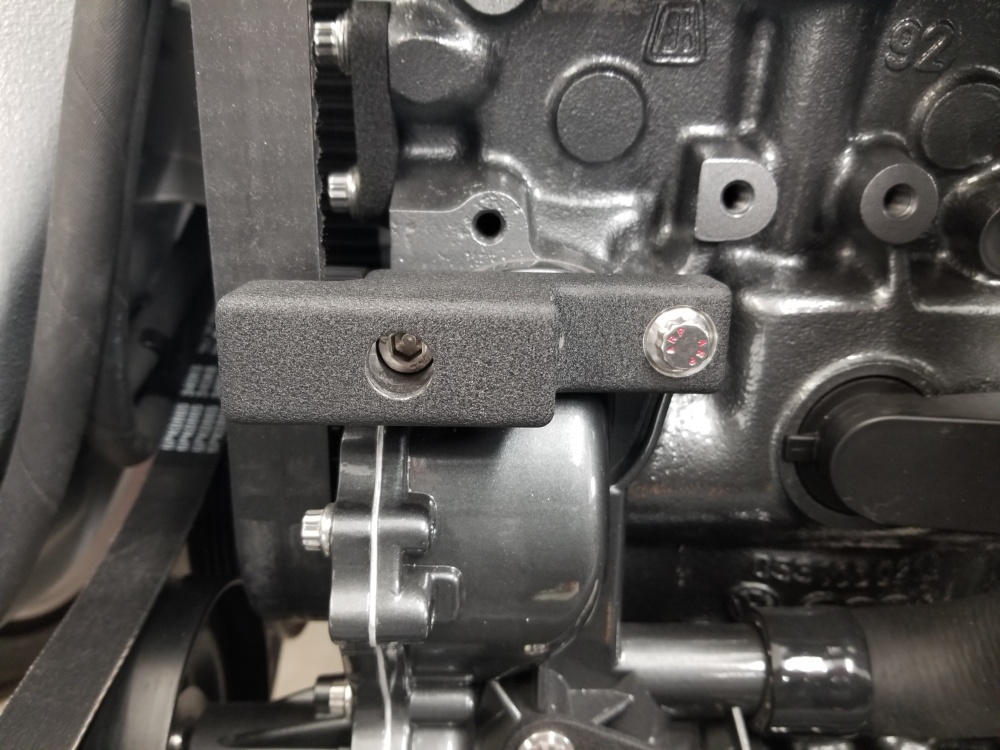
It was then electroless nickel plated. It installs at the same points as the fuel line clips and is spaced out. I may wrap it in
gold foil still.


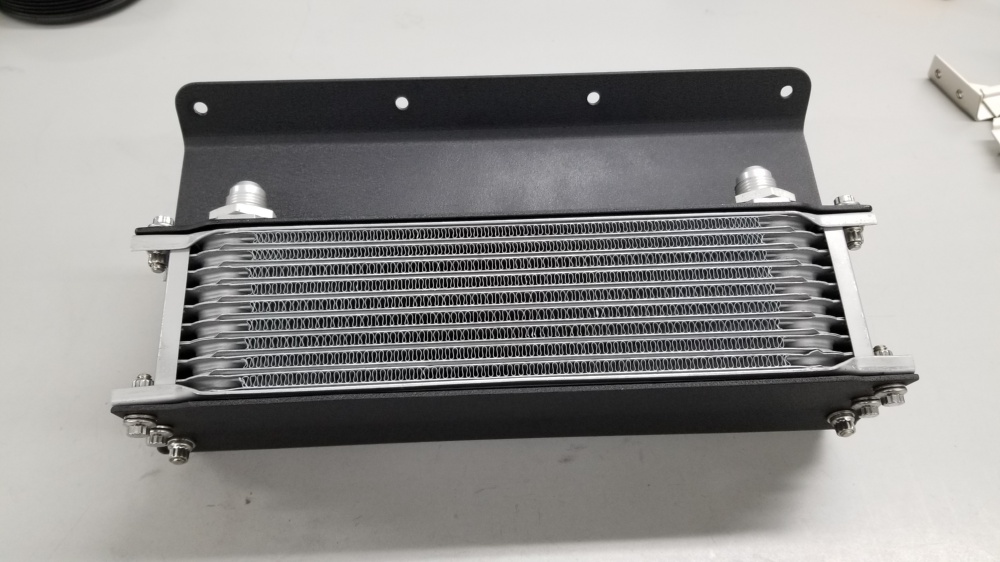
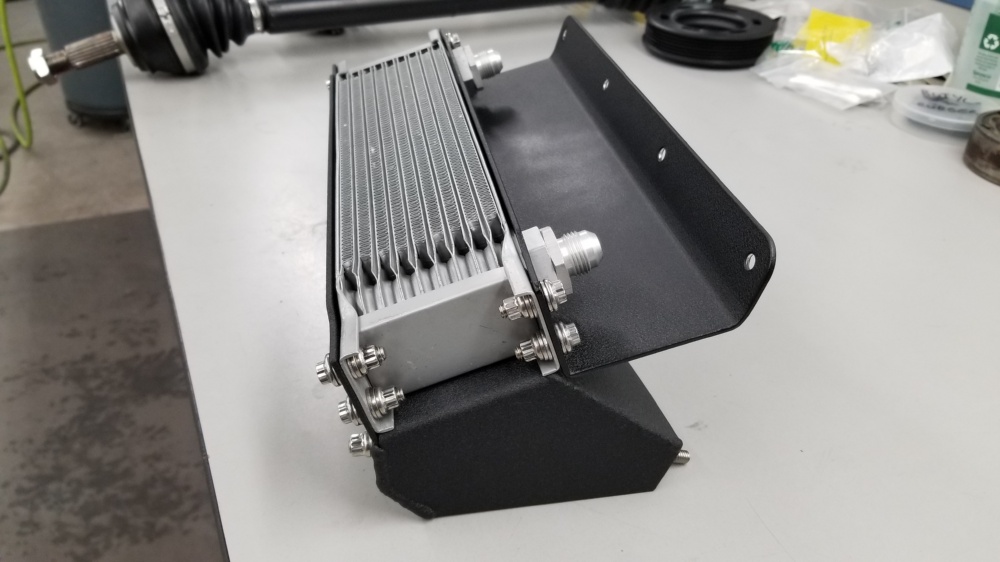
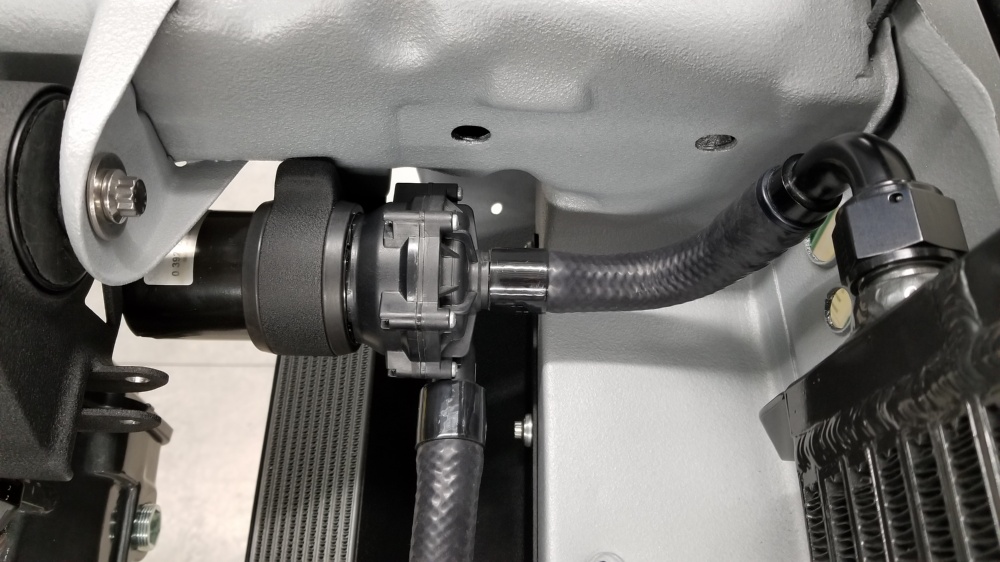
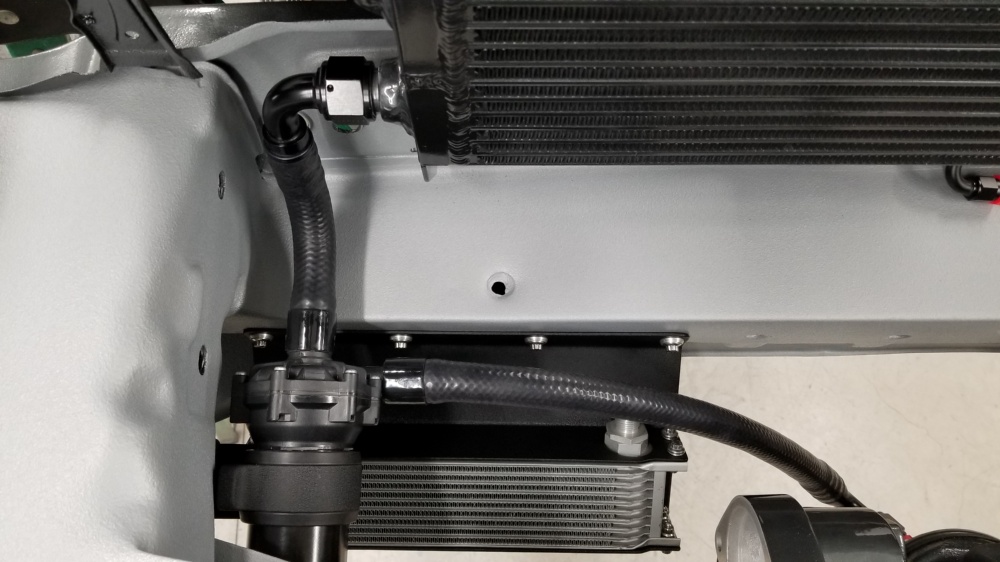
Up next was the mounting of the oil cooler.
Assembled.
The lower mount / rock guard is made from stainless rod and stainless mesh (was “fun” welding each leg of the screen to the fram)
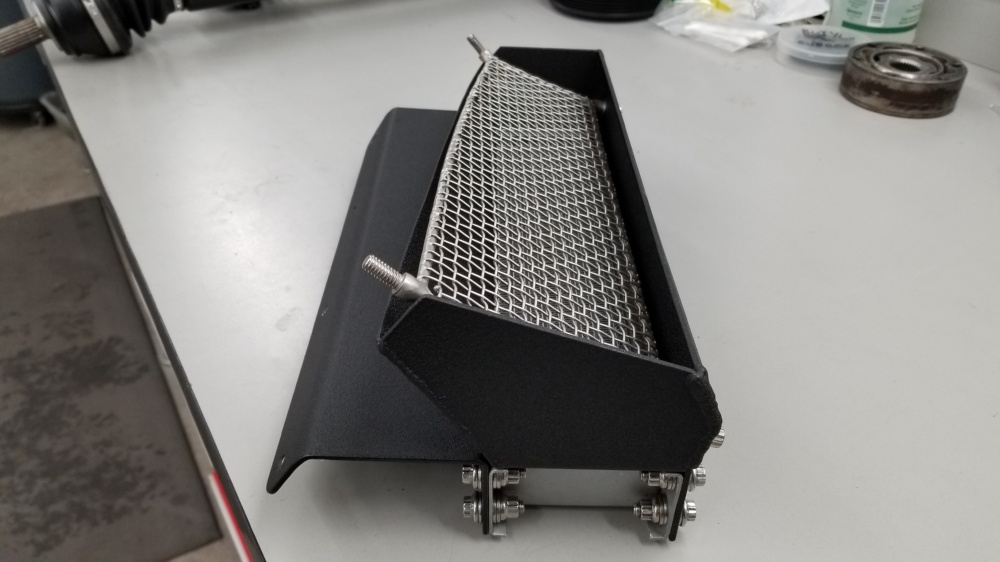

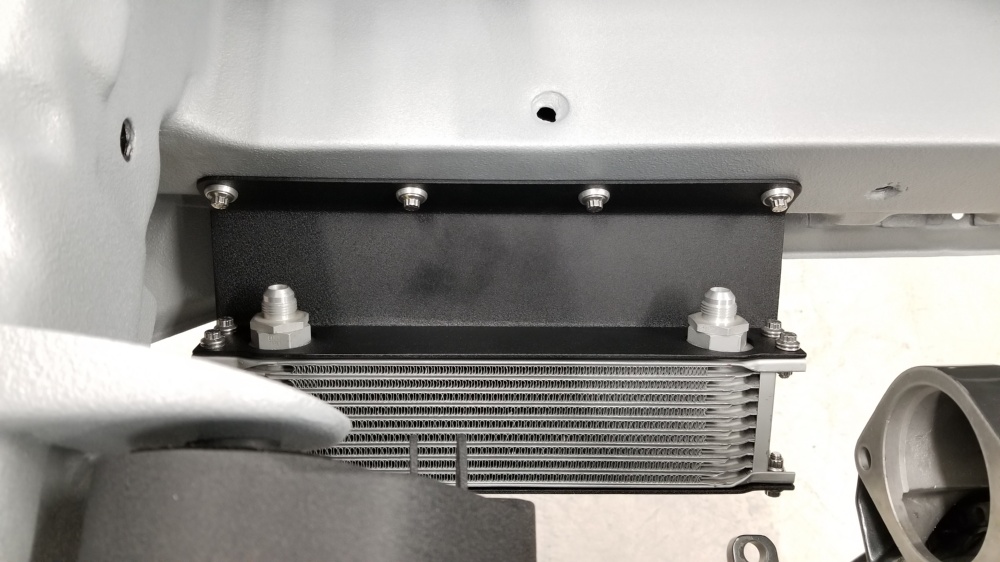
Installed


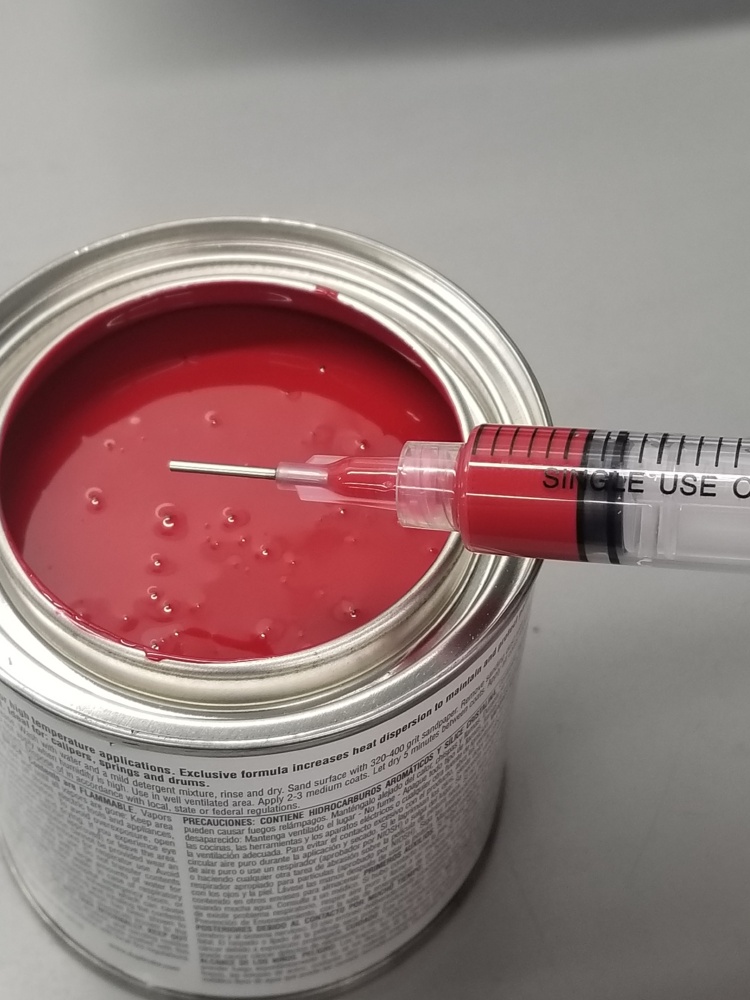
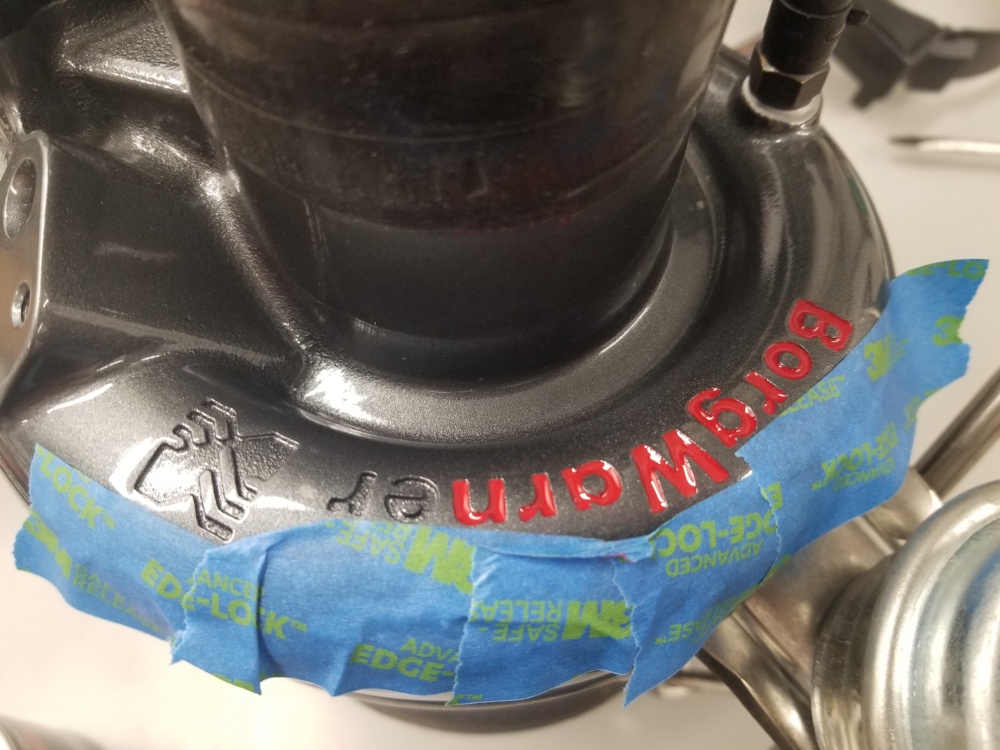
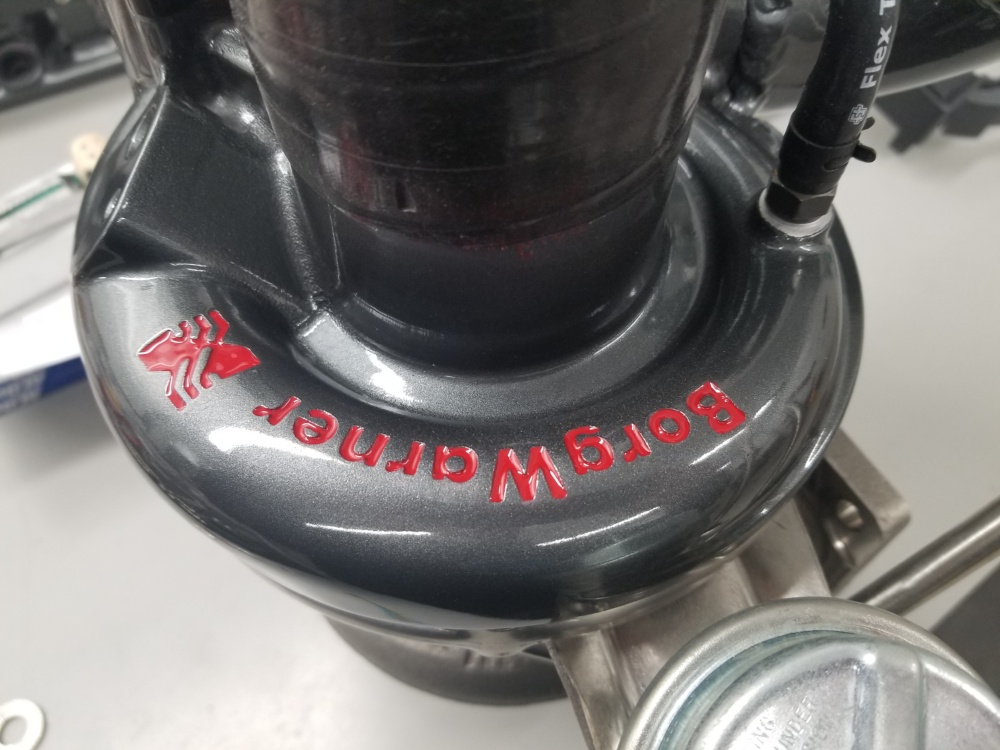
Then I finally did the red in fill on the turbo lettering. I just couldnt leave it after doing all the motor “ARP”'s.
Stole a glue syringe from the wife. It ended up being way easier than expected.

Dan
3 Likes
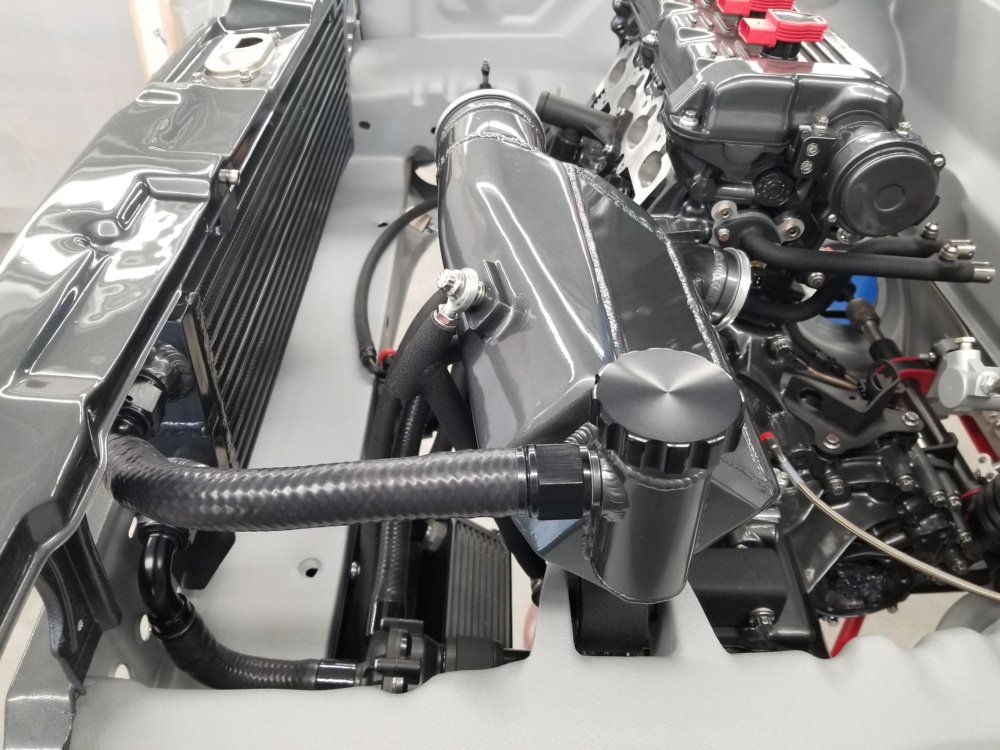
Up next, HX pump, HX, and intercooler.
Using the typical Bosch 0392022002 pump.
I modified a cheapo aluminum bracket to mount it, and welded a flange to the frame rail to bolt it to. (Im sure I documented that
here somehere).
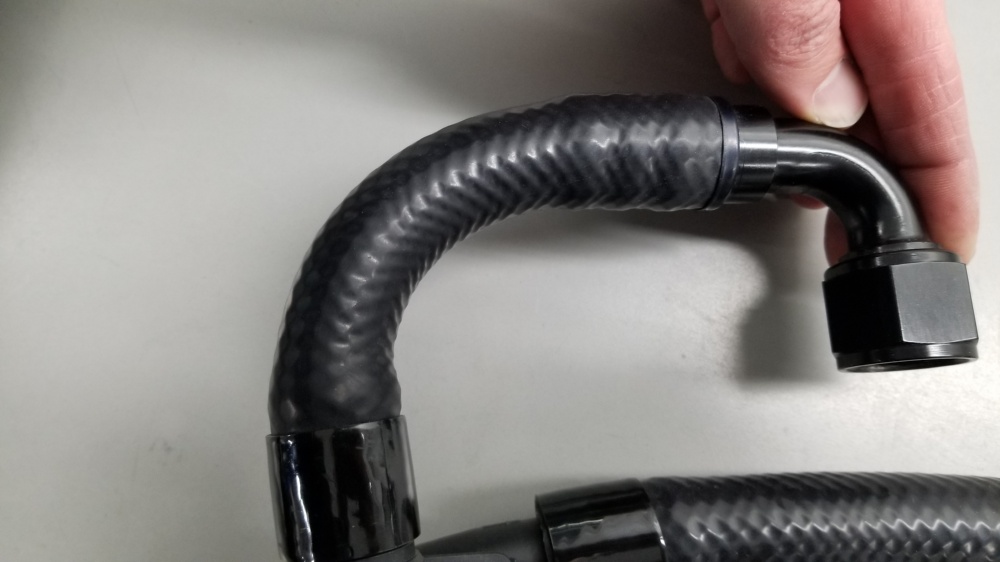
The hoses are vibrant silicone. I used a drysump hose support spring inside the pump inlet hose to keep it from kinking due to
the small radius. Gates Powergrip shrink clamps pn 32929 were used to keep a stealthy look and hopefully ensure no leaks.


This is how the hose behaves without the spring

And with the spring
Mouted

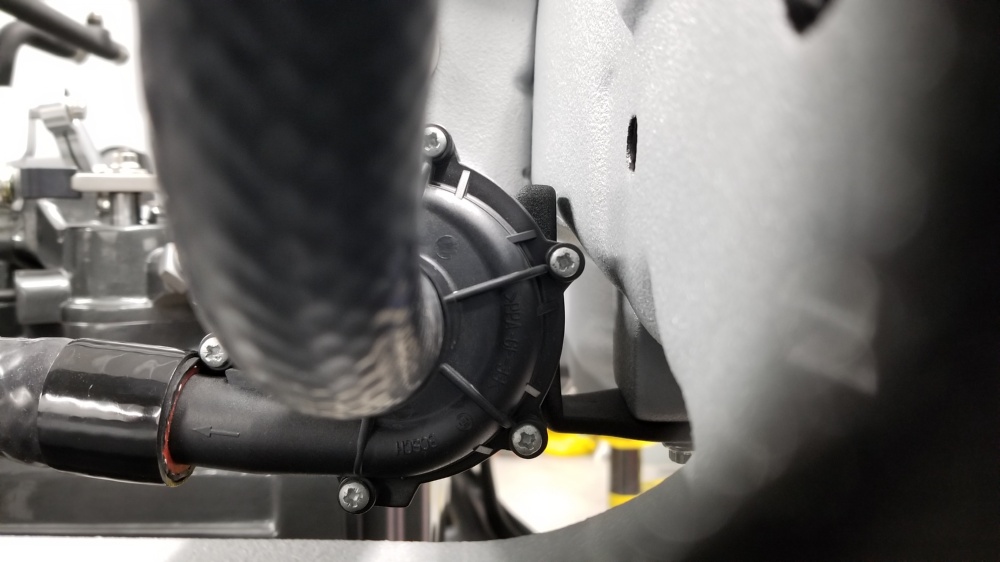
The bracket probably isnt going anywhere

And thus the need for the spring

HX installed

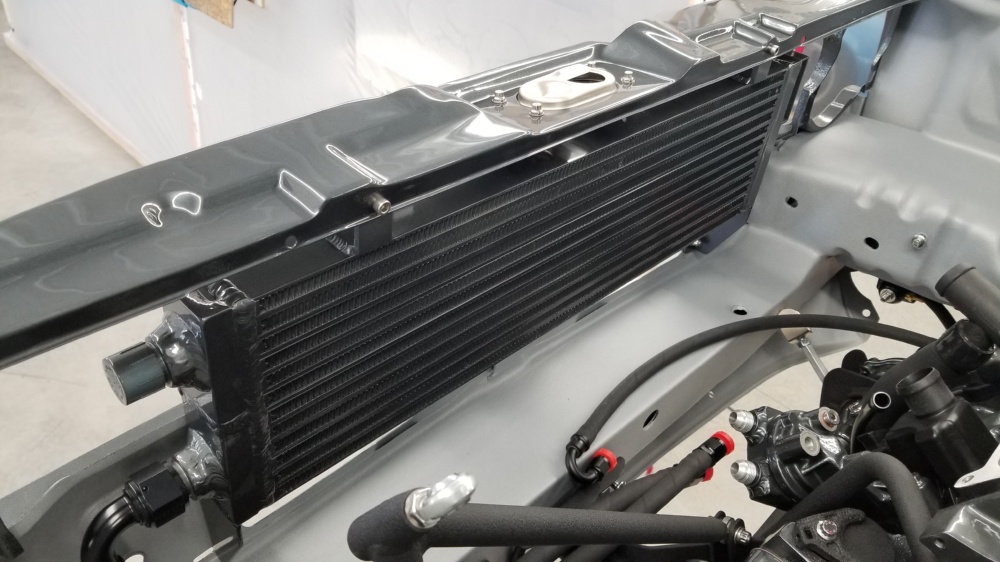
IC installed. Note the integrated fill location which I welded to the one tank of the IC.
Its suspended by two tube brackets with rod ends. One on the underside which has been welded into the trans mount, and the other
triangulated between the front motor mount and the trans mount.
Sorry for so many pics, it was hard to capture just how it all mounts etc in just one or two.


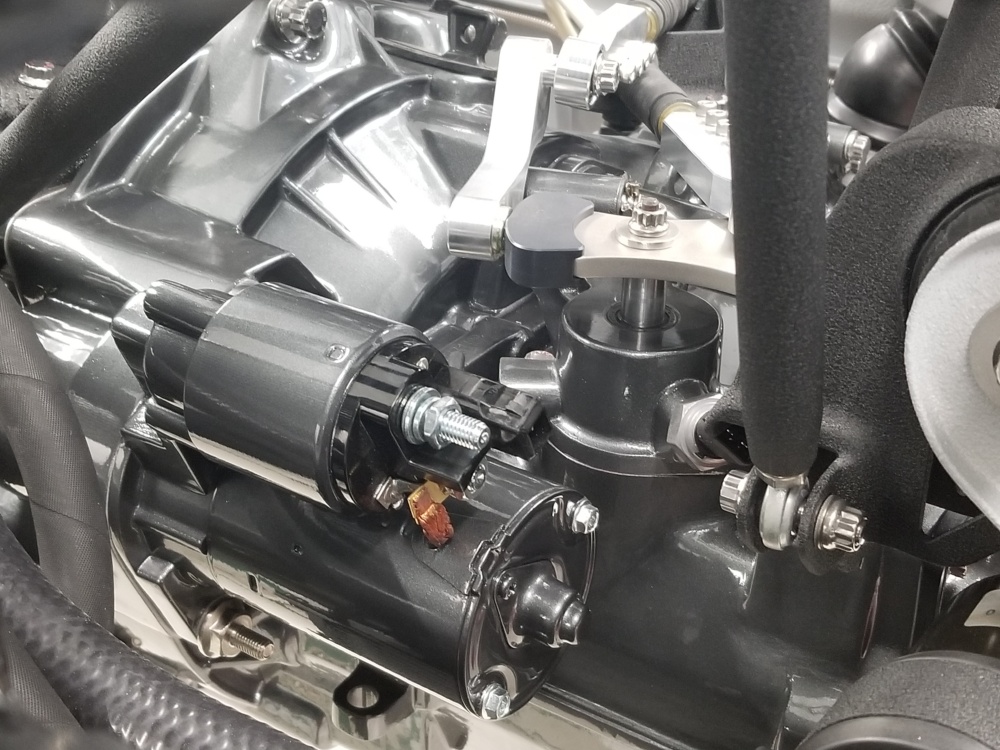
And then installed the starter, with new nickled plated OE bolts.
Cleaned the paint off around the bolts to ensure a good ground (clearly the trans side was masked during paint).
Dan
2 Likes
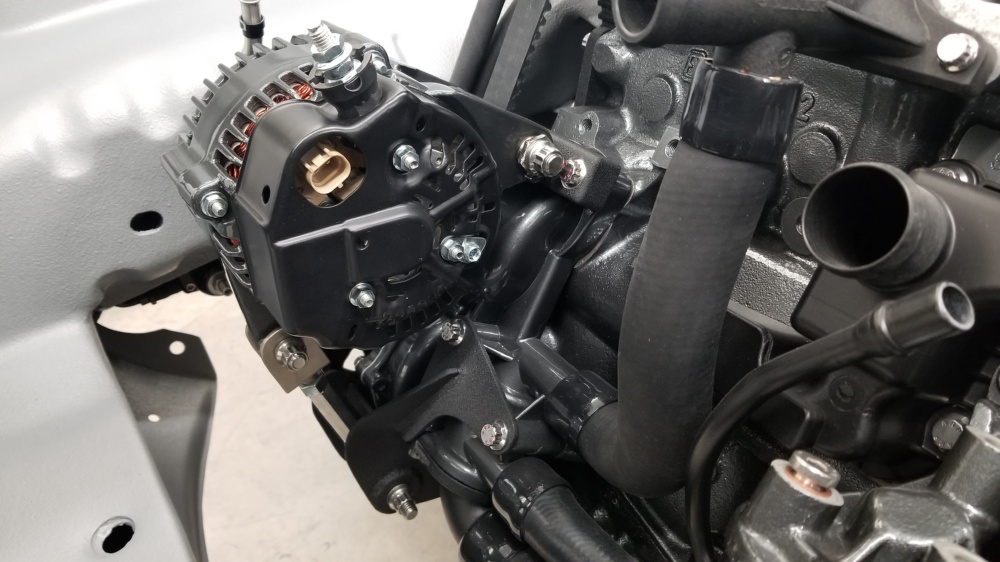
Alternator time.
Im using a completely custom setup that I dreamed up.
The alternator is a Denso style from a 01 Wrangler - 117A
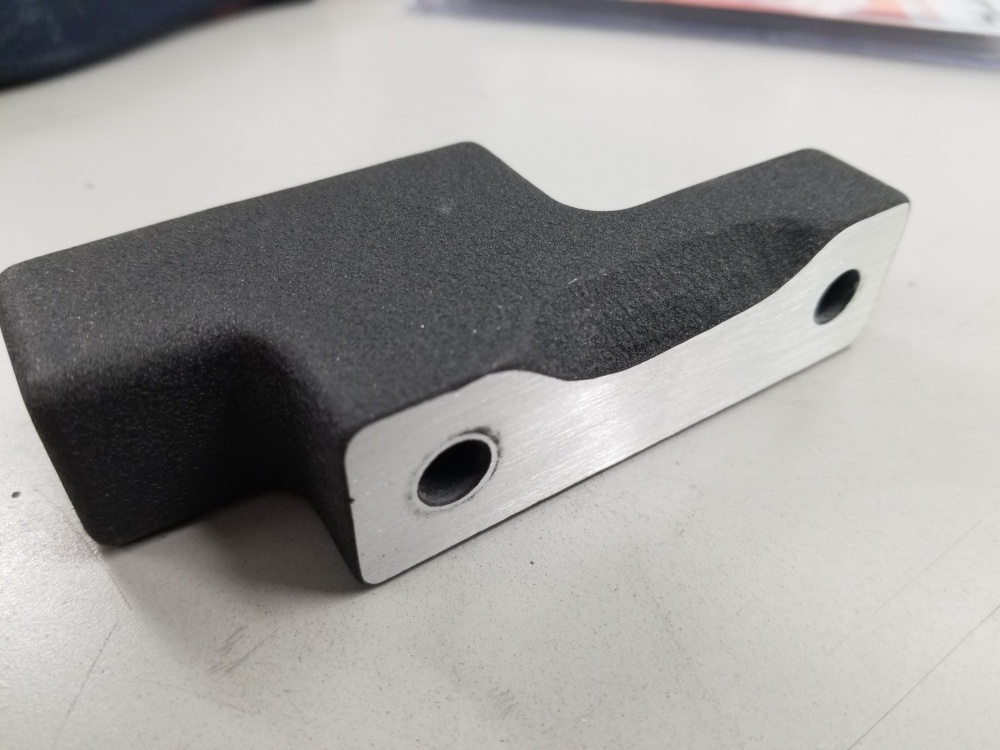
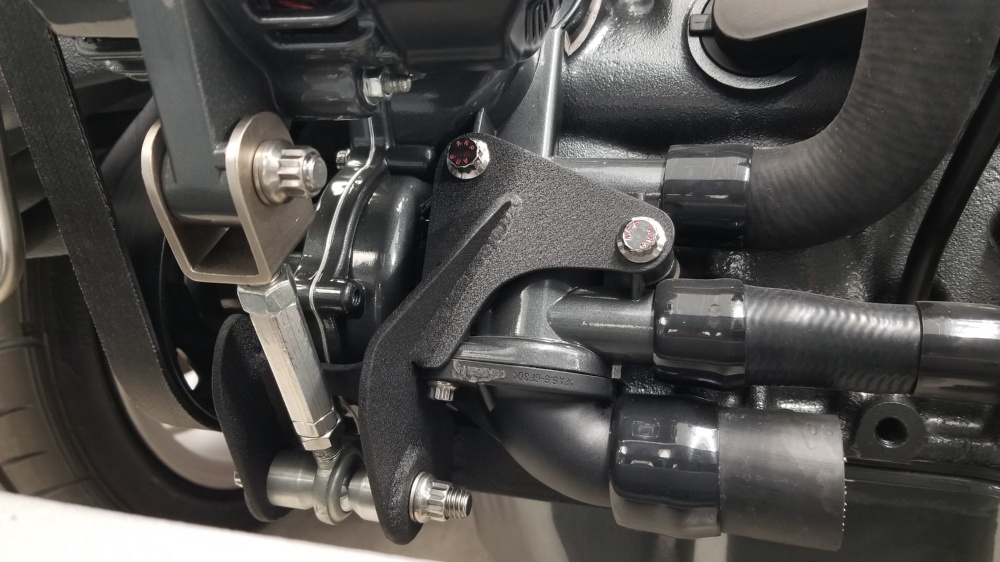
The upper bracket is a simple machined piece of 3/4" aluminum that bolts through the two upper water pump housing holes.
The lower bracket captures a few locations on the water pump housing and block.
A simple adjuster was make from a rod end and a piece of square tubing to make the U mount for the alternator.
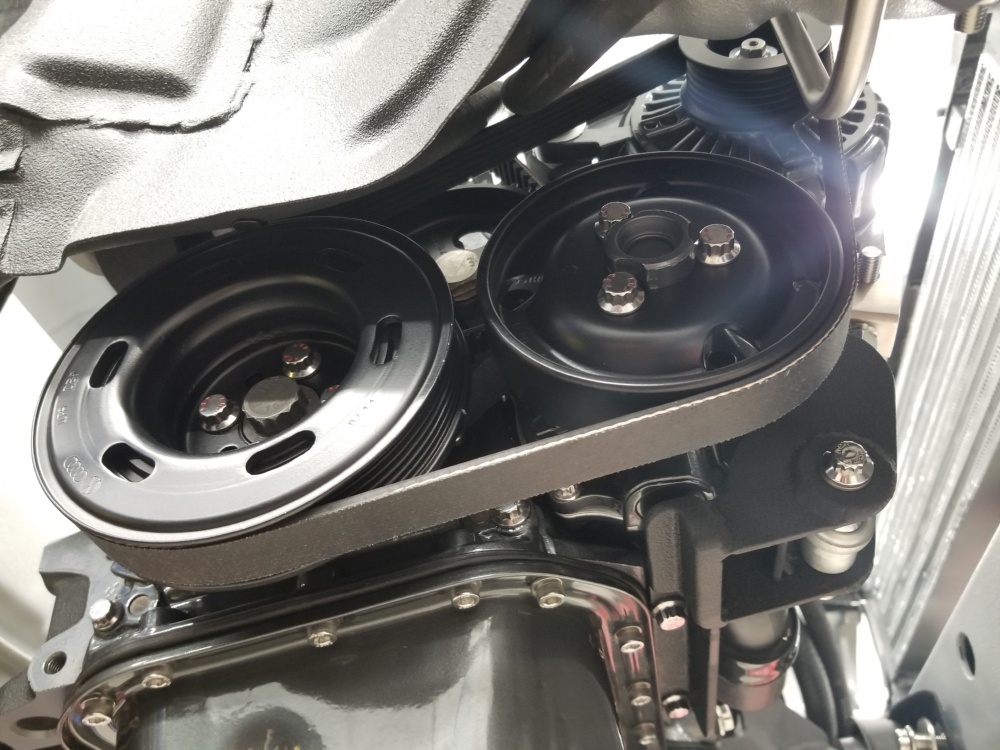
Im using a MK3 VR6 water pump pulley, 1.8T crank pulley modified by iABED with his spacer - it fits amazing and was a great price.
The iABED pulley with spacer painted up - he supplied it clean and sandblasted

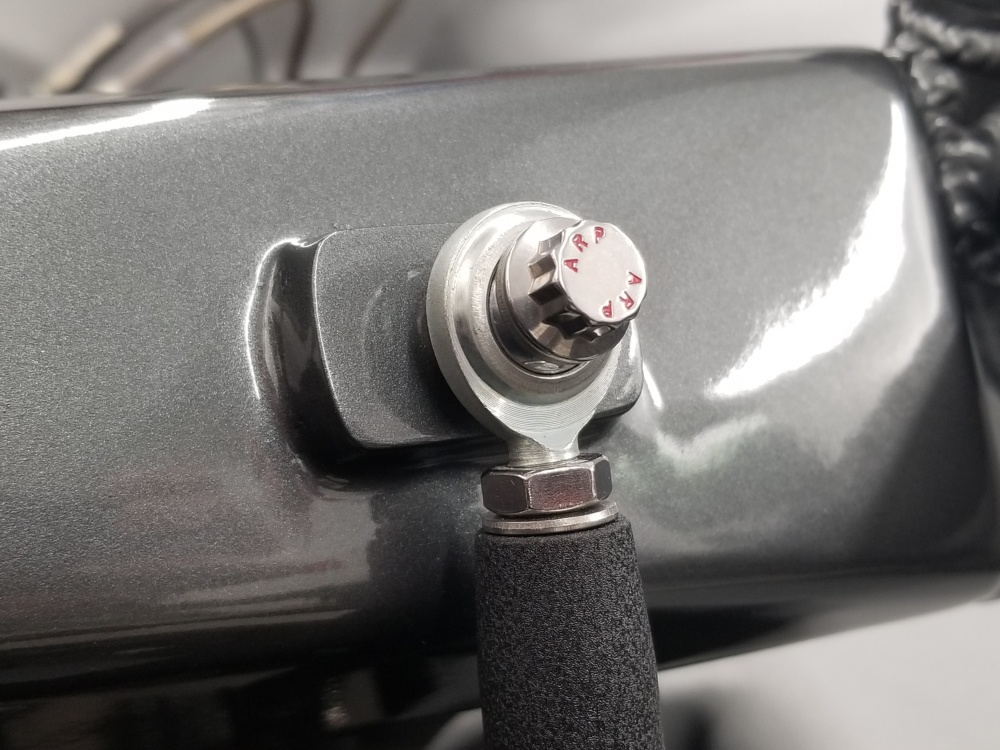
My original plan for the upper mount was to use a long bolt threaded into the nut of the alternator, cleary I dindt think that out well.

I decided to drill out the nut in the alternator and use a threaded rod with nuts on either end instead.
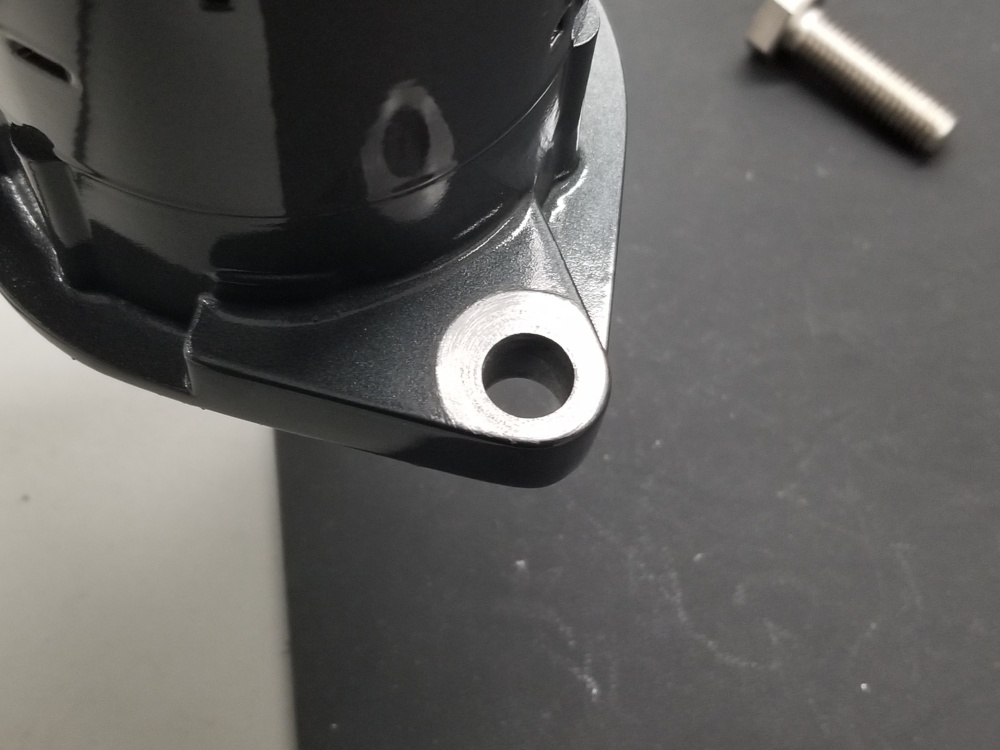
In order to get enough clearance I had to counterbore the one external moutning bolt 2mm.

Again, the powder was removed to ensure a proper ground.

Lower bracket


Belt in place. Ended up using a Dayco 340K6 (which is for an 01-05 civic)


Tensioner
To ensure proper tension I used this Gates 91132 Krikit II tension gauge.
Dayco recommends 187lbs tension for new 6 rib micro v rib belts. This made it a snap to verify.

Next I mounted the strut brace. Originally this was meant to install from the bottom, but it proved too hard to access the bolts, so I drilled through the mounting points and used longer ARP bolts. Also added some oe strut caps (for now).


Dan
2 Likes